Sunday, December 25, 2005

Honey pepper beef Fajita Tortilla

In the lexicon of food, a fajita generically refers to grilled meat served on a flour tortilla with condiments. Popular meats are beef, chicken, pork and shrimp. They are often cooked with onions and bell peppers. Popular condiments are sour cream, guacamole, salsa, pico de gallo, cheese, lettuce, and tomato. (courtesy of Wiki)
Oh dear, my fridge has run out of bell peppers and tomatoes. Oh well, improvise...
Ingredients
2 rump steaks, sliced
1/2 Pepper, deseeded and sliced into squares (optional)
Small onion, chopped

1 tsp English mustard (Djion's fine too but I like the 'kick' of English)
1 tbls honey
1 tbls chinese dark soya sauce
1 tsp corn flour
2 tsp tomato paste
Plenty of freshly ground black pepper

Method
1) Put the slices of steak, peppers and onions into a deep bowl.
2) Marinate by mixing with honey, dark soya sauce, corn flour, mustard and black pepper.
3) Once well marinated, drain away the marinade and set aside the marinade for later.
4) Grill the beef between 3 to 6 mins (depending on how rare you like your steak) on a very hot grill. Remove.
5) The peppers and onions take longer and have juices oozing out, so should be grilled after the beef. You don't want to 'stew' your beef by having the juices ooze out and bringing down the temp of your grill. These vegs can be grilled until the onions are nice and caramelized and the peppers have nice char marks on their skin.
6) Warm up some tortillas in a microwave, 10 seconds on High. Alternatively, warm on a dry frying pan, turning over to warm both sides. Remove tortillas and brush with the tomato paste.
7) Microwave the marinade to cook it (15 seconds on high should be sufficient). I use this as a salad dressing for my salad.
8) Wrap the beef, peppers and onions with the tortilla, and serve with salad.

Simple and nice for a hot summer's day!

Friday, December 23, 2005

Alternatives to bread

Wanted to try Mex food and went to the supermarket. Was mind-boggled by the types of warps available ...tortilla, taco, pita arrrgggghhhh! What's the diff?

(Courtesy of old Wikipedia - Wiki's your friend :P)

Tortilla (Mex) - It is made by curing maize in lime water, grinding and pre-cooking it, kneading it into a dough called masa nixtamalera, pressing it flat into thin patties, and cooking it on a very hot comal (a type of light sheet-metal griddle).

Enchilada (Mex) - An enchilada is a traditional Mexican dish. Enchilada literally means "seasoned with chiles". The traditional enchilada sauce is just that—dried red chile peppers soaked and ground into a sauce with other seasonings. The enchilada is typically made with a corn (maize) tortilla which is fried briefly in hot lard or oil to soften it, and then dipped in the chosen enchilada sauce. The tortillas are filled and rolled up, placed in a casserole, then layered with sauce and possibly other additions such as cheese and chopped onions. Fillings may be almost anything, depending on the cook's taste and means.

Quesadilla (Mex) - (from "queso", Spanish for "cheese") is a tortilla folded over shredded cheese or a cheese slice (often a Mexican-style soft farmer's cheese such as Chihuahua cheese or other light colored melting cheese), which might also include cooked meat and/or bean filling. It is then fried, deep fried or toasted using a broiler, griddle, or open fire, and sometimes spiced with salsa. The term can also be used for a pair of tortillas, with the cheese and other fillings between them, similarly cooked.

Taco (Mex) - A taco is a traditional Mexican dish comprising a rolled or folded, pliable tortilla (of either maize or wheat flour) filled with meat (generally grilled beef or pork), chili-based salsa, guacamole, and garnishes such as pico de gallo or cilantro. It may also contain just about any other filling that lends itself to it — generally meats or vegetables that are chopped and fairly dry.

Pita (Turk/Greek) - (also called pitta or pita bread or Turkish pide bread) is a round flat wheat bread made with yeast. Pita and other flat or pocket bread is traditional in many Middle Eastern and Mediterranean cuisines from North Africa through the Levant and the Arabian Peninsula to India and Afghanistan and is believed to have originated in Ancient Syria. It is also commonly called Lebanese, Syrian or Arabic bread, especially in the Arab world, Israel and communities with Arab immigrant populations.

Naan (Indian) - a round flatbread made of wheat flour. Naans are a staple accompaniment to hot savoury meals in Central and South Asia, including the Punjab and Rajasthan and Gujarat regions in north-west India, Pakistan, Afghanistan, Iran, Uzbekistan and the surrounding region. In Turkic languages (such as Uzbek and Uyghur) the bread is known as nan.

Tuesday, December 20, 2005

Snails!

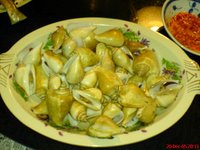
Dad outdid himself at dinner again. Of all the exotic stuff he chose to serve up, tonight was (sea) snails! It's served steamed with a chilli/garlic/lime sauce. To eat, it's got a little claw and just jab a toothpick into the flesh and lightly tug, and the whole thing comes out. Even Tara loved it. (without chilli of course!)

Monday, December 12, 2005

Sausages

My favourite food! And I know I'm not alone. There are so many variations - the Germans have their Weiners and Frankfurters, the Italians have their salami, the British have their bangers and chipolatas (affectionately also known as 'chips'), the Mexicans have their chorizo and us Chinese have our unimaginatively-named Chinese sausages (or lap cheong).

Doing a Wikipedia search boggles the mind - there are so many types (it runs in the hundreds) of sausages and they are actually classified into categories such as cooked, cooked smoked, fresh, fresh smoked, dry etc!

But throwing that all aside, I've had a long association with sausages. Since that 1st morsel I tasted in my school canteen - the lady pan fried what looked like normal canned cocktail sausages, but she was always able to make the crispy on the outside but not burnt, and melts-in-the-mouth on the inside. I began my life long search for the perfect sausage. To this day, I have never found the brand or the cooking method (does she boil them first?) that produces quite the same effect.

Thru the years, I used to think that all sausages looked the same - what I knew of as canned cocktail sausages. But then I went to UK and started eating their bangers which totally disgusted me. It had a horrible 'piggy' smell, was raw and liked to 'explode' (hence the name) and sacriledge of all sacriledge - they called them sausages too! I longed for a frankfurter!

Today I found my perfect chipolata - all this time I've been buying the wrong thing. I've been buying chicken chipolatas but by chance today I saw pork and tried them and I'm in heaven!

For me, I've had a life long love affair with frankfurters, can't go wrong with any one, but just the brand - have yet to find a brand that isn't overly salty when eaten neat. I remember in my ex-company, after a particularly tiring morning, all that I need to perk me up was to toss my frankfurters into the toaster oven with some hotdog bread, slap on the butter, cheese and mustard, toast the bread until the cheese melts, slap on the frankfurters and glugs of tomato and chilli and bring to mouth - absolute bliss! Enough to drive away any dark clouds.

But my life long quest for the perfect cocktail sausages isn't over. I hope to be rewarded one day.

Meanwhile, just to finish off with a bit of trivia:
The difference between a Full English Breakfast and a Big American Breakfast:

Full English: bacon, eggs, toast, bangers, baked beans, kidneys, grilled tomato, mushrooms, potatoes/hash brown/bubble & sqeak. The Scots vary it with black pudding or haggis.
Big American: bacon, eggs, sausages and toast with baked beans and hash brown

Hungry eh? ;)

Sunday, December 11, 2005

Teriyaki salmon

The thing about teriyaki sauce is that it's so simple to make yet. A lot is a matter of taste, so just adjust the quantities till you get a taste that you like. I learnt this from (of all places) British telly! The basics are these:
Ingredients
3 tbls dark soya sauce
3 tbls light soya sauce
5 tbls dark brown sugar
3 tbls sherry/Japanese mirin wine/Chinese rice wine
6 tbls water
1 salmon steak

Method
1) Mix everything except the water and microwave for 30 seconds and stir until the sugar dissolves.
2) Marinate the steak (works well with beef steak or chicken wings too)
3) Brush with oil and grill or bake at 200 degrees C for 20 minutes. To prevent splatter all over the oven, I wrap my salmon/steak/chicken wings in some foil as a foil packet. The downside of course is that the skin (for wings even salmon skin) will not get crispy.

Saturday, December 03, 2005

Rumballs by Mag

Okok I admit I've been somewhat neglecting my cooking recently. The other day, opened my cupboard and saw my baking tins and brand new jelly mould (thanks ZH!) sitting there sadly in a corner and felt guilty about not using them. Work has been bothering me a lot lately, whoever said Dec was a lull period??!!

Anyhow, Mags posted this superbly easy recipe, really inspiring to try, if I can haul my lazy ass off to the supermarket to get the ingredients!

ME Rumballs(serves 30)Ingredients
1 dark fruit cake (supermarket variety)
1 x 250g dark cooking chocolate
50g butter/margarine
Real Rum (recommended brand: Bundaberg Rum, of course!)

Instructions1. In a deep bowl, break up dark fruit cake using fingers. Pour 1/2 cup of rum over mixture. Mix it well. Cover with cling wrap. Set aside for overnight if you can. (I was too impatient and only left it alone for 2 hours, but still GOOD!)

2. In a microwave bowl, cook the cooking chocolate in the microwave according to instructions on pack. In a seperate microwave container, melt margarine/butter in the microwave for 15 seconds.

3. Pour melted chocolate and margarine/butter into dark fruit cake and rum mixture. Mix very well.

4. Take a tablespoon of mixture and shape it with the palm of your hands until they resemble golf balls. Place each rumball into small paper cake cups to prevent each rumballs froms sticking together. Refrigerate overnight to allow the rum to infuse.

5. You may also choose to roll your rumballs in dessicated coconut or chocolate bits for texture and presentation. I left mine au natural. It is simply divine!

Tip: The rumballs keep very well because they are alcohol laden. If you love your rum, add more to the mixture. They freeze well for a long time. So make plenty now and freeze them. When friends come over, thaw them out on your kitchen benchtop and they would compliment you to no end!

Verdict:
1) Finally tried out the receipe and realised that it's not really suitable for humid weather! :( The mixture started to melt pretty fast so you gotta work fast. Towards the end, everything was just a river of rummy choc and my balls weren't spherical at all. Alternatively, after adding the hot stuff and mixing properly (the melted butter and cooking choc), return to the fridge for just 20 mins to firm up again. Not too long or it sets as a blob and you can't work it into balls either!
2) I added left over choc chips to the mixture. Simply divine! Adds crunch to the bite. By the same token, u could add nuts too, altho that's not very 'rumball-ish'.

Updated: another recipe http://simmetra.blogspot.com.au/2012/12/rum-balls.html

Wednesday, November 16, 2005

Cheesy Italian Meatballs

This recipe I adapted from a recipe from DJ. I got inspiration from ondeh ondeh and Pizza Hut's Stuffed Crust pizzas. She got the original traditional meatball recipe got it off a real Italian.

IngredientsRatio: 1lb meat : 1 egg
Breadcrumbs
Water
Parmesan cheese - cut into cubes, say about 1" by 1"

Method
1 Mix meat with egg and water and add breadcrumbs one handfull at a time. Mix until it is "oozy". If it breaks too easy, add breadcrumbs; if it's too pasty, add water.
2 Add parsley, oregano, salt pepper.
3 Shape meat into balls. Size - golf ball < meatball < baseball
4 Using your thumb, stick your thumb in the ball and push in a cube of cheese. Re-form the meatball.
4 Put it in a baking pan (I put it into a pie dish) and bake 350F-375F for 1/2 hr, turn it over and bake for another 1/2hr. Check if it's done, if not, another 1/2 hr and check in between.
5 Some people put the meatball on a rack so that the oil will drip and won't be absorbed back into the meatball. I forgot about that when I baked, but I didn't find it too oily.

Friday, November 11, 2005

Baked Salmon & Mushroom casserole

Getting a bit sick of mushrooms recently, but came across a nicely packaged fresh oyster and shitake mixed pack from Carrefour and couldn't resist. Thought of having something a bit soupy, and remembered my brother's chicken and mushroom soup recently, so the best idea was why not combine and get baked fish AND a soup!

Ingredients
1 salmon steak
2 cups water
1 tsp sage
1 tsp thyme
1/2 tsp nutmeg
1 tsp ginger powder (or use fresh ginger, sliced if you have)
1 tsp salt
Pepper to taste

Method
1) Marinate salmon with spices, salt and pepper.
2) Slice the mushrooms and place them at the bottom of the casserole.
3) Sprinkle a bit of salt and pepper to taste.
4) Lay the salmon on top.
5) Pour on the water and cover the casserole.
6) Bake at 180 degrees C for 18-20 minutes until the water bubbles.
7) Serve with crusty bread or steamed rice.

Alternative
If you do without the water, you can alternatively add nobs of butter on the salmon and mushrooms, and sprinkle over with grated cheese (parmesan etc) and uncovered, bake at the same temp and time! Lovely too.

Sunday, November 06, 2005

Mushroom Frittata

The difference between frittata and omelettes (taken from About.com): You may be wondering what the difference is between an omelet and a frittata. In the strictest sense, the difference boils down to a matter of folding in a filling rather than mixing it in. Omelets traditionally have the egg mixture cooked and folded around a filling, while a frittata just mixes it all up, cooked in a mishmash combination all at once. Frittatas are often served at room temperature, making them perfect for brunches or larger groups.

Ingredients
4 eggs (2 per person)
1 packet mushrooms, sliced
2 tbsp milk
Herbs - oregano, rosemary, sage, thyme - whatever you feel comfortable with
Salt and pepper seasoning

Method
1) Grease a baking tin with butter.
2) Arrange the sliced mushrooms on the tin. Season with salt, pepper and herbs.
3) Beat the eggs together with the milk. Pour the egg mixture into baking tray.
4) Bake at 200 degrees C for 20-25 minutes until the egg firms and 'bloats' up.
5) Serve with a nice salad

Saturday, October 29, 2005

Fish casserole

Ingredients
2 batang fisk steaks
Per steak - 1 tsp salt, 1 tsp ginger powder, 1 tsp cumin, tsp tumeric. Mix dry ingredients well and rub onto the fish.
2 strips of bacon rashes
3 cloves garlic, crushed
2 shallots, chopped
1 broccoli
1/2 cup water
1 tbls dark soya sauce
1 tsp Thai chilli flakes

Method
1) Marinate the fish steaks. Set aside. Reserve some of the garlic and shallots.
2) Cut up the broccoli into little florets. Marinate with half tsp salt.
3) In a casserole dish, place the broccoli on the base and mix well with the leftover garlic and shallots.
4) Warp each steak with bacon and place the fish steaks on top of the florets.
5) Add the water and cover the casserole.
6) Bake at 200 degrees C for 18 mins, or 180 degrees C for 25 mins.
7) Mix the soya sauce with chilli flakes. This is the dipping sauce for the broccoli. Dilute with water if too salty.
8) Serve with crusty bread or rice.

Sunday, October 23, 2005

Pork Porridge

Went to Newton Hawker Centre last night. As the original one is under renovation, it has moved to this previously open area (was it a field or car park? Cant remember) next to these very nice colonial-style black and white shop houses. I did one time think of renting one during my 'shophouse phase' but then saw the hawker centre nearby - not a good thing!

Anyhow, was having a porridge craving. U know how it is when u get the Hong Kong style chok, grains nicely broken down till the whole liquid is this velvelty and delicious gruel that slides down your throat. It can also be stody, like oatmeal, the way my family used to cook it (my mom would say that it's more substantial), but that's not the way I like it. I'm also not a fan of Teochew style muay at all. I'd much rather eat mui fan but maybe that's the Cantonese in me talking. :)

Went to Newton last night for late dinner to satisfy my craving for bbq chicken wings and porridge, but my craving for porridge was cruelly misplaced - 1stly, could only find a fish muay, 2ndly - blardy ripoff - $4! Anyway, with visions of pork porridge swirling in my head, I'd thought I'd try round 2 today. To make it simple, I'm using a rice cooker to do all the work.

Ingredients
300g pork bones (used for soup) or spare rib (this has more meat but is more pricy)
200g pork collar or pork shin - sliced thinly
100g minced pork
100g pork liver, sliced thinly
2 cups rice
1.5l water
1 finger length ginger, sliced thinly
Salt to taste

Marinade
Pork bones - 2 tbsp light soya sauce, 1 tbsp rice wine, 1 tsp sugar, 1 tbsp sesame seed oil
Pork slices - same as above, halve the proportions
100g minced pork - I cheated, as I didn't want to discolor my porridge (making it dark from the soya sauce and wine), after putting in the pork bones, I used the leftover marinade to marinate the minced pork
Liver - 1 tsp salt and 1 tsp ginger powder

Method
1) In the rice cooker, pour in just a big of cooking oil and fry the ginger slices.
2) Drain the pork bones of the marinade. Brown the pork bones. Remember to reserve the marinade liquid to marinade the minced pork. Shape these into balls.
3) Pour in the rice and bowls of water. Stir. Cover and let the rice cooker cook for 1.5 hours.
4) Check the consistency of the gruel, usually, it helps to stir it and add (water) water if necessary so that the rice grains break up and gives a velvety consistency.
5) After 1.5 hours, carefully pour in the pork balls once at a time so that they retain their shape and stir. Add salt to taste.
6) When ready to serve, pour in the liver slices and switch off the heat. These will cook in the heat but you don't want them over-cooked.
7) To serve, Optional: Break in 1-2 eggs into each bowl and ladle the hot porridge on top. The heat will cook the eggs.

Wednesday, October 19, 2005

Salted Fish Fried Rice

Fried Rice has always been a boon and bane for me. I like eating it, it's super simple to cook (another 'throw everything in your fridge' dish), but gosh, so darn hard to get right! How do hawkers get that distinctively 'fried rice' taste? I can only describe it 'that slightly chao-da taste' that can't seem to be replicated at home. I strongly suspect it's because these guys probably never really wash their kwalis. It's the burnt on burnt taste so when u scrape the kwali - voila! Kinda like why people like claypot rice. Burnt bits! But imagine the srubbing up afterwards, not to mention burning my precious pots!

There's been a lot experimenting for me when it comes to fried rice - egg before rice or rice before egg? The former makes the fried rice drier, the latter makes the fried rice a bit wet. Personal preference I guess.

Ingredients (feeds 2)
2 bowls overnight rice - essential! Otherwise freshly cooked rice is just too soft.
1 handfull bean sprouts
Salted fish - don't quite know how to describe quantities for this, 2 pieces chopped up?
1 handful ikan billis
2 eggs, beaten
1 tomato, cubed
1 tsp XO sauce
1 tsp spicy bean sauce
1 tsp sambal (can add more to taste)
1 garlic, crushed
2 shallots, chopped
Cooking oil

Method
1) Fry the ikan billis and salted fish until crispy. Set aside.
2) Fry the garlic and shallots in the oil until fragrant.
3) The next few steps have to be done very swiftly - pour in the sauces, tomato cubes, and lastly, bean sprouts. Fry very briefly just to incoporate.
4) Add the egg. This will stick to the bottom of the pan so quickly, as soon as it solidifies, scrape it off the bottom and incorporate it with the rest of the ingredients. Remember to keep 'chopping' into tiny pieces.
5) Once all the egg is dry, pour in the rice. Really flatten it (to get it nearer the heat) and then incoporate again.
6) Lastly, return the salted fish and ikan billis and incorporate. Serve immediately. Alternatively, the ikan billis can be served separately to keep it crispy.

Monday, October 10, 2005

Grilled baby calamari

Dropped by the supermarket and picked up some fresh seafood for a change in diet. Came across baby calamari. This presented a challenge to me - I've never cooked squid before! I didn't even know how to clean it!

So digging back to my days of watching my maid clean squid, I remembered that there were 2 things that needed to be removed - the plastic-ky spine and the ink sac. Except in a baby squid, you don't really want to separate the body from the head, so there I was fishing around its torso. I found and removed the spine but not the ink sac, couldn't find it without having to dissect the poor squid.

One thing I learnt the hard way - the ink sac is actually quite salty! (probably from living in the sea) So no more additional salt needed next time.

This recipe was inspired by my recent Bangkok trip. We had the best grilled squid (these were giant ones), simply grilled and served with dipping sauces! A clean taste, the char-grilled squid was delicious, a simple taste of the sea! The dipping sauces provide all 4 dimensions of taste - sweet, sour, salty and spicy.


Ingredients
Baby squid, cleaned
Garlic, crushed
Oil for grilling
1 tbls honey


Dipping sauces
1 freshly cut chilli
2 tbls dark soya sauce
1 tbls Lime juice
Thai sweet chilli sauce

Method
1) Clean and prep the squid (e.g. can be skewered)
2) Marinate with crushed garlic and a drizzle of honey.
3) Brush the grill with cooking oil, heat till it smokes and place the squid on the grill to cook. Brush on oil on the squid. Cook, turning occasionally. Serve immediately.
4) For the salty and sour dipping sauce, mix cut chilli, lime juice and soya sauce.
5) To eat, dip squid into either the chilli/lime sauce, or Thai sweet chilli sauce, or even both!

Sunday, October 09, 2005

Country Quiche

I have this love affair with quiches - I love eating them! I still remember my 1st encounter with them was in this tiny cafe in Banff in the beautiful Canadian Rockies. First time I saw it, I didn't know how to pronounce it, and called it 'quic-key'. I was promptly corrected by the server!

Since then, I've loved its custard-y texture together with the melt-in-your-mouth buttery crust. My search for the perfect quiche recipe ended when my kitchen goddess friend, DJ shared this one with me. Altho rather difficult to whip up for a quick dinner, it's great for those lazy weekend afternoons. Served best hot but also equally good cold with a salad, leftover quiche is great as a light dinner.

Tips
1) This works best in those wall-mounted ovens with a sliding oven tray which u can slide in and out. Pour the egg mixture into something with a spout, e.g. measuring jug or even tea pot. Pour only half the mixture into the pie base. After placing the pie on the sliding tray, pour in the remainder till you reach nearly the brim of the pie. Slide it in. No spillage! I made the mistake of thinking I had a fantastic sense of balance. Between sliding in a to-the-brim quiche and trying not to scald my hands on the sides of the oven, my egg mixture spilt all over the oven floor and charred nicely. I had a good hard time trying to scrub it out later.

2) The diameter of the pie pan is quite vital - Pie pan depths are usually quite standard. The ingredients are calculated so that after pouring in all the egg mixture, you will almost exactly reach the brim of the pie base. But even if things don't work out so exactly, you can just pour in as much egg mixture as it takes to almost reach the brim. Remember not to pour right up to the very brim or it will overflow, the egg mixture will rise just a bit.

Ingredients (Either 1 large quiche, or 4 small ones)
Short crust pastry
200g flour
200g butter
3 tbsp cold water

Filling
2 big onion, sliced
150g sausages, sliced
Pinch of nutmeg
50g green peas
1 red chilli, deseeded and sliced
½ tbsp concentrated chicken stock

Egg mixture
3 eggs
150ml milk
Salt & pepper to taste

Method
1) Make short crust pastry by rolling flour and better until they resemble small bread crumbs. Combine into a ball and set aside in the fridge to rest for 20 mins.
2) In a pan, sauté the filling ingredients. Pour into the bowl containing the egg mixture and mix well.
3) Roll out the pastry into a 10” pan. Prick the base with a fork so that it doesn’t rise up during baking.
4) Pour in the filling.
5) Bake in the oven at 190 Degrees C for 25 – 30 mins or until golden brown.

Wednesday, October 05, 2005

Bak Ku Teh - with a twist

Trying to prepare a complete balanced meal is never easy when you're in a time crunch. After coming back from work, I'm tired and it's late, and I still need to squeeze in my exercise routine. So I'm always looking for 1 dish meals.

Bak Ku Teh is mostly a 1 dish meal, toss in a ready mix packet with the marinated bak ku - how tough can it be? However, there's never any veg in the soup! So hence started my quest to find the perfect veg that can add to the soup without sullying the flavour.

This week I bought spinach, intending to cook it separately. But today, after a particularly bad day at work, I thought - what the heck.

The result - sublime! The spinach adds a sweet nutty taste to the soup. On retrospect, why not, after all, we always cook spinach soup with bak ku anyway.
Some other vegs that don't work - chinese lettuce. It can go in to let the heat wilt in the soup but definately not soaked in or cooked in the soup, it leaves a slightly bitter taste. However, it does add a nice crunch.

There's no recipe today because how hard is it to make bak ku with a ready mix? All the instructions are on the packet.

Saturday, October 01, 2005

Baked fish wrap with asparagus

This is another recipe using asparagus and ham. It works just as well with bacon rather than ham. See how easy it is to come up with different variations of the same theme? This is also a very simple recipe - most of the spent is spent in the assembly, but almost minimal washing up. Perfect for an after work meal.
Ingredients (serves 2)
10 stalks of baby asparagus
6 cherry tomatoes, sliced in half
2 fish fillets (chose a firm fleshed fish, and preferably with skin on)
4 slices of ham
3 tbls butter
Olive oil
Salt and pepper
2 slices ginger, slivered
3 cloves of garlic, crushed
Herbs: Sage, parsley, nutmeg, thyme
Aluminum foil

Method
1) Marinate the fish by rubbing on salt and pepper. Lay on the slices of ginger.
2) While fish is marinating, in a bowl, pour in 1 tbls olive oil, salt, pepper and herbs. Mix well. Put in the asparagus and cherry tomatoes and toss like you would a salad.
3) To the butter (softened at room temp), add the garlic herbs and mix well. This is the garlic butter mix.
4) To assemble the package, take a big enough sheet of foil to fully envelope the fish, and also with enough allowance to crimp the edges. Lay open the foil, using butter or olive oil, oil the foil so that the fish won't stick.
5) Start with laying 5 asaparagus in the middle of the foil, then the cherry tomatoes on the side. Butter the fish fillet with the garlic butter, and wrap in ham. U can use a tooth pick to secure this so it doesn't open up. Lay this on top of the asaparagus.
6) Fold it over and crimp the edges so that any juices don't flow out. Repeat with other fillet. Poke 1 or 2 holes in the foil to allow the steam to escaape.
7) Place both packages on a tin foil to catch any juices that may flow out.
8) Bake at 180 degrees for 15 minutes.
9) To serve, cut open the foil. All juices will be trapped inside and you can eat it straight out of the foil. Just throw away the foil when done, u don't even have to wash any plates!

This foil package method works equally well with seafood e.g. squid with lemon juice and chilli, or even used over the barbi. I even toss the packet on a skillet sometimes instead of in the oven. U will know it's cooked when the steam in the packet causes it to puff up.

Ham and Asparagus pasta

This is a really simple recipe, again, using the stuff in my fridge. Sometimes it's fun to go to the supermarket and without planning ahead for the week, just buy whatever's on offer and then wing it.

Ingredients (serves 2)
1 cup of bechamel sauce (white sauce) - do a web search for ingredients and method. A good link of how to make basic sauces can be found here.
4 slices ham, sliced into squares
herbs - I like oregano and parsley for thisbut you can really use whatever you like.
2 handfuls asparagus, chopped up into inch long sections
Cooked pasta of your own choosing (sphagetti, angel hair etc)
Butter for cooking
3 cloves crushed garlic

Method
1. Make the sauce in a pot. Set pot aside.
2. In a pan, saute the garlic and then pan fry the asparagus until softened and then add the ham and pan fry until slightly singed around the edges.
3. Pour the contents of the pan into the pot of sauce.
4. Pour in the cooked pasta and mix well. The residual heat from the pot will gently warm thru the pasta. (I know people usually serve up the pasta on the plate and the pour the sauce over. No no! The correct Italian way is to pour the pasta back into the sauce pan (with flame switched off) and give it a toss so that the sauce coats the pasta evenly. The residual heat from the pot will help warm thru the pasta too. Serve this up immediately so the pasta stays al dente.)
5. Serve with glass of white wine. Presto!

Thursday, September 29, 2005

Fish head bee hoon

I'm into this noodle/pasta phase ever since we ran out of rice. Yeah, we're cheapskates who refuse to buy rice, but rather redeem packets of rice thru our fuel points. Only problem is - rice has been out of stock at petrol stations for over 2 mths now! Dun know real or not... This is a nice body warming soup on a dreary rainy/wintry day.

Felt an inspiration to recreate my favourite soup dish after a bout of 'healthy eating', ie eating more fish rather than chicken or pork.

The soup base is flexible, either chicken or pork bone stock both go well with fish. Logically, you could of course boil pure fish bones, but that would take a lot of fish bones to make that same concentration of soup, and you'd have to be careful to drain the soup to remove all bones/scales.

Ingredients
1 fish head (obviously must be a big enough lah!)
2 fish fillet steaks, cubed or sliced (I'm no fish expert but a fish with firm flesh that doesn't fall apart easily upon cooking would be good. My personal favourites for this are dory or cod fillet - fewer bones too)
1.5l chicken/pork bone stock
1 finger length of ginger, sliced
salt and pepper to taste
vegetables - either cai xin, chinese lettuce or bean sprouts all work here
tomatoes, cubed
Noodles - again, personal preference, you can use bee hoon, chor bee hoon or ee mee
Tou fu, cubed
100ml milk
cooking oil

Method
1) Gently fry the ginger and fish head. (You can also briefly fry the cubed/sliced fillet but I don't really find it necessary since fish cooks very fast. Remove)
2) Pour in the stock and simmer with the ginger and fish head for 20 to 30 mins to bring out the flavour. Remove the fish head and strain the soup for bones or scales if necessary. You can remove the meat or just simply chop it up and serve it separately so that your guests don't end up choking on the bones.
3) Add the tomatoes, vegetables (except chinese lettuce if using) and fish fillet and cook for 5 minutes.
4) Add in the noodles and toufu and stir well. Let simmer for another 3 minutes.
5) Pour in the milk. This is pretty much by taste, add too little and you can't taste the creaminess. Add too much and it becomes fish shake!
6) Serve immediately. (if using chinese lettuce, serve on the side. Let the heat wilt the veg. The taste is quite pungent and you don't really want the taste in the soup, u only want the cruchiness of the lettuce)

Yin & Yang Salmon

Another one of Mag's creations - if you don't experment, u don't know!

Ingredients (serves 2)
2 Salmon Portions (perferably with the skin on one side)
1/4 Nori sheet, cut into 2 long strips
1 tsp wasabi
2 tbsps mayonnaise
1 tsp soya sauce
Generous Bed of greens - spinach, rocket, salad leaves
8 cherry tomatoes
8 Asparagus
1/2 lemon, juiced
Salt and Pepper
Cooked Rice, optional
Instant Miso Soup, optional

Method
1. Rub salt and pepper on salmon portion. Wrap 1 nori strip around the each portion. Drizzle olive oil to coat fish, this will also help nori strip stick to fish and skin of fish to crisp.
2. In a small bowl, add wasabi, mayonnaise and soya sauce. Set aside.
3. In a non-stick pan, make sure it is hot and do not put olive oil in pan (it will smoke the entire house!). Place each oiled fish portions on the pan. Turn flame down to medium and let fish cook and crisp up.
4. While, fish is cooking, arrange bed of greens and tomatoes on each serving plates. When fish is ready, place fish on top of salad greens. Place a generous dollop of wasabi mayonnaise on top of fish.
5. While non-stick pan is still hot, cook the asparagus with a tsp olive oil for 30 seconds. Remove it and place it on top of the fish. Pour lemon juice over the asparagus. Serve hot.
6. You may also serve dish with steaming hot rice and a bowl of instant miso soup. Absolutely divine!

Tuesday, September 27, 2005

Mag's Garlic & Rosemary Chicken

Ingredients
1 chicken, skinned and cut into pieces
8 cloves garlic, minced
1 red onion, chopped finely
2 carrots, cut into chunks
2 Celery sticks, cut into chucks
5 stalks rosemary
1 litre of chicken stock
Olive Oil
Salt and pepper to taste

Method
1. In the hot pan, add 2 tbsps of olive oil. Put chicken pieces in and brown.
2. Take chicken pieces out, put it aside. In the hot pan, add garlic, onion and rosemary. Cook till fragrant.
3. Return browned chicken pieces into the pot with the fragrant condiments. Add carrots, celery and 1 litre of chicken stock. Cover pot and simmer for 30 mins.
4. Serve it on its own or with rice

Sunday, September 25, 2005

Fried Bee Hoon

Today's lunch was another case of 'whatever's in the fridge'. Generally this is a very flexi recipe, you can add as many varieties of ingredients as u want. For instance, if I had carrots, bean sprouts, chinese cabbage or fish cake, I'd add them in.
Ingredients - serves 2
1 tomato, chopped into cubes
A few leaves of wong bok, sliced
100g pork mince
6 crabsticks, cubed
1/2 handfull dried shrimp
6-8 dried shitake mushrooms, soaked in hot water, stalks removed and sliced (save the water used to soak the mushrooms)
1/3 packet bee hoon (enough for 2 people), soaked in water until soft
3 eggs, beaten
2 cloves of garlic, crushed
2 shallots, chopped
1 tsp sambal chilli }
1 tsp spicy bean sauce } sauce A
1 tsp XO sauce (optional) }
1/2 tsp sugar
cooking oil

Marinade
Marinate pork mince with 1/2 tbls light soya sauce, 1/2 tbls chinese rice wine, 1/2 tbls sesame seed oil, corn flour and pepper. Leave for at least 15 mins.

Method
1. Once the oil is warm enough, fry the garlic, onions and dried shrimp.
2. Once the fragrance comes out, throw in the minced pork and stir fry with sauce A.
3. Put in the vegetables (including mushrooms) and stir fry to incorporate with the minced pork. Add sugar. Pour in the water used for the mushrooms. Cover the pan until vegetables are cooked. (about 5 minutes)
4. Put in the crab stick. Pour in the beated egg and stir well to break up the egg.
5. Pour in the bee hon and stir well. Be careful not to over stir as you don't want to break up the bee hoon.
6. Serve.

Friday, September 23, 2005

Claypot Chicken Rice

This is a super simple to make dish that is also flexi. Altho it says 'claypot', u don't really need to use one, it can be cooked up in the rice cooker even. What I like about it is the 'all in 1 approach' so I don't need to go around washing up so many pots.

Frankly, altho some people say that the flavour from the claypot tastes better, to me, unless you're going to do it over the traditional charcoal stove, otherwise, it doesn't make a huge difference. Worse, I'm told that claypots have limited life spans, they tend to crack easily after some use. All the scraping and scraping when you dig the side probably doesn't help. Think of all the clay you're eating. And it's also a pain to wash off all the burnt bits. Nah, not worth the trouble. I remember 1 hawker coated all his claypots with aluminum foil to save on washing. Guess what, his stall didn't last long.

Ingredients - serves 2 (since when have my recipes done anything else?)
Chicken parts - I like chicken wings and drumlets best (about 4 to 5 pieces per person should suffice) but you can also use half a chopped up chicken.
2 - 3 lap cheong, sliced up
Cai xin, boiled
8-9 dried mushrooms, soaked in hot water. Remove the stalks and slice up.
1 ltr chicken stock
1 cup rice, soaked for at least half hour in (room temp) water
3 big slices ginger
4 cloves garlic, crushed
2 spring onions, save the green leafy part for granishing
cooking oil

Soup
A few leaves of chinese cabbage, chopped up
1 carrot, peeled and cubed
1 potato, peeled and cubed

Marinade
1 tbls each of (dead easy, everything is all proportionate!)- oyster sauce- sesame seed oil- sugar- dark soya sauce- light soya sauce- chinese rice wine

Method
1. You can make your own stock if you have the time. I usually boil chicken carcass with white onion, carrots, celery for half an hour to an hour. I throw all this away after that and keep the stock.
2. In a pot, if you have left over chicken skin/fat, fry it until the oil oozes out. Toss in the lap cheong and fry until the oil oozes out. Throw away the chicken skin and add the garlic, ginger, spring onion and shallots and fry until the aroma comes out.
3. Brown the chicken parts and throw in the sliced mushrooms.
4. Drain the soaked rice and pour in. Stir well.
5. Transfer the mixture to a rice cooker and cook as u would normal rice. Use the water used to soak the mushrooms and some of the chicken stock. (use as much liquid as you would for normal rice. A simple ang mo method is double the volume of liquid to rice, but i find that with Thai rice, this makes the rice a bit too soft since they normally use long grain rice which is harder)
6. While rice is cooking, do the soup. Using the left over chicken stock, add the cabbage, carrot and potato.
7. Once the rice is cooked, the soup would be ready too. Serve with the green bits of the spring onion.

To adapt this recipe to cooking in the rice cooker, u can also switch on the heat on the rice cooker and use it to fry the ingredients before putting in the rice.

Saturday, September 17, 2005

Beef Risotto

I'm mostly a 'use what's in the fridge' or 'in season' type of person, I see what I have in my fridge or what's on offer in the supermarket and alter my recipes accordingly. This week, I bought beef cubes to do a chinese beef stew, and bought peppers and mushrooms for salad. But then I thought - hey, why not try a beef risotto instead? Would be a good alternative to my original chicken and mushroom risotto. Slightly charred beef with griiled peppers and mushrooms! Great idea.

Ingredients - Serves 21 packet of beef for stew, about 200-300g (Buy beef cuts for stew. You need something that softens with slow cooking, For instance, steak is pricey and hardens rather than gets soft with cooking.)
1 pepper/capsicum (I like only yellow and red ones, they are sweeter in taste than the green ones, and there's more capsicum and Vit A in them compared to the green ones)
1 punnet of fresh button or shitake mushrooms, sliced
1 Large white onion
3 - 4 cloves of garlic, crushed1 cup arborio rice (also known as risotto rice)Herbs: I like to use my 'shi da tian wang' mixture from the song Scarborough Faire. It's a good way to mix herbs for anything 'ang mo' tasting. So 1 teaspoon each of parsley, sage, rosemary and thyme. I also use nutmeg for the slight nutty flavour.
Freshly milled black pepper
Parmesan, grated
1 tbls soya sauce (this replaces salt. I prefer this because it gives a more uniform flavour compared to salt, where you can get pockets of salt if it's not mixed properly. Also, salt tends to draw out the juices from the beef during cooking, thus rendering it tough and tasteless)
1 tbls cornflour
3 glasses of red wine (optional)
1.5 ltr beef stock
Cooking oil and butter for cooking

Method
1. Marinate the beef with the herbs, freshly ground black pepper and soya sauce. Coat with corn flour if you are using thawed beef to soak up the extra water. Leave to marinate at least 1/2 hr.
2. Slice up the pepper, mushrooms, garlic and onions.
3. In a very hot pan, pour in some cooking oil and brown the beef cubes. Remember to turn them over so all sides are nicely browned, and the sides can even be a bit charred. Do a few pieces at a time, you don't want the thing to turn soggy when the juices come out. This makes the beef tough. The pan should be hot all the time rather than simmering. Remove from pan.
4. Camerialise the onions with butter. After this is done, throw in the garlic, peppers and mushrooms. Toss around.
5. Transfer the vegetables to a pot, together with the beef cubes. Pour in the rice. Stir until incorporated. Once you start seeing and hearing the rice start to sizzle, pour in 2 ladles of beef stock. Step back and you should see a sudden puff of steam and hear something which sounds like a huge 'sigh'. According to an Italian chef, the Italians call this the "sospiro" or 'the sigh'. This is the mark of a good risotto. (Or is it sospirare? Pls forgive my Italian if the form of the word is wrong, haha!) Kinda reminds me of how chicken rice is cooked too! So we Chinese don't just have a monopoly on cooking techniques.
6. Pour in another few ladles of stock. Stir! One thing about a risotto, the creamy texture only comes out if the risotto is 'loved', ie stirred constantly. This is why all those 'quick bake' recipes just don't taste the same. Slowly stirring for 20 minutes over the stove is nothing compared to tossing it in an oven and baking. The starch of the rice is released when liquid is introduced slowly and stirred, allowing the grain to absorb the rice and release its starch. This gives the risotto its trademark creamy texture. Adding cream or butter is just a cop out!
7. Keep adding stock every time when it looks like the liquid has been absorbed, and stirring. This goes on for about 20 minutes until the rice has softened. But don't over do it, you still want it al dente.
8. About halfway thru the cooking process, pour in the red wine, and add more of the herb mexture to the risotto to give the rice some flavour.
9. Once the rice is cooked, throw in the grated parmesan, turn off the heat and stir it in. How do you tell if the rice is done? Different parts of Italy have different ways of eating risotto, some like it soupy like Teochew muay, others like it stody like Hong Kong congee. It's all personal preference. You don't have to use up all the stock. Leftover stock can be used to loosen the leftover risotto when warming up the leftover risotto, as leftover risotto tends to get stody in the fridge.
10. Serve with more grated parmesan, freshly milled pepper and a glass of red wine.

Verdict: I've tried a variation using pork but still prefer my original chicken and mushroom combination. Somehow that's just the creamiest.
Wednesday, September 14, 2005

Shanghai style minced pork noodles

Today I shall start documenting (haha, since that seems to be a major part of my new job scope - documenting things) my recipes, both those that I invent, as well as ones that I like. This will be my legacy when I die, so at least my hubby doesn't go hungry. After I'm dead, it doesn't matter what he does to my kitchen, at most I'll come and haunt him in his dreams to clean up! :D

This recipe was thrown together after 2 weeks of eating salad. Damn healthy but really boring, and *someone* was complaining. Since there wasn't much food in the fridge to begin with, and time is also short for me, this was a happy compromise. It took only 20 mins prep time (mostly on marinating, so I use the time to prepare my other dish, a salad - haha, still cannot escape that!) and 15 mins cooking time, and only 5 minutes to invent. I improvise as I go along!

Ingredients - Serves 2
200g minced pork
200-300g shanghai noodles (dry)
1 tsp minced garlic
1 tsp minced onions/shallots
2 - 3 tsp cooking oil
Corn starch solution
5-6 dried mushrooms, sliced (soak mushrooms in hot water 1st)

Marinade for pork
0.5 tbls light soya sauce
0.5 tbls dark soya sauce
0.5 tbls chinese wine
0.5 tbls sesame seed oil
dash of 5 spice powder
dash of sugar

Sauce
1 tbls spicy bean sauce
1 tbls sambal
1 tbls XO sauce (optional)

Method
1. Boil enough water in a big pot. Once water has come to a rolling boil, toss in the noodles and cook as per instructions on the packet. I usually use 1 fistful (about 100g) per person but for people with bigger appetites, use 2 fistfuls. (but my hands are pretty small)
2. Once slighty under-cooked, pour away water and drain noodles in colander. Run under cold water to stop the cooking. Set aside. You don't want the noodles too well-cooked because u will be frying them up again later and still al dente.
3. Heat up some cooking oil. Toss in minced garlic and shallots and fry until you hear the sizzling sound (don't over do it). Toss in the sauces and stir well.
4. Toss in the mince meat and stir fry. Try to break up the minced bits into as tiny bits as you can. Throw in sliced mushroom. Pour in a splash of water (this is a gravy to be absorbed by the noodles, it is not a soup!) Cover and simmer for 5 -7 minutes until mushrooms are soft.
5. Once simmering merrily, pour in corn starch and incorporate well until sauce thickens. Pour back noodles and fold in carefully, warming up the noodles but be careful not to break up the strands.
6. Serve immediately with chopped spring onion if desired.

Verdict
My chief taster said that it wasn't a bad effort. Compared to Crystal Jade, it's less salty. However, it 'looks' like sphagetti. Ah well, think of it chinese sphagetti then!

Tuesday, September 13, 2005

1st post

Food - food isn't just about living. Do we live to eat, or do we eat to live?

My 1st experience with cooking food began in my mom's kitchen. Both my mom and gran were avid cooks, their food was talked about among relatives. I guess I inherited this love for cooking from a young age. Up to now, I still miss their cooking and it's tragic that our family recipes are lost forever.

My first encounter with cooking began actually with baking - during the week before CNY, I always looked forward to coming home from school and helping Gran make CNY cookies - keuh bankit, butter cookies, yum. I grew up learning how to bake apple pie from my mom.

Later on, I was good friends with the maid, and would hang out in the kitchen with her. It became only natural that I started as her kitchen helper - chopping garlic, onions and preparing vegetables, even helping her stir fry. Little did I know how much this would help me later.

My next experience was in hostel, where my room mates and I cooked instant noodles and canned food for dinner - made us all lose weight rapidly and it was cheap too! Those were fun days, 3 cooks in the kitchen. :)

When I first got married and moved to Manchester, UK, my hubby never expected I could cook. Growing up with maids, neither did I. Yet alone in a foreign kitchen, in foreign country, with nothing much else to do other than study, I cooked to get a taste of home, and to help pass the time in a cold wintry place. Watching lots of food channel and food shows with Britians best chefs was totally inspirational. I started to cook and hey, I took like a fish to water, all my chopping and preparation skills came back!

Coupled with the great food science tips from food channel, I was inspired to try out new recipes. Living in a country with 4 seasons helped - the food in the supermakets were always diverse, we could have new dishes every season.

My food exploration journey began...and now continues after I've moved to my own apartment.

Bon appetite!

Hokkaido milk bread loaf