Showing posts with label baked. Show all posts

Saturday, July 18, 2026

Thin crust pizza

I just discovered the last pizza dough recipe I used was 10 years ago and I haven't made pizza from scratch since! I decided to try this recipe by Kitchn which looked easy enough. The draw was using regular flour rather than bread flour and had minimal proofing. What you really want in terms of prep work on a weekday evening! I doubled the recipe to make 4 pizzas, so the dough can be made once and then eaten over 2 nights depending on the size of the eaters.

Ingredients (makes four 10 to 12 inch pizzas)

4C flour

1½C lukewarm water 

2 tsp yeast

2 pinches of salt

Ingredients for pizza (eg tomato paste, salami, ham, pineapple, olives, pizza, etc).

Around 1 tbsp oil

Chirizo and salami pizza

Method

1. Mix the flour with the water, yeast and salt.

2. Knead for 5 to 8 minutes. Ball up the dough, then cover and proof for around 10 to 15 minutes while prepping the pizza topping. At this point, I saved half the dough for the next night in the fridge and proofed the rest.

3. At this point, the recipe recommends putting an upturned pan in the oven preheated to 220 deg C, and place the pizza on top. Afraid of dropping the pizza when placing it on an upturned pan either putting in or taking it out of the oven, I didn't bother. However it would probably have helped to either do this or bake the pizza base blind to avoid the ingredients making the base soggy.

4. Stretch out the dough as thin as possible, using a rolling pin to help. If the dough keeps shrinking, leave to rest covered for a further 10 minutes. I roll it out as thin as I could then placed it on in the pizza pan. I then used my fingers to push it outwards to the pan's edges so it made a tiny lip at the pan's edge.

5. Brush on a thin layer of oil on the base. Spread on the tomato paste then place the toppings. Try not to stack toppings on top of each other. I did lay a thin layer of cheese on top on tomato paste before my other ingredients, then finished off with another thin layer of cheese on top of the toppings. For wet ingredients like olives and pineapple, it's best to drain as dry as possible and even use a paper towel to blot dry. 

6. Bake for 8 to 12 minutes, checking frequently after the 8 minute mark. 

Feedback

- The dough is fine and easy enough to make. The issue perhaps is with the process. I removed the pizza from the oven once the cheese was nicely browned but just before it burnt, around 10 minutes. However because the pizza base wasn't pre-baked, 10 minutes only just cooked the dough but it was slightly soggy whereas the cheese has already melted almost to the point of burning. So especially after I used more soggy ingredients (olive and pineapples) on my second attempt, the base was more soggy compared to just chirizo, cheese and salami. I was afraid the oil from these meat products would make the pizza soggy but they didn't.

Hawaiian pizza

Sunday, October 15, 2023

Milk bread with filling (sponge method)

From the comparison recipes, decided to try HappyGoKathy (video and write up) based on her sausage octopus buns. This recipe was highly recommended by Yanna. According to the blogger, the bread keeps moist even after a few days. The recipe uses fridge-cold yeast sponge which works best in summer when other breads can end up over-proofing in the heat.

Sponge

210g bread flour

135ml water, finger warm, around 35 deg C

Instant yeast 3g

1. The night before, combine the ingredients.

2. Knead for 5 minutes then store in a covered container overnight for at least 15-17 hrs.

Main dough

Ingredients

90g bread flour

12g milk powder

25g sugar

60-65ml milk

5g salt

25g butter, room temp and cubed.


Method

1. Put the dry ingredients with torn up sponge into the mixer. Add half the milk. Mix for 2 minutes on Speed 1 until mixed.

2. Add more milk slowly and continue to mix on Speed 2.

3. Once bowl is dry from milk (dough is formed), add salt. Mix for 2 minutes at Speed 2. 

4. Once incorporated, bowl is clean. Turn up to Speed 4 and mix for 8-10 mins. Check dough is elastic when finger poked through windowpane leaves ragged edges. (She encourages putting the bowl before mixing in the fridge to keep it cold!)

5. Add butter several cubes at a time at low speed and mix at Speed 2 briefly each time until butter is mixed in, around 2 mins total. When adding butter, the dough may break up again so use spatula to incorporate and scrape.

6. Once all mixed in, turn up speed for 5-8 mins until finger poked into windowpane leaves smooth edges. Dough is smooth and shiny, elastic and should not be sticky.

7. Form a ball. Dough should not be more than 26-27 degrees C otherwise the bread is coarse if exceeds 28 deg C. Cover and sprinkle the surface of the dough with water. Proof for 30 - 45 mins. When done, insert finger into the dough and the hole may spring back a bit shouldn't totally close up. If it doesn't spring back at all, it's over-proofed!

8. Beat down the air bubbles and cut 8 portions of 65g each (or depending on filling). Form balls. If dough becomes too taut to roll out with rolling pin, rest under damp tea towel for 15 to 20 mins to relax before continuing to shape dough for filling. 

9. Watch the rest of the video if using sausage otherwise use own filling. Dough should be really elastic and easy to seal seams.

10. After shaping bread, cover and allow to ferment for approx 1 hr.

11. Egg wash just a thin layer and sprinkle with sesame seeds if using and then bake at bottom rack at 180 deg C for 15 - 18 mins.

Recipe feedback

- It works! Quite happy that I've never gotten such 'Asian-like' bread before - soft and what anpan should taste like. The dough was elastic and a dream to work with when it came to crimping. 

- I followed my instincts rather than following the timings for mixing given in the recipe because she used a different beater to KA. I based my intuition based on feel and look developed from experience.

- I've also learnt the magic ratio of filling to dough: about 1: 1 is ideal.

Saturday, October 14, 2023

Preferment milk bread comparison recipes

 I have tried so many methods to make red bean bread from tangzong method with bread flour which for some reason turned crusty, tangzong method with bread and cake flour which came out super dry, to Japanese An-Pan with bread and cake flours which was still dry altho fluffy, and also An-Pan with plain flour which came out super dense although fluffy. I also tried making buns from bread flour and condensed milk which were sweetish and great for sweet fillings were a difficult to shape and not very fluffy.  My pan is L21*W12.5*11Hcm (aka 1.5 jin pan which fits 580g dough).

I am trying preferment (Poolish, Biga, Spong-dough methods) - see Jack for an explanation.

After the last failure with sponge method milk loaf, I decided to investigate sponge and gelatinsed dough recipes to try if using filling

1. Taiwanese style HappygoKathy (video and written recipe) octopus sausage buns recommended by YC - overnight preferment has yeast and needs kneading before leaving in fridge. 210g + water and yeast knaded for 5 minutes then storied in fridge for 15-17 hrs. Next day, tear up sponge and add 90g bread flour with milk powder, milk and butter. Prove 30 - 34 mins. Makes eight 65g dough balls. Shape and prove 1 hr. Bake 180 deg C for 15 -18 mins. (Tried here)

2. Kat Kwa's Jap milk bread (video): 500g bread flour in KA, 1hr proof, 3 dough balls in 1 pullman tin, 45 min proof, baked 190 deg C for 40 mins

3. Kat Kwa's earl grey milk bread (video): 100g bread flour with yeast for sponge, 48 hrs rest, scaled milk, 500g bread flour in KA with sponge, prove 45 mins, 2 pullman loaf, prove 45 mins

4. Kat Kwa's 2-styles sausage buns (video): 210g bread flour with yeast beat in KA, proof 2 hrs; 70g bread + 60g plain flour with yeast then beat in KA with proofed dough, condensed milk and egg. Proof 30 mins. Cut into 12. Form traditional coil sausage and also 'grapes-look' sausage with cheese. Proof 45 mins. Bake 180 deg C for 15 mins.

5. Kat Kwa's slitted red bean buns (video): Same method as above and same flour amounts:

6. Kat Kwa's Hokkaido-style milk bread (video): Called gelatinsed dough method, this is overnight preferment with no yeast and needs kneading before leaving in fridge. 100g bread flour + 80g boiling water kneaded for 5 mins and stored overnight in fridge. Next day, tear up gelatinsed dough and add to 400g bread flour with yeast, milk, egg, whipping cream, butter in KA. Prove 50 mins. Create 6 balls and put into 2 Pullmans. Prove 45 mins. Bake 180 deg C for 30 mins.

7. FlavourQuest using taro filling (video) recommended by Isabel - also gelatinsed dough method but slightly different. 200g bread flour with milk and sugar. Knead then overnight in fridge. Next day, already windowpane. Make a well in the dough and add yeast and milk and butter and knead in. Very hard and messy to knead in. If using KA, have to tear up the gelatinsed dough.


Friday, October 06, 2023

Shokupan milk bread (Sponge method)

After my success with using the sponge method to make bao buns, I decided to try this recipe for milk shokupan bread by WTT (video).

Update: This recipe turned out to be a FAIL possibly because I over-kneaded with KA. I read the recipe's commenters and I wasn't the only one based on her mixer's beating timings so I'm not keen to try again.

Ingredients (makes 587g dough)

Sponge

170g bread flour

200g water

23g honey

¼ tsp yeast

Method: Combine ingredients for sponge in a stand mixer and stir on Speed 2 for 2 minutes. Cover and leave in a warm place for 1 - 4 hours. If leaving longer, keep in the fridge for up to 24 hours and no longer.

Bread dough

Ingredients

160g bread flour

½ tsp yeast

20g dry milk powder (produces softer bread than liquid milk but if using liquid, replace all the water in the sponge with liquid milk instead and scald the milk ie simmer at 80 deg C to remove protease enzyme. This enzyme breaks down bread gluten and results in less rise. Let liquid milk completely cool first or it will kill the yeast)

5g salt

25g honey

50g unsalted butter, softened and cubed

Egg wash: 1 large egg + 1 tsp water

1 tsp sesame seeds (optional)

Method

1. Combine ingredients in KA except for butter. Stir at Speed 2 for 1 minute then increase to Speed 4 for 5 minutes. The dough should still be a bit sticky.

2. Add the butter slowly in 3 or 4 increments and beat for about 2 minutes in between. Finally, beat until the dough is shiny and smooth although may still be sticky. Continue to beat for another 7 -10 minutes until windowpane stage. This was very tough on the KA, I kept taking it out to scrape because the dough ball stuck stubbornly together. Once all the butter had been worked in and the bowl was clean, I took it out and hand kneaded for 20 mins and it still didn't reach windowpane.)

3. Gather into a ball and oil a bowl and put it in. Cover. Allow to prove until double it size, about 45-60 mins.

4. Deflate the dough and divide into 3 balls. The bread is very soft so it will collapse as one big loaf. Cover and allow to rest for 10 mins to relax the gluten.

5. Shape the dough accordingly (whether for filling or to fit a shokupan). Cover and prove for another hour until 90% full in the shokupan. 

6. Preheat oven to 180 deg C. Prepare the egg wash. Brush eggwash thinly and sprinkle sesame seeds if using. 

7. Bake in the middle of the oven for 40 mins. Bread may need tenting halfway if it gets too brown. Internal temperature of the bread (right in the centre of the loaf) at 35-40 mins should be 88 deg C. If not, continue baking 3-5 mins and check again. Temp needs to be checked because bread is so soft and airy so needs to be completely cooked otherwise it will collapse under the weight of the crust.

8. For shokupan, drop the tin on the counter to shock it and prevent shrinkage. Brush with melted butter if preferred. Let sit in the pan for 5 mins. Remove bread from pan and lie loaf sideways on a cooling rack for 15 mins. Totally remove bread and leave it to cool completely on the rack (about 2 hrs). Do not attempt to slice bread until completely cool or bread may collapse or turn gummy!

Recipe feedback

- This is a really long recipe even in summer because of the sponge dough development and then two provings, and then the bread takes another 40 minutes to bake. That's almost 7 hours (including preferment; even longer in winter) of inactive time. It will help reduce half the time if the preferment is done overnight.

- This bread isn't great for filling. The seams are hard to close as the dough seemed very dry right from the moment the main dough went into the KA - there is no liquid to bind other than the honey, I was almost tempted to add water because there were spots of dry flour. The Sponge isn't very wet either (when I used milk). Even if I had used water + milk powder separately in the sponge and main dough as the recipe wrote, it's hard to see how the bread would end up being moist.

- First attempt: not sure what happened but didn't rise. Was it the salt I accidentally added in the sponge?

- After some research, I think I have overkneaded because this is what happens - it became difficult to knead (stiff) and bakes as dense and hard because it can't rise. I had found it very difficult to knead in KA (dough kept balling and refused to be kneaded) cos I thought it was too little water. So after 20 mins in KA when it was already smooth and not tacky, I still took it out to knead by hand for 10 mins cos I could never achieve windowpane stage. 

- Different to over proofing which tight squat with gummy crumb as mine actually had a soft crumb. Overproofed dough can be saved by just punching out and proofing again. There is no way to save over-kneaded dough. Can try letting the dough relax/proof for double the amount of time but it doesn't always work.

- How to correctly proof dough by Perfect Loaf. Underproofed would suddenly 'over spring' with massive rise, dough ruptures, large hole pockets with dense spots. Properly proofed dough has even crumb and even dispersion of holes. Overproofed dough has no oven spring, squat, dense with tiny holes. Overproofed is better than under cos at least the dough will be delicious (taste). Make foccasia or crotons.

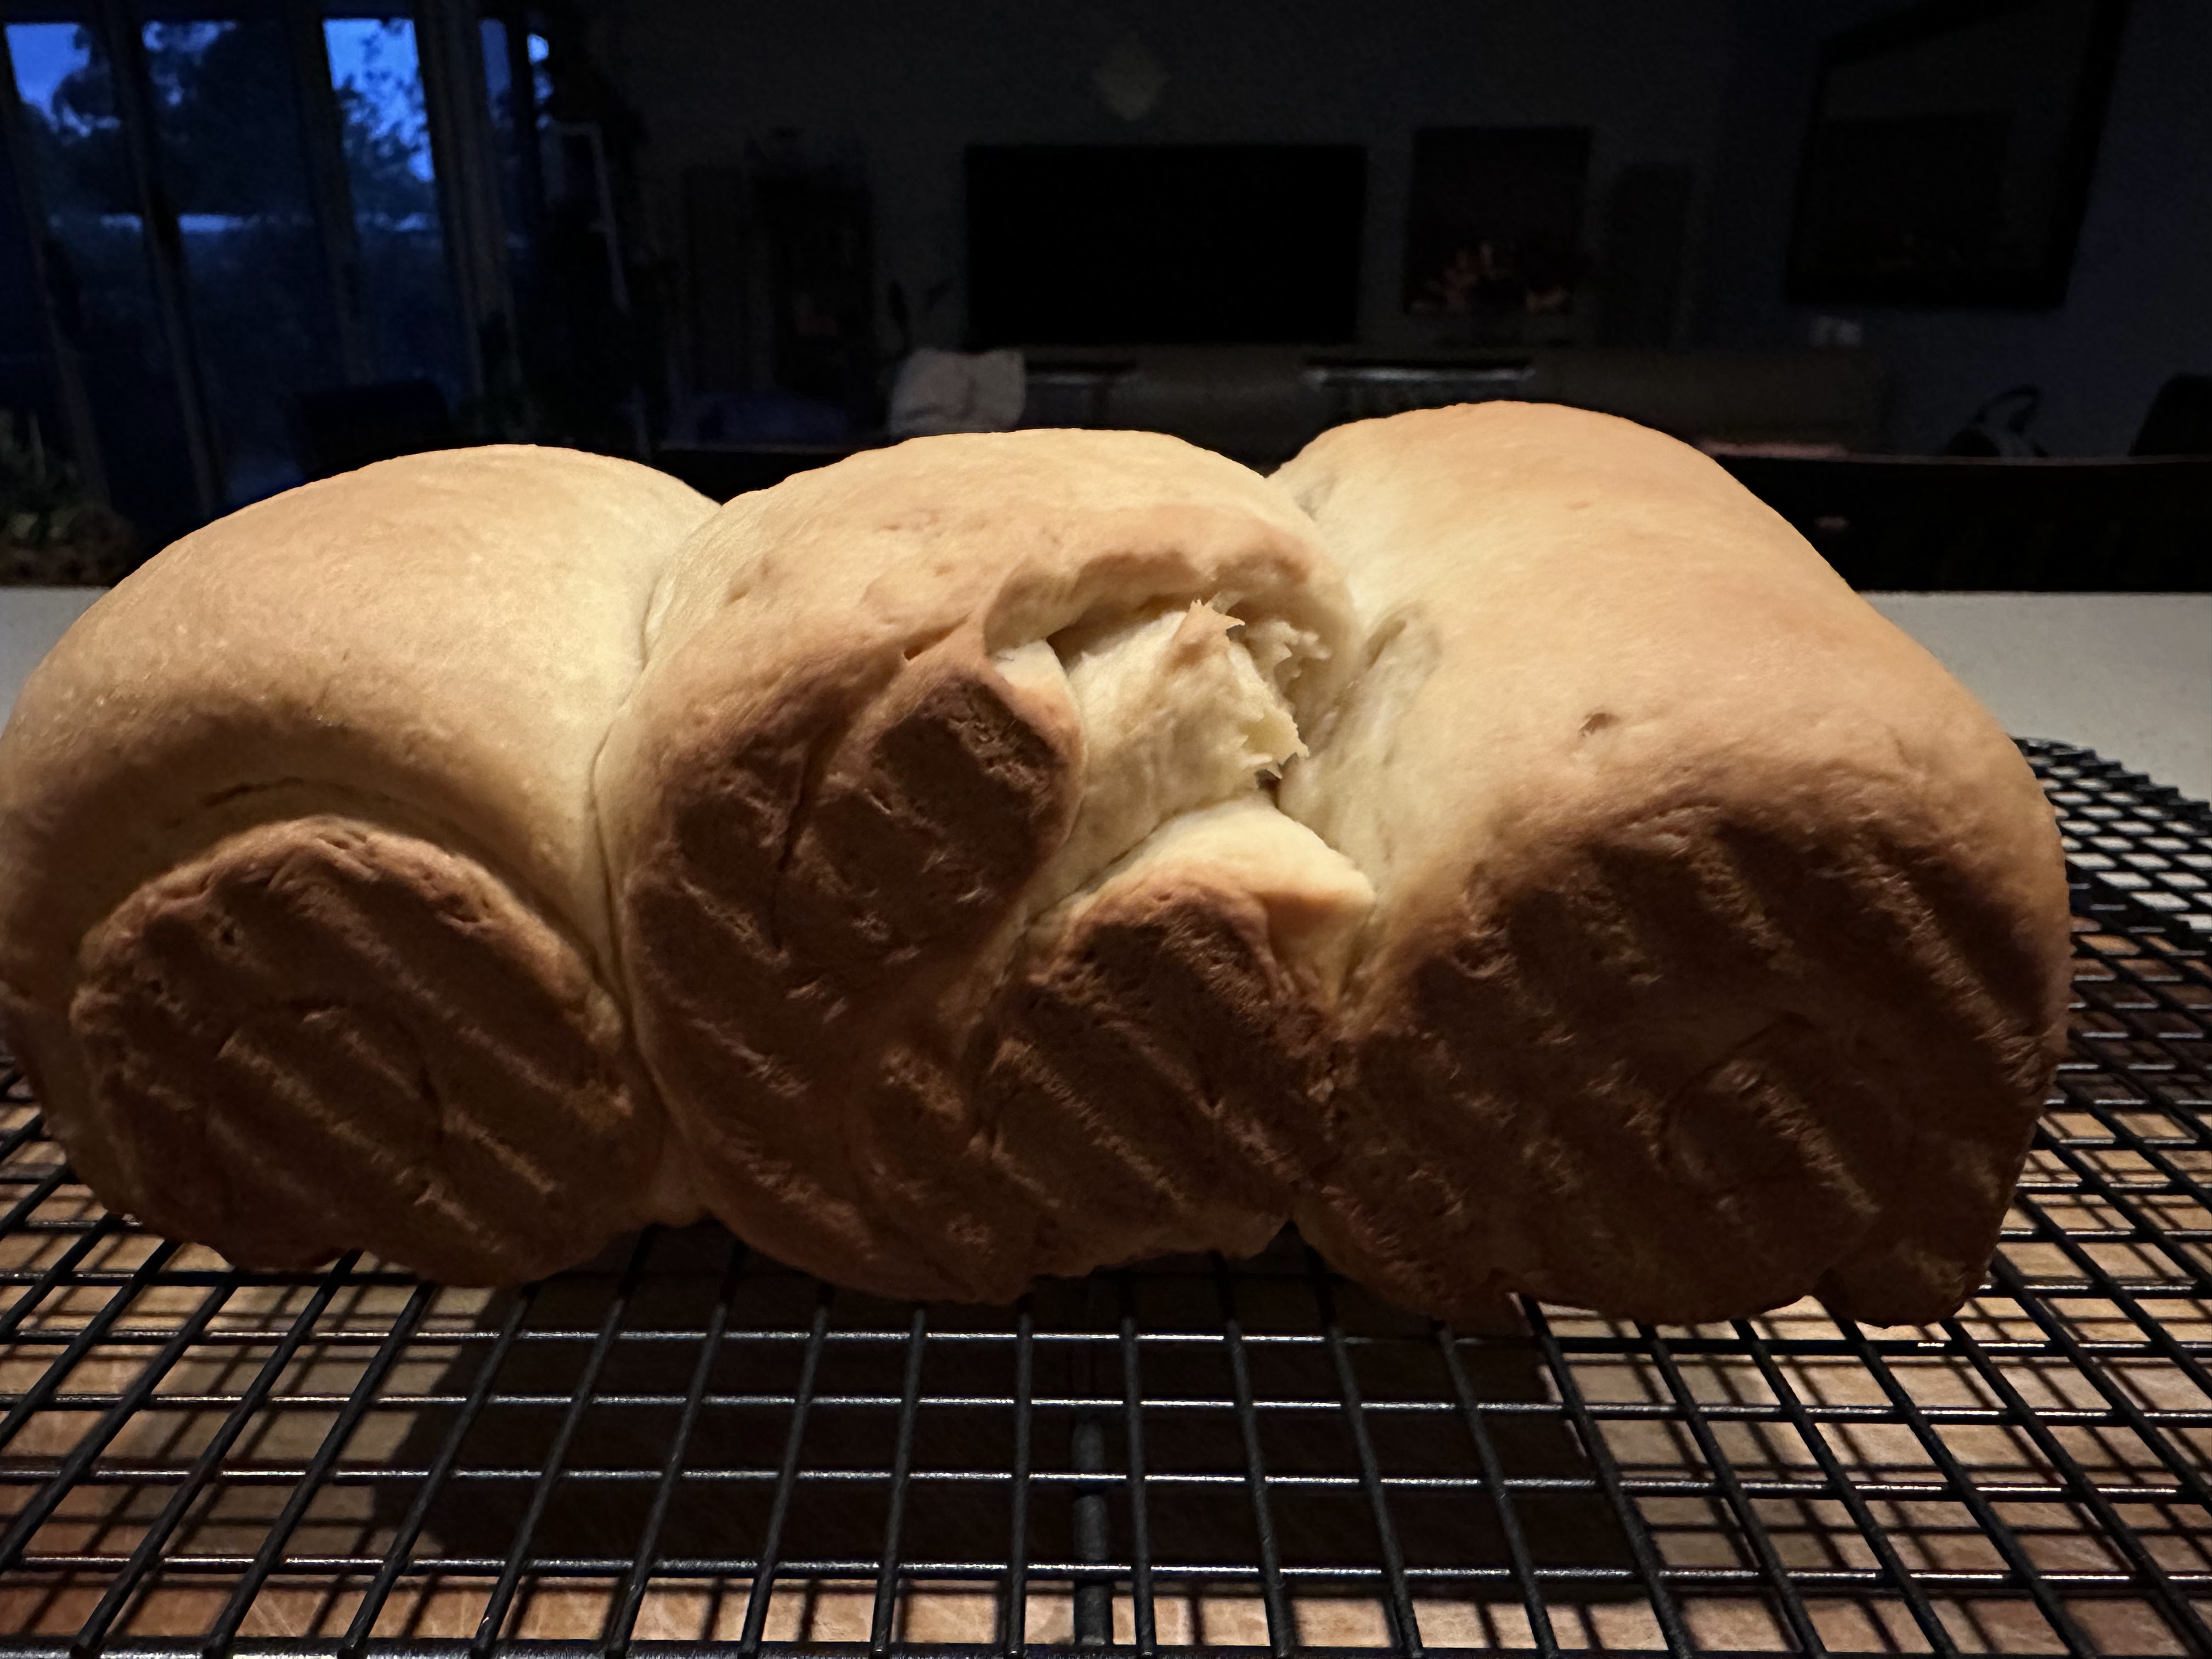
Sideway view when sitting on side to cool
Top of loaf when sitting on side to cool
View of loaf from side. No rise
Top view of loaf

Saturday, September 23, 2023

Condensed milk buns with filling

Since this milk bread receipe comparison, I've experimented with different milk bread methods that used cream but no oil and had 2 proves or had oil but needed 3 proves.

Decided to try Omnivore's Cookbook that uses condensed milk and only 2 proves. However, instead of making dinner rolls as her recipe describes or my usual Pullman tin, I'm making bread with filling.

Ingredients for condensed milk bread - 650g dough makes 9 dinner rolls or 12 buns

300g (2½ C) bread flour

140ml (½ C) milk

7g (2½ tsp) instant yeast 

30g (2½ tbsp) sugar

80g (¼ C) condensed milk

4 tbsp butter,  melted

1 egg

Filling of choice - 780g: I made my own coffee mung bean using Kitchen 101 but with 300g dried beans

Method

1. Activate yeast: warm milk to about 38 deg C in microwave. Add pinch of sugar and yeast. Sit for 20 minutes to activate.

2. Add flour, milk, rest of sugar, condensed milk, butter, egg to mixer. Mix together first with spatula. Add yeast and mix. Cover and rest for 20 mins.

3. Using KA, start low and then increase to 8 out of 10 (! - this is against the instructions in the instruction manual which recommends no more than speed 2 or 4!). Knead for 10 to 12 minutes until dough is smooth. Scape if necessary. Stop when you reach window-pane stage. Dough should be wet and slightly sticky but should not stick to your hands.

4. Grease a bowl and put in dough shaped in a ball. Cover with let rise in a warm spot until doubled in size, approx 1 hr.

5. Meanwhile, if using filling, divide filling up into 12 balls. Cover with cling film and set aside.

6a. If making dinner rolls, divide dough into 9 and use a 9 x 9" (23 x 23cm) lined baking pan. Each dough ball weighs 68-70g. Cover with plastic wrap and prove until doubled in size, approx 35 mins.

b. If adding filling, divide up dough into 12 balls. Fill with filling and close. Form a ball and place on lined baking tray. Allow to prove until doubled in size, approx 35 mins.

7. Eggwash with thin layer of milk, just the tops of the buns.

8. Bake at 175 deg C for 15mins (with good temperature control but I will stop at 10 mins to rotate trays) or until golden brown. For dinner rolls, internal temp should be 88 deg C.

9. Let bread rest for 5 mins then transfer to cooling rack.

10. To reheat, warm in microwave for about 10 (no filling) to 20 (with filling) seconds. If freezing, keep in ziplock bag for up to a month. Reheat at 175 deg C without first thawing for 10 mins.

Recipe feedback

- Dough is really soft and moist but is difficult to shape. Although very elastic, it refuses to 'stick' when crimping the seam to close. On one hand, any pleats made will be very obvious but on the other hand, any imperfections are also obvious. Perhaps being more sparing with coating the bowl and dough ball with oil during the first proof might help.

After proofing: Imperfections, slits that won't seal! Bumps, dings and lumps on the surface

- Because of the high sugar content in the bun, it browns easily so milk wash is ok, not egg wash.

- How do I prevent the 'cavern' in the bun ie the filling sinks and leaves a huge gap in the roof of the bun? This time, I was super generous with the filling, in effect, putting in more filling by weight than the weight of the dough. Yet there was still a huge cavern. I think it has to do with wrapping style i.e., using the bao wrapping method tends to pull too much dough over the top to crimp and seal (and even then, it's hard to do with this dough). Maybe I have to use the mooncake wrapping method which slowly works the dough over the filling but this dough isn't sticky enough to seal close. 

- In sum, this recipe would be good for plain buns or with sweet filling.

Updated: This recipe by Savour Easy uses normal flour, room-temp butter and hand kneading instead of bread flour, melted butter, and KA. Otherwise, the portions and proportions are very similar. I may give it a try next time when I want a milky sweet bread to contain my filling as hopefully the bread will be more malleable and amenable to shaping due to the inclusion of room temp butter rather than melted butter. It also suggests tenting the bread in the last 10 mins to prevent burning.

Saturday, September 16, 2023

Baked mooncake skin

After a lot of reading up, I decided to go mostly with Souped Up Recipes due to her extensive video and tips as well as use of cake flour. I've incorporated some of the good tips from others. This recipe only documents the dough as I bought ready-made filling which comes in 500g packages. This recipe can make varying amounts of mooncakes depending on size of mould. I devised a whole spreadsheet for my 75g, 150g and 200g moulds with single and double yolk variations! In this recipe, I made 2.5x the amount of dough in order to produce 20 mooncakes of various sizes, with 4 types of fillings (store-bought 500g each package of filling)

The 20 mooncakes, not including another tray of 4 spares with single yolks (leftover filling and dough)
The full bake, including spares (aka 1 yolks)
Double yolk in 200g mold - looks a bit dry? The yolk was abit rubbery. Proportions are also out, seems like too little filling to too much yolk
Single yolk in the 150g mold. Seems like ideal proportion of yolk to filling

Ingredients (Makes one portion of 420g dough to wrap approx. 500g filling)

250g cake flour

135g golden syrup

50g veg oil (peanut preferred)

3g (½ tsp) salt

13g (2.5 tsp) lye water (homemade)

Egg wash: 1 egg yolk + 1 tbsp water

12 egg yolks (may not end up using all)

2 tbsp rose wine

2 tbsp sesame oil (optional)

Method

1. Mix golden syrup, veg oil, lye water and salt. Lightly beat until incorporated.

2. Sift in 250g flour and lightly knead until the dough is elastic and pliable but doesn't stick to the hands. Don't over-knead. Cover with cling film and leave on the counter to rest for 2 - 3 hrs until no longer sticky.

3. Marinate the egg yolks in rose wine (or sesame oil) for 5 minutes. Remove and wipe dry with paper towel. Weigh each yolk and set aside. (Optional: bake for 150g for 6 mins then let cool to give the yolk a roasted flavour, although Taste Asian says no need).

4. Weigh out filling and roll each into a ball: i.e., individual fillings + egg yolk (approx 12g each) should equal total weight of filling. Cover with cling film.

75g mould (no yolk) using 1:3 ratio: 25g dough + 50g filling 

150g mould using 2:3 ratio: 50g dough + 100g filling; with 1 yolk: 50g dough + 21g yolk + 79g filling (#see note)

200g mould using 2:3 ratio: with 1 yolk: 80g dough + 21g yolk + 99g filling; with 2 yolks: 80g dough + 2*21g yolks + 78g filling (see video for how to roll encase 2 yolks, essentially, make into an oval 'ball'.

5. Weigh out dough and roll into balls. Cover with cling film. Prepare tray to bake - best to indicate which tray/portion of the tray is for what filling(s).

6. Encase dough over filling (see video). Using palm, press out each dough ball into a circle about 4 to 5 inch diameter if using 100g mould. Turn it upside down and wrap so that there are no air pockets. Turn back right-side up and then slowly press the dough to slowly encase the filling until it completely covers and then pinch the same to close.

7. Place ball into mould and lightly flatten. Place mould on baking tray. Press down until you encounter resistance. For round moulds, hold the pressure steady for at least 15 seconds or stamp several times to establish the pattern. For square moulds, hold the pressure steady for at least 30 - 40 seconds so the filling and dough fill out the corners. (probably not advisable for beginners to have yolk inside when using square moulds as it might flatten the egg)

8. Mist each mooncake from a height (to prevent too much water accumulating in the ridges of the pattern). Immediately put in the oven and bake on middle rack at 180 deg C for 10 mins until edges harden and turn lightly golden brown. (5 - 7 mins in small oven and 7 - 10 mins in big oven)

9. Remove from oven and allow to cool for 20 mins. Don't eggwash when the mooncake is hot otherwise the pattern will run. Egg wash the top and sides lightly with egg. Remove excess wash from in between the ridges with smaller brush or blot with kitchen towel so the pattern doesn't blur. Return to oven to bake:

- Bake at 180 deg C for further 5 to 10 minutes (5 - 7 mins in small oven and 7 - 10 mins in big oven) at same temperature until golden brown. Keep a close eye as fillings are cooked so it's about getting a golden skin. Don't bake for too long or it will dry out and crack.

- Optional: remove and egg wash for second time after 5 minutes then return to oven to finish baking, approx. 5 to 8 more minutes but keeping a close eye so they don't burn or burn.

10. Leave in tray to cool for at least 30 minutes as skin will be soft and flakey and easily break or crack when hot. Once cooled slightly, leave on wire rack to cool completely for at least 2 hours.

11. Store at room temp in airtight container for 2 to 3 days for 回油. The skin should become very shiny and moist. The skin will also become darker due to the lye water. Keep in fridge with each one wrapped in cling film for up to 10 days, or freeze immediately and keep for up to 3 months. When ready to eat, bring to room temp and then lightly toast in toaster oven.

Recipe feedback

- Even though using storebought filling, it's important to fry up and add oil, as well as check freshness of the product. (Clockwise from top left: chestnut, black sesame, red bean, yam). The oil on the yam had split and wasn't the freshest. Also, chestnut, yam and red bean tended to be quite dry anyway so definitely needed the oil for mooncake.
- The first batch of dough was a total failure. Even after resting for 3.5 hours, it fell apart into crumbs when trying to massage it. When I touched it and tried to flatten it out, it cracked every which way and was impossible to work with. I think it's because of my home made lye water which was a total failure. 
- Second try seems to work because I'm using storebought lye water. The chemical constituents are different to homemade so that's probably the reason!
- It's very difficult to cover those with egg inside as they are less forgiving. To completely cover the seam, I have to push the dough upwards to close the gap. This ends up causing the filing to shift and expose the egg so when stamping the design, the egg is obvious. 
Can see the yolk poking out
- Also found that the 3:7 ratio is insufficient. It needs to be 2:3 dough:filling because baked skin is not very stretchable compared to snowskin. Have adjusted above.
- Do not rest the dough more than 2 hours. Ideally after 30 mins when it's no longer sticky to the touch. Dough becomes really dry and started to crack by the time I reached the last batch of 8 mooncakes. I had very carefully wrapped everything in plastic from filling to dough to completed mooncakes, and I had a very humid afternoon as it was raining heavily. Without which, there would even more cracking.
Cracked! After first 15 mins. Next time will reduce to 10mins first round
- The 200g could barely able to contain 2 yolks and doesn't allow a deep imprint to be left. It was ok with 1 yolk.
the 200g double yolks (clockwise from top left: red bean - lotus seed design?, yam - rose design, chestnut - peony design, black sesame - lily design

- # For some reason the 150g are really short! The 150g could more likely be a 175-180g mold. EDIT: I had mismeasured the filling by 20g and each mooncake is only 125g total. Because there was just enough dough to encase the underweighted filling, in reality, 3:7 is not viable. I've updated above.
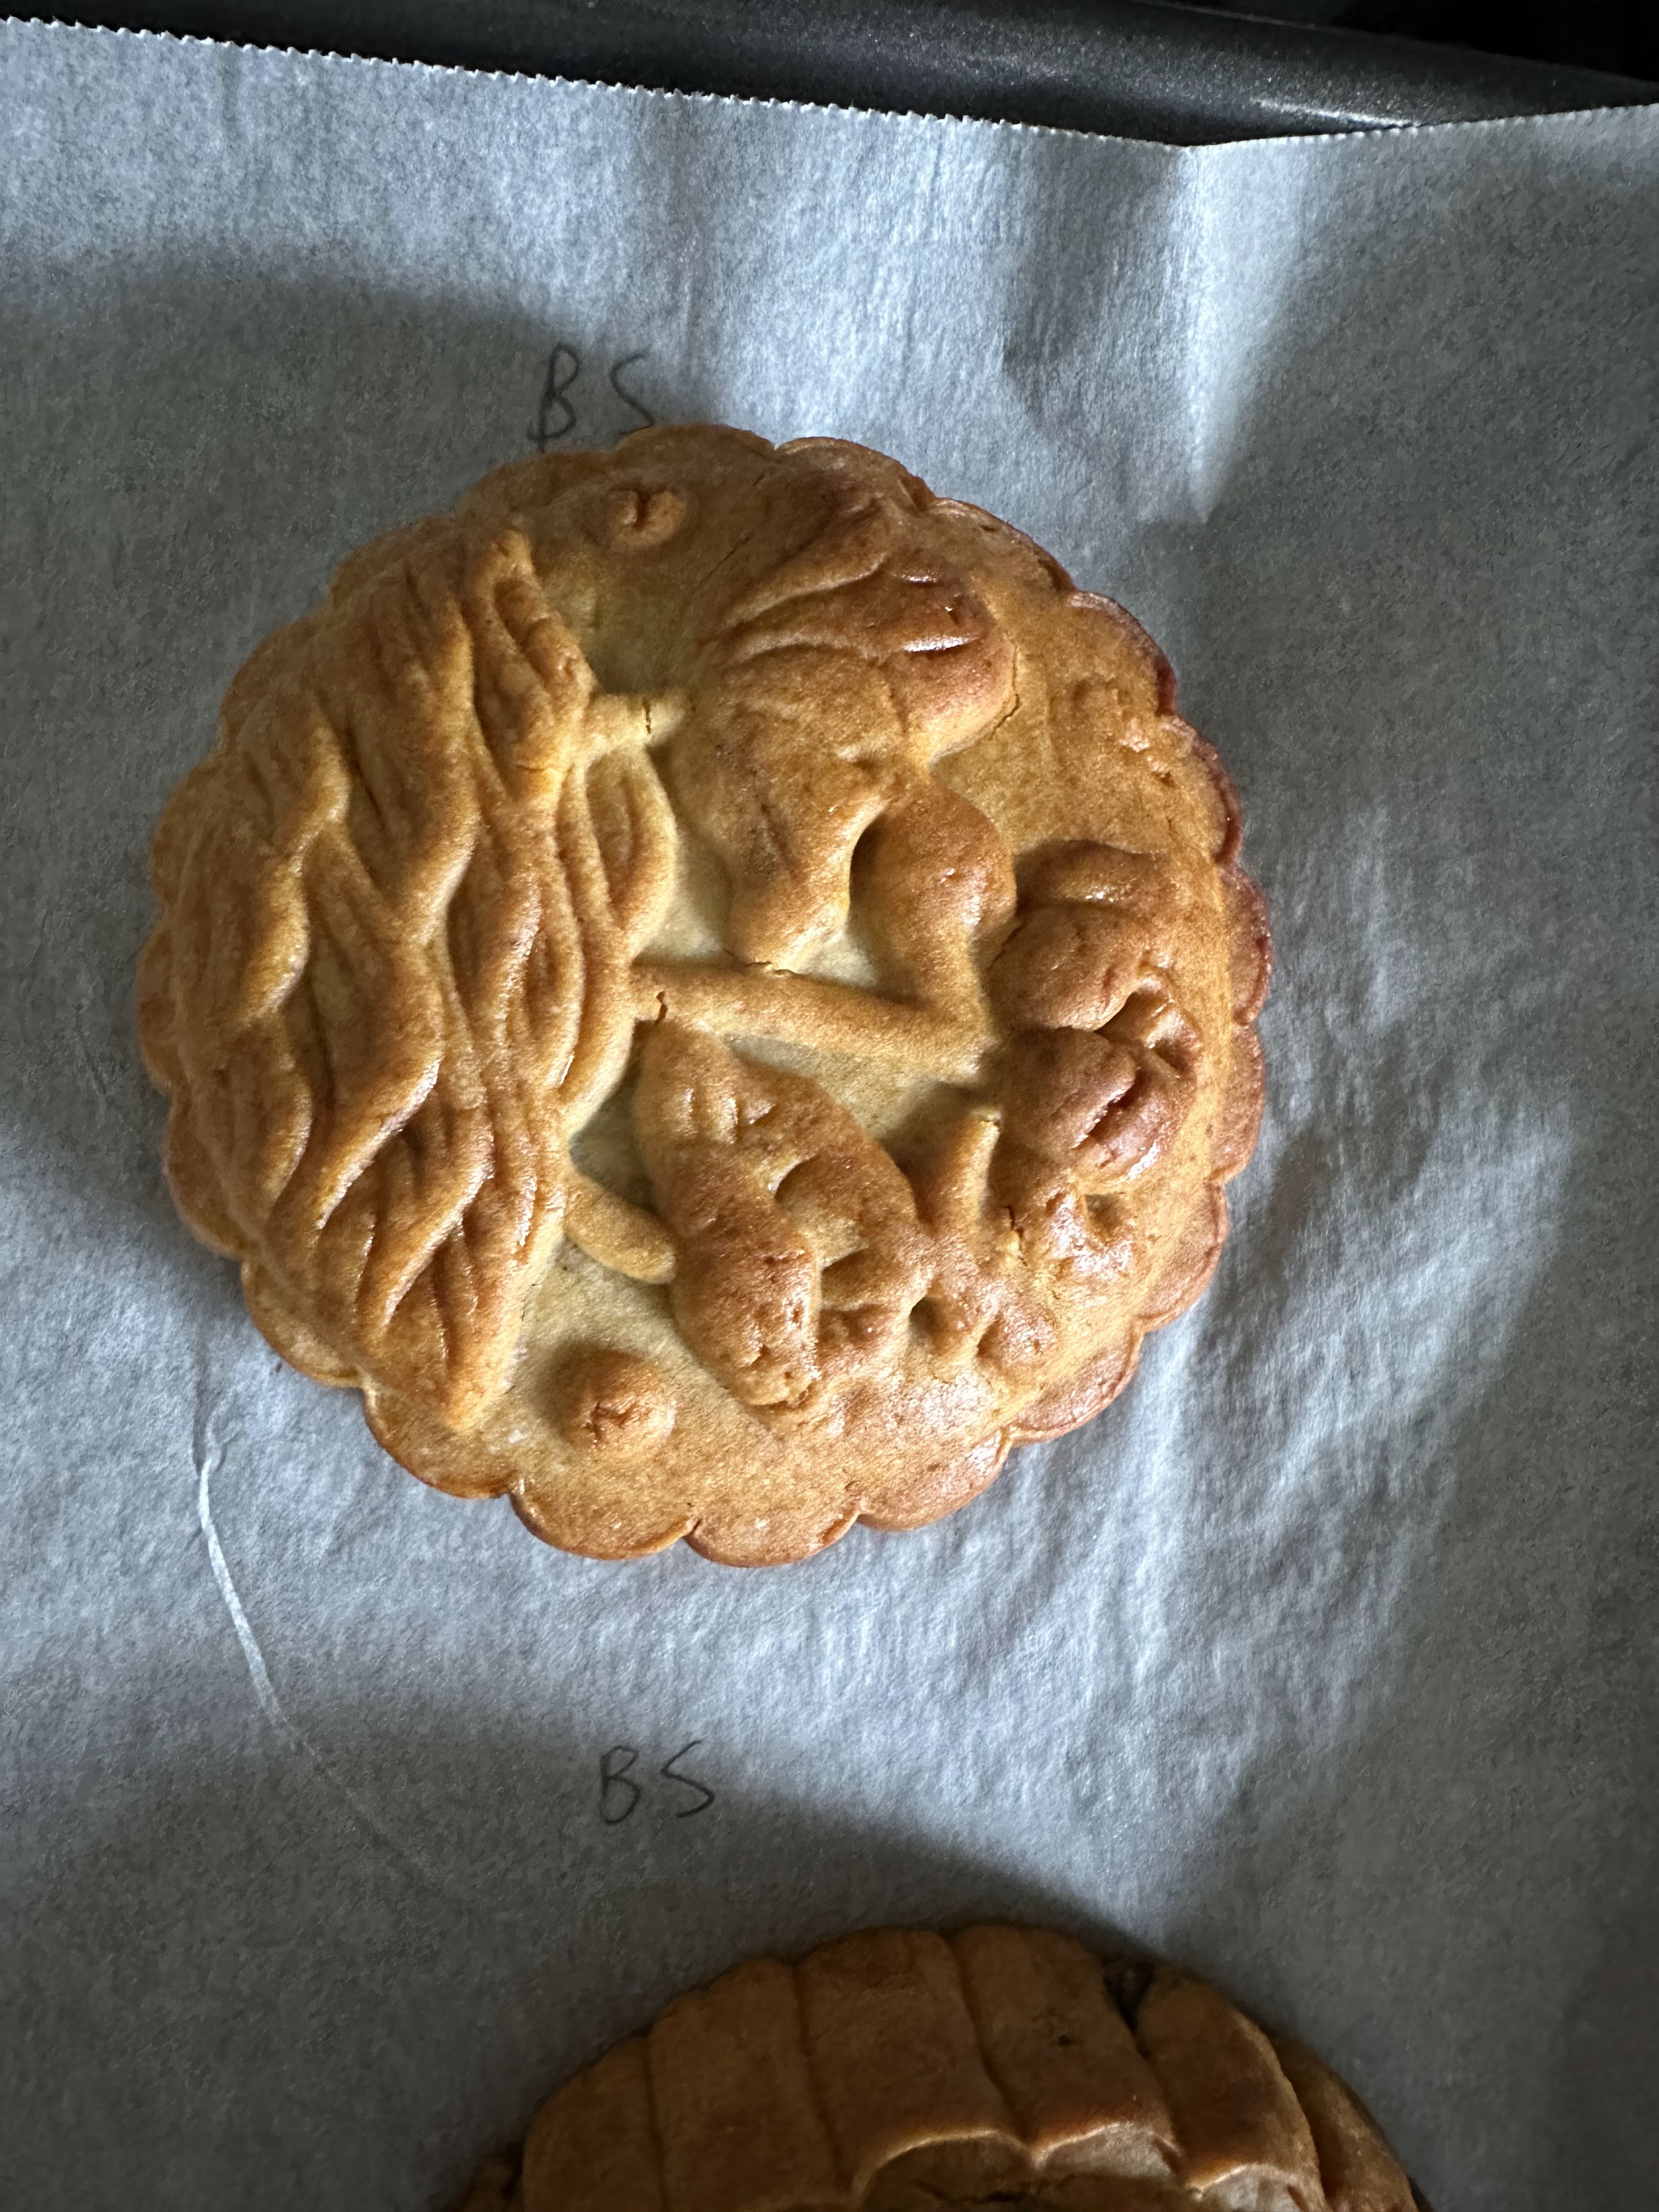
150g red bean - fish design
150g black sesame - lily design
150g yam - lotus design
150g chestnut - peony design

- Most difficult filling to work with : black sesame. Easiest to handle when chilled hardened so form ball first then keep chilled. Next is red bean, similarly, form ball and chill. Taro and chestnut are really dry and hard so need a lot of oil when frying. The oil helps with the handling otherwise it is too hard to form balls. However, they don't retain the oil and exudes the oil after being in the fridge.
After 回油


Saturday, September 02, 2023

Baked mooncake recipe comparisons

This post contains homemade recipes for lye and golden syrup, different paste recipes, and tips for mooncake making in general.

1. Pandan coconut filling mooncake by Kat Kwa (video), makes sixteen 50g mooncakes

- 300g plain flour with baking soda instead of cake flour. Cover and rest for 2 hrs on countertop.

- Cover and rest rest dough for 2 hours so it's not sticky and can be handled

- Bake for 180 deg C for 12 mins without egg washing. Remove from oven and leave to cool for 30 mins before egg washing. Mix egg yolk with 2 tbsp egg white and 1 tsp salt. Egg wash thinly the tops. Bake further 10 - 15 mins.

2. Black sesame with yolk in lotus seed paste by Kat Kwa (video), makes six 180-200g mooncakes

- 2 layer filling: Toasted ground black sesame mix with peanut butter and 150g lotus paste which encases yolk. Uses another 600g lotus seed paste to encase the black sesame

- 160g plain flour. Cover and rest 30 mins on countertop until dough no longer sticky.

- 100g lotus seed paste (with melon seeds), 30g sesame seed paste, 40g dough, ?g egg yolk

- (Didn't mist!) Bake 180deg C for 15 mins. Cool for 20 mins. Egg wash with 1 yolk, 1 tbsp egg white, ⅛ tsp salt. Brush only top. Bake 180 deg C for another 10 - 12 mins. Store airtight container for 2 days outside fridge.

3. Traditional lotus seed by Kitchen 101 (video+written recipe), makes four 180-200g mooncakes

- 100g cake flour, 460g paste

- 48g dough + 115g paste + 1 yolk

- Mix yolk with rose or any cooking wine and steam 5 mins

- After mixing the dough, do not over-knead. Just mix until all combined. 

- Mist before putting in oven to bake at 160 deg C for 10 mins. Egg wash of 1 yolk + 1 tbsp milk (for darker colour). Return to oven to bake 10mins or until golden brown. Keep in airtight box for 2 - 3 days outside of fridge until skin is softer and glossy.

4. Cooking therapy - Lotus seed (¾ C dried lotus seeds, 3tbsp oil; makes ten 80g mooncakes)

- ¾ C (178g) plain flour

- Only cools dough in fridge for 30 mins

- Bake 177 deg C for 3 mins. Egg wash lightly with 1 egg + 3 tbsp milk. Bake further 12 mins.

5. Christines - 420g lotus seed paste, yields twelve 50g mooncakes

- Golden syrup recipe - cook at 110 - 115 deg C for 45 mins. Use after 2 days. Lasts a few months at room temp.

- 100g plain flour

- Rests covered dough for 40 mins until no longer sticky.

- Bake 180 deg C for 10 to 12 mins. Egg wash 1 egg yolk with 2 tbsp white. Bake another 5 mins.

- Mooncake sld be moist from oil not water. Oil develops after around 2 days so mooncake should be fairly dry after baking. If the mooncake is very moist right after baking, it will become more soggy over time so that's wrong.

6. Taste Asian - filling is irrelevant (written), makes ten 53g mooncakes

- Recipe for dry conc lye water: bake 1 portion at 175 deg C for 30 mins. Add four portions water.

- Only add as much flour only until required to form soft dough. Use fork or stainless steel whisk to combine the dough.

- Fridge dough for 30 mins.

- Can use honey instead of golden syrup and lye but pastry will not be as soft and lighter in colour.

- 100g cake flour

- Demonstrates how to prepare egg yolk. Wiping is enough!

- Ratio of dough to filling is 1:2

- Mist surface of mooncake with water before baking. 

- Bake 175 deg C for 5 mins to firm the surface so pattern won't be blurred by egg wash. Brush with egg wash and remove excess with kitchen towel then bake for further 10 mins.

7. China Sichuan food (written + video) - lotus seed (200g dried lotus seeds with 90g oil), red bean (200g red bean with 2 tbsp lard/oil), mung mean (240g mung bean with 40g butter and 50g oil) fillings. Makes 14 mooncakes (eight 50g incl egg yolk and six 45g w/o egg yolk)

- Recipe for golden syrup

- 115g plain flour and 380g paste; 14 balls of 15g dough with 35g paste + yolk or 30g paste

- Fridge for 2 - 3 hrs.

- Mist with water than bake at 180 deg C for 5 mins. Egg wash lightly with 1 yolk and 1 tbsp white. Bake further for 15 - 20 mins until well browned.

8. Gin's Kitchen - Lotus seed (400g dried lotus seeds and condensed milk with 200ml oil makes 900g paste), makes seventeen 75g moulds

- How to prepare the egg yolks: mix yolk with wine to marinate for a few minutes then wipe dry. Cut in half and set aside.

- 200g plain flour 

- Rest 2 hrs in fridge or overnight. If overnight, allow to come to room temp for 30 mins.

- dough to filling is 3:7 (23g dough: 52g paste incl 5g yolk)

- Mist before going into oven. Bake at 177 deg C in upper third of oven for 10 mins, let cool for 15 mins. Brush with egg wash of full egg. Bake at 162 deg C for further 25-30 mins. Fully cool on baking tray.

9. Eatlittle bird - lotus seed paste (200g dried lotus seeds with 100ml oil). Make eighteen to twenty 50g mooncakes

- 225g plain flour.

- Rest at room temp for 30 mins. Dough will still be slightly sticky and oily.

- Egg wash with 1 egg + 1 tbsp water

- 50g mold = 20g dough + 30g filling (incl ½ egg yolk)

- 100g mold = 40g dough + 60 filling (incl full egg yolk)

- Bake at 180 deg C without fan for 10 mins. Cool for 10 mins before egg washing. Use kitchen paper to blot excess. Bake at 160 deg C for 10 to 15 mins. Allow to fully cool on baking tray. Can store at room temp for 1 week.

10. Cicili - Red bean (1133g filling using 680g dried beans), makes twelve 125g mooncakes (video)

- Video has most comprehensive method.

- A note on filling. There is an insane amount on the oil in the filling (¼ C or 60ml oil for 1133g filling). Stir in half of oil the oil for 3 mins then add the rest and stir for another 9 mins at low heat.  

- Filling to dough between 2:1 to 3:1 e.g., 74g filling to 51g dough (using 600g plain flour)

- Incorporates a lot of resting time. Rest filling 1 hour until cool to handle. Rest dough 2 hours which seems ideal. 

- Always keep dough and filling and unbaked mooncakes covered with plastic wrap to prevent drying out.

- Spray assembled mooncakes and rest covered for 30 mins. Then before baking, spray again and immed bake for 5 mins at 204 deg C on middle rack. Remove and cool for 15 mins then brush with egg. Egg wash sldn't be applied when mooncakes are hot or the pattern will be blurred. Bake again for 10 mins at 190 deg C. Remove from oven and cool for 30 mins before transferring to cooling rack for 2 hrs.

11. Essential mooncake guide by Runawayrice - method

- For Snowskin mooncakes, ratio of dough to filling is 1:1

- For baked mooncakes, ratio of dough to filling is 2:1 for bigger mooncakes (i.e., 75g will be 25g skin and 50g filling) but 1:1 for smaller mooncakes (50g)

- Store homemade baked mooncakes outside for 2 - 3 days to 回油 then in fridge for up to 10 days or freezer for up to 3 months. Snowskin can be stored outside for 1 - 2 days then refrigerated for up to a week. However, they taste better cold.

12. Ultimate guide by Omnivore's Cookbook - Black sesame filling (140g raw seeds with GRF and 55g butter). Also has lotus seed filling (100g dried seeds with 50g oil makes 400g paste) and red bean paste (100g beans with 50g oil makes 400g paste) recipe on her blog. Makes 10 mini mooncakes (50g)

- recipes for golden syrup and lye water (dry conc) - bake at 120 deg C for 1 hr in lined tray.

- 100g cake flour

- Different brands of golden syrup and kansui will have different pHs. To future confuse things, homemade vs shopbought will be different. How the golden syrup and kansui interplay will affect colour of mooncake and even shape (eg can be misshappen after baking).

- Cake flour leaves beautiful pattern by sticky dough

- Suggests baking 8 to 9 mins on middle rack before egg washing.

- Best egg wash is yolk + pinch of salt but very difficult to brush.

- Best brush will be hair rather than silicon which drags on too much egg wash. Also, use small brush to remove excess egg wash in between the grooves where its not wanted or will blur the pattern.

- Mooncakes will flakey and soft when hot so allow to cool before moving.

- Bake mini mooncakes at 180 deg C, first phase 8 to 10 mins until edges turn golden and dough has hardened. Then egg wash and further 8 to 11 mins until golden brown.

12. Souped up recipes (Video) - Lotus seed filling (155g dried seeds with 80g oil and cornstarch to make approx 500g filling.) Makes twelve 100g mooncakes with double yolk (tried here)

- Very comprehensive 15 min video!

- Lotus seed filling: Choose lotus seeds with starch included in it. Cooks in IP 30 mins but 30 mins frying on low heat to dry up! 

- Can use honey but not honey with crystals as will affect texture of wrapper. No need to use lye water.

- Lye water is for colour but can use water as substitute. It will affect colour. Recipe for lye water (liquid form) given. 2.5g baking soda + 1.5 tbsp water simmered for 15 seconds. Cooled and yield 13g (2.5 tsp) for her recipe.

- 250g cake flour makes about 420g dough. Check consistency that it's soft, pliable and non-stick with elasticity.

- Wrap in plastic and rest 3 hours at room temp.

- Cooks yolk by baking 150 deg C for 6 mins. Optional step but roasted taste.

- Suggests using bigger mould for beginners [35g dough + 65g filling = 42g filling + 23g for 2 yolk]

- Demonstrates how to wrap 2 egg yolks which makes it oval ball shaped. 

- Use palm to push out dough till you get a 4 - 5 inch in diameter circle. Flip dough and filling upside down (see video) to prevent air. Flip back right side up and then push dough to close and seal.

- Dust with cake flour. For round mould, once there is resistance, press for 15 seconds to establish the shape. For square mould, press gently with sustained pressure for 30 - 40 seconds so the mooncake fills up all 4 corners.  

- Mist mooncakes. Bake 168 deg C for 8 mins. Egg wash is 1 yolk with 1 tbsp water. Brush thin layer of egg wash including the sides. Same temp another 8 mins. Brush with egg again. Finally, bake 6 - 10 mins. Totally cool before storing.

Filling recipes : Unlike making the filling/pastes for other doughs, baked mooncake filings requires the inclusion of a LOT of oil so that the skin can 回油 

Best IP recipe for lotus seed paste: Souped up Recipes

Best IP recipe for red bean paste: What to cook today

Best recipe for black sesame seed paste by Omnivore Cookbook

Best recipe for mung bean paste - use IP method from AKK but add oil (additional approx 2 to 4 tbsp of lard and/or oil)

Kitchen 101's list of 'healthy' mooncake paste recipes: her pastes aren't very oily or sweet as she uses a liquid (e.g., milk or water) with Glut Rice Flour as the thickener. These make a moist (but not oily mouth feel) paste and really cuts down on pan frying time. In my opinion, perhaps less suitable for baked mooncakes which really need a lot of oil!

Store pastes frozen and then thaw before using. Storing paste in the fridge even wrapped in cling film and in a plastic bag will still dry out the paste.

Yolk preparation tips

Kat Kwa's tips to fix greasy paste (e.g. storebought and put in the fridge or frozen and oil separates from paste)

How to prepare frozen salted egg yolk: 

In contrast, Taste Asian used 'fresh' raw salted egg yolks did a test and said wipe off with water produced the best result in his baked mooncake tests.


How to prepare fresh salted egg yolk

Lisa's kitchen: bake at 170 deg C for 8 - 10 mins.


Homemade Lye and Golden Syrup recipes

The issue with making baked mooncake is that it requires golden syrup and lye, both ingredients aren't widely used in many other recipes, so unless you intend to keep making mooncakes every so often, it's going to be sitting in the cupboard a really long time. In particular, mooncake recipes only need maybe 1 tsp of lye water as it's a corrosive liquid (highly concentrated alkali) which I don't really want sitting around randomly in my cupboard.

Here are some alternatives:

Mooncake syrup making by Kat Kwa which involves boiling 1 lemon and 1 kg of sugar in water for over an hour. You have to leave it for at least 2 weeks or till next year(!) is ideal.

2 tbsp/27g Lye water (liquid form) by King Arthur from the red bean mooncake recipe (which uses stand mixer to beat the dough). This lye recipe involves boiling baking soda and water. There are other recipes which produce adding water dry baked bicarb. Bake bicarb soda at 120 deg C for 1 hr and then adding water in a 1:4 ratio (eatlittlebird). Dry conc is customisable cos other recipes e.g., pretzels require 1:2 baked bicarb to water.

Monday, September 20, 2021

Fisherman's pie

I have known about this recipe since about 20 years ago when I was first introduced to it in the UK. It is one of their 'traditional' fares but I have never made it because I have never found the right fish or had leftover mashed potato.

I finally had one too many potatoes in the fridge and decided to try my hand at this pie. It also just happened that I had bought some frozen fish fillets.


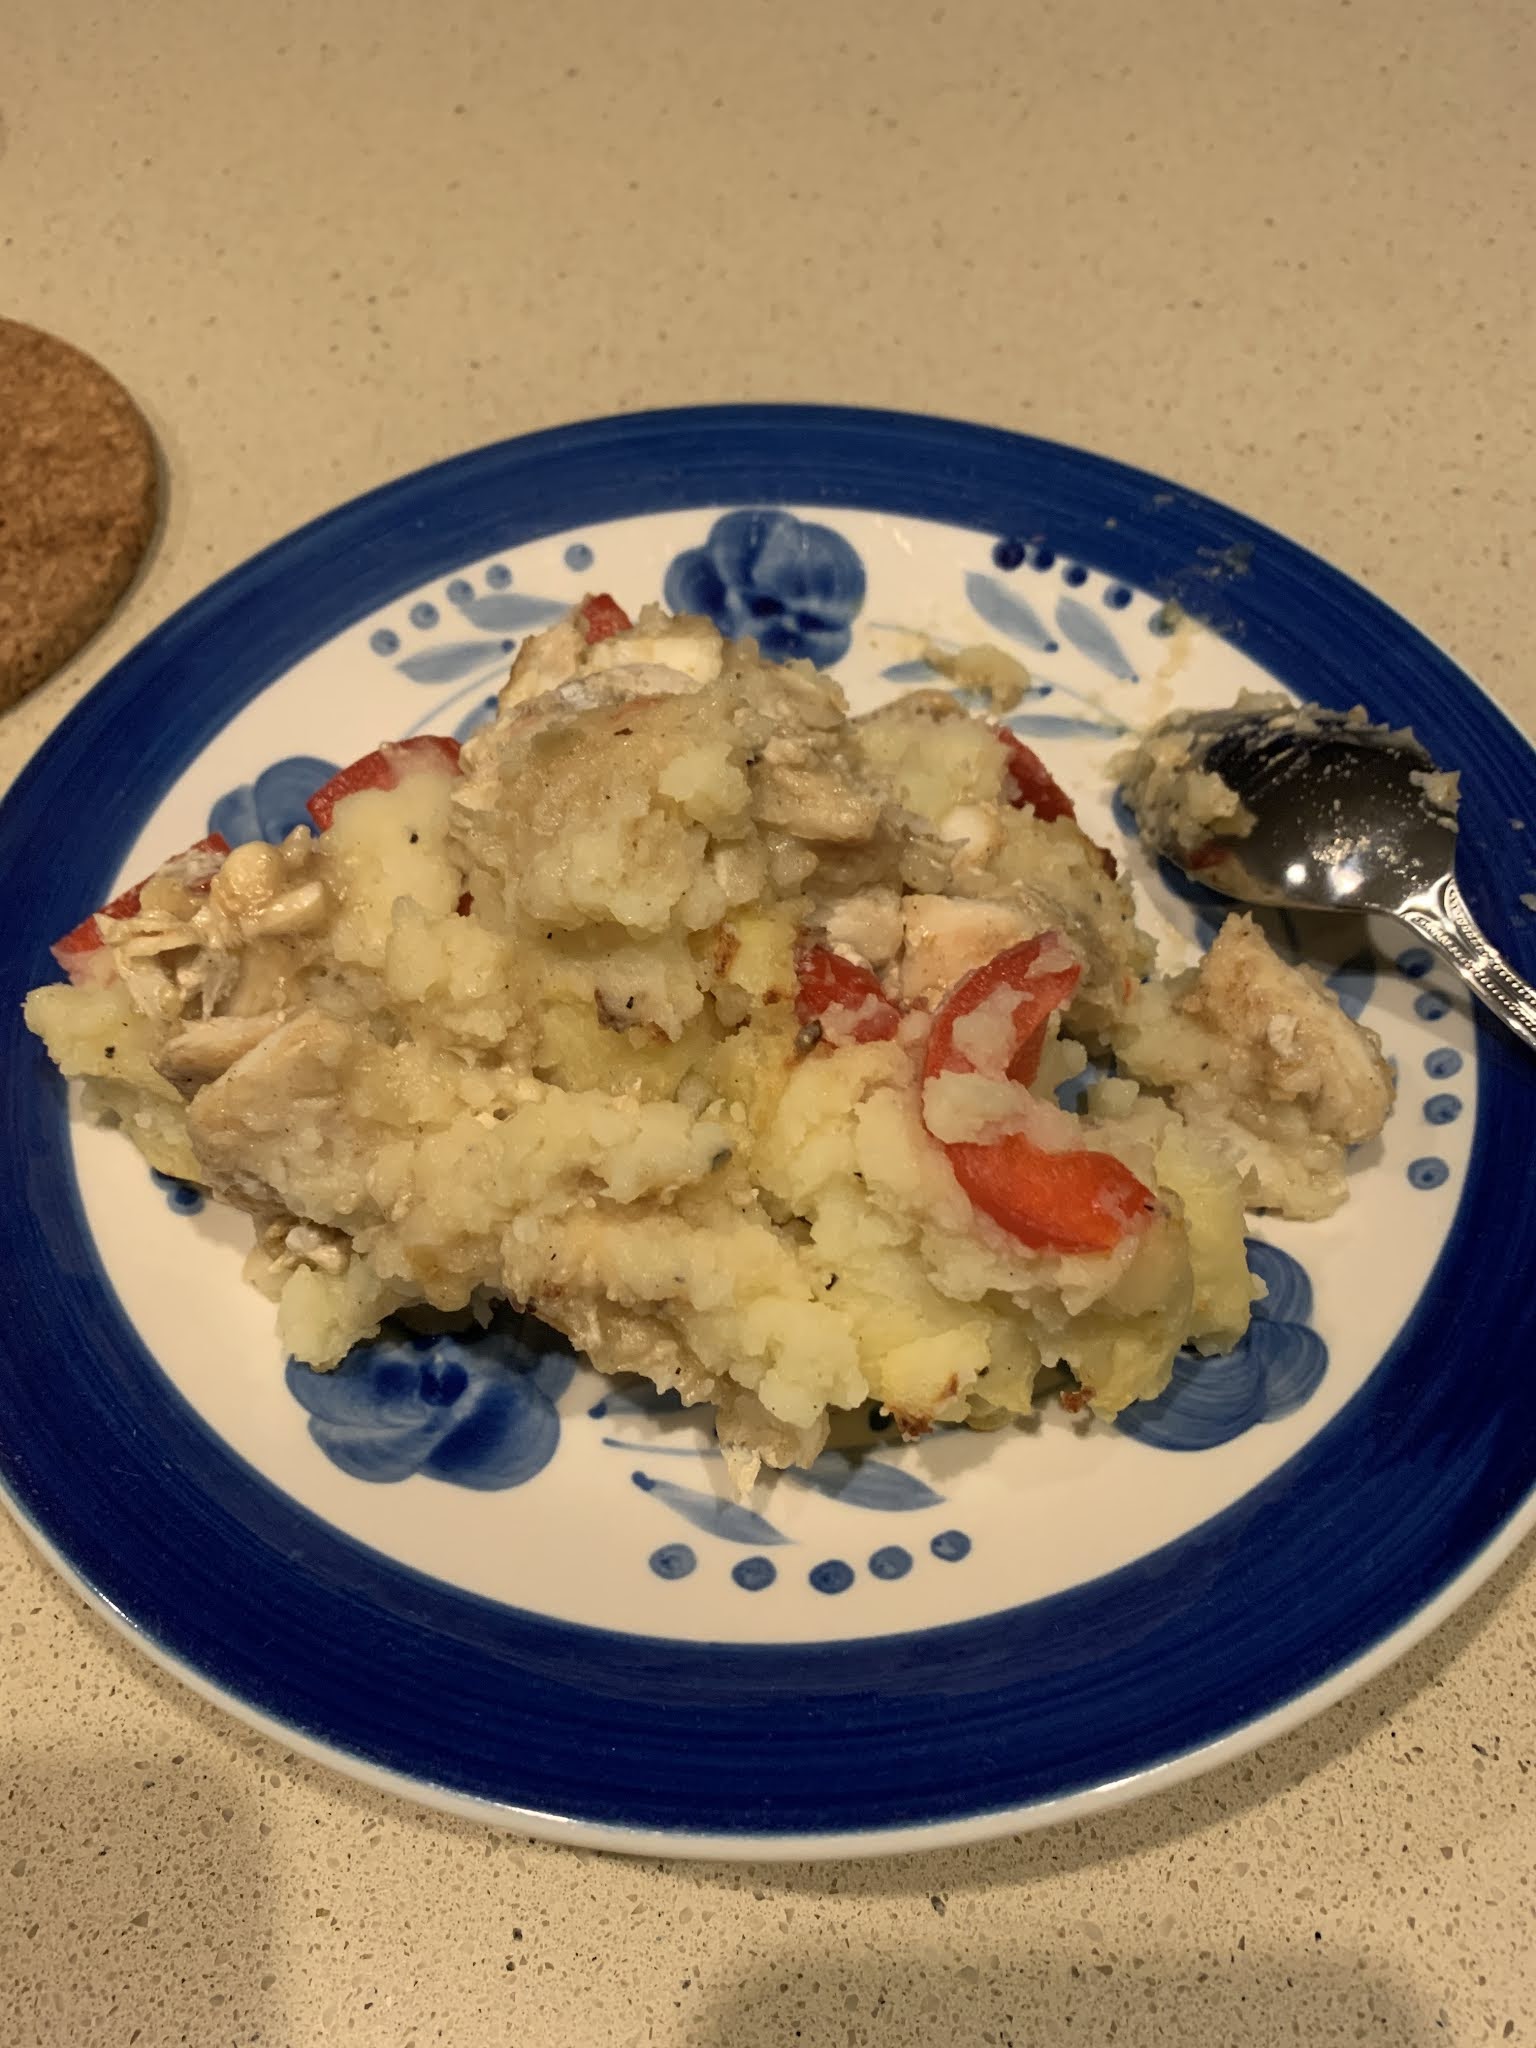
Not very appetising looking but tastes delish


Ingredients

7 to 8 frozen fish fillets, cut into chunks (allow to thaw a little to facilitate cutting)

2 tbsp corn starch

4 potatoes, peeled and cubed

1 capsicum, cubed

2 tsp curry powder (or whatever preferred seasoning)

2 tbsp of butter

1 tsp chicken stock powder

Salt, white and black pepper to taste

Method

1. Prepared the mashed potato. Bring cubed potatoes to a boil with enough water to cover. Takes about 10 to 15 minutes once the water is boiling. Be careful, it will overflow!

2. While potatoes are cooking, prepare the fish. Line a shallow baking tin. Add in the cubed fish fillets and toss in corn starch, salt, white pepper, and curry powder. Ensure that the fish is laying in a single layer.

3. Top with capsicum, again laid in a single layer. 

4. Place into the oven and bake for 15 minutes at 180 deg C until the fish is semi-cooked.

5. Once potatoes are fork tender, drain. Mash with the butter, chicken stock powder, salt, and black pepper. 

6. Spoon over the mashed potato on top of the capsicum and smooth the top. Draw designs with a knife or fork. The more nooks and crannies, the most crispy!

7. Bake for 20 minutes at 200 deg C. If the mashed potato has not turned golden brown, turn on the grill and grill on high for about 5 minutes.

8. Serve immediately!


Sunday, July 04, 2021

Japanese cotton souffle recipe (improved)

I have tried making the Japanese cotton cheesecake so many times but it never succeeded. I realised it has less to do with the recipe than the oven! I decided to use my new-ish Breville air fryer oven because I have never used the bake function, and the blogger's oven looks like the older version of my oven.

Karen Ling: https://www.youtube.com/watch?v=Vl4gg-0b7Zo

It is a 100% success! A lot has to be said about using digital ovens. I am never going back to my conventional analog oven for this cake.

Ingredients (fits 8 inch cake springform tin)I

250g cream cheese, softened

80 unsalted butter, softened

50g whipping cream

150g fresh milk

5 eggs, separated

35g corn starch

100g sugar

2 tsp vanilla extract

¼ acid eg lemon juice or white vinegar


Method

1. In a bain marie, melt the cream cheese and butter. Add the whipping cream and fresh milk and mix until smooth and no lumps remain. Turn off the heat and take the pot off the heat. 

2. Add the egg yolks and mix with a whisk until smooth. Add the vanilla extract and combine.

3. Sift in the corn starch and fold in. Set aside.

4. In a really clean bowl, add the egg whites and acid. Whip up the meringue until soft peaks (approx 5 minutes on KA speed 6) by separating and adding the sugar in three batches. 

5. Dollop ⅓ of the meringue into the cheese mixture and mix well, no need to be too careful with bursting the air bubbles. 

6. Add the next ⅓ of the meringue but this time, fold in gently with a whisk. 

7. Pour the entire cheese mixture into the remaining ⅓ meringue. Fold gently with a whisk, then change to the spatula and fold, enduring no more white streaks.

8. Pour into a 8 inch springform with the bottom lined with parchment. Line the outside of the pan with foil to prevent water seepage. I didn't because I clipped the parchment into the tin, and also put a rack in tray of water so the water level was below the parchment. Use the spatula to flatten the surface and draw strokes in the batter to dispel air bubbles. Lightly tap the tin on the counter top to burst big bubbles.

9. Preheat to 175 deg C. Fill the bottom tray with about ¼ inch water. Put in the tin.

10. Turn down and bake at 150 deg C for 30 minutes. Turn down to 130 deg C and bake for another 30 minutes. Then turn off the heat and let the pan sit inside the oven with the door closed for a further 30 minutes.

11. Unmold the cake and let it cool, then store in the fridge for at least 4 hours. Serve up.

The blogger also used a mirror pectin glaze, which I didn't bother with.

Recipe feedback

Recipe is perfection! Top was smooth (other than my failure to properly flatten the top of the batter). I might have been able to use the mirror pectin to hide the craters. No cracks on the top and nice golden top. No unexplained 'waist' on the sides. Inside was cooked through. The use of corn starch instead of cake flour meant very smooth mouth feel. It wasn't too sweet.

- Update: Kathrine Kwa suggests using room temp water about ¼ up side of round tin that has the cake in it. Bake 150deg C for 90 mins, then turn off oven. Crack open door and leave inside to rest for 30 mins before removing from oven and then tin. Nothing mentioned about dropping tin on counter.

Saturday, December 19, 2020

Baked Cherry cheesecake

Preparing for a party, I thought about resurrecting my favourite Nigella's no bake blueberry cheesecake. It involves 2 packets of cream cheese, an 8" pan, and a bottle of Dalfour's blueberry jam. I came across RecipeTinEats' baked Strawberry Cheesecake which is very similar except that it's baked and uses sour cream rather than whipping cream. The most difficult part is probably making the berry sauce which is optional. I used a package of frozen cherries which I had in the freezer so presentation-wise, it'll be less pretty than using fresh fruit but the effect is the same.


Ingredients for base

200g sweet biscuits (I used malt biscuits which in a 220g packet; this includes enough crust to go up the side of the tin)

120g butter, melted (I used 150g because I had 220g biscuits)

Method for base

1. Prepare the 8" springform tin. Turn the base upside down so that there's no lip. Add the parchment and clip the base. Butter the sides of the tin and line with parchment.

2. Crush the biscuits in a food processor. Alternatively, use a ziplock and bash away.

3. Once there is a fine crumb, drizzle in the melted butter. It should resemble sand.

4. Pour into the prepared tin. Use a spatula to press down. Using a glass or measuring cup, press down firmly on the base and against the wall of the tin. The crumb mixture should go up ¾ of the wall of the tin.

5. Cover and leave the base in the fridge to harden slightly.

Ingredients for filling

500g cream cheese (2 packs of Philly), room temp

2 tbsp plain four

1 tsp vanilla extract

½C sour cream

1½C caster sugar

Zest of 1 lemon

Method for filling

1. Beat cream cheese until smooth, 20s on Speed 4. (Don't introduce air otherwise the surface will crack)

2. Add flour, beat for 5 seconds at Speed 4.

3. Add extract, sour cream, sugar, zest; 10s on Speed 5.

4. Add eggs one at a time, no more than 5s each on Speed 5. Beat until eggs are just blended.

5. Pour into prepared base. 

6. Bake in a pre-heated oven 150 deg C in fan forced (convection but no top and bottom grills) for 55 minutes until the top is just set. The sides will be set but the centre will have a slight wobble. 

7. Turn off the oven but leave it inside for another 10 minutes, then open the door 20 cm and let it cool down for 30 minutes in the oven with door ajar. Take it out to totally cool down.

8. Refrigerate at least 4 hours.


Method for berry sauce

500g of a berry (strawberries, blueberries, etc. I used cherries which are in season; fresh or frozen)

2 tbsp water or lemon juice (depending on the sweetness of the fruit)

½ C sugar (can reduce but a few tbsp depending on sweetness of the fruit)

2 tsbp water for slurry

1½ tsp corn starch for slurry

Method for sauce

1. Roughly cut up half the fruit and halve the other half of the fruit. If using frozen fruit, thaw them. It may be difficult to halve or cut the fruit without it falling apart so omit this step.

2. Pour the fruit and 2 tbsp of water into a saucepan. Pour in the sugar and mix.

3. Bring to a boil. Turn down and simmer for 10 minutes, stirring to prevent the mixture burning at the bottom.

4. Make the slurry by mixing corn starch and water. Continue stirring the slurry. Stir the mixture and drizzle in the slurry. Once thickened, turn off the fire. Set aside to cool and the refrigerate. It will thicken up slightly once chilled in the fridge.


Assembly

Take out the chilled cheesecake. Pour the sauce on top. If the sauce is not of a pouring consistency, add just add a touch of water (½ tsp at a time) just to loosen it. It should dribble down the side but not drench it.

Feedback

- Turning the bottom upside down was fine except the butter melted and seeped out! Was not expecting that! Perhaps using digestives might have helped as they are more 'absorbent' than the malt biscuits I used.

- I found the sugar in the cherry sauce way too sweet! It was good for entertaining as people tend to like sweet desserts but not for home consumption. Might have to add, taste, then add more if needed next time.

Saturday, August 22, 2020

Choux pastry: Comparison recipes

 I have shortlisted several bloggers with videos and who do the entire range of pastries associated with choux pastry using slightly different methods. I've found out that the difference between profiteroles, cream puffs, and eclairs is dependent on the shape, topping, and filling. 

1. Bigger Bolder Baking cream puffs (Christmas profiterole recipe) (Easy choux pastry)

- Starts with whisk to whisk the flour in, then changes to spoon. Leaves it on the stove while beating the flour in. 

- Beats up the egg. Doesn't use KitchenAid when incorporating batter and egg.

- Uses wettened finger to smooth down the tips after piping the cream puffs

- Sprinkles water on the baking parchment around the cream puffs (to create the steam to give them a poof)

- Garnish with chocolate ganache and strawberries, filled with fresh cream, dusted with sugar

- Bake at 200 deg C for 25-30mins or at 220deg C for 20 mins then 10 mins with heat turned off.

- Store in fridge with filling, or freeze.

2. Sally's Baking Addiction cream puffs

- Eclairs are filled with custard (Americans call it pastry cream) and topped with ganache, cream puffs are filled with whipped cream and dusted with icing sugar, profiteroles are filled with ice cream and topped with ganache

- Easiest recipe. Uses 1 cup cream for ganache and 1 cup cream for cream filling

- Uses KitchenAid. Doesn't pour in all the beaten egg (only till the point it's combined) but leaves some for egg wash.

- Also paints the parchment with water

- Bake at 204 deg C for 20 mins, reduce to 177 deg C for 10-15 mins until golden brown

- Store unfilled or freeze.

- For the ganache, advises against using buttons. Use equal portions of double cream and choc by weight. Chop the choc finely, use a stove to heat up the cream just to simmering (never boiling), and pour onto the choc. Use only a glass or metal bowl (never plastic), and let it sit for 5 minutes before stirring. Stir with a metal spoon or silicon spatula (never a whisk or worst, wooden spoon) from the centre working outwards. Leave to cool for 15 minutes before using. Store unused at room temp for up to a day as the fridge will harden it into a spoonable fudge.

3. Natasha's Kitchen cream puffs (Eclairs wh includes pastry cream recipe)

- Also mentions the differences between eclairs with ganache, profiteroles, and cream puffs.

- Takes milk mixture off the stove to add in the flour and then incorporates it off the stove before putting it back on the stove to cook for a few minutes (2 to 3 minutes) until a film forms at the bottom.

- Uses Kitchenaid hand beater to beat for a while to cool it down, then adds whole eggs.

- Bake at 218 deg C for 10 mins, reduce to 162 deg C for 20 to 22 mins until golden brown.

- Store unfilled or freeze but can also store and freeze them with filling following her tips.

- For the ganache, uses chocolate buttons

Choux pastry tested here.

4. Pretty Simple Sweet - Ganache tips

- Play around with ratios to get it as a glaze or spreadable consistency or hard like truffle. Only cream and chocolate. Other additions such as butter and corn syrup for added creaminess or shine.

Sunday, August 16, 2020

Garlic dauphinois potatoes

 Basic recipe: https://www.bbc.co.uk/food/recipes/dauphinoisepotatoes_90205

Ingredients

2 floury potatoes, sliced thinly with a mandolin (I simply sliced them into thin battons) 

1 packet double cream, approx 120ml

4 cloves of garlic, smashed and minced

Milk (approx 50 to 75ml)

Favourite herbs

½ C hard shredded cheese e.g. mozzarella or cheddar or both

Chopped cooked bacon or shredded roast chicken

Salt and pepper to taste

Chives (to serve; optional)

Method

1. Cover a baking dish with parchment. Thinly lay a single lay of potato batons onto the bottom. Sprinkle with some garlic, herbs, and chopped cooked bacon (or shredded roast chicken).

2. Pour on about a third of the double cream. Sprinkle with salt and pepper.

3. Repeat in this order: potatoes, garlic and herbs, chopped bacon, double cream, salt and pepper. Continue until all the ingredients have been used up.

4. If it looks too dry, top up with a splash of milk. You want everything about ¾ submerged so that it doesn't bubble over and overflow. 

5. Cover the entire top with shredded cheese.

6. Bake at 200deg C for 40 minutes, checking to ensure that the potatoes are cooked by piercing through and breaking up with a fork. Turn the grill on high and grill until the cheese is golden brown.

7. Serve immediately with a scattering of chives if available.


Sunday, July 12, 2020

HK/Macau paper-wrapped cupcakes

I have wanted to try this recipe for some time but never found the time to. It looks like a simpler and more delicious version of the steamed 鸡蛋糕. Here are the recipe comparisons:

Chiffon method
1. Nasilemaklover
- makes 7 in speciality mould
- Uses 4 eggs, separated
- Uses self-raising flour
- Uses beater for chiffon method
- Uses oil

2. Christine's recipes
- Original recipe with speciality tin: makes 6
- Pandan paper wrapped with speciality tin: makes 8
- Uses 5 eggs and cake flour
- Uses beater for chiffon method
- Regular flavour uses melted butter but pandan flavour uses oil

Creaming method
1. Rasa Malaysia
- makes 16 mini ones
- Uses 4 large eggs and normal flour
- Uses beater for creaming method
- Uses oil

2. Ancoo - Tried below
- Makes 15 mini cakes
- Uses 4 egg yolks and 3 egg whites (what am I going to do with an extra white?)
- Uses cake flour and corn starch
- Uses beater for creaming method
- Uses melted butter


Ingredients - makes 12
4 egg yolks
3 egg whites
1 tsp vanilla
70g sugar
70g cake flour
10g (1.5 tbsp) corn starch
Muffin cases in the egg tart tins
½ tsp baking powder
75g melted butter

Method
1. In a bowl, cream the 4 egg yolks and 3 whites with the sugar at high speed for 5 minutes until pale yellow and thick. Lower to low speed and beat for 1 more minute.
2. Sift the flours and baking powder.
3. Add the flours batter in two batches, and fold in.
4. Take a bit of the batter and add in the melted butter. Combine well. Return this to the main batter and fold in.
5. Pour into prepared tins. Traditionally, the flower shaped tins with parchment paper inserted are used. I only had muffin cases which I inserted into egg tart tins.
6. Pour ⅔ full. It will be quite liquidy. Tap gently on the counter to remove the air.
7. Bake at 180 deg C for 15 minutes until a toothpick inserted comes out clean. I turned it at the 15th minute because the browning was uneven.
8. Remove the muffin cases to a wire rack to cool. Serve warm.