Showing posts with label cream cheese. Show all posts

Monday, May 04, 2026

Chocolate cotton cheesecake

I have tried so many cotton cheesecakes including a whole series in 2017 where I tried a whole series of cotton cheesecake experiments.

Because I'm bored with plain cotton cheesecake, here I focus on chocolate cotton cheesecake which I have never tried before. I note the use of flour rather than cake flour in both recipes, the Kat Kwa version using 8" pan with 5 eggs, and the Kitchen101 version using 9" pan with written recipe here using 6 eggs. From my previous experiments, I've realised that my small oven can only take up to a 8" pan and the big oven works best with the 9" pan. Other than that differences in proportions and slight differences in method, the main ingredients are the same - plain flour, milk (unlike cake flour and variations such as double cream, whipping cream or condensed milk in some recipes), melted chocolate and cocoa. 

After it's cooled

Note that in terms of baking time, the 8" takes 150 deg C for 90 mins in 1 inch tap water with no extra cooling down time in the often and unmolding immediately after removal from the oven. The larger cake is baked in cloth lined water-bath also 1 inch tap water baked at 150 deg C for 40 mins then 1h 20mins at 140 deg C. Then left to cool with door ajar in turned off oven for 40 to 50 mins to minimise shrinkage. After removing from oven, unmould and cool in elevated position 6" from counter top. Not sure why there's such a huge difference in the baking times!

Ingredients (for 8" pan)

225g cream cheese

50g butter

80g dark chocolate for baking

150ml milk

20g cocoa

50g flour

5 eggs, separated

90g caster sugar

pinch of salt

dash of lemon/lime juice

Method

1. In a bain marie, melt the cream cheese, butter and dark chocolate using a spatula. When all melted, add in milk using a whisk to combine but don't whisk too hard and introduce air. (Optionally, add in 2 to 3 tbsp of sugar)

2. Remove from the pot from the heat and add the yolks one at a time, using the whisk to combine.

3. Sift in the cocoa and flour with the pinch of salt, and again use the whisk to combine.

4. In a very clean bowl, whisk the egg whites. Once the whites are frothy, squirt in the lemon/lime juice. Then, slowly rain in the caster sugar at intervals. Turn up the KA and beat until soft peaks. Just when it's almost soft peaks, turn down the KA to low to beat out the bubbles.

5. Using the whisk transfer over ¼ of the meringue into the yolk-cream cheese mixture and combine lightly. You can be quite rough with this.

6. Pour the mixture back into the remaining meringue and use the whisk to combine. Be more careful but do a good job. Finally, transfer to a spatula and fold carefully.

7. Prepare the baking tin and line the sides with parchment so that the parchment is taller than the side of the tin. Your cake WILL grow and overflow otherwise. Using foil, wrap the outside of the tin so that water doesn't go in. In a larger tray that's large enough to hold the baking tin, pour in around 1 inch of room temp water. 

8. Place the tin in the water bath. Bake for 90 mins at 150 deg C. Once done remove immediately and unmold but not removing the parchment. Elevate the cake and allow the cake to cool at least 6 cm away from the counter top.

9. Once fully chilled, remove the parchment and keep the cake in a airtight container for 4 hrs or best overnight to fully chill. Cake tastes better fully chilled than at room temp.

Feedback

- In the past, I used cake flour and I'm wondering if it's caused me a multitude of problems including cake deflating. This time I used plain flour to hopefully give the cake more structure.

- The cake cracked and burnt. Note to self - in my small oven, the cake is too close to the top heating element once it sits in the water bath tray. It's fine for castella because there's no water bath. And as a result too, there was a very serious 2 waists!

Just out of the oven, crack is prominent

After cooling - the crack has closed up

- I removed it from the oven almost immediately and removed the tin as the instructions asked, but it still deflated. It was already badly cracked due to being too close to the heating element.

- So far this 6-egg Earl Grey in the 9" tin in the big oven followed by 5-egg Black Sesame in 8" in the small oven have been the most successful. Even with the same cooking times (150 deg C for 90 mins), looks like cooling in the oven for 30 to 40 mins is a must. Next to try will be the 2 hour at low temp baking by Kitchen101!

Saturday, September 20, 2025

Chocolate burnt basque cheesecake

From my favourite auntie Kathrine Kwa's collection. My previous 2 recipe attempts either were too much work because no beater was used, or used a blender but then the air caused it to rise too fast and then it looked ugly (but correct basque look!). Both recipes used a high temperature (230deg C) so it would rise and brown nicely (but have to watch like a hawk) while the inside remains jiggly. However due to that high temp, they would crack too. Hence this recipe uses a lower temperature more akin to baking Japanese-style souffle cheesecake sans water bath, but baked for longer and without switching off the oven (to prevent falling and cracking). Will this yield more consistent and pretty results?

I also decided to revert to JOC's method of slowly blending everything in to incorporate as little air as possible, hoping if there is less air, it won't collapse as dramatically. Her recipe kept it almost like a baked custard and used corn starch but because I didn't beat it at all so substituted cake flour to give it more structure.

Ingredients

500g cream cheese (2 packets Philly), softened

120g sugar

5 eggs

250ml whipping cream (she used 200ml but I only had a 250ml pack)

250g melted dark chocolate (70% cocoa)

10g cocoa powder

10g cake flour 

Pinch of salt

Method

1. Prepare a 8 inch pan in the traditional basque method with foil and 2 layers of crumpled parchment. 

2 Meanwhile, melt choc bar over bain marie or in microwave on small increments. 

3. Next, melt in the cream cheese.

4. Once incorporated, add the sugar and stir until well combined.

5. Switch of the heat. I kept in the bain marie because this recipe has no oil so I was afraid it would harden. Add eggs one at a time and beat well after each. Make sure to only add the next egg when the previous one has been combined, otherwise it becomes hard to keep it lump free once more liquid goes in.

6. Transfer to a bigger mixing bowl if needed. Add in the whipping cream in and beat lightly, but don't overbeat and incorporate too much air.

7. Lastly add the melted chocolate and use a spatula to stir in. Once mostly combined, you can return to the beater at low speed.

8. Sift in the cocoa and cake flour, and pinch of salt.

9. Pour into a lined 8" cake tin. Lightly tap on the countertop to dispel bubbles.

10. Bake on the middle shelf at 220 deg C for 30 mins. Grill with upper heat for 2 to 3 mins until top is darker.

11. Remove from oven and leave in tin for 10 mins to cool so it doesn't crack or shrink. Top sld still be slightly jiggly.

12. Once slightly cooled, remove from tin but do not remove the paper. Continue to let it come to room temp. Chill in fridge for at least 6 hrs or best overnight.

13. To cut cleanly, use a knife dipped in warm water and wipe after each cut with damp towel.

Feedback

- Even though the temp was lowered by 10 deg C, it still cracked! But I believe this had more to do with the basque-style of lining the tin with crumpled parchment and my cake 'caught' on the craggy edges and tore itself.

Saturday, October 28, 2023

Earl grey cotton cheesecake (improved)

It's been a long time since I've made cotton cheesecakes. I went through through a whole series period in 2017 where I tried so many recipes and methods in an attempt to use my 9 inch pan. All kinds of problems occurred including cracks, undercooked or developing a waist. I read so many different blogs for troubleshooting. There were different temperatures used in a heroic blogpost where I tried 7 different methods, used double cream, higher temp baking which caused it to deflate, finally success using my small oven but with 8 inch pan but failure when I used the same oven with a 9 inch pan. I won't go into those cakes where I left out key ingredients like flour or milk which naturally, failed. This recipe is not very forgiving. In short, I haven't found a really reliable recipe or method.

Although I haven't had much success with my big oven due to poor temp control, I've realised that using the big oven is the only way to bake a 9 inch cake.

Kat Kwa's earl grey cotton cheesecake for 8 inch pan (video) - nothing spectacular aka the standard bain marie method with 5 eggs. She uses condensed milk which I don't have. She uses 3 bags of tea in 160ml hot water and steeps for 15 mins. She uses room temp water for the water bath and bakes 150 deg C for 90 mins. She uses a small oven where the cake sits in the centre but the top of the cake has at least 20cm clearance from the oven roof. The cake doesn't sit inside with the oven off. She unmoulds immediately and removes parchment after it comes out.

I am very brave in attempting to use my big oven again because I want a 9 inch cake using 6 eggs. I'm using MyKitchen 101 (video and written) standard cotton cheesecake adapted for earl grey. I'm also using Kat Kwa's cooking times of 90 to 95 min at 150 deg C instead of Kitchen101's 150 deg C for 40 mins then 140 deg C for 1 hr 20 mins and cooled in switch off oven for 40-50 mins with door ajar. My manual oven cannot change temps so fast.

Ingredients
250g cream cheese, room temp and cubed
50g butter
½ tsp salt
30g sugar (for yolks) and 120g sugar (for meringue)
3 bags of earl grey tea
150g milk (use 170g then extract out 150g milk tea)
70g plain flour + 20g cornstarch (aka 90g cake flour)
6 eggs, separated
2 tsp lemon juice

Method
1. Line a 9 inch baking pan with parchment. Prepare the tea: heat up the milk to 95 deg C and add the 3 tea bags. Steep the bags in the milk for 15 mins then extract out 150g of milk tea.
2. In a bain marie, combine cream cheese, salt, butter and first portion of the sugar and melt then blend until smooth. Remove from bain marie.
3. Sieve in flours and fold in. Set aside.
4. Add egg yolks one at a time and mix well each time.
5. In a very clean bowl, whisk up the egg whites at low speed. Once frothy, add the lemon juice.
6. Add the sugar in 3 batches and mix each time for 1 - 2 mins. Once all the sugar is in, turn up to high speed. Beat until nearly soft peaks then turn down and beat at least speed for 2 minutes to dispel the bubbles. Meringue is ready once shiny and peaks fold over.
7. Add first batch of meringue to batter and gently mix with hand whisk.
8. For the second and third batch of meringue, be more careful mixing in with the hand whisk so as not to knock out the air. 
9. For the fourth and final batch of meringue, pour the batter back into the meringue and use a spatula to fold in, turning the bowl as you fold. Tap the bowl on the counter top to burst the big bubbles.
10. Pour batter into the lined baking tin and tap on the counter top to break big bubbles. Use a skewer to trace out zig zags to dispel smaller bubbles.
11. Place a cloth in a bigger baking tray and place the cake tin on top of the cloth. Pour in room temp water till 1 inch up the side of the tin. (cake cracks if using hot water).
12. Place the cake in the lower third (but not at the very bottom) of the oven and bake for 150 deg C for 90 mins. Turn off oven and remove water bath. Leave cake inside with door ajar for another 30 mins to minimise shrinkage.

13. Remove from oven and unmold completely. Allow to cool on a rack at least 6 cm above the counter top until completely cool. Best to refrigerate overnight before slicing.

Recipe feedback
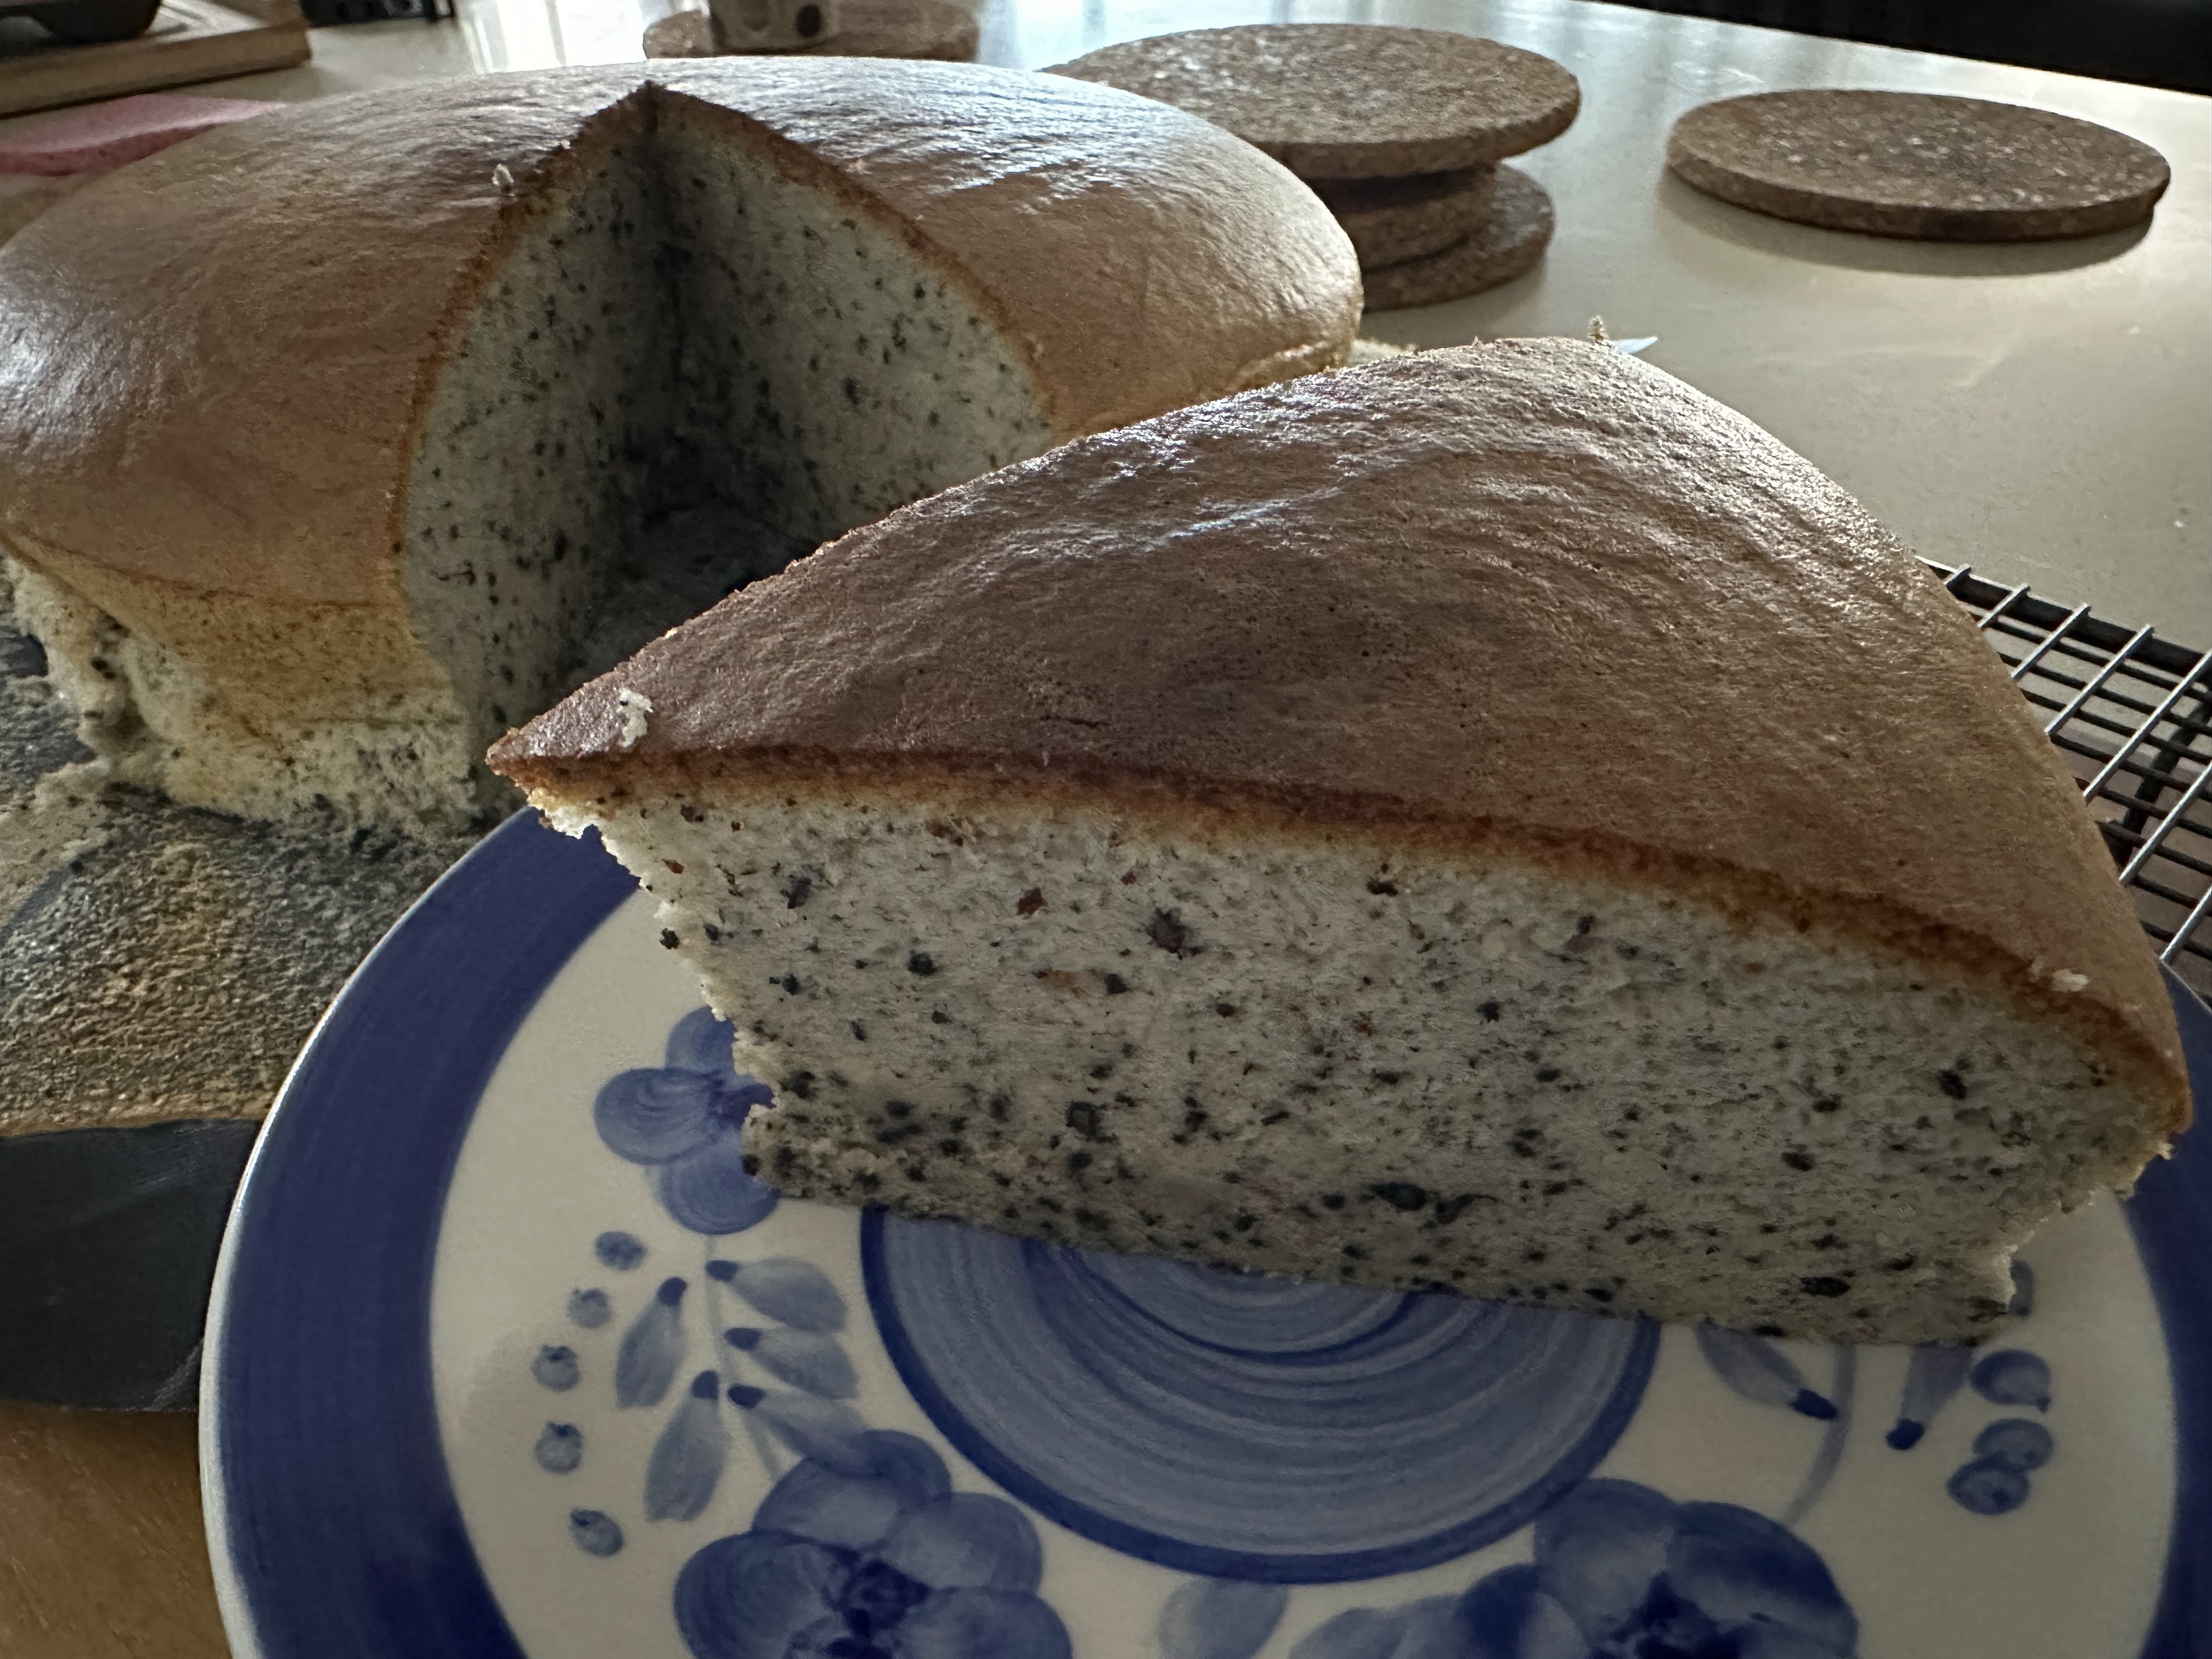
- A really short cake (2 inches tall) but at least no cracks! No waist! The brown isn't very golden but I think the cake is perfection as far as I'm concerned.
- When I peeled off the sides and bottom, the bottom was somewhat moist and soft so I had to be very careful not to tear a huge chunk out of the cake. However, with refrigeration, it should be firm up. At least the bottom is cooked!
- Based on the colour, in this big oven, 160 deg C for 85 minutes with 30 mins resting in the oven with door ajar would probably be ideal, except my big oven doesn't like keeping at 160 deg C for some reason and keeps going above or under.
- Compared to my black sesame cotton cheesecake previously, temp and timing were the same. The only real differences in method were:
1) I left the cake in the oven for further 30 minutes with door ajar instead of removing immediately and dropping it on the counter top. This prevented the waist. 
2) My water bath similarly started from room temp water so no crack (which Kitchen 101 suggests happens when using hot water). Water also only came to 1cm (instead of 1 inch as per black sesame cheesecake) up the side. With both recipes, I didn't wrap the outside of the tin in foil so there wasn't an eggy centre. The water had most evaporated by the time I removed it from the oven!
3) My top also didn't rise as high this time and the colour wasn't as nice because the oven was bigger and the top of the cake wasn't as close to the heating element. Updated: I've realised that I swapped the order of the flour and egg yolk. Looks like they do make a difference as the flour needs to slightly cook in the heated milk + melted cream cheese mixture.
4) I totally removed all parchment, even that at the bottom to prevent any condensation and thus wetness at the bottom. That led to heart stopping moments when I was afraid the cake would tear or split when I was peeling away the parchment from the side and flipping it over to remove the bottom and again when removing the parchment from the bottom.
Cake next day after overnight in fridge. Slight sag at the side because parchment and pan were removed

Beautiful Earl Grey color

Saturday, August 19, 2023

[FAIL] Lemon souffle cheesecake

I have 2 lemons sitting in the fridge. What do I do? I could bake lemon chiffon again (last baked in 2017 but only used half a lemon worth of juice which came out without much lemon taste) or continue my cotton cheesecake exploration. Ingredients from Skyapple uses 2 lemons but weirdly doesn't have tin size, oven temp and baking times. Her cake cracked on top so I wouldn't follow it either. Method from Karen Ling based on this best attempt in my small digital oven with 8 inch tin so I adapted below for 9 inch by increasing baking times.

Ingredients - for 9 inch tin

140g sugar, divided use

6 eggs, separated

50g butter

250g cream cheese

100ml milk

Juice and zest of 2 lemons

Pinch of salt

60g flour + 2 tsp corn starch (I replaced with 80g cake flour)

Method

1. Bring cream cheese, milk, and butter all to room temp. Prepare the tin by lining with reusable silicone parchment (I think this could be one of the the solution to my multiple failed soufle cheesecake experiments that used this 9 inch that didn't keep its height here, here, and here.) even though this is a PushPan.

2. In a bain marie, melt cream cheese and butter, then add milk. Whisk until smooth. 

3. Add in sugar and whisk in until melted. Temp of batter should be about 50-60 deg C now.

4. Remove from heat and add yolks one at a time and whisk in after each addition. 

5. Add in the juice and zest and incorporate in. (save about 1 tsp of lemon juice for meringue)Set aside.

6. Fold in the sifted flour. 

7. In a very clean bowl with clean beaters, beat egg whites on Speed 6 until opaque. Add salt and 1 tsp lemon juice. Beat for another 20 seconds.

8. Add ⅓ of sugar and beat at Speed 4. Continue to beat and add the sugar in 2 more batches. Once all added in, turn up to Speed 6 to 8.

9. When the meringue is shiny, stop to check for soft peaks. If near soft peaks, turn down beater to beat at Speed 2 for 1 to 2 minutes until soft peaks stage has been reached.

10. Add ⅓ of meringue into yolk batter and use whisk to temper in.

11. Return batter to remaining meringue and use whisk to fold in before swapping to spatula to carefully fold in from the bottom. Ensure no more streaks.

12. Pour into 9 inch tin with parchment (and optional foil wrapped around bottom to prevent seepage). Tap the tin on the countertop lightly to dispel bubbles. Run skewer in zigzag pattern to dispel smaller bubble. Place in water bath and pour room temp water to come ⅓ up side of tin. 

13. Bake at 150 deg C for 90 mins (check for centre wobble). Turn off the oven and remove water bath. Leave cake in oven with door closed for another 30 minutes.

14. Unmould cake from tin but leave parchment on. Leave to cool completely in parchment before attempting to remove parchment and cut. Even better, keep in parchment and fridge for 4 hours.

Forgot the milk and slightly overbeat the eggs so very flat.

Small cracks, very flat but no waist!

Recipe feedback

- This recipe was a long shot anyway without proper instructions but leaving out the milk certainly didn't help! Despite that, I tried to achieve 'no waist'. I followed the baking method for a 8 inch souffle cake (Preheat at 175 deg C, turn down to 150 deg C for 30 mins, 130 deg C for 30 mins, off oven for 30 mins, then leave out to cool completely around another 30 mins.) It was undercooked. I probably will not try this recipe again but if I did, I will try for the full 90 mins at 150 deg C. (Note that leaving it in the off oven doesn't cook the cake further. If it is undercooked in the centre bottom, it will still remain undercooked.)

- And since the cake has a high liquid content, it might need 1 tsp of baking powder to give it more lift.

- Puzzlingly, there were still small cracks which is when and why I turned it down to 130 deg C.  

- No waist! So leaving it another 30 min in off oven, then outside to cool completely in the silicone parchment works. 

Friday, August 11, 2023

Black sesame cotton cheesecake

By Kat Kwa. Other flavours of hers are Choc cotton cheesecake and Earl Grey cotton cheesecake which have all been made using 8 inch round tin with removable base and 5 eggs using chiffon method. I am adapting using 6 eggs in 29 inch round removable base pan.

Ingredients

250g cream cheese

60g butter

192ml milk

60g plain flour (or 80g cake flour - I used cake flour because I was very thorough with the whisking to take out the lumps)

48g ground black sesame

6 eggs, separated

⅛ tsp of salt

140g caster sugar

Method

1. Place the cheese, butter, and milk in a bain marie. Gently whisk to melt. Remove from heat.

2. Sift the flour into the bowl and mix with whisk. 

3. Add the black sesame and mix with whisk.

4. Add the yolks. Whisk to incorporate.

5. Whisk the 5 egg whites until opaque. Add salt.

6. Continue to while adding sugar in 3 batches. Beat until soft peaks.

7. Add ⅓ of meringue into black sesame mixture. Use whisk to incorporate.

8. Pour back the mixture into the remaining meringue. Fold in using whisk then spatula to ensure no white streaks.

9. Pour into prepared 9 inch tin with removable base and lined with parchment. Tap on the counter to dispel big bubbles.

10. Place tin into a larger tin and pour in room temp water 1 inch up the side.

11. Bake at 150 deg C water bath for 90 - 95 minutes (depending on temp control).

12. Once done, remove immediately from oven. Drop on counter and unmold, including removing parchment. Allow to cool completely before cutting.

Rose beyond the tin in the oven
Sides started to deflate after cooling.
Recipe feedback
- Sides deflated as it cooled. I wonder if using flour instead of cake flour would have prevented that.
- Middle top was slightly burnt but middle inside was still a bit wet but JUST cooked. I can't turn up the heat or keep it another minute otherwise top will burn. This seemed to solve itself next day once it had set overnight in the fridge.
- Not sweet at all, could add another 20g of sugar. (added to recipe above)
- As usual, this formed a waist when it started to deflate. The instructions said to remove it immediately out of the oven and drop on the counter and then unmould and remove parchment unlike most other cotton cheesecake recipes which ask for leaving the cake in the oven with it off to slowly cool down. 
- This cotton cheesecake recipe by Rice&Flour suggests possible reasons and solutions including improper beating (beat until soft peaks, which I did), baking in a water bath with boiling water straight from the kettle and water going up to ⅓ or ½ way up (which I didn't because I set the cake on a grill in my water bath to elevate it out of the water). I'm not convinced because Kat Kwa's cake sits in a tin to keep it out of the water and then the baking tray. 
- The third and most interestingly, having too small an oven for the cake tin because the tin needs to sit in the middle of the oven. Specially forming a waist, sinking in the middle or deflating is attributed to oven i.e., wrong baking temp or insufficient baking time, or too large pan in too small oven. She bakes at 150-160 deg C using 6 eggs with 20cm pan for 70 to 90 minutes. She advises overbaking is better than underbaking so better to leave it in oven turned off for additional 15-20 mins. She also says that big pan in small oven often leads to uncooked middle so better to turn down temp and bake for longer. She also talks about understanding your oven. Tips include not letting the batter of beaten eggs rest for too long (which weakens rising), place baking pan at centre of oven and use top and bottom heat. Top heat too high causes rapid rise and then collapse/deflate once out of the oven yet top burned and tough but centre heavy and undercooked. If temp is too low, crust will be hard and pale in colour yet interior is dense and wet so cake also sinks when out of oven.

Monday, July 03, 2023

IP One-pot Macaroni and cheese (not baked)

Comparison recipes using one pot and not baked mac and cheese:

Centrecutcook (includes video)

- evaporated milk, cheddar and cream cheese, other cheese optional, butter

- no roux

- 4 minutes and quick release. If package cooking time is less than 6 minutes, then pressure cook only 3 minutes.

- Add bacon or sausages etc.

Damn Delicious

- Double cream, cheddar and parmesan

- no roux

- 6 minutes and quick release

- Add veg.

Amy and Jack (includes video, tried below)

- Evaporated milk, egg, butter, cheddar

- 4 mins and gradual release (intermediate between quick and not natural release). 

- To derive cooking time: take package time/2 - 1 on high pressure with gradual release.

- no roux but uses keep warm to cook the egg and melt cheeses

I decided to mainly A+J which is the most complicated recipe but also looks the most delicious, but adding ideas from the rest!

Ingredients

454g macaroni or similar pasta

1 l (4 C) water

4 tbsp butter

397g sharp cheddar, grated (not package)

170g cream cheese

Salt and black pepper to taste

2 large eggs, beaten

1 tsp mustard powder

1 tsp hot sauce

1 tsp onion or garlic powder

355ml evaporated milk (I substituted with double cream and milk)

4 tbsp butter

Optionals: 1 cup frozen veg and 1 cup cooked bacon

Method

1. Pour macaroni and water into the pot. Add salt to the water.

2. Seal and cook for 4 minutes (or follow formula above based on package) on high pressure.

3. In the mean time, mix the cream, milk, mustard and onion or garlic powders, and 1 tsp hot sauce if using.

3. Unseal and gradual release. Turn on the keep warm. There should be no more than ¾ water left, drain any excuess.

4. Add the butter and mix well.

5. Pour in the egg mixture and mix well. If adding frozen veg or cooked sausages and bacon, add it now.

6. Add in the cheeses, ⅓ at a time and stir until fully melted. 

7. Check for seasoning and top up if necessary. Serve immediately. 


Saturday, May 27, 2023

Blender Basque burnt cheesecake

This is a new recipe with different timings and ingredients from the original one attempted in 2022. Source from NoRecipes (has video). I've been doing it wrong all this time! I have been trying to cook till it set, apparently that's wrong! It was meant to be severely undercooked inside and have the colour outside so half the baking time. The fridge is the magic element that sets the cake. The method is also a lot easier and faster. It uses a blender or food processor, doesn't require bringing things to room temp, and doesn't require lots of patient hand blending!

Fresh out of oven

Deflated slightly after cooling

After 1 night

Ingredients (fits 6 inch round pan but I'm using 7" so it's very short with 1 block of cheese. Recipe also has upsize suggestions for bigger pans)

1 block (226g) Philly cream cheese

1 C (237ml) double cream

2 eggs

100g sugar

15g cake flour

½ tsp vanilla extract

Method

1. Preheat oven to 230 deg C.

2. Line a 6 or 7 inch round pan with parchment.

3. Add all the cold ingredients to a blender and blend until smooth. Set aside for 20 minutes for the bubbles to settle.

4. Pour into prepared cake tin. Run a skewer through it to burst big bubbles and tap several times on the counter.

5. Bake to 25, max 26 minutes (for 6" pan, start watching from 22 mins). The top should be just caramalised (not burnt). The centre has significant jiggle. (See video to understand consistency)

6. Leave it to cool completely on baking rack and fridge min 5 hours or overnight, storing in a Ziplock bag.

7. Cut with knife warmed in hot water to make clean cuts.

Feedback

I have been doing it all wrong! I really need to underbake it and it will still be totally molten liquid. Then, let the fridge do its job and firm it up and set it. This way, it doesn't harder in the fridge but remains silky fudgey rather than a hard cheesecake.

However this is only half the height of the original recipe. After beating, the batter will be too full for the can tin.

The above recipe uses is for a 6" pan for 1 block of cream cheese but I used a 7". Here's one for a 8" pan using 3 blocks of Philly.


Update #1 I doubled the proportions and used the same 7" pan.

Took 23 to 24 minutes (watched like a hawk from 20 mins) to ensure top is brown but not burnt. Because it's so thick, it then needs further baking at for 30 mins at lower temp of 140 deg C. Leave in oven but open door ¾ way to leave it to cool slowly for about an hour, then transfer and cool on cooling rack until completely cool. Store in fridge for 4 hours or best overnight to completely chill and harden.

Just after baking

Straight out of the oven

Update #2 Second temp of 150 deg C for 30 mins. 

Started again at 230 deg C for 20 minutes (already started to burn!) then switched off oven. Had to leave the door to bring temp down rapidly (resulting in the crack) then 150 deg C for 30 minutes. Then switched off oven and left door ajar for 20 to 30 minutes to gradually cool down.

Straight out of oven (after 20 minutes cooling in the oven with oven off)

Cake came out quite cooked with minimal jiggle.

Crack from the rapid cooling initially. Very slight jiggle. Will be fine eating at room temp but hard if straight from the fridge.

Update #3 Second temp of 150 deg C for 20 mins

The recipe was also slightly tweaked so I only had 250g of double cream (instead of 2C after doubling the other ingredients). This way it wouldn't overflow.

This time it was 230 deg C for 21 mins then I turned after temp down to 150 deg C, I cooked for further  20 mins, with further 20 minutes in the oven that had been turned off with door left ajar.

No jiggle whatsoever out of the oven. There was already a crack after the 150 deg C.
Crack is visible but the rest of the cake is so pretty with my new Temu disposable cake liners!

Because there was almost half the liquid of the original doubled recipe, this is a firmer cheesecake than the more almost mousse-like texture of the original recipe. This version seems to work best eaten at room temp. However for a cake that can be stored in the fridge, the second temp seems to be 140 deg for 30 mins followed by storing in the fridge (but served counter-top 'thawed' out of the fridge) seems to work better. 

Saturday, October 08, 2022

Cream cheese castella

From this video recipe by Mommy Oven. I had 1 block of Philly to use and was so sick of the normal cream cheese recipes. I found this video blog sponsored by Philly nonetheless and decided to upsize to half a block aka 125g (out of a 250g block of cheese). The original recipe calls for 100g so these are my own upsized measurements to fit my 24*13*7 big loaf tin.

Try 1

Try 2

Ingredients (all at room temp)

125g cream cheese

31g honey

44g milk

150g sugar

32g oil

5 eggs, separated

150g cake flour

1 tsp vanilla extract

¼ tsp lemon juice

Method

1. Put the half block of softened Philly cream cheese and using a spatula, flatten it against the side of the bowl to break up.

2. Add honey and combine until no more lumps. Take care to really work it so that there are no more lumps.

3. Add milk and continue to combine until no more lumps.

4. Finally add oil and vanilla extract and do the same. Set aside.

5. In a very clean bowl, beat the egg white until opaque at low speed (KA1). Add the sugar in 3 batches, adding the next batch of sugar only when the previous batch has been incorporated.

6. Add a dash of lemon juice. Turn up the speed to KA 2 and then gradually increase to 4. 

7. Turn up to KA6 and beat briefly, alternating with speed 4 to get small bubbles. Be very careful at Speed 6 as it can go from beaten to watery in a matter of seconds (trust me I know because I had to feed a whole batch of 5 eggs to the dogs!)

6. Once the meringue reaches just before stiff peaks, add the egg yolks and at Speed 1, beat very very briefly (about 1 min) until just combined. The mixture should resemble ribbons when it falls on itself.

7. Sift the flour into the mixture in two batches, making sure to fold each time. Take your time to fold carefully until no dry flour spots remain.

8. Pour ⅓ of the cheese mixture into the egg mixture and incorporate to loosen the egg mixture, you can be quite rough and beat it in for about 30 seconds. Pour the loosened cream cheese mixture back into the egg mixture. Fold decisively with as few strokes as possible (approx 30 seconds) turning the bowl as you go.

9. Pour the mixture from a height into a prepared (parchment wood-lined) loaf tin. Tap the tin on the counter to dispel air bubbles. Then, using 2 skewers, draw lines up and down the mixture in a grid to dispel the smaller air bubbles.

10. Bake at 175* deg C for 10 minutes, then turn down to 140 deg C for 45 minutes until cooked.

Try 1: at 180 deg C and 45mins 140 deg C
Try 2 at 175 deg C and 45 mins 140 deg C

11. Take the tin out and drop it onto the counter from a height. Oil a parchment and invert the top of the cake on to the parchment and leave it top side down for 5 minutes so that the cake top is smooth and flat. 

12. Remove the parchment from the bottom and invert the bottom back onto a cooling rack to allow to cool completely. 

12. Let it down completely. Best wrapped in cling foil and then left at room temp for a day. Next day, partake! 

Verdict

- Try 1: * The top cracked! According to this blogger, either the meriginue was overbeaten (beat to medium instead of stiff peak), the tin was too small (possibly, the side of the pan may have been too short) or the temp was too high (possibly because recipe starts at 180 deg C and short of taking the cake out of the oven and collapsing, the oven temp takes some time to come down. However, if I put it in for less than 180 deg C initially, it may not brown sufficiently). Perhaps to turn down to 175 deg C for 10 minutes followed by 140 deg C for 45 to 50 minutes (incorporated changes in original recipe).

: Right out of the oven, the top is crispy but the sponge feels dry. I cooled it down then wrapped it in plastic wrap. The next day, the sponge felt moist while still soft! There were a few minor gummy spots, which means I cannot reduce the heat or cooking time by too much. However, by Day 2 it felt dry.

- Try 2: Top still cracked. I tried serving it bottom side up which looks nicer and flatter but the sloping sides of the pan made it look awkward. Straight out of the oven, it doesn't feel as dry as the first attempt.

Wednesday, August 17, 2022

Cranberry cheese bread

Two recipes as sources and both using Tangzong. The proportions vary. DreamersLoft uses 310g bread flour as well as 56g cake flour, with higher propotion of tangzong roux but less liquid overall as it uses milk powder. Bakomanic uses 318g bread flour and very little tangzong but has more liquid overall. Both however use 1 block of Philly cream cheese (difference of 10g between the recipes?) which is great for me as there is no leftover.

Dreamlovers makes 17 buns (35g dough per ball and proves twice for 40 mins each, and bakes at 210 deg C for 12 minutes. Bakomanic makes 9 to 12 buns (50 to 70g dough ball) and proves twice: first time 1 hr and second time 30 minutes, and then bakes at 180 deg C for 19 to 23 minutes. 

Both recipes do it the same way e.g. have to leave a gap of around 2cm around each bun as it spreads, and proofs and bakes with a dark coloured tray on top to give it sufficient colour.

Decided to try Dreamers recipe today.

Ingredients

Tangzong*

100g bread flour

500g water

1. Combine in pot and cook by stirring continously on low fire.

2. Once dough reaches 65 deg C, it is ready.

3. Use clingfilm to cover the top and touch the surface to prevent a skin from forming. Set aside to cool. This can be prepared day before and placed in the fridge then brought out to bring to room temp for an hour when about to make the buns.

Filling

Meanwhile, prep the filling. Bring cream cheese to room temp.

240g Philly cream cheese (1 box)

50g icing sugar (i used regular sugar)

25g milk

50g dried cranberries

1. Except for the dried cranberries, prepare the filling by beating the cream cheese with icing sugar and thinned down with milk.

2. Place into a piping bag. Set aside.

3. Rehydrate cranberries for 15 minutes in water. Then drain and squeeze dry. Chop into smaller pieces if they are too big.

Dough

210g bread flour

56g cake flour

20g milk powder

42g sugar

pinch salt

6g instant dry yeast (2.5 tsp is 7g) 

84g tangzong, room temp

85g water

30g egg, room temp

22g unsalted butter, room temp

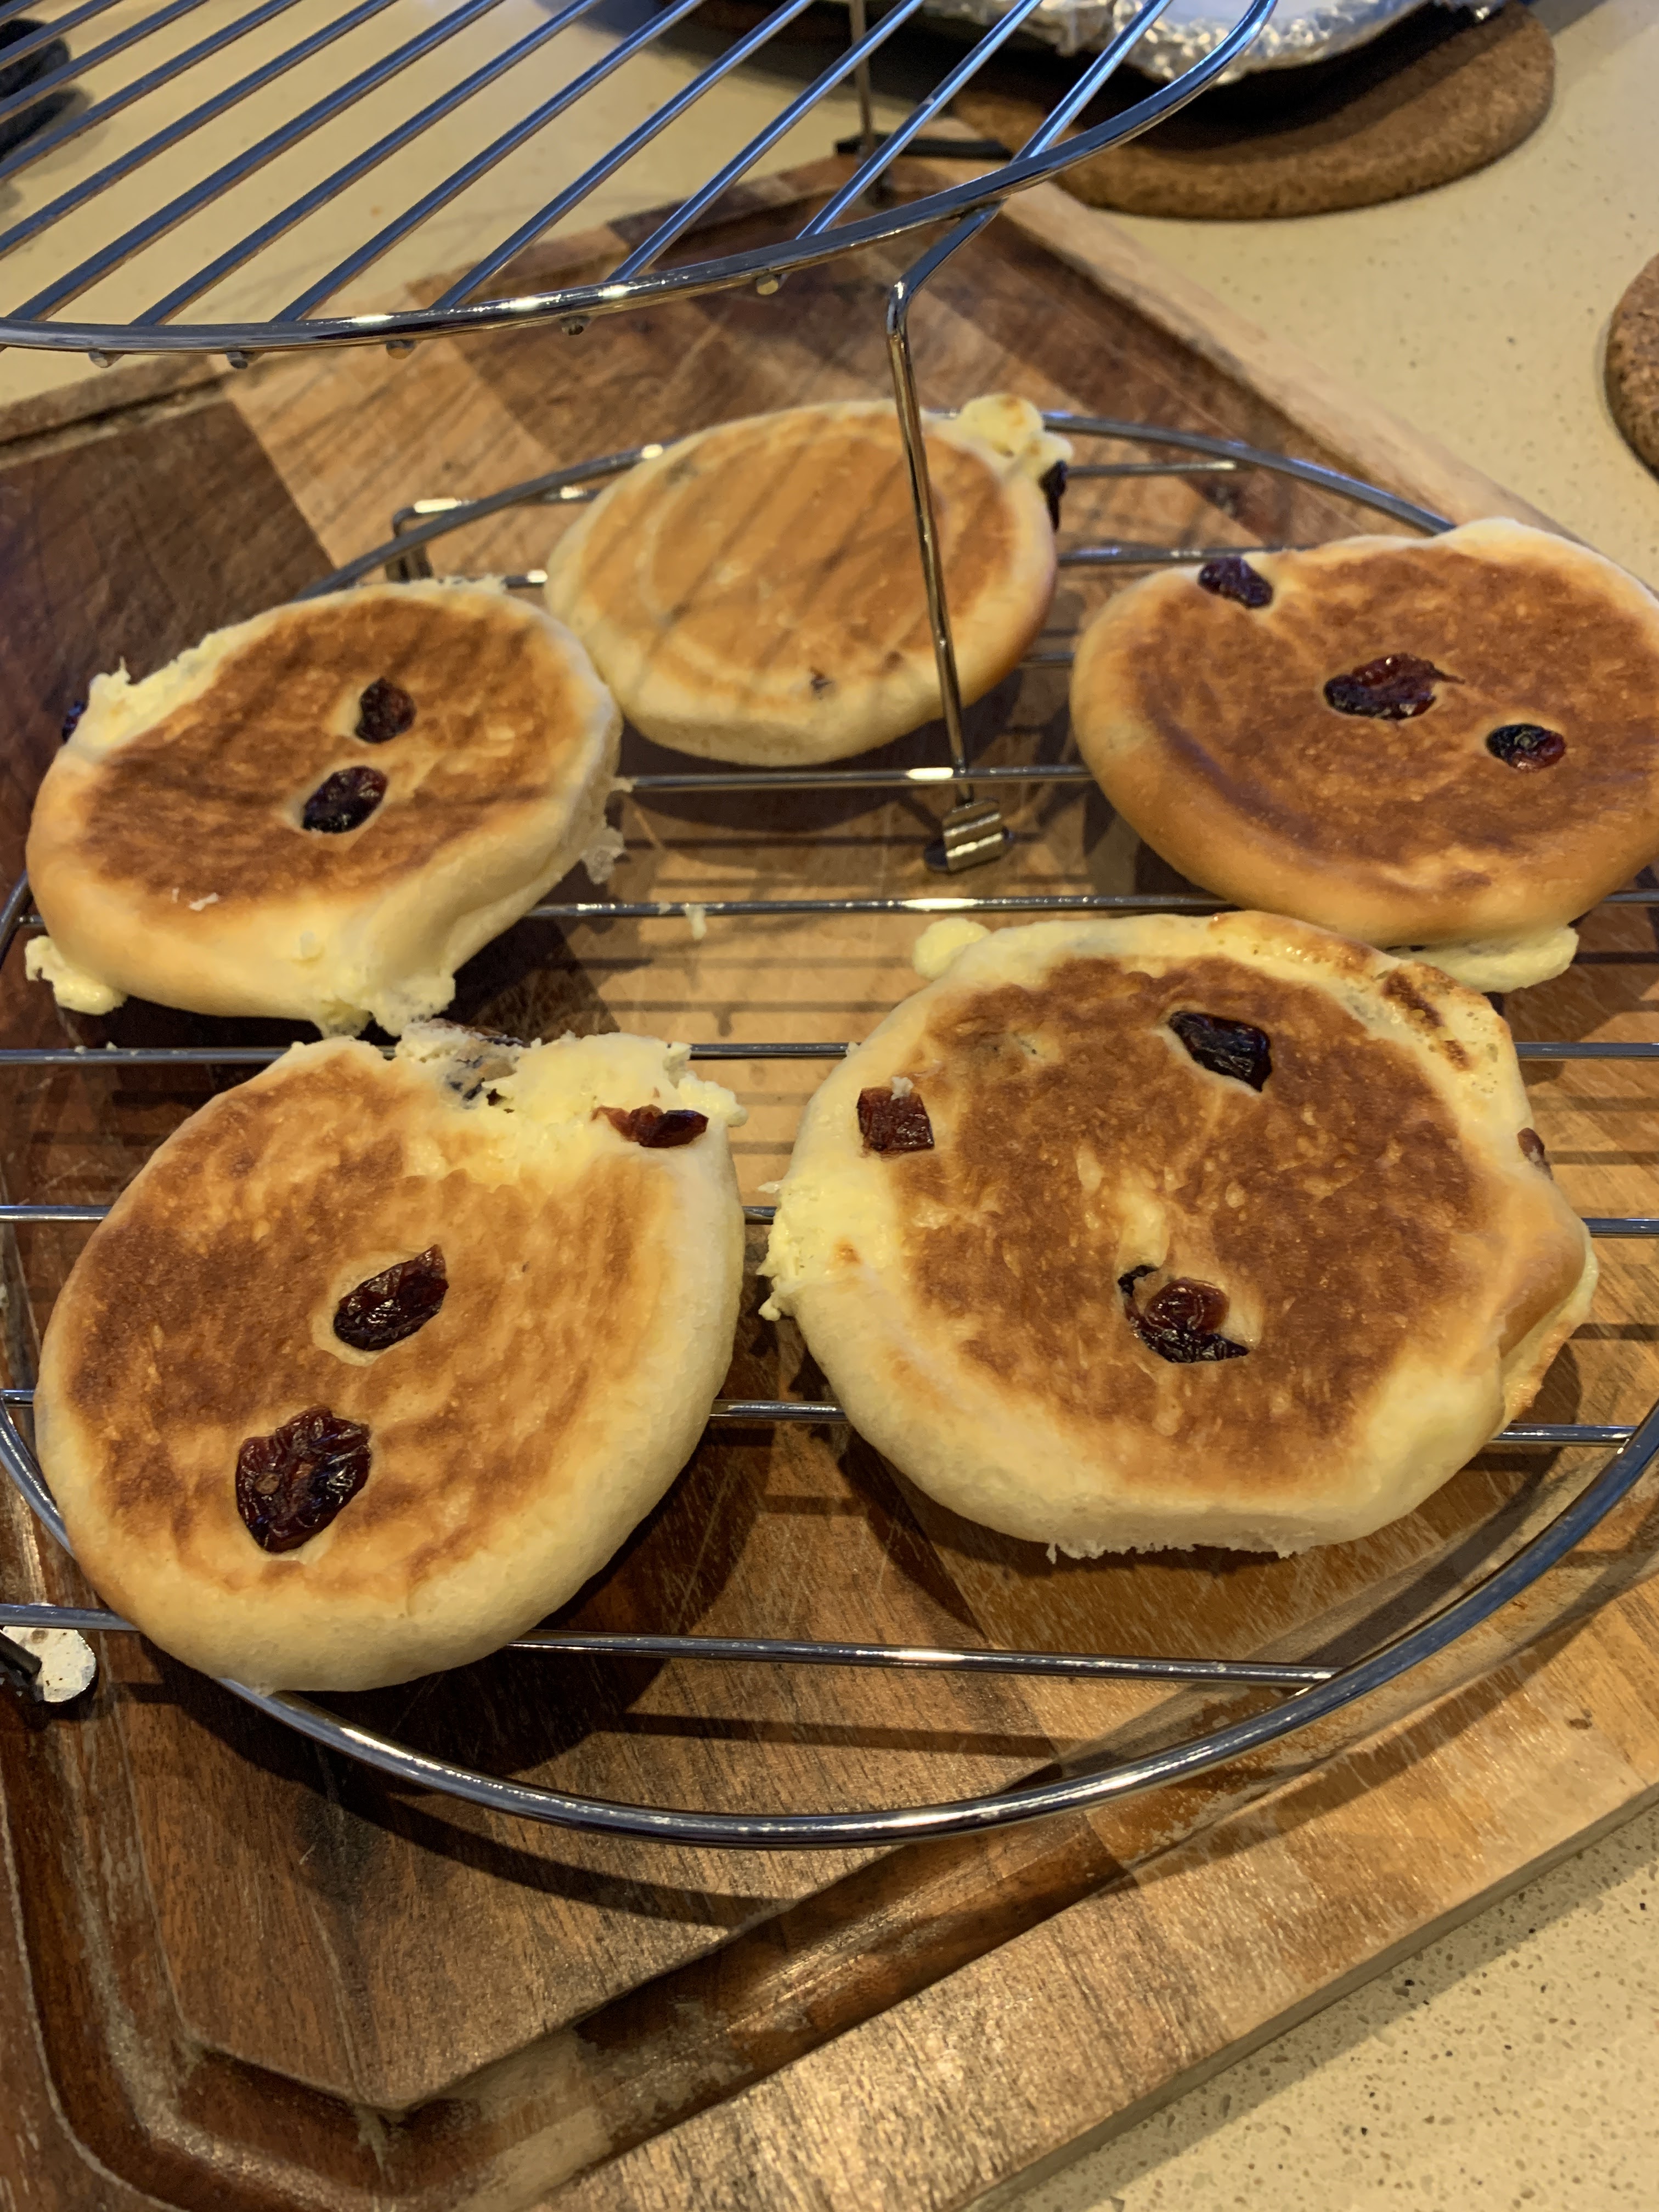
Big oven. Pressed too hard.

Small oven. Bake 1 minute less aka 11 mins


Method (makes 18)

1. Combine the dry ingredients in KA bowl using Stir function (Speed 1)

2. Add the rest of the ingredients a bit at a time except butter. Stir. May need to stop to scrape down.

3. Once gluten forms, add the butter, small cubes at a time and continue to use Speed 1 to stir in.

4. Once combined, turn up to Speed 2 and then Speed 4. Beat for 12 to 15 minutes until window pane stage.

5. Add cranberries and Stir for 1 minute.

6. Remove dough from bowl, oil bowl. Tuck the dough into a ball and return to bowl. Coat the dough lightly with the oil from the bowl. Cover bowl with cling film and then tea towel. Set aside in warm area to prove for 45 to 60 mins (depending on room ambient temp) until expanded double in size. Check using the finger poke test.

7. Dough weighs about 630g. Divide into around 35g balls (makes 18). Tuck ends into balls and set aside for 10 minutes to relax.

8. Flatten out each ball with palm (coated with little bit of flour if required) and pipe in cream cheese, about 2 tsp. Gather the edges and pinch to seal, ensuring no leakage. 

9. Gently cup and roll around on the surface. Place on lined dark coloured tray. Ensure buns have at least 2cm spacing all around as they will expand. Cover with baking paper and then top with another dark coloured baking tray so they will expand flat and outwards rather than rising up. VERY gently press down to flatten as you don't want to burst them. Allow to prove for 45 to 60 minutes until grown 1.5x in size.

10. Bake for 12 mins at 210 deg C (only 11 mins in big oven), top and bottom heating. When baking, keep the tray on top so that it will not rise but instead expand sideways.

11. Remove from oven and cool on wire racks.

Receipe feedback

* The recipes makes far more tangzong than required, probably 3x the amount. I understand the point about drier flour needing to soak up more water, but if the tangzong produced is slightly less than 600g and only 84g is required, surely ⅓ of the recipe should suffice? In future, I'd make slightly more than ⅓  i.e., 30g bread flour to 150g water. Coincidentally, this is very closer to what Bakeomanic uses ie 3 tbsp + 1 tsbp (ie around 11g bread flour) is to 50ml water.

- Overall, I now recall why I hate tangzong recipes. The dough is very hard to handle initially in the mixer, super sticky and soft. It is still soft and sticky after proving but at least doens't stick to hands. , without noticeable difference in the softness of the baked bread.

Saturday, January 01, 2022

Basque burnt cheesecake

This is indeed the easier cheesecake I have ever made! No finicky oil and cheese separating, fallen or over-beaten meringue, temperature control, worry about cracks, water bath temp, cooling down gradually, shrinkage, etc. In fact, the uglier it is, the more rustic!

Recipe taken from Just One Cookbook. Although there isn't a video, she goes into extreme detail so it would be worthwhile to read it before proceeding. She also suggests measurements for 7" and 8" pans but since I just happened to have a new 7" pan, what a nice way to break it out! Although her recipe states a pan with a removable base, I lined with foil to help make it easy to lift out. The outside of the cake won't be as pretty as there will be creases but no matter. Ironically, I bought the pan with the intention of baking cheesecake in a water bath, so my pan doesn't have a removable base. But no matter.

The hardest parts about making this cheese cake are the planning ahead (to bring everything to room temp and letting the cake totally cool down before de-panning), and making sure to carefully remove lumps at every stage of mixing. Lumps become harder to remove once more and more liquid is introduced. Also make sure to use an offset spatula or another smaller spatula and scrape down the big spatula and bowl often. This prevents lumps from gathering on the big spatula which become harder to remove later on. The mixer can't be used as it beats up too much air which causes it to deflate and crack.

Fresh out of oven
Fresh out of oven

Shrank after 10 minutes

Cooled down to room temp. A tiny cake!

So small but so rich!

Ingredients

454g cream cheese (aka 2 packets of Philly cream cheese), room temp

100g sugar

3 large eggs (50 g each without shell), room temp and whisked thoroughly

15g cake flour

6g corn starch

Pinch of salt

240ml whipping/double cream (36 - 38% fat), room temp

1 tbsp vanilla extract (or her recipe uses 15ml lemon juice)

Method

1. Take the eggs and cream cheese out of the fridge and let them come to room temp. If required, gently warm the cream cheese in the microwave to soften. Avoid melting so use gentle microwave power e.g. 15s increments at 50% power.

2. Preheat oven to 230 deg C, fan forced. Turn on the grilling elements! Middle rack. Make sure there is enough clearance so the parchment doesn't touch the top grilling element and burns. It will be useful to preheat to your oven's maximum when you start preparing.

3. Prepare the pan. As my pan doesn't have a removable base, I lined it with aluminium foil to make removal later easier as I can lift it out. On top of that, overlay 2 pieces of parchment. The parchment needs to overlap in order to full cover the pan. See JOC for instructions and pictures to see the final product regarding should look like.

4. Gather the rest of the ingredients. In a large bowl, mash the cream cheese. Try to remove as many lumps as possible. 

5. Add the sugar in 3 batches. Mix well and remove lumps but really flattening the cream cheese into the bottom of the bowl. The mixture is ready when there are no noticeable granules of sugar.

6. Add the beaten egg in 3 batches. After each addition, the mixture appears to curdle but just mix it in. Again, remove any lumps.

7. Sift in the two flours and salt. Do this in batches and very carefully remove lumps after each addition. This will be the hardest stage as there will be so many lumps. Very carefully take your time and remove as many as possible.

8. Add in the double cream incrementally and stir in. At this point, remove any more lumps but it becomes very hard to remove lumps at this stage because there is so much liquid.

9. Pour into sieve overlaid on top of the prepared pan. Sieve the mixture to remove any final lumps. Gentle tap on the counter top to remove big bubbles. Run a skewer in a jigjag manner around the pan to burst smaller bubbles.

10. Put in a bigger cookie pan to catch any drips and make removal from the oven easier. Bake at 230 deg C for 60 to 65 minutes. I needed the full 65 minutes so that the cake emerges with a mild wobble in the centre. However, I couldn't get the full brown top. Do not be tempted to over-bake just to achieve the colour as the cake will become hard and dry.

11. Allow cake to cool in the pan on a wirerack. The airflow under the pan will facilitate cooling. If you want a firmer cake, at this point, chill in the fridge in the pan for 4 hours. Do not cover with cling film as condensation will drip on the cake's face and ruin it. Instead, cover with a cloth. If you want a less firm cake, serve at room temperature. Similarly, after you remove the cake from the fridge (e.g. chilled leftovers), allow to sit out for at least 30 minutes to lose some of the chill. The cake tastes better at room temp or slightly chilled rather than cold.

Recipe feedback: The amount of sugar is correct. This cake is so tiny but so rich. Imagine the 2 packets of cheese and double cream inside! Baking it for 65 minutes although didn't produce the full burnt colour yields the correct wobbliness.

Second attempt

Used small oven. Only needed 61 mins and fully browned! But it cracked :(


Nice burnt bits on the side
Crack 'healed' after it sank! Yay.

Third attempt
Poor temp control in the big oven so it went up and down between 230 to 250 deg C. Did the full 65 mins. too burnt?


A bit too burnt! Was crusty
Fourth attempt
Used small oven. This attempt was the most bizzare. Baked at 230 deg C for about 43 mins and started to burn. Checked and it was still majorly wobbly so turned down to 200 deg C and tented for further 10 minutes. Still came out in the centre but at least the top wasn't burnt hard and crusty!

Cake sank a bit after 10 minutes of cooling. Turns out crust is pretty perfect though! Not hard and crusty like Attempt 3. The slice broke, perhaps inside a bit undercooked still and would certainly benefit from eating after it's been chilled. Moral of the story, if using the small oven, check on it at 45 minutes not 60 minutes!

Overall feedback (Based on feedback from here)
- cracks: Centre crack means overcooked. Temp needs to be raised to cook top faster but keep centre rare.
- Cake falls: It's correct. Sides are cooked and stay tall but centre falls because no more hot steam.
Since this recipe gives such inconsistent results, I thought I'd try a different recipe. Tried here.

Sunday, July 04, 2021

Japanese cotton souffle recipe (improved)

I have tried making the Japanese cotton cheesecake so many times but it never succeeded. I realised it has less to do with the recipe than the oven! I decided to use my new-ish Breville air fryer oven because I have never used the bake function, and the blogger's oven looks like the older version of my oven.

Karen Ling: https://www.youtube.com/watch?v=Vl4gg-0b7Zo

It is a 100% success! A lot has to be said about using digital ovens. I am never going back to my conventional analog oven for this cake.

Ingredients (fits 8 inch cake springform tin)I

250g cream cheese, softened

80 unsalted butter, softened

50g whipping cream

150g fresh milk

5 eggs, separated

35g corn starch

100g sugar

2 tsp vanilla extract

¼ acid eg lemon juice or white vinegar


Method

1. In a bain marie, melt the cream cheese and butter. Add the whipping cream and fresh milk and mix until smooth and no lumps remain. Turn off the heat and take the pot off the heat. 

2. Add the egg yolks and mix with a whisk until smooth. Add the vanilla extract and combine.

3. Sift in the corn starch and fold in. Set aside.

4. In a really clean bowl, add the egg whites and acid. Whip up the meringue until soft peaks (approx 5 minutes on KA speed 6) by separating and adding the sugar in three batches. 

5. Dollop ⅓ of the meringue into the cheese mixture and mix well, no need to be too careful with bursting the air bubbles. 

6. Add the next ⅓ of the meringue but this time, fold in gently with a whisk. 

7. Pour the entire cheese mixture into the remaining ⅓ meringue. Fold gently with a whisk, then change to the spatula and fold, enduring no more white streaks.

8. Pour into a 8 inch springform with the bottom lined with parchment. Line the outside of the pan with foil to prevent water seepage. I didn't because I clipped the parchment into the tin, and also put a rack in tray of water so the water level was below the parchment. Use the spatula to flatten the surface and draw strokes in the batter to dispel air bubbles. Lightly tap the tin on the counter top to burst big bubbles.

9. Preheat to 175 deg C. Fill the bottom tray with about ¼ inch water. Put in the tin.

10. Turn down and bake at 150 deg C for 30 minutes. Turn down to 130 deg C and bake for another 30 minutes. Then turn off the heat and let the pan sit inside the oven with the door closed for a further 30 minutes.

11. Unmold the cake and let it cool, then store in the fridge for at least 4 hours. Serve up.

The blogger also used a mirror pectin glaze, which I didn't bother with.

Recipe feedback

Recipe is perfection! Top was smooth (other than my failure to properly flatten the top of the batter). I might have been able to use the mirror pectin to hide the craters. No cracks on the top and nice golden top. No unexplained 'waist' on the sides. Inside was cooked through. The use of corn starch instead of cake flour meant very smooth mouth feel. It wasn't too sweet.

- Update: Kathrine Kwa suggests using room temp water about ¼ up side of round tin that has the cake in it. Bake 150deg C for 90 mins, then turn off oven. Crack open door and leave inside to rest for 30 mins before removing from oven and then tin. Nothing mentioned about dropping tin on counter.

Saturday, December 19, 2020

Baked Cherry cheesecake

Preparing for a party, I thought about resurrecting my favourite Nigella's no bake blueberry cheesecake. It involves 2 packets of cream cheese, an 8" pan, and a bottle of Dalfour's blueberry jam. I came across RecipeTinEats' baked Strawberry Cheesecake which is very similar except that it's baked and uses sour cream rather than whipping cream. The most difficult part is probably making the berry sauce which is optional. I used a package of frozen cherries which I had in the freezer so presentation-wise, it'll be less pretty than using fresh fruit but the effect is the same.


Ingredients for base

200g sweet biscuits (I used malt biscuits which in a 220g packet; this includes enough crust to go up the side of the tin)

120g butter, melted (I used 150g because I had 220g biscuits)

Method for base

1. Prepare the 8" springform tin. Turn the base upside down so that there's no lip. Add the parchment and clip the base. Butter the sides of the tin and line with parchment.

2. Crush the biscuits in a food processor. Alternatively, use a ziplock and bash away.

3. Once there is a fine crumb, drizzle in the melted butter. It should resemble sand.

4. Pour into the prepared tin. Use a spatula to press down. Using a glass or measuring cup, press down firmly on the base and against the wall of the tin. The crumb mixture should go up ¾ of the wall of the tin.

5. Cover and leave the base in the fridge to harden slightly.

Ingredients for filling

500g cream cheese (2 packs of Philly), room temp

2 tbsp plain four

1 tsp vanilla extract

½C sour cream

1½C caster sugar

Zest of 1 lemon

Method for filling

1. Beat cream cheese until smooth, 20s on Speed 4. (Don't introduce air otherwise the surface will crack)

2. Add flour, beat for 5 seconds at Speed 4.

3. Add extract, sour cream, sugar, zest; 10s on Speed 5.

4. Add eggs one at a time, no more than 5s each on Speed 5. Beat until eggs are just blended.

5. Pour into prepared base. 

6. Bake in a pre-heated oven 150 deg C in fan forced (convection but no top and bottom grills) for 55 minutes until the top is just set. The sides will be set but the centre will have a slight wobble. 

7. Turn off the oven but leave it inside for another 10 minutes, then open the door 20 cm and let it cool down for 30 minutes in the oven with door ajar. Take it out to totally cool down.

8. Refrigerate at least 4 hours.


Method for berry sauce

500g of a berry (strawberries, blueberries, etc. I used cherries which are in season; fresh or frozen)

2 tbsp water or lemon juice (depending on the sweetness of the fruit)

½ C sugar (can reduce but a few tbsp depending on sweetness of the fruit)

2 tsbp water for slurry

1½ tsp corn starch for slurry

Method for sauce

1. Roughly cut up half the fruit and halve the other half of the fruit. If using frozen fruit, thaw them. It may be difficult to halve or cut the fruit without it falling apart so omit this step.

2. Pour the fruit and 2 tbsp of water into a saucepan. Pour in the sugar and mix.

3. Bring to a boil. Turn down and simmer for 10 minutes, stirring to prevent the mixture burning at the bottom.

4. Make the slurry by mixing corn starch and water. Continue stirring the slurry. Stir the mixture and drizzle in the slurry. Once thickened, turn off the fire. Set aside to cool and the refrigerate. It will thicken up slightly once chilled in the fridge.


Assembly

Take out the chilled cheesecake. Pour the sauce on top. If the sauce is not of a pouring consistency, add just add a touch of water (½ tsp at a time) just to loosen it. It should dribble down the side but not drench it.

Feedback

- Turning the bottom upside down was fine except the butter melted and seeped out! Was not expecting that! Perhaps using digestives might have helped as they are more 'absorbent' than the malt biscuits I used.

- I found the sugar in the cherry sauce way too sweet! It was good for entertaining as people tend to like sweet desserts but not for home consumption. Might have to add, taste, then add more if needed next time.