Showing posts with label poach. Show all posts

Sunday, June 21, 2020

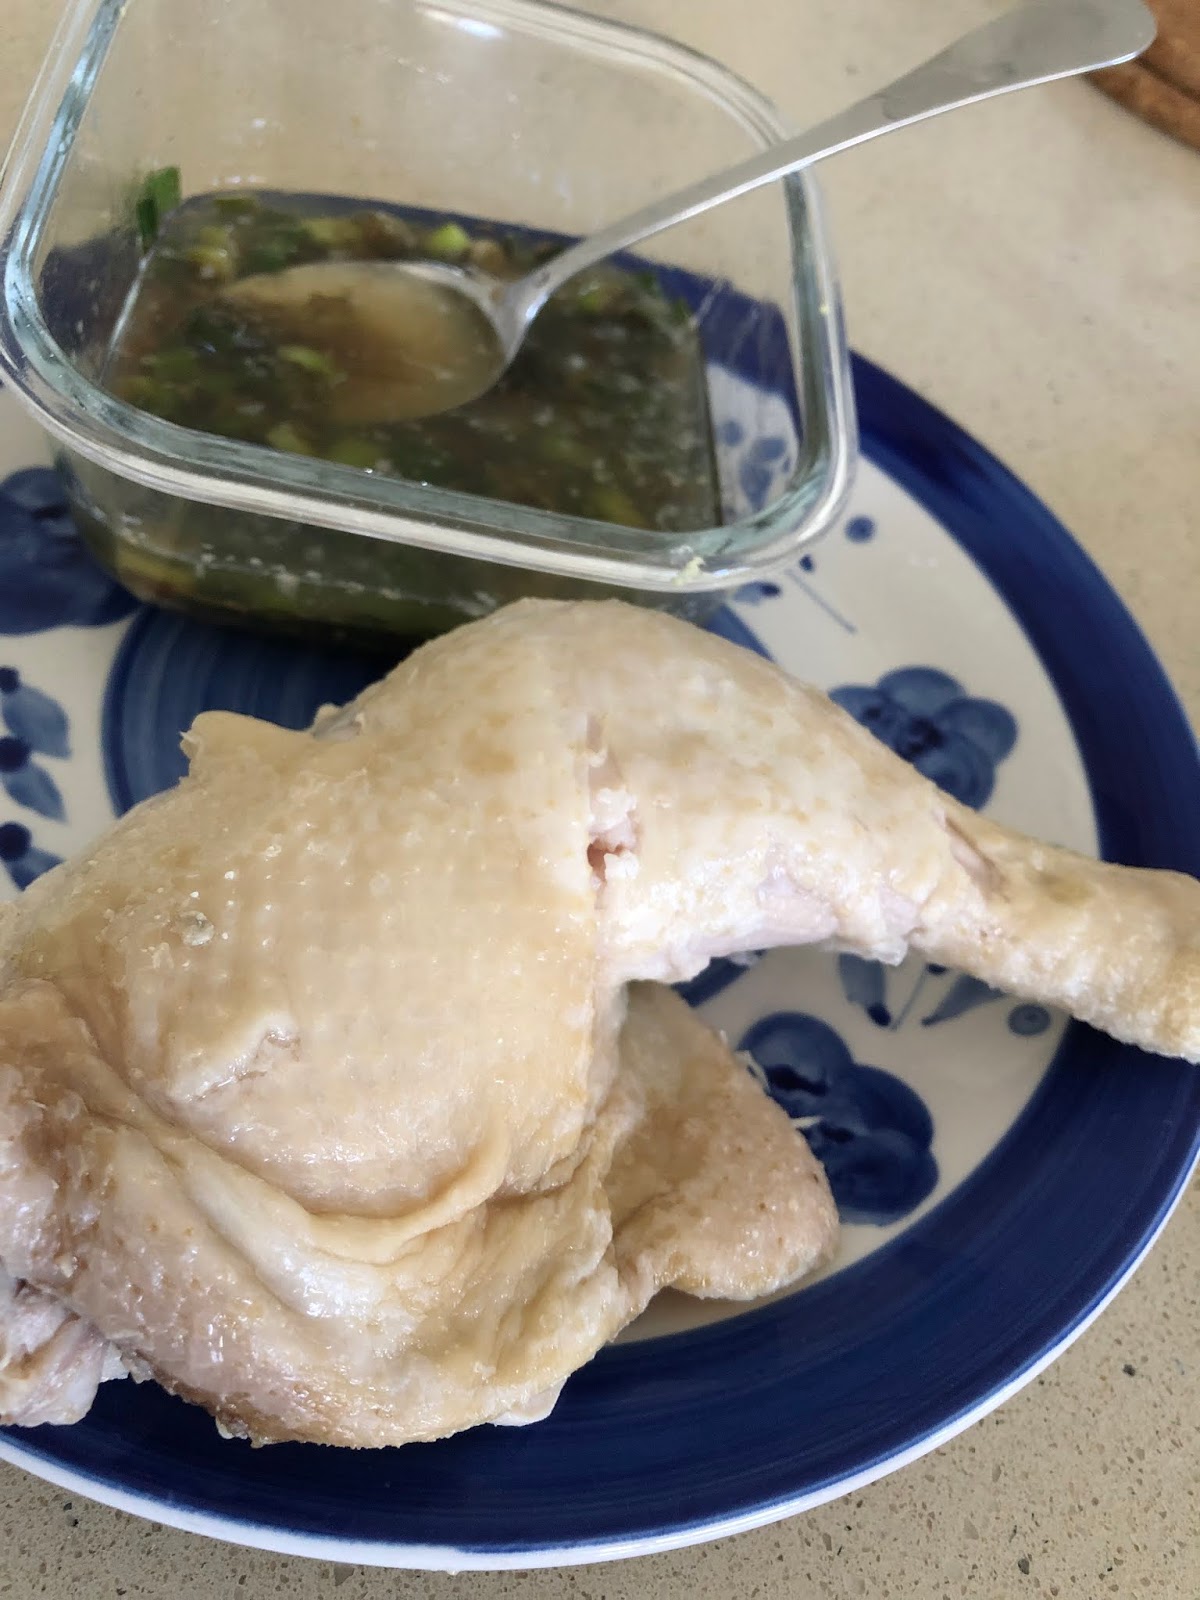
Poached chicken (chicken rice chicken)

This is a great recipe for small family of 2. I haven't tried with more chicken maryland pieces but I must say that it is a MUST to use chicken maryland and not substitute for drumsticks. My previous failed attempts at cooking chicken rice chicken failed because I used drumsticks. I can't find a chicken small enough to fit my pot so thought I could substitute with drumsticks. As Y pointed out, the skin will shrink and it looks very ugly! So true, that's always where I went wrong!

This is a video recipe by oe cook. I didn't follow her cooking times but just the method and ingredients very broadly. An important point was that she left the pot uncovered. It will probably affect the cooking times and also temperature. My attempt led one maryland to be just cooked but the other was overcooked. I'd probably adjust the timings in a future recipe.
Ingredients
For chicken
2 chicken marylands, brought to room temperature
1 spring onion, chopped
1 slice of ginger, lightly smashed
2 pandan leaves, knotted
Dash of cooking wine

For serving sauce
2 spring onions, chopped
2 tbsp oil
1 thumb sized ginger, grated
1 small shallot, finely sliced
2 tsp light soya sauce

Method
1. Fill the pot with enough water to cover the chicken marylands. Add the aromatics and bring to a boil.
2. Once boiled, add the chicken maryland. You can dip it in and out three times, some bloggers say that this 'seals' the skin so that it's more springy. Bring back to a reboil.
3. Cover and once reboiled (my AMC pot has come to the 2nd indicator) and turn off the fire. Leave covered to steep for 25 minutes. Meanwhile prepare water bath.
4. At the 15 minute mark, reboil to 2nd indicator again. This step was important because while one chicken was slightly overcooked (the skin shrank), the other was JUST cooked and perfect! Strain out and test for doneness with a chopstick skewered to the thickest part. Juices should run clear.
5. Immediately strain and place the chicken into the water bath. Top off with ice cubes. Leave aside to cool down.
6. Prepare the sauce. Place chopped up spring onions and grate the ginger.
7. Warm up the oil. Fry the shallots on medium flame until golden. Strain the shallots and save for another time. (If not using shallots, warm the oil until it is smoking, you can smell the oily smell).
8. Pour the boiling oil over the ginger and spring onion. Careful, it will splatter. Stir in until combined.
9. Add the soya sauce. To make it extra delicious, skim off some of the chicken fat from the stock and pour into the sauce and mix.
10. Serve the thicken with the cooking caramel sauce and topped off with the serving sauce.

Update: Alternate method using rice cooker: Kitchen Tigress

Saturday, February 23, 2013

Soya sauce pork

Two recipes which I'll like to try:

Ginger vinegar trotters: http://ellenaguan.blogspot.sg/2010/06/ginger-vinegar-trotter.html
Soya sauce pork belly: http://ellenaguan.blogspot.com.au/2013/02/braised-pork-belly-with-rice.html
Another Tau Yew Bak: http://www.noobcook.com/tau-yu-bak-braised-pork-belly-in-soy/2/

Thursday, February 14, 2013

Soya sauce chicken

I adapted the recipe from : http://rasamalaysia.com/chinese-soy-sauce-chicken-recipe/2/

Ingredients
9 chicken drumsticks (original recipe uses about 6 pieces)
3 cloves
3 star anise
1 tsp five spice powder
1 tbsp garlic
1 tbsp ginger
8 dried shitake mushrooms, soaked in 1 cup of water till soft then drained and sliced. Reserve the soaking water.
6 hard boiled eggs
1 cup dark soya sauce
1.5 cups light soya sauce
4 cups water

Method
1) Add all the ingredients, except the drained mushrooms, eggs and chicken. Add the water and water used to soak mushrooms. Bring to a boil for 15 minutes.
2) Add the drained mushrooms and chicken. Bring to a rolling boil for 10 minutes, uncovered. Turn down the flame, skim off impurities. Cover and simmer for 30 minutes. It may be useful to give a taste to see whether the soya sauce is too salty and adjust accordingly. I found that the brand of light soya sauce I used to be particularly salty and had to top up with water.
3) Turn off the fire and add the eggs. Let everything steep for several hours. You may have to occasionally turn the chicken and eggs to ensure that all sides get a chance to steep and they don't get uneven 'tan marks'.
4) Serve with steamed rice, or in my case, I used noodles for 'longevity' during this CNY period. As an option, garnish with coriander or parsley and chilli.

Thursday, February 07, 2013

CNY Chicken recipes

Two CNY recipes by one of my favourite food bloggers, Rasa Malaysia. Recipes that I've always wanted to know how to do but could never find the right recipes, simply because I didn't know the correct name for them! Eg the roast chicken you find on ang mo sites are quite different from the roast chicken we get in Chinese restaurants.

Soya sauce chicken: http://rasamalaysia.com/chinese-soy-sauce-chicken-recipe/2/
Roast chicken: http://rasamalaysia.com/chinese-roast-chicken/2/

Saturday, September 11, 2010

Milk poached fish

I found this new item at the supermarket. (I know its new because the sign said so ) So far we've only got cod, so this is a welcome new addition. It brought back memories of my UK days with other favourite British favourites such as cod, sole, or plaice.

I remembered a common recipe called milk poached fish, which basically uses milk to keep the flesh moist. However, most recipes use haddock (either the smoked or the fresh variety), which we (still) don't have here. Ironically, I never tried cooking fish in the UK whilst I was there, simply because I don't know how to prepare it. Thankfully, we now have ready-prepared fillets.

I adapted from a recipe I found online for milk poached haddock, and adjusted with cooking times which I found for halibut. I used the poaching liquid for a bechamel sauce. The result? The fish was indeed easily forked through and flaked and really quite moist without being mushy.

Ingredients
300g fillet of halibut
1 onion, chopped
1 clove of garlic, crushed
1 tsp basil (fresh or dried is fine)
1 tsp dill (fresh or fried is fine)
pinch of salt
dash of white pepper
1 cup of warm milk

For the bechamel sauce: 1 tbsp butter, 1 tbsp flour


Method
1) Place the fish in a baking dish deep enough to hold the poaching liquid. Arrange the onion and garlic in the dish, and sprinkle on the herbs, salt and pepper. Pour on the milk. It should mostly submerge the fish. If not, top up with more milk.

2) Bake in the oven for 30 to 45 mins at 160 deg C. The cooking time will depend on the thickness of the fish (my fillet was about an inch thick) but you will know its ready when the fish is easily flaked with a fork. Remove the skin, flake the fish and set aside. Don't worry about lumps at this point. Slowly add the milk, vigorously stirring throughout to avoid the sauce catching on the bottom. It will burn quite easily. Add as much milk as is necessary to produce the 'saucy' consistency you need - neither too gluey nor too runny.

3) To make the sauce, first strain the poaching liquid. You can reserve the onions and garlic if you wish to serve it up. Top up the liquid to 1 cup with more milk.

4) In a saucepot on the stove, melt the butter. Add the flour and stir until incorporated. Don't worry about lumps at this point. Slowly add the milk, vigorously stirring throughout to avoid the sauce catching on the bottom. It will burn quite easily. Add as much milk as is necessary to produce the 'saucy' consistency you need - neither too gluey nor too runny.

5) Serve immediate, drizzling the sauce on top of the fish. Remember, bechamel sauce doesn't keep well. It forms a skin when cool and needs to be reheated over a bain marie, so only make as much sauce as you require.