Showing posts with label chocolate. Show all posts

Monday, May 04, 2026

Chocolate cotton cheesecake

I have tried so many cotton cheesecakes including a whole series in 2017 where I tried a whole series of cotton cheesecake experiments.

Because I'm bored with plain cotton cheesecake, here I focus on chocolate cotton cheesecake which I have never tried before. I note the use of flour rather than cake flour in both recipes, the Kat Kwa version using 8" pan with 5 eggs, and the Kitchen101 version using 9" pan with written recipe here using 6 eggs. From my previous experiments, I've realised that my small oven can only take up to a 8" pan and the big oven works best with the 9" pan. Other than that differences in proportions and slight differences in method, the main ingredients are the same - plain flour, milk (unlike cake flour and variations such as double cream, whipping cream or condensed milk in some recipes), melted chocolate and cocoa. 

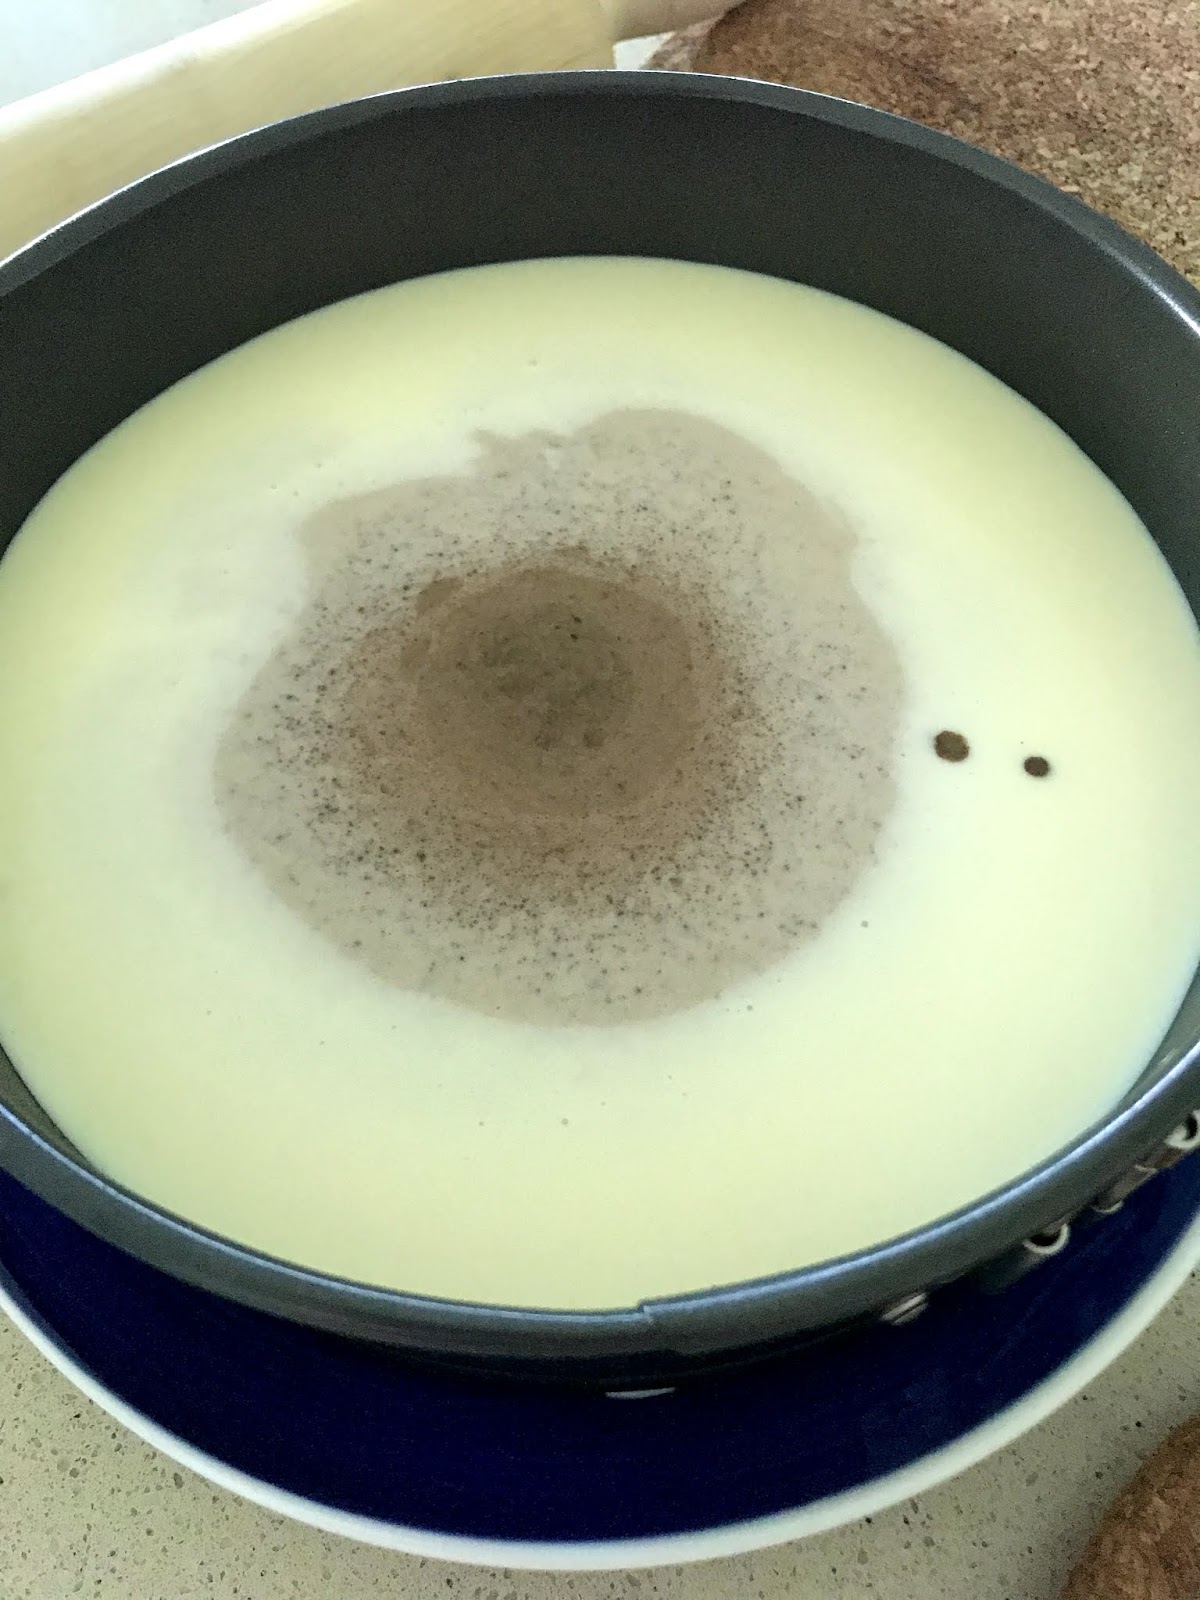
After it's cooled

Note that in terms of baking time, the 8" takes 150 deg C for 90 mins in 1 inch tap water with no extra cooling down time in the often and unmolding immediately after removal from the oven. The larger cake is baked in cloth lined water-bath also 1 inch tap water baked at 150 deg C for 40 mins then 1h 20mins at 140 deg C. Then left to cool with door ajar in turned off oven for 40 to 50 mins to minimise shrinkage. After removing from oven, unmould and cool in elevated position 6" from counter top. Not sure why there's such a huge difference in the baking times!

Ingredients (for 8" pan)

225g cream cheese

50g butter

80g dark chocolate for baking

150ml milk

20g cocoa

50g flour

5 eggs, separated

90g caster sugar

pinch of salt

dash of lemon/lime juice

Method

1. In a bain marie, melt the cream cheese, butter and dark chocolate using a spatula. When all melted, add in milk using a whisk to combine but don't whisk too hard and introduce air. (Optionally, add in 2 to 3 tbsp of sugar)

2. Remove from the pot from the heat and add the yolks one at a time, using the whisk to combine.

3. Sift in the cocoa and flour with the pinch of salt, and again use the whisk to combine.

4. In a very clean bowl, whisk the egg whites. Once the whites are frothy, squirt in the lemon/lime juice. Then, slowly rain in the caster sugar at intervals. Turn up the KA and beat until soft peaks. Just when it's almost soft peaks, turn down the KA to low to beat out the bubbles.

5. Using the whisk transfer over ¼ of the meringue into the yolk-cream cheese mixture and combine lightly. You can be quite rough with this.

6. Pour the mixture back into the remaining meringue and use the whisk to combine. Be more careful but do a good job. Finally, transfer to a spatula and fold carefully.

7. Prepare the baking tin and line the sides with parchment so that the parchment is taller than the side of the tin. Your cake WILL grow and overflow otherwise. Using foil, wrap the outside of the tin so that water doesn't go in. In a larger tray that's large enough to hold the baking tin, pour in around 1 inch of room temp water. 

8. Place the tin in the water bath. Bake for 90 mins at 150 deg C. Once done remove immediately and unmold but not removing the parchment. Elevate the cake and allow the cake to cool at least 6 cm away from the counter top.

9. Once fully chilled, remove the parchment and keep the cake in a airtight container for 4 hrs or best overnight to fully chill. Cake tastes better fully chilled than at room temp.

Feedback

- In the past, I used cake flour and I'm wondering if it's caused me a multitude of problems including cake deflating. This time I used plain flour to hopefully give the cake more structure.

- The cake cracked and burnt. Note to self - in my small oven, the cake is too close to the top heating element once it sits in the water bath tray. It's fine for castella because there's no water bath. And as a result too, there was a very serious 2 waists!

Just out of the oven, crack is prominent

After cooling - the crack has closed up

- I removed it from the oven almost immediately and removed the tin as the instructions asked, but it still deflated. It was already badly cracked due to being too close to the heating element.

- So far this 6-egg Earl Grey in the 9" tin in the big oven followed by 5-egg Black Sesame in 8" in the small oven have been the most successful. Even with the same cooking times (150 deg C for 90 mins), looks like cooling in the oven for 30 to 40 mins is a must. Next to try will be the 2 hour at low temp baking by Kitchen101!

Saturday, September 20, 2025

Chocolate burnt basque cheesecake

From my favourite auntie Kathrine Kwa's collection. My previous 2 recipe attempts either were too much work because no beater was used, or used a blender but then the air caused it to rise too fast and then it looked ugly (but correct basque look!). Both recipes used a high temperature (230deg C) so it would rise and brown nicely (but have to watch like a hawk) while the inside remains jiggly. However due to that high temp, they would crack too. Hence this recipe uses a lower temperature more akin to baking Japanese-style souffle cheesecake sans water bath, but baked for longer and without switching off the oven (to prevent falling and cracking). Will this yield more consistent and pretty results?

I also decided to revert to JOC's method of slowly blending everything in to incorporate as little air as possible, hoping if there is less air, it won't collapse as dramatically. Her recipe kept it almost like a baked custard and used corn starch but because I didn't beat it at all so substituted cake flour to give it more structure.

Ingredients

500g cream cheese (2 packets Philly), softened

120g sugar

5 eggs

250ml whipping cream (she used 200ml but I only had a 250ml pack)

250g melted dark chocolate (70% cocoa)

10g cocoa powder

10g cake flour 

Pinch of salt

Method

1. Prepare a 8 inch pan in the traditional basque method with foil and 2 layers of crumpled parchment. 

2 Meanwhile, melt choc bar over bain marie or in microwave on small increments. 

3. Next, melt in the cream cheese.

4. Once incorporated, add the sugar and stir until well combined.

5. Switch of the heat. I kept in the bain marie because this recipe has no oil so I was afraid it would harden. Add eggs one at a time and beat well after each. Make sure to only add the next egg when the previous one has been combined, otherwise it becomes hard to keep it lump free once more liquid goes in.

6. Transfer to a bigger mixing bowl if needed. Add in the whipping cream in and beat lightly, but don't overbeat and incorporate too much air.

7. Lastly add the melted chocolate and use a spatula to stir in. Once mostly combined, you can return to the beater at low speed.

8. Sift in the cocoa and cake flour, and pinch of salt.

9. Pour into a lined 8" cake tin. Lightly tap on the countertop to dispel bubbles.

10. Bake on the middle shelf at 220 deg C for 30 mins. Grill with upper heat for 2 to 3 mins until top is darker.

11. Remove from oven and leave in tin for 10 mins to cool so it doesn't crack or shrink. Top sld still be slightly jiggly.

12. Once slightly cooled, remove from tin but do not remove the paper. Continue to let it come to room temp. Chill in fridge for at least 6 hrs or best overnight.

13. To cut cleanly, use a knife dipped in warm water and wipe after each cut with damp towel.

Feedback

- Even though the temp was lowered by 10 deg C, it still cracked! But I believe this had more to do with the basque-style of lining the tin with crumpled parchment and my cake 'caught' on the craggy edges and tore itself.
Saturday, June 07, 2025

Lazy chocolate caramel gateau

The original recipe by Ann Coo involves using a small 6 to 7 inch pan, Valrhona chocolate and baking at 170 deg C for 20 mins. She said this was a lazy recipe and she's right, because this is only my 2nd recipe blog post in 2025, I ain't got time for using and washing up a mixer! Further, I decided to go all in and change up the pan size and pan all in once without trialling along the way! I expect this to go horribly wrong but what the heck, I don't have time to experiment and try. As such, all proportions have been increased by ⅓ (aka added an extra egg) to account for the bigger pan size (I used my 8inch round). 


Ingredients 

180g (1 bar) hopped baking chocolate (Valrhona if possible, I only had Cadbury)

40g caramel chips

120g sugar

1.5 tsp vanilla extract

3 large eggs

120g butter

pinch of salt

52.5g plain flour or 80g cake flour

Method

1. Melt butter and chocolate using double boiler. Allow to cool down.

2. Separately, hand whisk eggs and sugar until dissolved. Combine with melted butter and chocolate.

3. Sieve in flour and fold in.

4. Pour the mixture into 8 inch round pan and bake 170 deg C for 30 to 35 mins. (After 30min with good temp control, the top was still wobbly so I switched off the oven and left it inside for a further 5 mins until skewer insert comes out clean.)

5. Let it sit in the pan for 10 minutes then invert onto rack to cool. Serve warm or totally cooled with more granache.

Receipe feedback

By happy accident, my choc bar was only 180g so I topped up with what I thought was meltable choc chips. They turned out to be caramel chips and the result is amazing!

Thankfully I had also cut the sugar otherwise it would be too sweet.

In the end, it was a bit on the sweet side (imagine if I hadn't remove the sugar!) but not cloyingly sweet.

The texture was very fudgey chewy with slight papery crispy top, overall similar to brownie.

I honestly think maybe 6 to 7 inch cake is enough because it's so rich otherwise, it will take a long time for 2 ppl to finish!

Friday, November 22, 2024

Polo bun topping comparison recipes

Rotiboy style

Mexican mocha Brioche bun in KA (makes 6): xiaochuniang. Bread flour brioche. Topping 1tsp instant coffee dissolve in 20ml warm water. Cream 60g butter, 50g icing sugar and pinch salt. Add coffee in several batches. Add 30g beaten egg. Fold in 70g cake flour and 5g cocoa. Pipe on the topping. Note smooth and rough sides, roll ⅓ dough into a ball then wrap ⅔ dough over the ball. This keeps the ball tall rather than flattening out when proofing.

Coffee bun by hand (makes 6): Delicious day Bread flour brioche. Uses 36g or 3tbsp butter, 36g sugar, pinch salt, 28g/half egg, 4tbsp/42g bread flour, 2g instant coffee, 1tbsp/6g warm water. Pipe on.

Coffee toast with melty centre (makes 4 portions): Jun & Tonic. 8 slices sandwich bread, ½C/100g sugar, ½C/120g salted butter, 1 egg + 1egg (eggwash), 5g/1tbsp instant coffee, 1 tsp vanilla, 15ml/1tbsp hot water, 120g/1C flour, pinch salt. Eggwash the sides of 1 slices (near the crusts). Put the slices of butter (not included in the ½C) in the middle of bread. Lay other slice to cover. Mix the other ingredients with whisk and spready on top side. Bake 180deg C for 12 - 15 mins.

Coffee topping on ready-made bun with choc chip filling (makes 6): yoon noong: uses ready made bread and pipe on. Stuff choc chips in bread. Can't get topping recipe as text obscured.

Coffee bun by Kirbyyy (5 slices bread): 1 tbsp instant coffee + 1 tbsp hot water, 4-5 tbsp butter, 1 egg, ½C powdered sugar, ½C flour. Slice bread in half and butter (not included in ingredients). Cover the remaining half slice. Pipe on. Airfry 180 deg C for 10 mins.

Coffee topping on normal white bread slices (makes 2): Lenardy: 60g butter, 50g icing sugar, 1 egg, 2 tsp instant coffee powder mixed with ½ tsbp hot water and dissolved; 70g flour => pipe over 4 slices of bread

HK style

HK style by hand: Ali's kitchen Brioche Bread flour. Milk powder with plain flour to make cookie

HK polo bao in mixer (in cantonese) with butter inside: Anchor Sarah reel Brioche Bread flour. Need to keep the bun dough cold (below 28 deg C). Change from dough hook to scraper beater (because bowl is cold). Cookie dough topping has to be rolled out and pasted on top.

Soft milk bread using sponge method with bread flour (makes 9 buns) by Miki Food and she adds red bean filling topped up with what she calls souffle milk topping which is creaming sugar and butter but no flour added. Unfortunately the recipe is very brief and method isn't very clearly articulated so doesn't say to pipe on the topping or to roll it out (which is very difficult!)

Saturday, July 27, 2024

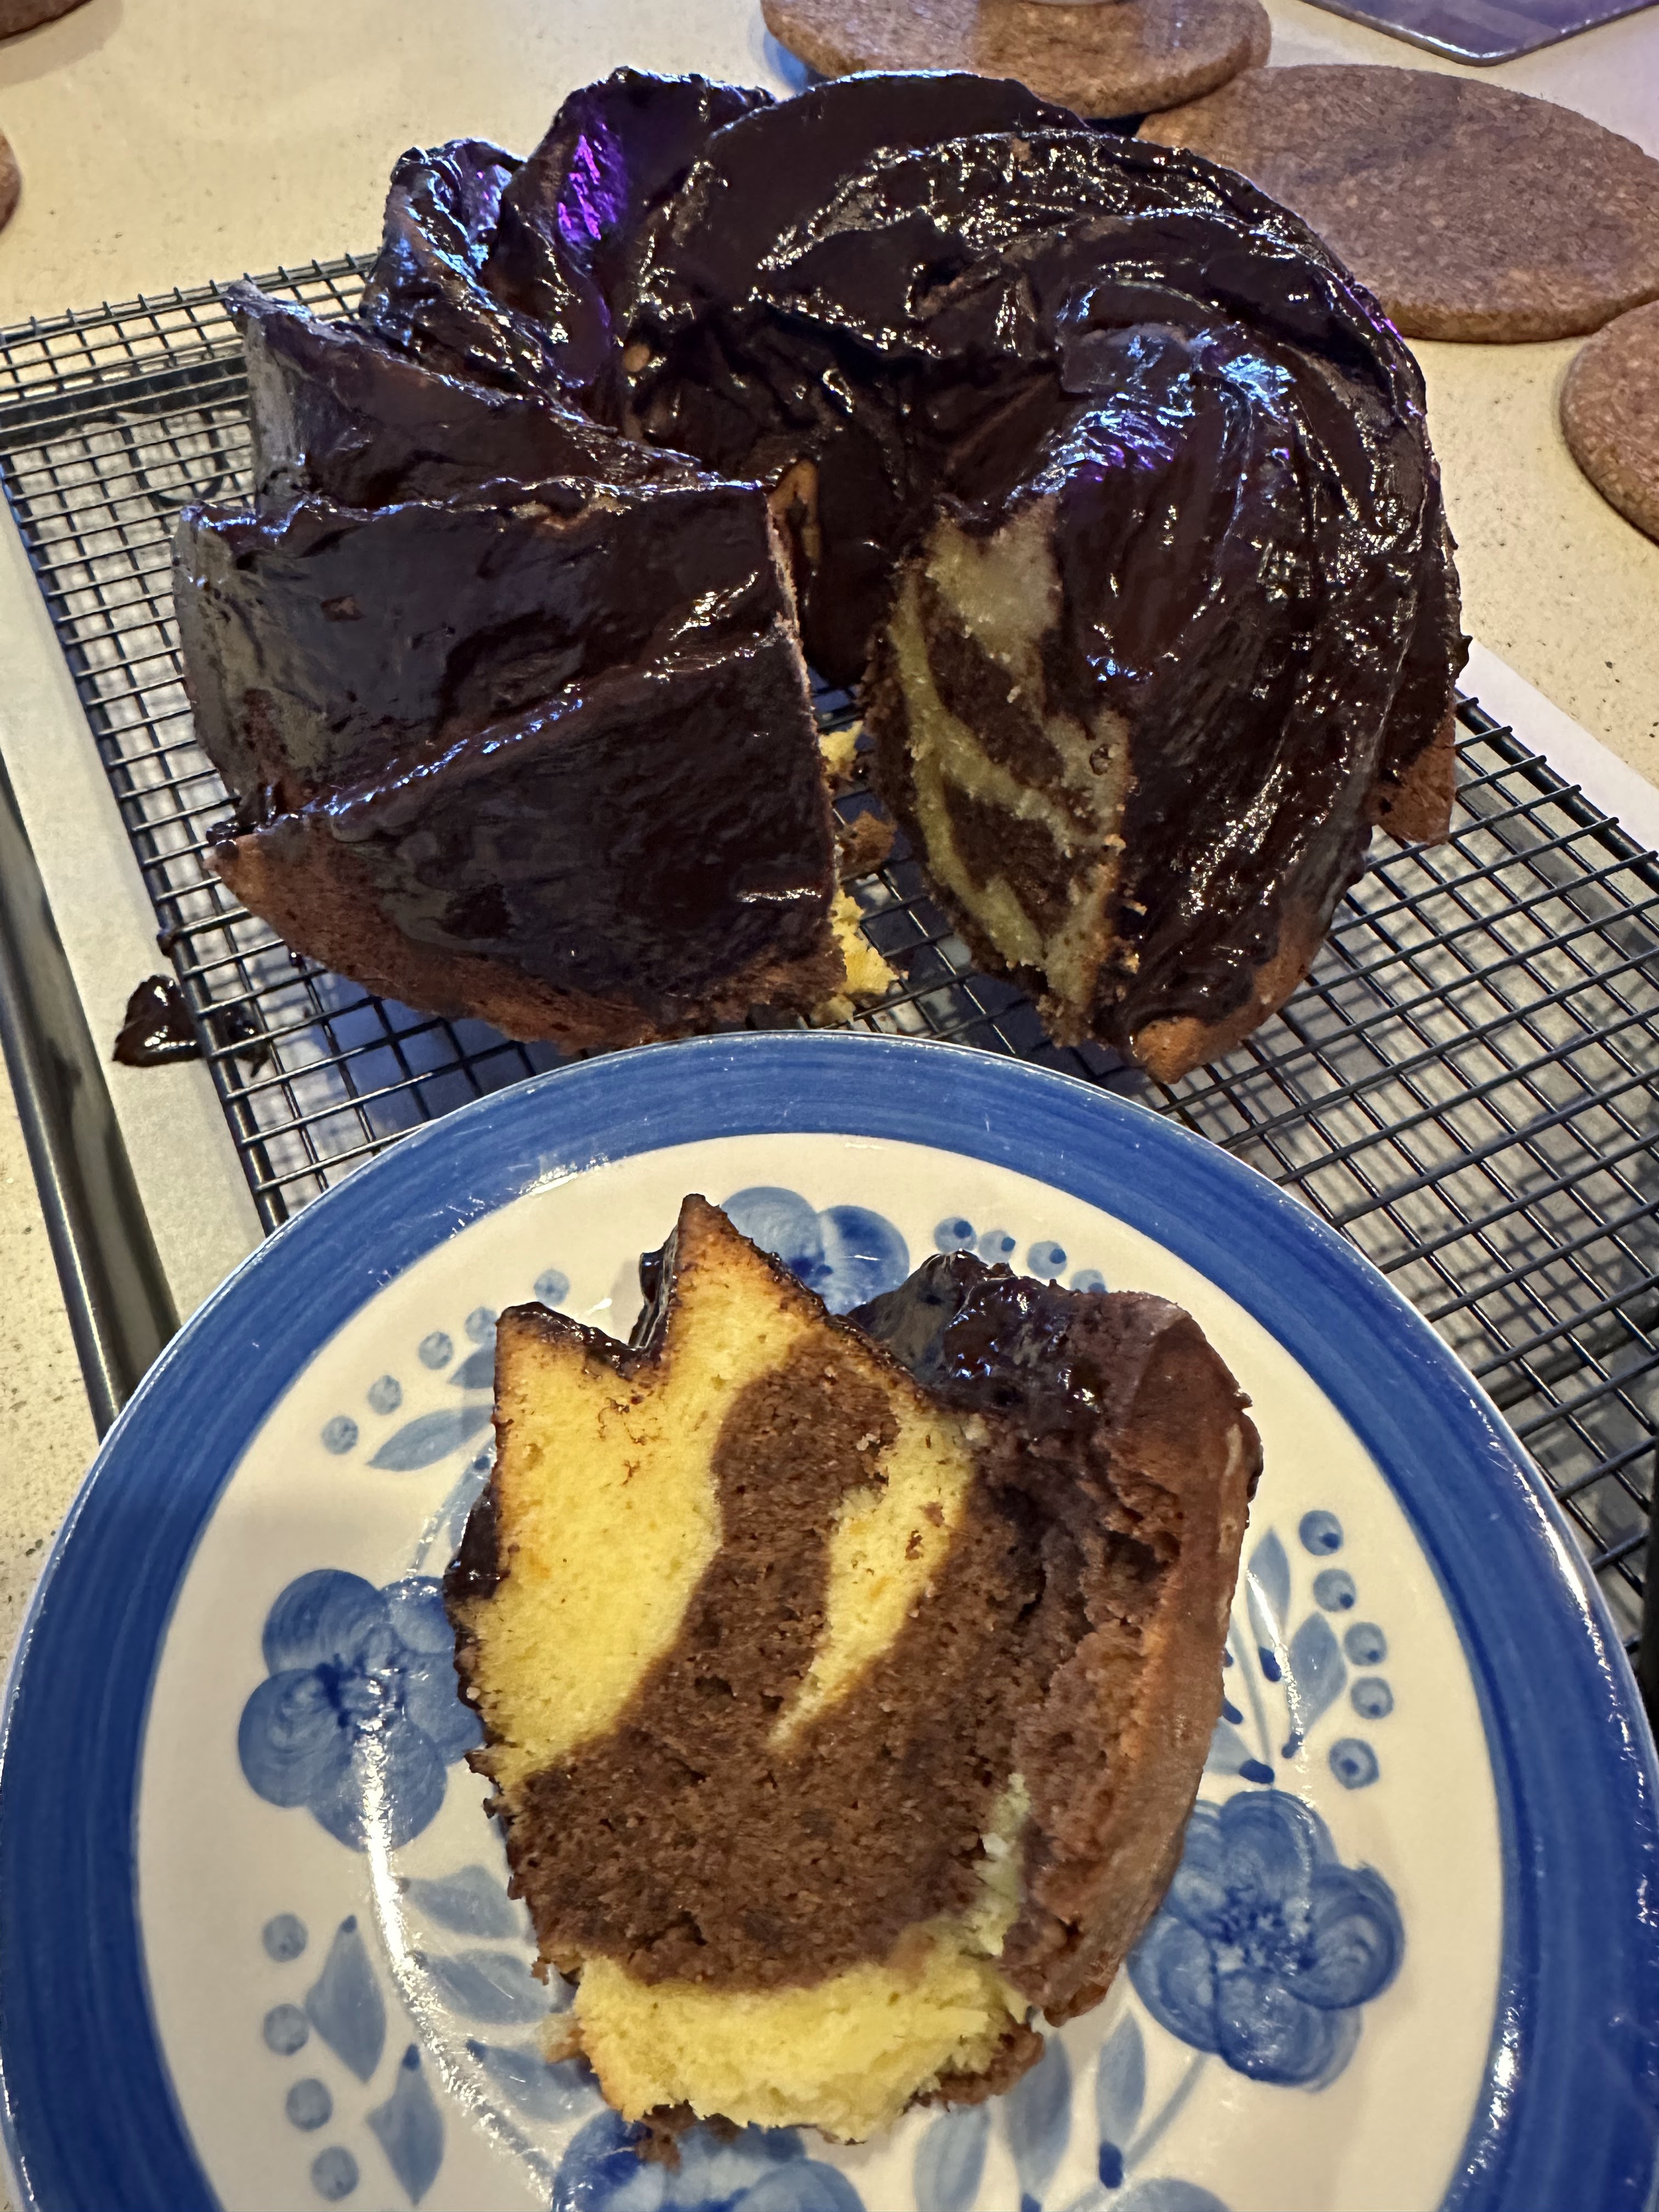
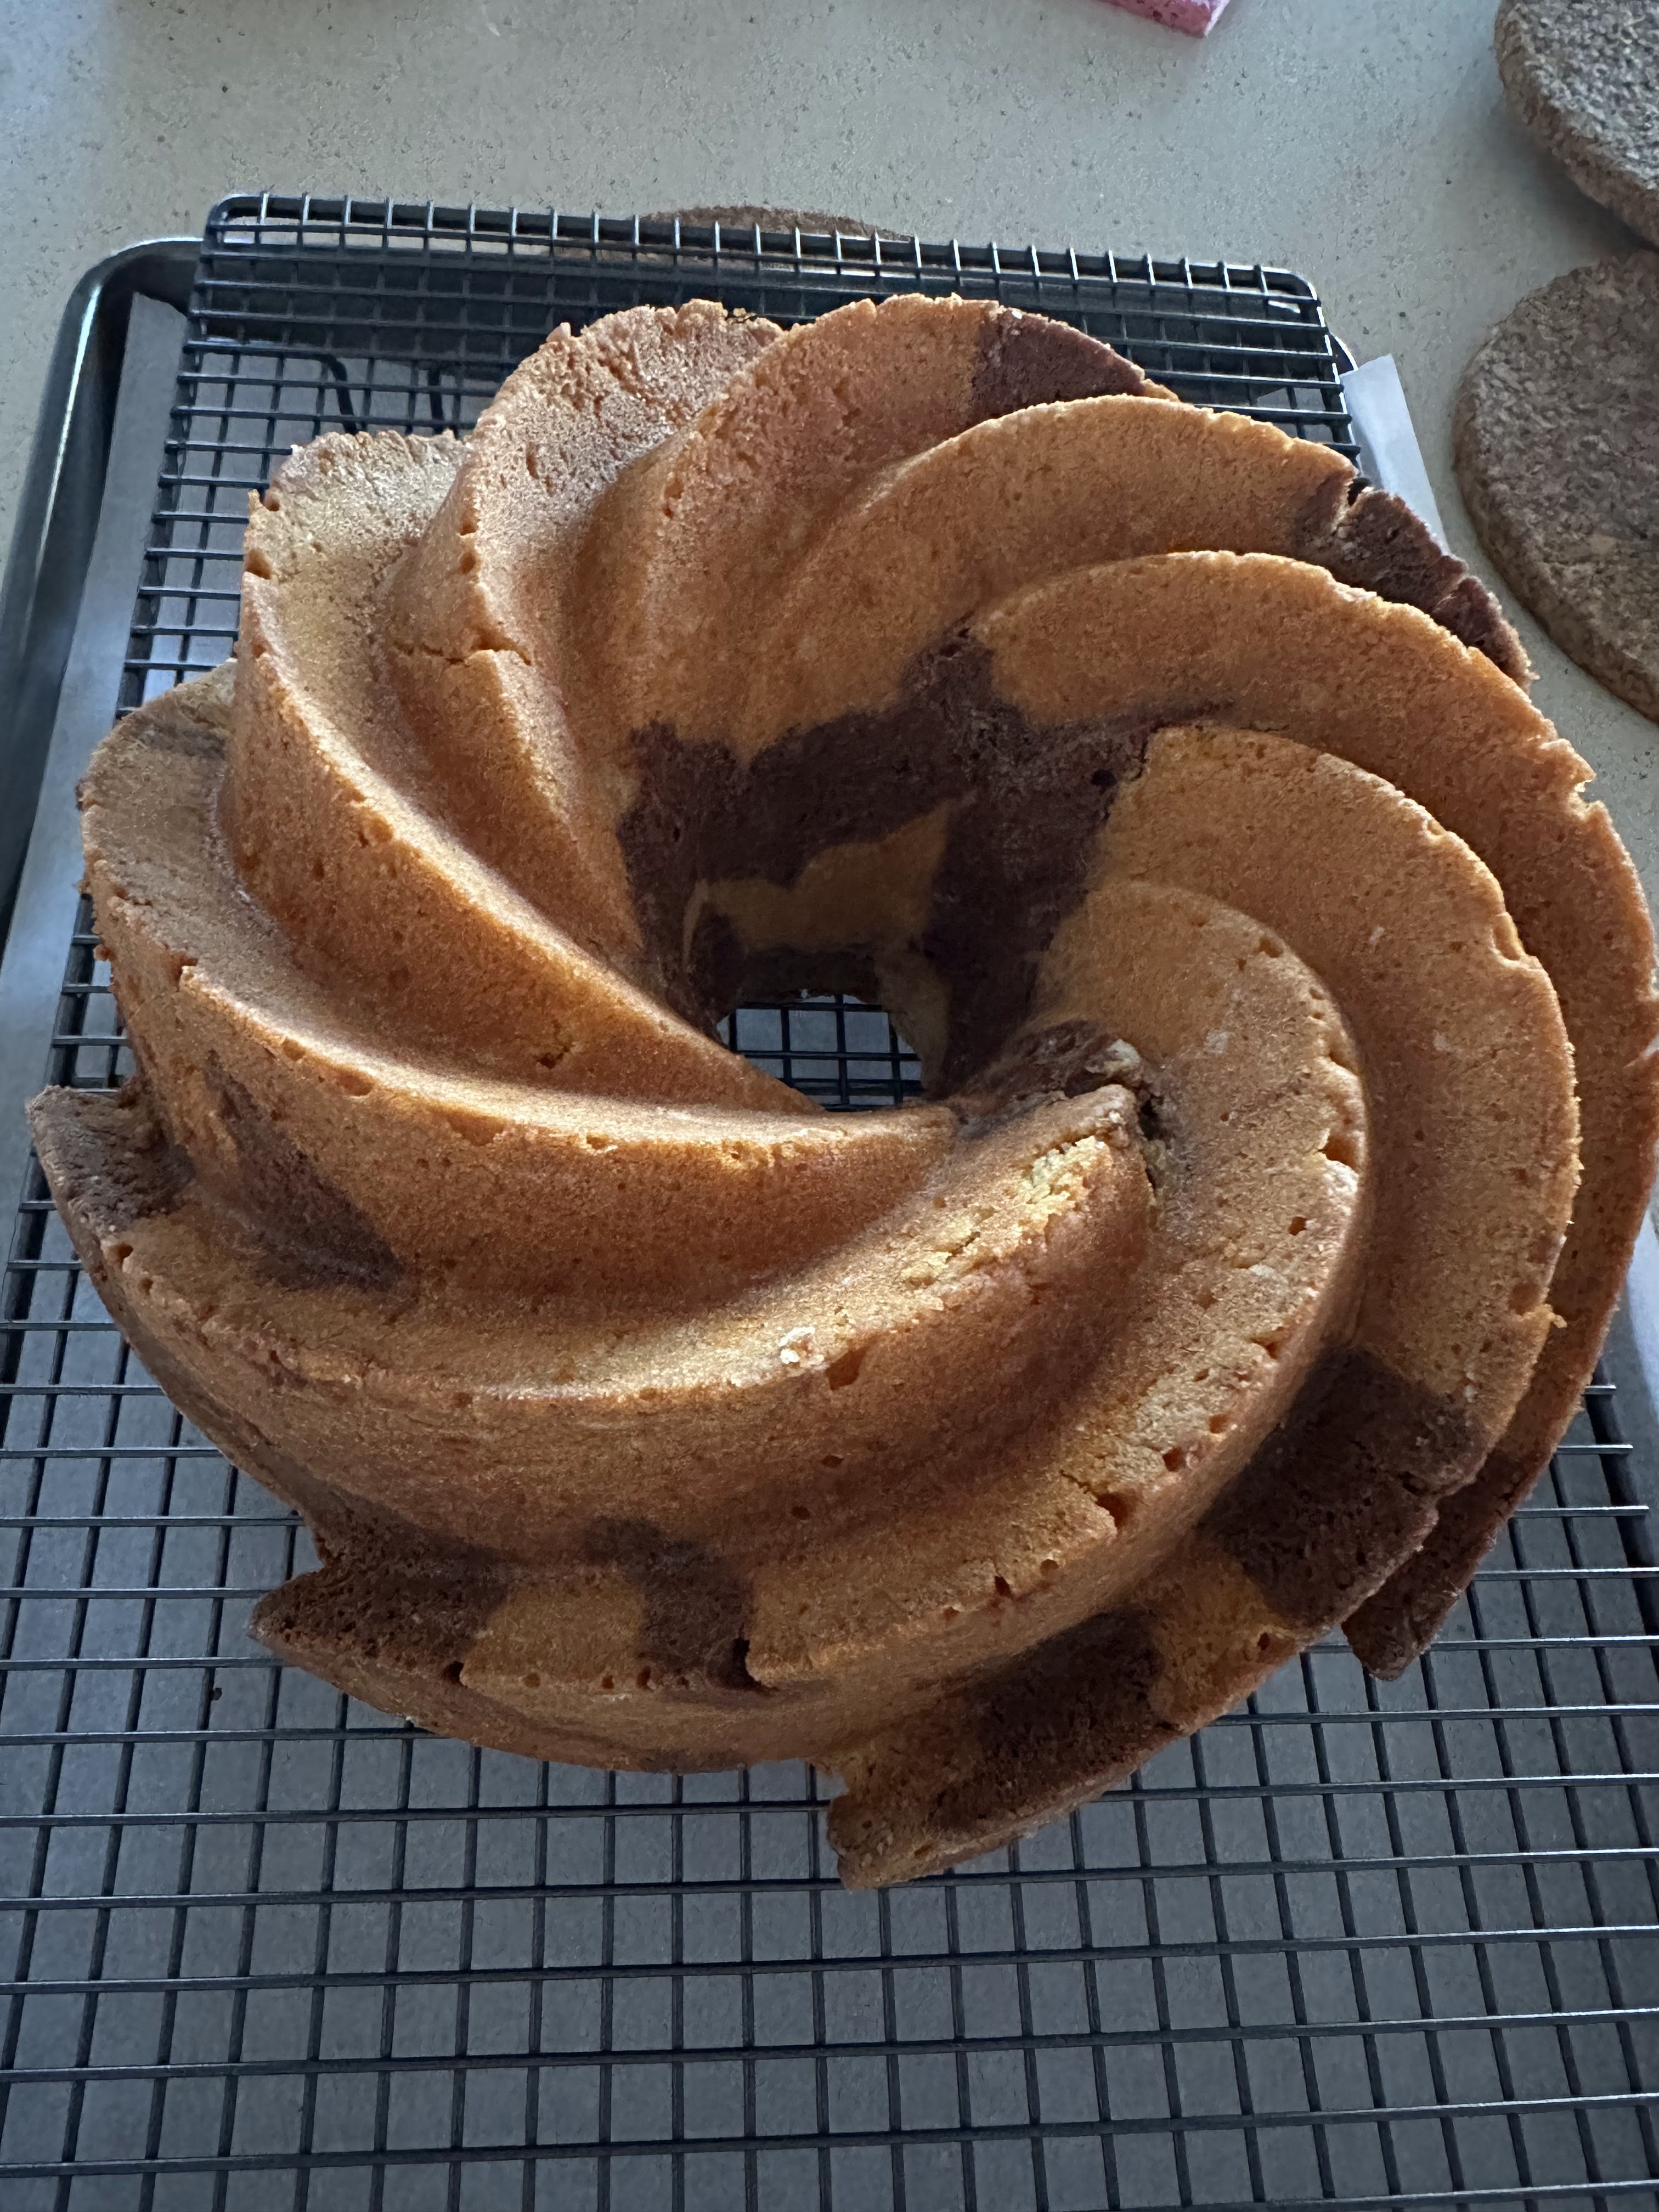
Orange chocolate marble bundt

When I was reading up on this, there are two kinds of orange chocolate cakes. There is the Jeffa cake, which combines the chocolate and orange. The one I want has to split up orange and chocolate components, because I want to taste them differently. So I chose the marble cake from Pies and Tacos. But I do want a granache glaze so I used Smitten Kitchen's recipe which was to suit a 10C bundt cake.


Ingredients (recipe is for 12C but I've downgraded to 10C for my bundt)

398g flour

27g cocoa powder

15g baking powder

¼ tsp salt

236g butter, softened

416g sugar

4 eggs

1¼ tbsp orange zest

1.46 C orange juice  

Glaze

1 tbsp butter

1 tsp orange zest

2 tbsp orange juice

¾ sugar OR

Granache (from Smitten Kitchen)

225g semisweet choc chips or chopped choc

120ml (½C) heavy cream


Method

1. Grease bundt.

2. Divide flour into 2 bowls (approx 199g per bowl). Add half of baking powder (7.5g). Add half of the salt (ie about ⅛ tsp).

3. Add cocoa powder to just one bowl. 

4. Sift both bowls (separately of course).

5. Cream butter in stand mixer for 2 minutes. Add sugar gradually and keep creaming for 2 - 3 mins until pale and fluffy.

6. Add eggs one at a time and ensure each is fully incorporated before adding the next. Scrape down after each addition.

7. Add orange zest and mix to combine.

8. Weigh cake batter and divide into 2 bowls. Divide orange juice. 0.8C (slightly more than ¾C) for orange batter. Remainder for chocolate batter.

9. Work in each bowl separately. Sift dry ingredients in each bowl.

a. To orange batter, add 0.8C orange juice. Sift in the dry ingredients and whisk to fold in. To avoid curdling, start with flour, then juice. Alternate flour and juice and fold after each addition. Start and end with flour.

b. To the chocolate batter, add remainder of orange juice. Sift in the dry ingredients. Similar to above, start and end with flour by alternating dry, wet, dry until all the ingredients have been used up.

10. To assemble, pour ⅓ of orange batter at the bottom. Top with ½ of choc batter. Top with ⅓ of orange batter. Pour on remaining half of the choc batter. Finish with remaining orange batter.

11. Bake at 175 deg C for 60 minutes (recipe said 40 to 50 minutes, that was so wrong!) Tent if top becomes too brown. Cake is ready when toothpick inserted comes out clean. Cake should spring back when you touch the top with your finger.

12. Remove from oven and allow to cool in pan for 10 minutes over a rack.

13. Make the glaze or granache. If using granache, cake has to be completely cool before pouring on the granache.

14. To make the glaze: put in a small saucepan and combine until sugar is melted.

15. To make the granache, add hot (not boiling) cream to the choc. Allow to stand for 3 minutes before stirring with a metal spoon only!

16. Unmold the cake after 10 minutes in the pan (not too much longer or the cake will stick to the pan) and flip onto the cake rack. If using glaze, brush on the glaze. If using the granache, allow cake to totally cool before pouring on. Only cut the cake when the cake is cool.


Feedback
- The receipe called for 40 to 50 min baking time but I tried inserting a skewer at 45 minutes (totally wet!), 52 minutes (still somewhat wet) and at 60 minutes, it was finally dry and as the recipe said, when I pressed a finger down on top, it sprung back up. However, the 'fins' of the bundt have become crusty. Next day, it turns soft but overall, the cake is dry esp the formerly crusty outside bits. 
Possible solutions:
- Perhaps instead of glazing with granache, I will use the orange glaze to add a bit of moisture to the fins.
- Placing a cookie sheet underneath? My bundt is golden so probably it cooks faster than inside. Also, possibly lowering the temp and cooking longer.
- Feedback on granache: this recipe means the choc isn't very flowly and will slowly dribble down the side. Nice consistency for glazing and piping on. However, next day in the fridge, it is very hard - scrapeable with a spoon but not margarine spreadable. Maybe more like butter consistency?
- After doubling the amount of cream, it is too flowly to use as glaze but next day in the fridge, it becomes margarine spreadable.

Saturday, July 08, 2023

Dark chocolate pear and walnut bundt

I have been craving a pear and walnut chocolate cake, don't ask me why. The caveat was that I needed to use my bundt so after looking around, I settled on this recipe by Sugar Love & Spices for Ciambella dark choc, walnut and pear cake. (no video - I wish there was because I don't know if I'm doing it wrong!)

Ingredients

100g milk

60g dark chocolate, chopped

125g sugar

3 eggs

120g butter, room temp

135g flour

30g cocoa

Pinch of salt

¼ tsp cinnamon

Pinch of cardomon (optional but I had it)

4g (1 tsp) baking powder

70g walnut, toasted and chopped

1 pear, peeled and cubed


Method

1. Prepare the bundt tin by oiling and flouring or covering with goop. I took the extra step of sifting on cocoa powder.

1. In a small pot, heat the milk and sugar until dissolved. 

2. Add the chopped chocolate and mix until dissolved. Do not let the mixture boil. Set aside to cool slightly.

3. Add the eggs one at a time and whisk to incorporate.

4. In a bowl, mix the dry powered ingredients: flour, cocoa, salt, cinnamon, cardomon, and baking powder. Mix well and set aside.

5. In a KA bowl, beat the butter until pale and fluffy. Scrape down.

6. Drizzle in the chocolate mixture at the side of the bowl slowly. Beat. The mixture will be clumpy and appear to seize up, do not panic.

7. Add the flour mixture 3 or 4 tbsp at a time and beat in at Speed 2. Once the flour has been mixed in, turn up to between Speed 4 to 6 but do not overbeat.

8. Fold in the chopped walnut and pear. The batter will be quite thick, like muffin mixture.

9. Spoon in the mixture and make sure to push the batter to the sides rather than near the funnel (otherwise the cake tends to peak in the centre). Bang the ban on a (protected) countertop to dispel air bubbles.

10. Bake for 180 deg C for 35 to 45 minutes. (mine took 34 because the oven temp was quite constant today but even then it was probably a bit over-cooked. 32 might have been enough)

11. Let the cake cool in the tin for at least 15 to 20 minutes. Then, put a serving plate tightly over the cake tin and invert. The cake should slide out easily if you prepared the tin correctly!

12. Store outside the fridge in an airtight container for up to 3 days.

Recipe feedback

- This yields a smaller cake than the previous chocolate bundt. It is not sweet but feels very dry even fresh out of the oven.

- The liquid goop (microwaved till runny) dusted with cocoa was a good idea in terms of looks.

- The batter was more muffin-like so it was very holey compared to the previous cake. However, nothing a dusting of powdered sugar can't solve!

- The cake tastes best the next day when it's less crusty and dry straight out of the oven. It stayed moist up to 2 days after, kept at room temp. I put a cup of water in with the cake in the airtight box and it really helped the cake stay moist!

Saturday, July 01, 2023

Mocha bundt with walnuts

This is the base recipe by King Arthur which I adapted because I wanted to use up my walnuts. No KA needed.

Ingredients

Cake

1 C (227g) coffee

227g butter, room temp

¾ C (64g) cocoa (dutch processed or natural)

2 C (397g) sugar

¾ tsp baking powder

⅓ tsp baking soda

¾ tsp salt

2 C (240g) flour

2 tsp vanilla extract

2 large eggs, room temp

½ C (113g) sour cream or yoghurt, room temp

Glaze

⅓ C (113g) chocolate chopped or semi-sweet chips [weight measurements seem wrong, double check]

¼ C (57g) heavy or whipping cream [weight measurements seem wrong, double check]

½ C toasted walnuts, roughly chopped

Straight out of the tin

Drizzle on granache

After painting with granache in poor light

After painting with granache in good light

After cutting off the broken bits

Method

1. Prepare a bundt pan with goop.

2. Put coffee, butter and cocoa in a pan and whisk until butter melts. Alternatively, use a microwave. Set aside to cool.

3. Put sugar, baking powder, baking soda, salt, and flour and mix well. 

4. Toss the walnuts in the flour mixture to coat well.

5. Pour the chocolate mixture into the dry ingredients and mix well.

6. In a separate bowl, whisk eggs, vanilla, sour cream/yoghurt. 

7. Pour in the chocolate batter and mix well. 

8. Spoon batter into the prepared bundt pan to prevent air bubbles. Lightly tap on the countertop to dispel air bubbles. Fill the bundt to about ⅔ way or about 1¼ inch from the top. Use a spatula to spread the batter so that sides are higher than center. DO NOT OVERFILL. Pour the excess into cupcake liners.

9. Place on lower oven rack. Bake for 50 to 55 minutes at 175 deg C (I needed the full 55 minutes because the oven went down to 180 then down to 150) until long toothpick comes out clean, start checking about 8 minutes before total time. (Check dark pans around 40 mins). Leave in tin for 10 minutes before the inverting out onto a baking rack. Allow to cool completely.

10. Make the glaze. Heat up cream in pan on medium heat or in microwave bowl. Cream should be bubbling along the edge. DO NOT BOIL.

11. Pour the cream over the chocolate (in a heatsafe bowl) and let sit. DO NOT TOUCH. Then after 5 minutes, use a metal spoon only, stir from the edges to the middle until chocolate melts. Cool for 15 minutes to thicken to pouring consistency. 

12. Put the cake rack over a pan to catch dripping chocolate. Spoon the granache over the cake and let it drip down the sides. 

Recipe feedback: 

- The sugar seems like A LOT but it's necessary because of the chocolate, coffee, and sour cream. Do not reduce by more than 20 g.

- The goop was very obvious with the floury streaks. It looked better after I painted it with granache using a pastry brush.

- The fins were very crunchy straight out of the tin. A bit dry in fact but the rest of the cake was ok, very moist.

- Do not keep in the fridge overnight, it becomes dry and hard.

- The glaze weight measurements seem wrong, may need double checking. In the end I used ⅔ C choc chips and ½ C double cream otherwise there is insufficient cream to melt the choc.

Tuesday, December 28, 2021

Chocolate castella cake

Since this post that compares the different type of castella cakes, I have tried the standard recipe here. It came out mostly successful but the bottom was gummy. Y suggested that it was because my oil hadn't been heated up high enough, and I think it was because I didn't follow the steps correctly. 

I was making halfway when the electricity went out and so stalled after the flour had been beaten into the yolk. Luckily no ill effect.


That was a recipe for 7 eggs in a 8" square pan. I looked around and most other recipes were either 5 or 6 eggs in the same size and shape pan. I decided to adapt 3 recipes for this attempt, mostly based on how spongey the final product looked in the video. The methods were mostly the same except one added the egg yolks before milk, another added the milk before the yolks, and a third didn't even have any yolks. The baking temps and timings were mostly consistent at 150 deg C but I thought I'd increase by another 2 minutes given my experience with uncooked bottom the last time.

Sources: Laura's Kitchen, Apron, and Table Diary. This recipe largely follows the ingredients from Apron but the methods from Laura's Kitchen and Table Diary.


Ingredients (20cm or 8 inch square tin)

6 eggs, separated

70ml oil

28g cocoa powder

60g cake flour

90ml fresh milk, fridge cold

½ tsp vanilla

¼ tsp salt

75g sugar

splash of lemon juice

Method

1. Separate the eggs when cold. If possible, put the egg whites back into the fridge to chill.

2. Prepare the tin by lining outside with aluminium foil and the inside with parchment.

3. Bring the oil up to between 70 to 80 deg C. I found that heating it for about 1 minute on high already brought it up to 100 deg C (!) so heat on low fire for approx a minute and check with a thermometer. Don't guess cos you won't guess correctly!

4. Sift the flour, cocoa powder, and salt into the oil. Mix well with a spatula.

5. Add half of the cold mix and mix, follow by the other half. Ensure no lumps remain. The mixture may be claggy at this point, that's normal.

6. Add one egg yolk at a time and combine well. At the end of the all the yolks, the mixture should be silky smooth. Set aside.

7. At speed 2, beat the egg whites with lemon juice until foamy. Add the sugar in 3 batches and turn up to speed 4. Once all the sugar has been added, increase the speed to between 6 to 8. Just before it reaches soft peaks stage, turn down to speed and beat for 1 minute to remove the big air bubbles.

8. Add ⅓ of the meringue into the chocolate batter. You can be rather rough and not worry about the air as  the point at this stage is to lighten the chocolate batter and to mix it well. 

9. Add the next ⅓ of the meringue and use either a whisk or spatula to fold well, taking slightly more care not to knock out all the air.

10. Pour the batter back into the remaining ⅓ of meringue and this time, slowly but carefully fold until no more white streaks remain.

11. Pour into the prepared tin. Drop the tin onto the countertop from about 5 cm heigh to knock out the air bubbles.

12. Place the tin into a larger tin, and pour hot water into the larger tin. (I didn't bother with this step because I had put the larger tin and room temp water in the tin to pre-heat in the oven, and sat a rack on the larger tin. So when the oven was sufficiently hot, I put the smaller tin on top of the rack of the larger tin) Ensure that your foil is above the water line so that no water goes into the cake tin.

13. Bake at 150 deg C for 62 minutes. Remove from oven and de-pan. Remove the parchment. Allow to cool down before carving.

Recipe feedback: 

- I could do with another say 10g of sugar as it wasn't as sweet as I'd like, but this is a Korean recipe and maybe they're less into sweet stuff? Who knows. I chose this recipe because it had the lower amount of sugar compared to the rest so I should have expected this. But I can live without the additional sugar.

- The recipe is perfect! The additional 2 minutes just EXACTLY dried out the cake without making it dry.


Monday, October 05, 2020

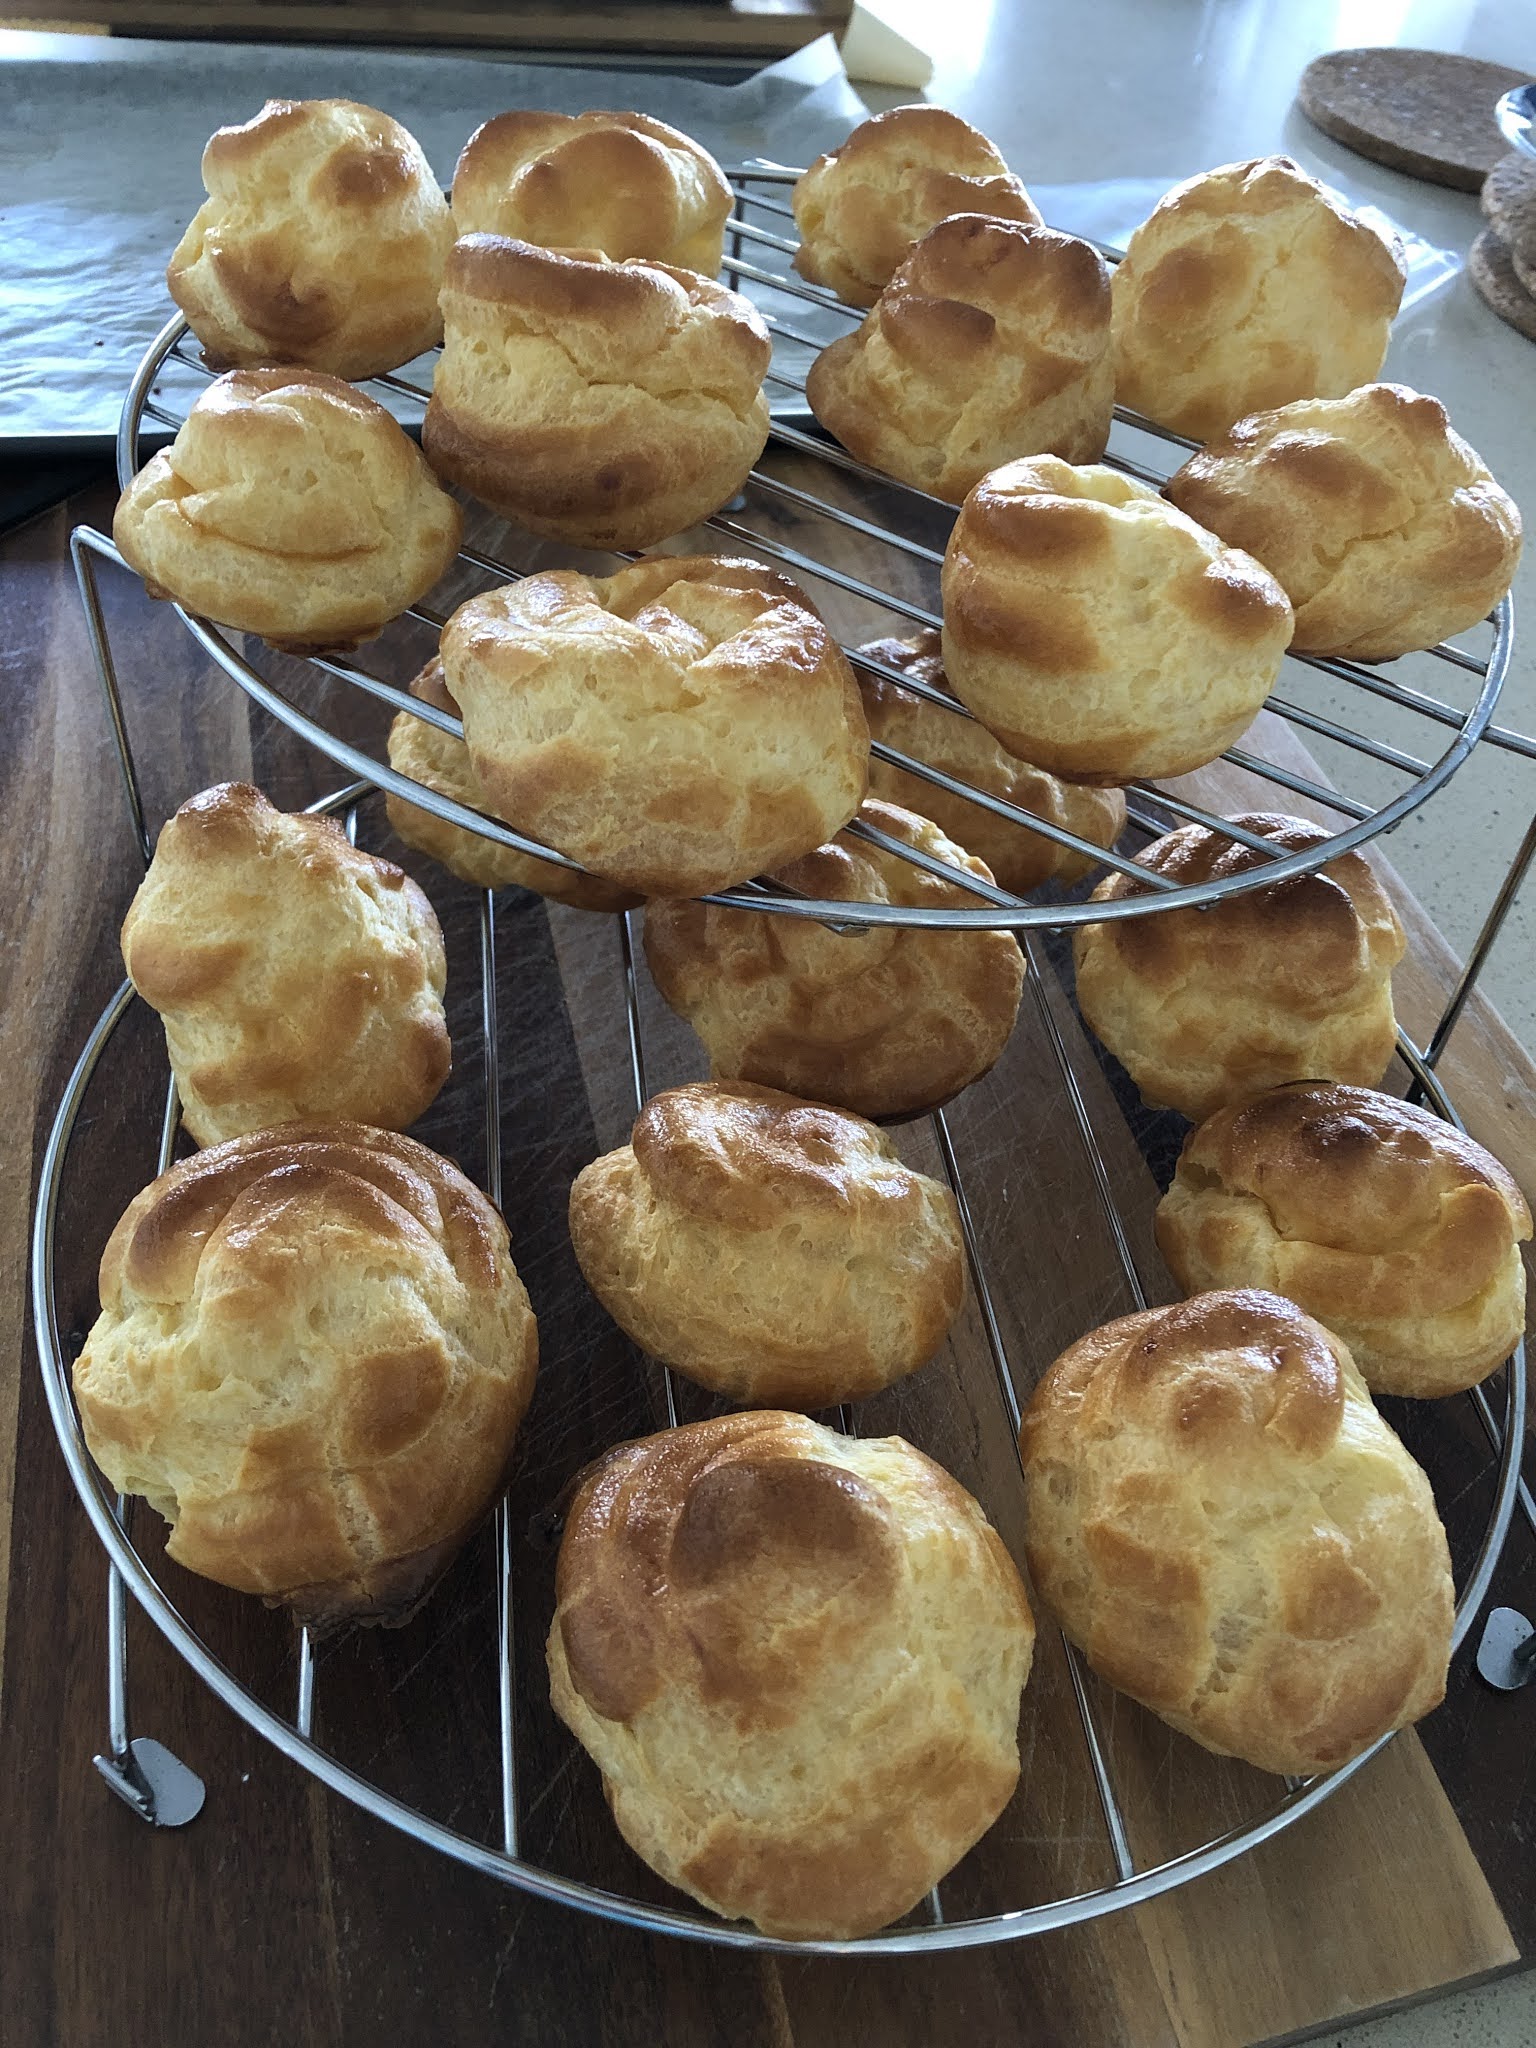
Custard cream puff

Retried the profiterole recipe from here with an improved custard using custard powder.

Ingredients (Makes 23 to 27 puffs, each one and a half inch wide by half inch tall cream puffs)

Cream puffs

½ C water

½ C whole milk

½ C (118g) butter or 8 tbsp

¼ tsp salt

1 C flour

4 large eggs, room temp, beaten

Splash of milk (for glaze)

Custard 

5 tbsp Foster Clark's custard powder 

500ml milk

2 to 3 tbsp sugar (to taste)

Method

Make the Choux pastry

1. Combine the water and milk in a pot with the butter. Melt the butter and bring to a gentle simmer (very small bubbles appear at the edge of the pot).

2. Remove from the stove and add the flour. Using a whisk if preferred (I found it helped but was really difficult to wash), add all the flour at once and stir until well combined.

3. Return to the stove and press down the batter onto the bottom of the pot to cook off the raw flour taste. Cook for about 2 to 3 minutes until a film forms at the bottom of the pot. Remove from the heat and allow to cool.

4. Beat the eggs in a Pyrex measuring jug. While the dough has cooled slightly, drizzle the egg a bit at a time into the dough and stir well with a wooden spoon. It will start off as a curd and split but continue beating. A KitchenAid can be used at this point but I didn't bother due to the washing up. Pour on as much egg as needed to make a thick ribbon when the spoon is lifted. Leave a few teaspoons behind to glaze the puffs.

5. Spoon into a piping bag and use a ½" round tip. 

6. I pre-prepared my parchment by drawing 1½" rounds on the wrong side of the parchment and then turned it right side up and placed it on the cookie sheet. Ensure there is space between each for them to grow.

7. Using the drawn guides, pipe 1½" wide by 1" tall. Use a moistened finger to pat down the tips of any piped batter and to smoothen the tops if necessary. Sprinkle the rest of the water onto the parchment around the puffs. This will give it the steam to give the puffs a sudden lift.

8. With the leftover beaten egg, add a splash of milk and brush the tops of the puffs.

9. Bake at 200 deg C for 10 minutes, then turn down to 170 deg C and bake for a further 20 to 22 minutes until golden brown. Do not open the oven door ever or the puffs will collapse.

10. Once it has finished baking, turn off the oven and open the door ajar. Leave the puffs inside for 10 to 15 minutes to cool slightly and dry out.

11. Remove from the oven and remove each puff to a cooling rack to cool completely. To test if completely cooked, break one apart and it should be dry and hollow inside, not cakey and spongey. It is better to over-bake than underbake.

12. Make the custard as per instructions on the box. Cool completely in the fridge. (Easier to make this the day before)

13. Assemble puff by cutting a hole at the side of each puff or cutting off the top. Then either pipe or fill the puff with a teaspoon. Serve immediately with strawberries and dusting of icing sugar if required.

Profiteroles

Topped with 1 bar of cooking chocolate, melted over a bain marie


Sunday, August 23, 2020

Chocolate ganache Profiteroles

I have been wanting to make this for a very long time. Based on the recipes and tips from here, essentially Natasha and Sally's whose recipe ingredients are identical, and the methods of all three Natasha, Sally, and Gemma (essential for NOT using the KitchenAid). I had made classic cream puffs with my mom during my childhood but we had always filled them with Bird's custard. Unfortunately, I have only seen it in the supermarkets here once and now can't find it when I need it. At a pinch, I used custard pouring cream but thickened with tapioca starch (because corn starch whilst used for desserts, also separates in the fridge). That proved to be a bad idea because it was gloopy and almost slimey rather than thick, creamy and luscious, and it flowed out everywhere. The texture does improve in the fridge so maybe that was the trick.

Ingredients (Makes 22 to 28 puffs, each one and a half inch wide by half inch tall cream puffs)

Cream puffs

½ C water (120ml)

½ C whole milk (120ml)

½ C (118g) butter or 8 tbsp

¼ tsp salt

1 C flour

4 large eggs, room temp, beaten

Splash of milk (for glaze)

Custard (used in this recipe but I wouldn't re-use this in the future)

300ml pouring custard from Paul's

4 tbsp tapioca starch

4 tbsp water or enough to create a slurry

Chocolate ganache

150ml double cream

150g baking chocolate bar or good quality chocolate chips (I used melting chips from Nestle)


Method

Make the Choux pastry

1. Combine the water and milk in a pot with the butter. Melt the butter and bring to a gentle simmer (very small bubbles appear at the edge of the pot).

2. Remove from the stove and add the flour. Using a whisk if preferred (I found it helped but was really difficult to wash), add all the flour at once and stir until well combined.

3. Return to the stove and press down the batter onto the bottom of the pot to cook off the raw flour taste. Cook for about 2 to 3 minutes until a film forms at the bottom of the pot. Remove from the heat and allow to cool.

4. Beat the eggs in a Pyrex measuring jug. While the dough has cooled slightly, drizzle the egg a bit at a time into the dough and stir well with a wooden spoon. It will start off as a curd and split but continue beating. A KitchenAid can be used at this point but I didn't bother due to the washing up. Pour on as much egg as needed to make a thick ribbon when the spoon is lifted. Leave a few teaspoons behind to glaze the puffs.

5. Spoon into a piping bag and use a ½" round tip. 

6. I pre-prepared my parchment by drawing 1½" rounds on the wrong side of the parchment and then turned it right side up and placed it on the cookie sheet. Ensure there is space between each for them to grow.

7. Using the drawn guides, pipe 1½" wide by 1" tall. Use a moistened finger to pat down the tips of any piped batter and to smoothen the tops if necessary. Sprinkle the rest of the water onto the parchment around the puffs. This will give it the steam to give the puffs a sudden lift.

8. With the leftover beaten egg, add a splash of milk and brush the tops of the puffs.

9. Bake at 200 deg C for 10 minutes, then turn down to 170 deg C and bake for a further 20 to 22 minutes until golden brown. Do not open the oven door ever or the puffs will collapse.

10. Remove from the oven and remove each puff to a cooling rack to cool completely. To test if completely cooked, break one apart and it should be dry and hollow inside, not cakey and spongey. It is better to over-bake than underbake.


Make the Custard (this can be made a day ahead and chilled)

1. Pour the pouring custard into a pot and bring to a gentle simmer (never a boil).

2. Turn off the heat and add the stir. Stir well until combined. If preferred, sieve to remove any lumpy batter.

3. Place a cling film directly onto the surface of the custard and allow to cool before eventually cooling in the fridge. It must cool in the fridge otherwise the custard is slimey and not even spoonable into the puff casings.

Updated: Using custard powder

Make the Ganache

1. While the puffs are cooling, prepare the ganache. Chop the chocolate into tiny pieces, the tinier the better. Place the chocolate pieces into a Pyrex or metal bowl (never plastic).

2. Warm up the double cream. Bring to a simmer (small bubbles at the edge of the pot). Never boil. 

3. Remove from the heat and immediately pour onto the chopped chocolate. Allow to stand for around to  2 to 5 minutes.

4. Using a metal spoon, start from the centre and stir, gently stirring outwards until well combined. It should be slightly runny. Allow to cool for 15 minutes and it should thicken up into a pouring consistency.

Assembling the profiterole

1. While the ganache is cooling, cut holes into the sides of the puffs with a small but sharp knife.

2. Pipe in the custard until the puff is full (you'll feel a bit of pressure on the piping tip). Use a butter knife to remove any excess. 

3. When all the profiteroles have been filled, invert each puff and drip the tops into the ganache. Set on the wire rack to drip off. You probably want something to catch all the drips under the wire rack, it will get VERY messy!

4. They can be eaten served with strawberries and whipped cream but are best chilled for at least 4 hours (for the custard and ganache to set) and eaten then. 

Monday, May 04, 2020

Chocolate madeleines

Followed the same recipe and method as last time https://simmetra.blogspot.com/2019/05/cake-like-matcha-madeleines.html except I baked for 15 minutes this time (higher followed by lower temp).

Ingredients (makes 20)
113g butter, melted and brought to room temp + 2 tbsp melted butter for coating (28g)
⅔ C sugar (133g; can be reduced to 130g)
1 C flour (120g)
1 tsp baking powder
1 tbsp cocoa powder
Pinch of salt
1 tbsp milk, at room temp
2 large eggs, at room temp

Method
1) Take eggs and milk out of the fridge and let them come to room temp. Melt the butter and allow to cool to room temp. 
2) Combine the sugar and egg. Whisk until pale and fluffy.
3) Sieve the flour, baking powder, salt, and cocoa powder until well combined. Sift twice or three times if necessary. Sift into the egg mixture and fold carefully to avoid knocking out the air. I used the whisk to fold the flour in.
4) Add the milk and carefully blend.
5) Add in half of the melted butter and blend, and continue adding slowly and blending carefully.
6) Cover with cling film and put in the fridge to rest for more than 30 but up to 60 minutes otherwise the butter hardens. 
7) While waiting for the batter to chill, preheat the oven to 180 deg C. Brush the moulds with plenty of melted butter. Dusting with sifted of flour is not necessary as it can get claggy.
8) Fill each mould about ⅔ full, with 1 level tbsp of batter (using the measuring spoon). No need to smoothen out the top as it will spread out and flatten.
9) Bake at 177 deg C (no higher as it can burn on the outside but leave the inside raw). Baking time is 13 minutes, although watch carefully in the last 2 minutes or it can burn.
10) Use a fork to release each and leave to cool on a cooking rack. Alternatively, invert the entire madeleine tin over the cooling rack.
11) Leave to cool slightly for 3 minutes and eat immediately while the edges are still crispy. It looses its crispiness after 10 minutes (!). Best eaten with 24 hours. Store the cooled remainder in an airtight box at room temp for up to 4 days.

Recipe feedback
- I accidentally let the temperature go up to 220 deg C and then had to bring it down gradually to 170 deg C after 10 minutes, so I swapped the trays and set another 5 minutes to ensure that the insides were cooked. This seems closer to the 190 deg C I've seen some recipes use. When it came out, they were perfect! Still crispy but cooked inside.
 - They looked a bit burnt but that could also be because they're chocolate so it's hard to tell. 
- The hump wasn't very high or rather, they were uneven. Those on the bottom shelf rose higher and more uniformly than those on the top shelf.
- Speaking of chocolate, the taste wasn't strong enough so I might need to put another tbsp of cocoa the next time.
- Next time going to increase the proportions by 1 egg to make a third more.
150g butter, melted and brought to room temp + 3 tbsp melted butter for coating (38g)
177g sugar
160g
1⅓ tsp baking powder
2 tbsp cocoa powder
Pinch of salt
1⅓ tbsp milk, at room temp

3 large eggs, at room temp

Saturday, September 28, 2019

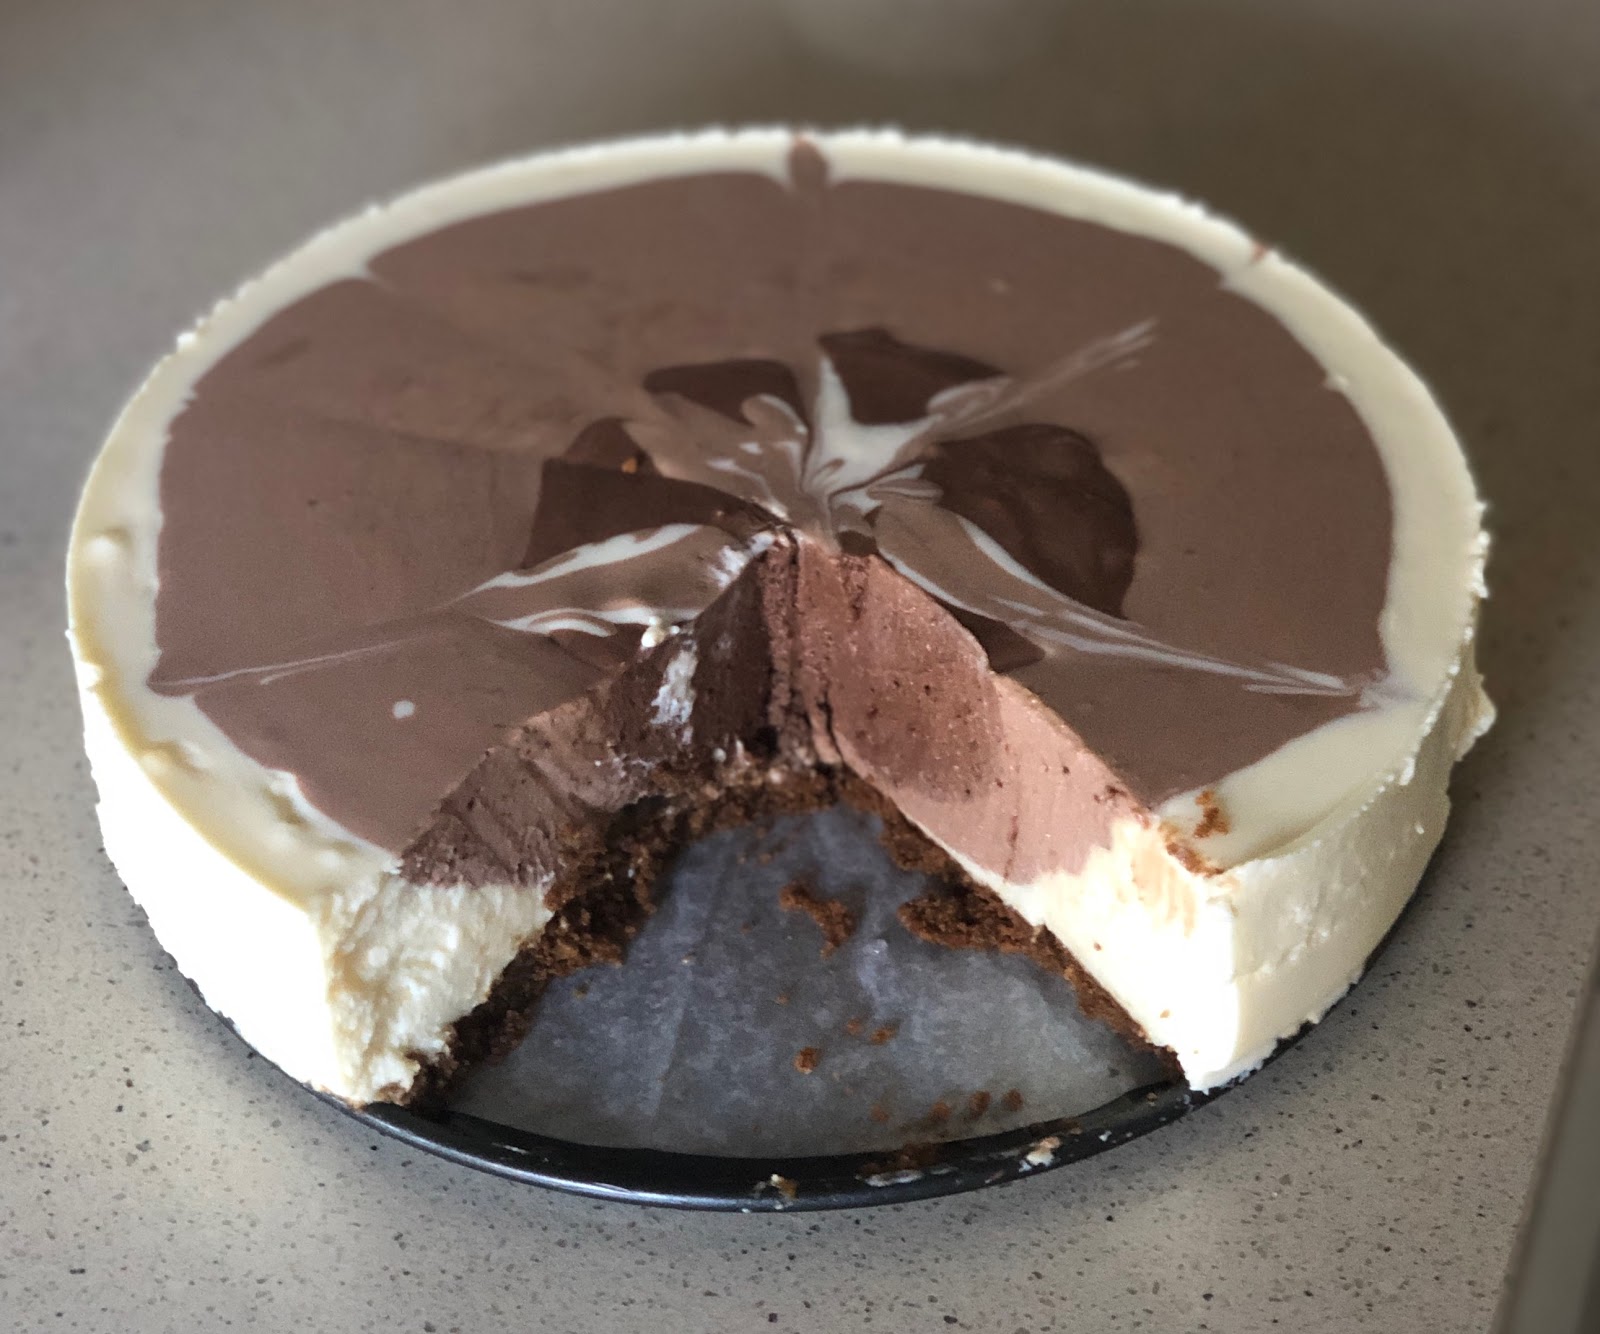
No-bake Chocolate mousse gradient cheesecake

From the first attempt which was the no-bake choc mousse ripple cheesecake, I decided to perfect my technique. I found the proportions in this first version excessive (e.g. 520g of double cream) which is what happens when you use maths. I decided to go with my gut feel and also what's available in the supermarket (e.g., I can buy a 250ml double cream bottle but would have to buy a large 500ml double cream and add 20g from a new packet). The measuring was also too fiddly and while I'm a perfectionist, I can live with less than equi-distant circles.


Ingredients (8 inch round tin)
15 ginger snap biscuits or similar sweet biscuit
2*250g blocks of Philly cream cheese, softened + 4 tbsp powered sugar
75g butter, softened
250ml double cream + 3 tbsp powdered sugar
cold 350ml milk + 4 tbsp powdered sugar
2 tbsp gelatine powder
5 tbsp cocoa powder

Method
1. In a food processor, process the biscuits until a fine crumb forms. Add the butter and chop till it forms the texture of wet sand.
2. To make the cheesecake base, line the bottom of a 8 inch springform tin with parchment. Oil the sides of the tin with butter. Pour in the sandy crumbs and press down with a spatula or the bottom of a glass. Press it in until the layer is flat. Leave in the fridge to firm up.
3. Sprinkle the gelatine powder onto the surface of the cold milk and leave it to bloom.
4. After about 5 minutes, microwave the milk for a minute (until warm to the touch) and whisk in the gelatine until no lumps remain.
5. In a clean food processor bowl, beat the philly with the powdered sugar until smooth. Pour in the milk and pulse until smooth. Pour into a big mixing bowl.
6. In the food processor bowl, beat the double cream with the powdered sugar until textured but not yet stiff. Pour into the cheese mixture and fold in. Set aside.
7. In a smaller mixing bowl, add a few tbsp of the batter and 3 tbsp of cocoa powder. Whisk until smooth and pour in more batter (total should be less than ⅓ of the total batter) until you attain a dark chocolate colour.
8. In a medium mixing bowl, repeat the method with the 2 tbsp of cocoa powder. Pour in the batter, this should be about half of the remaining batter. You would be left with the remaining half of the batter that has no cocoa (i.e. cream colour) in the big bowl. Store the big and medium bowls in the fridge for about 5 minutes to firm up slightly, otherwise the batter is too runny and the pattern will not be distinct.
9. Take the cheesecake base out from the fridge. Pour in the batter from the big bowl onto the base. Return to the fridge to chill for 5 minutes.
Looking much neater than my first attemp. Note how thick the batter in the centre is
10. Carefully pour the batter from the medium bowl from a height (5cm) onto the centre of the colour. This allows the batter to spread and fill slowly.
11. Pour in the final darkest colour in the small bowl. This batter is slightly thicker due to the high concentration of cocoa powder, so ladle it to fill the centre but do so slowly and carefully. Carefully use a palette knife to smoothen the top.
12. Drop the cake tin from a height of 5 cm to dispel big bubbles. If desired, swirl the colours with a palette knife.
After swirling
13. Return to the fridge to chill for at least 4 hours until firm. To unmould, run a knife around the edge of the tin to loosen from the side. (I forgot and the cake tore trying trying to dislodge itself from the tin!) To serve, use a cold knife and wipe the blade with a damp cloth after each cut.

Sunday, July 21, 2019

Black forest swiss roll

I adapted from the coffee swiss roll by Yochana and my adaptation was spot on!

Ingredients
5 eggs, at room temperature
90g sugar (do not reduce this amount)
30g cocoa powder
70g plain flour
pinch of salt
65g corn oil or melted butter (I use oil)

Filling
150ml double cream
¼ cup icing sugar (do not reduce this amount)
1 cup drained canned and pitted cherries

Topping
100ml double cream
4 tbsp icing sugar
Drained cherries for deco

The toppings cover the cracks in the cake
Method
1. Take out the eggs and bring them to room temperature.
2. Prepare the pan by lining it with parchment.
3. Beat the eggs with sugar until pale and foamy, until the ribbon stage. It should triple in volume.
4. Add the oil in batches and also mix until incorporated.
5. Fold in sifted cocoa powder, flour, and salt.
6. Pour into the pan and flatten with spatula. Ensure that fills the corners of the pan. Drop from a height to dispel the bubbles.
7. Bake at 180 deg C for 18 to 20 minutes until the top springs back when touched.
8. Once out of the oven, immediately take the cake out of the tin and let it cool on a wire rack for 5 minutes.
The top. The skin got stuck to the paper and peeled off. Oh no!
9. Place a clean baking paper on another larger baking tray. Invert the cake onto the baking tray and remove the backing of the cake. Let it cool further on a wire rack.
10. Once cool enough to handle (about 5 minutes), roll the cake up as tight as you can (but be careful not to crack the cake!) using the baking paper to assist. Cover with a cloth and leave to cool completely.
11. While waiting for the cake to cool, beat the double cream with the icing sugar until stiff peaks.
Cracks on the side from being very heavy handed with the cake
13. When the cake is completely cool, unroll it. Cut off 1.5 cm at a diagonal on one of the short ends. This will help the cake to form a nice seam. Spread on the cream thinly with an offset spatula. Place the drained cherries to only the first quarter of the cake (the side you begin rolling). If you put too much fruit, it becomes very hard to roll. Re-roll the cake. Make sure that it is resting on the seam.
Decorated
14. Wrap the cake in the baking paper and then wrap over with cling film. Let it cool and rest in the fridge on its seam, for a minimum of 1 hour or best overnight.
Everything looks nice after a clean up!
15. While chilling, make the topping. Just before serving, pour on the whipping cream for the topping and decorate with cherries. Serve immediately!

Recipe feedback
- Considering I adapted this recipe from the coffee swiss roll, it was great! It was very moist but a bit crumbly and this showed when I tried to roll it. The top skin of the cake stuck to the parchment when I had inverted it onto the baking try to remove the backing. I had to turn it back so that the bottom of the cake was showing on the outside.
- I had forgotten to add sugar to the filling cream and it would have gone really well against the sourness of the cherries. But overall, satisfied!

Updated: This cherry swiss roll has an interesting way of placing the cherries to roll up.
https://www.anncoojournal.com/cherry-swiss-roll-cake/?fbclid=IwAR1c2Bn5ROhI8EZbTWM4Dq4Thj1QgWWgCnMi0BncgteVN3QQwvQ_z30LseY

Saturday, November 17, 2018

No-bake Chocolate mousse ripple cheesecake

I have been looking at marbling effects in cakes recently. After my last less than successful cheesecake zebra effect, I decided to try again. Given the hot weather, I didn't feel like slaving in front of a beater and hot oven, so settled for these recipes that call for gelatine. I shortlisted two recipes: one uses matcha (https://www.youtube.com/watch?v=4WSoP6X7_Z8&app=desktop - has video) and another uses chocolate (https://tasty.co/recipe/chocolate-ripple-cheesecake - has video). Both create a very uniform ripple or monochromatic effect. However, the matcha one is only for a 6 inch cake and uses a cake base which I'm reluctant to spend the time baking. The choc one uses a 9 inch pan but uses 4 blocks of cream cheese, which is way too much (and fatty!) for 2 people to finish.

I decided to upsize the matcha cheesecake to a 8 or 9" (using maths) but to use cocoa powder and a biscuit base instead. So here is my amalgamation of these two recipes and also borrowing from the base from Nigella's no-bake cherry cheesecake.

Ingredients (for 8" pan)
Base
125g sweet biscuits (about 24 biscuits e.g. oreo with cream removed, ginger snap, digestives, milk biscuits)
75g softened or melted butter
Mousse filling
6 sheets gelatine, cut into smaller pieces and soaked in cold water
approx tbsp cocoa powder
380g milk
210g sugar
520g double cream
2 boxes of 250g cream cheese (room temp)

Bowl 1: 5 tsp + 180g mouse
Bowl 2: 4 tsp + 240g mousse
Bowl 3: 3 tsp + 300g mousse
Bowl 4:  1.5 tsp + 300g mousse
Bowl 5: 360g mousse or remainder

Method
1) Crush the biscuits either in a food processor or in a bag and then bashed with a rolling pin. Add the softened to melted butter and incorporate well.
2) Grease a biscuit tin. Pour crushed biscuits into the tin and flatten the bottom with a flat surface. Push the mixture up the sides. Place in the fridge to harden while working on the filling.
3) Prepare 4 bowls. Pour in cocoa powder and 2 to 3 tsp of water. Proportions above.
4) Microwave the milk until hot but do not boil. Remove gelatine sheets and squeeze out extra water. Add to the scalded milk. Mix to dissolve.
5) Add the sugar and stir until incorporated.
6) In Bowl 5, cube the cheese cheese. Pour part of the milk mixture and mix well. Add the remaining milk mixture and mix until incorporated. If required, sieve the mixture to remove lumps.
7) Beat the double cream (I used Bowl 4) until the surface is textured.
8) Add beaten double cream to the milk-cheese mixture in Bowl 5 and fold in.
9) In separate bowls, mix the paste for each bowl. Pour in the mousse into each bowl (use a kitchen scale) and fold in to incorporate. Bowl 5 has the remainder.
10) Remove the cake pan from the fridge. Starting with Bowl 5, pour in the centre from a height so that it forms a nice circle shape and spreads to the sides. Next, carefully pour Bowl 4 (second greatest volume of mousse and lightest colour) in the centre from a height. Repeat with Bowls 3, 2, 1 in that order (decreasing volumes of mousse and increasing darkness in colour).
11) Cover and leave to cool in the fridge for at least 4 hours or best overnight.
12) To unmould, run a spatula around the edge and test with a finger to ensure that it has detached from the ring. Also use a hairdryer to heat up the rim would help.
13) Serve with more whipped cream. Keep the uncut cake in the fridge or it will melt.
Recipe feedback - updates incorporated above
I made several mistakes.
1. I way under-estimated the gelatine and it turned out too watery so when I poured it on, the colours all blended into each other.
2. Trying to save a bowl for washing up, I decided to beat the cream cheese, sugar, and lastly the double cream all in the processor. Not beating the double cream separately and then folding in the cream cheese seemed to make a difference because once I added in the milk, all hell broke loose when it all became a sloppy messy. (The chocolate ripple recipe beat everything together but on deeper inspection, now I realise that recipe has no milk.)
Try 1 - Colors merged
Try 1 - All messed up inside
Try 1 - Cross section. The white is more distinct because I waited 5 minutes before pouring the first brown but didn't wait thereafter.
3. The colours were not distinct enough and I had to top up each colour with additional cocoa. This made it all lumpy. Even though I used a sieve when pouring in, each color was still speckled.
4. I only used 1 carton of cream cheese which made for a very short 1.5inch cake. I have doubled to 2 boxes of cream cheese.

Updated: A much simpler recipe: https://simmetra.blogspot.com/2019/09/no-bake-chocolate-mousse-gradient.html