Showing posts with label glutinous rice. Show all posts

Saturday, February 28, 2026

Claypot glutinous rice

I have cooked both regular rice in claypot with lapcheong as well as glutinous rice with lapcheong using the Claypot function in my rice cooker. Both recipes work really well after a lot of research, trial and error. However, now I want to up the ante and cook glutinous rice in the claypot! I am avoiding adding raw meat (eg chicken) as that only increases the complexity - I want to prefect the rice portion first.

Easiest recipe and method by Leonard Lee where he cooks the raw chicken separately in a wok vs slightly more involved recipe where he cooks the chicken in the claypot. Both recipes use raw chicken but I will just use thinly sliced raw pork and lap cheong.


A bit too scorched?

Ingredients

4 small C or 3 big C glutinous rice (soaked for at least 3 to 4 hrs)

2.6C water (roughly 1C rice: 0.6C water)

30g rice wine

1 tsp sesame oil

300g meat (eg sliced chicken highs)

6 - 8 rehydrated shitake mushrooms, sliced

15g dried shrimp

minced garlic

Garnishing: 1-2 tsp sesame oil, sliced spring onions

Sauce

2 tbsp light soya

1.5 tsp sugar

1.5 tsp chicken stock powder

30ml shrimp soaking water

30ml mushroom soaking water

Dash of white pepper

Green leafy eg chai xin or kai lan

Egg (optional)

Method

1. Soak dried shrimps in rice win for 15 mins. Set aside soaking wine liquid.

2. Soak dehydrated mushrooms for 1-2 hrs and slice thinly. Set aside soaking liquid.

3. Optionally, marinade the raw sliced pork. (oyster, dark soya light soya, corn starch, sugar, pepper)

4. Coat bottom with 1 tbsp of lard. Add the drained glutinous rice to claypot. Add the water and 30g of rice wine and 1 tsp sesame oil.

5. Bring to boil over heat. Stir once then turn to medium high and simmer, covered, for 8 (2 smallC) to 12 to 15 mins (3 large C, depending on amount of rice and water). You should see the lid stop 'bubbling' even though it may still be exuding steam.

6. In the mean time, cook the sauce. Then proceed to blanch the veg.

7. Once time is up, turn off the heat. Use chopstick to poke holes in the rice. Add the sliced pork and lap cheong carefully. Cover the lid and pour sesame soil or liquid lard around the rim. Turn the heat back up to high for 5 minutes to cook the raw ingredients. 

8. Once you hear sizzling sounds, it's ready to scorch the rice. To produce the scorched rice, wear mitts and rotate the pot for 5 minutes on high. You will know it's done when you can smell the scorched rice fragrance.

9. Turn off the flame. If using egg, add it now. Cover for 2 minutes. Then serve by adding the sauce. Mix at the table.

Recipe feedback

- Initially I followed the same recipe as using rice (2 small C) and right off the back, could smell the smell of burnt rice! So I've adjusted the recipe to include 4 small C rice or 3C big C.

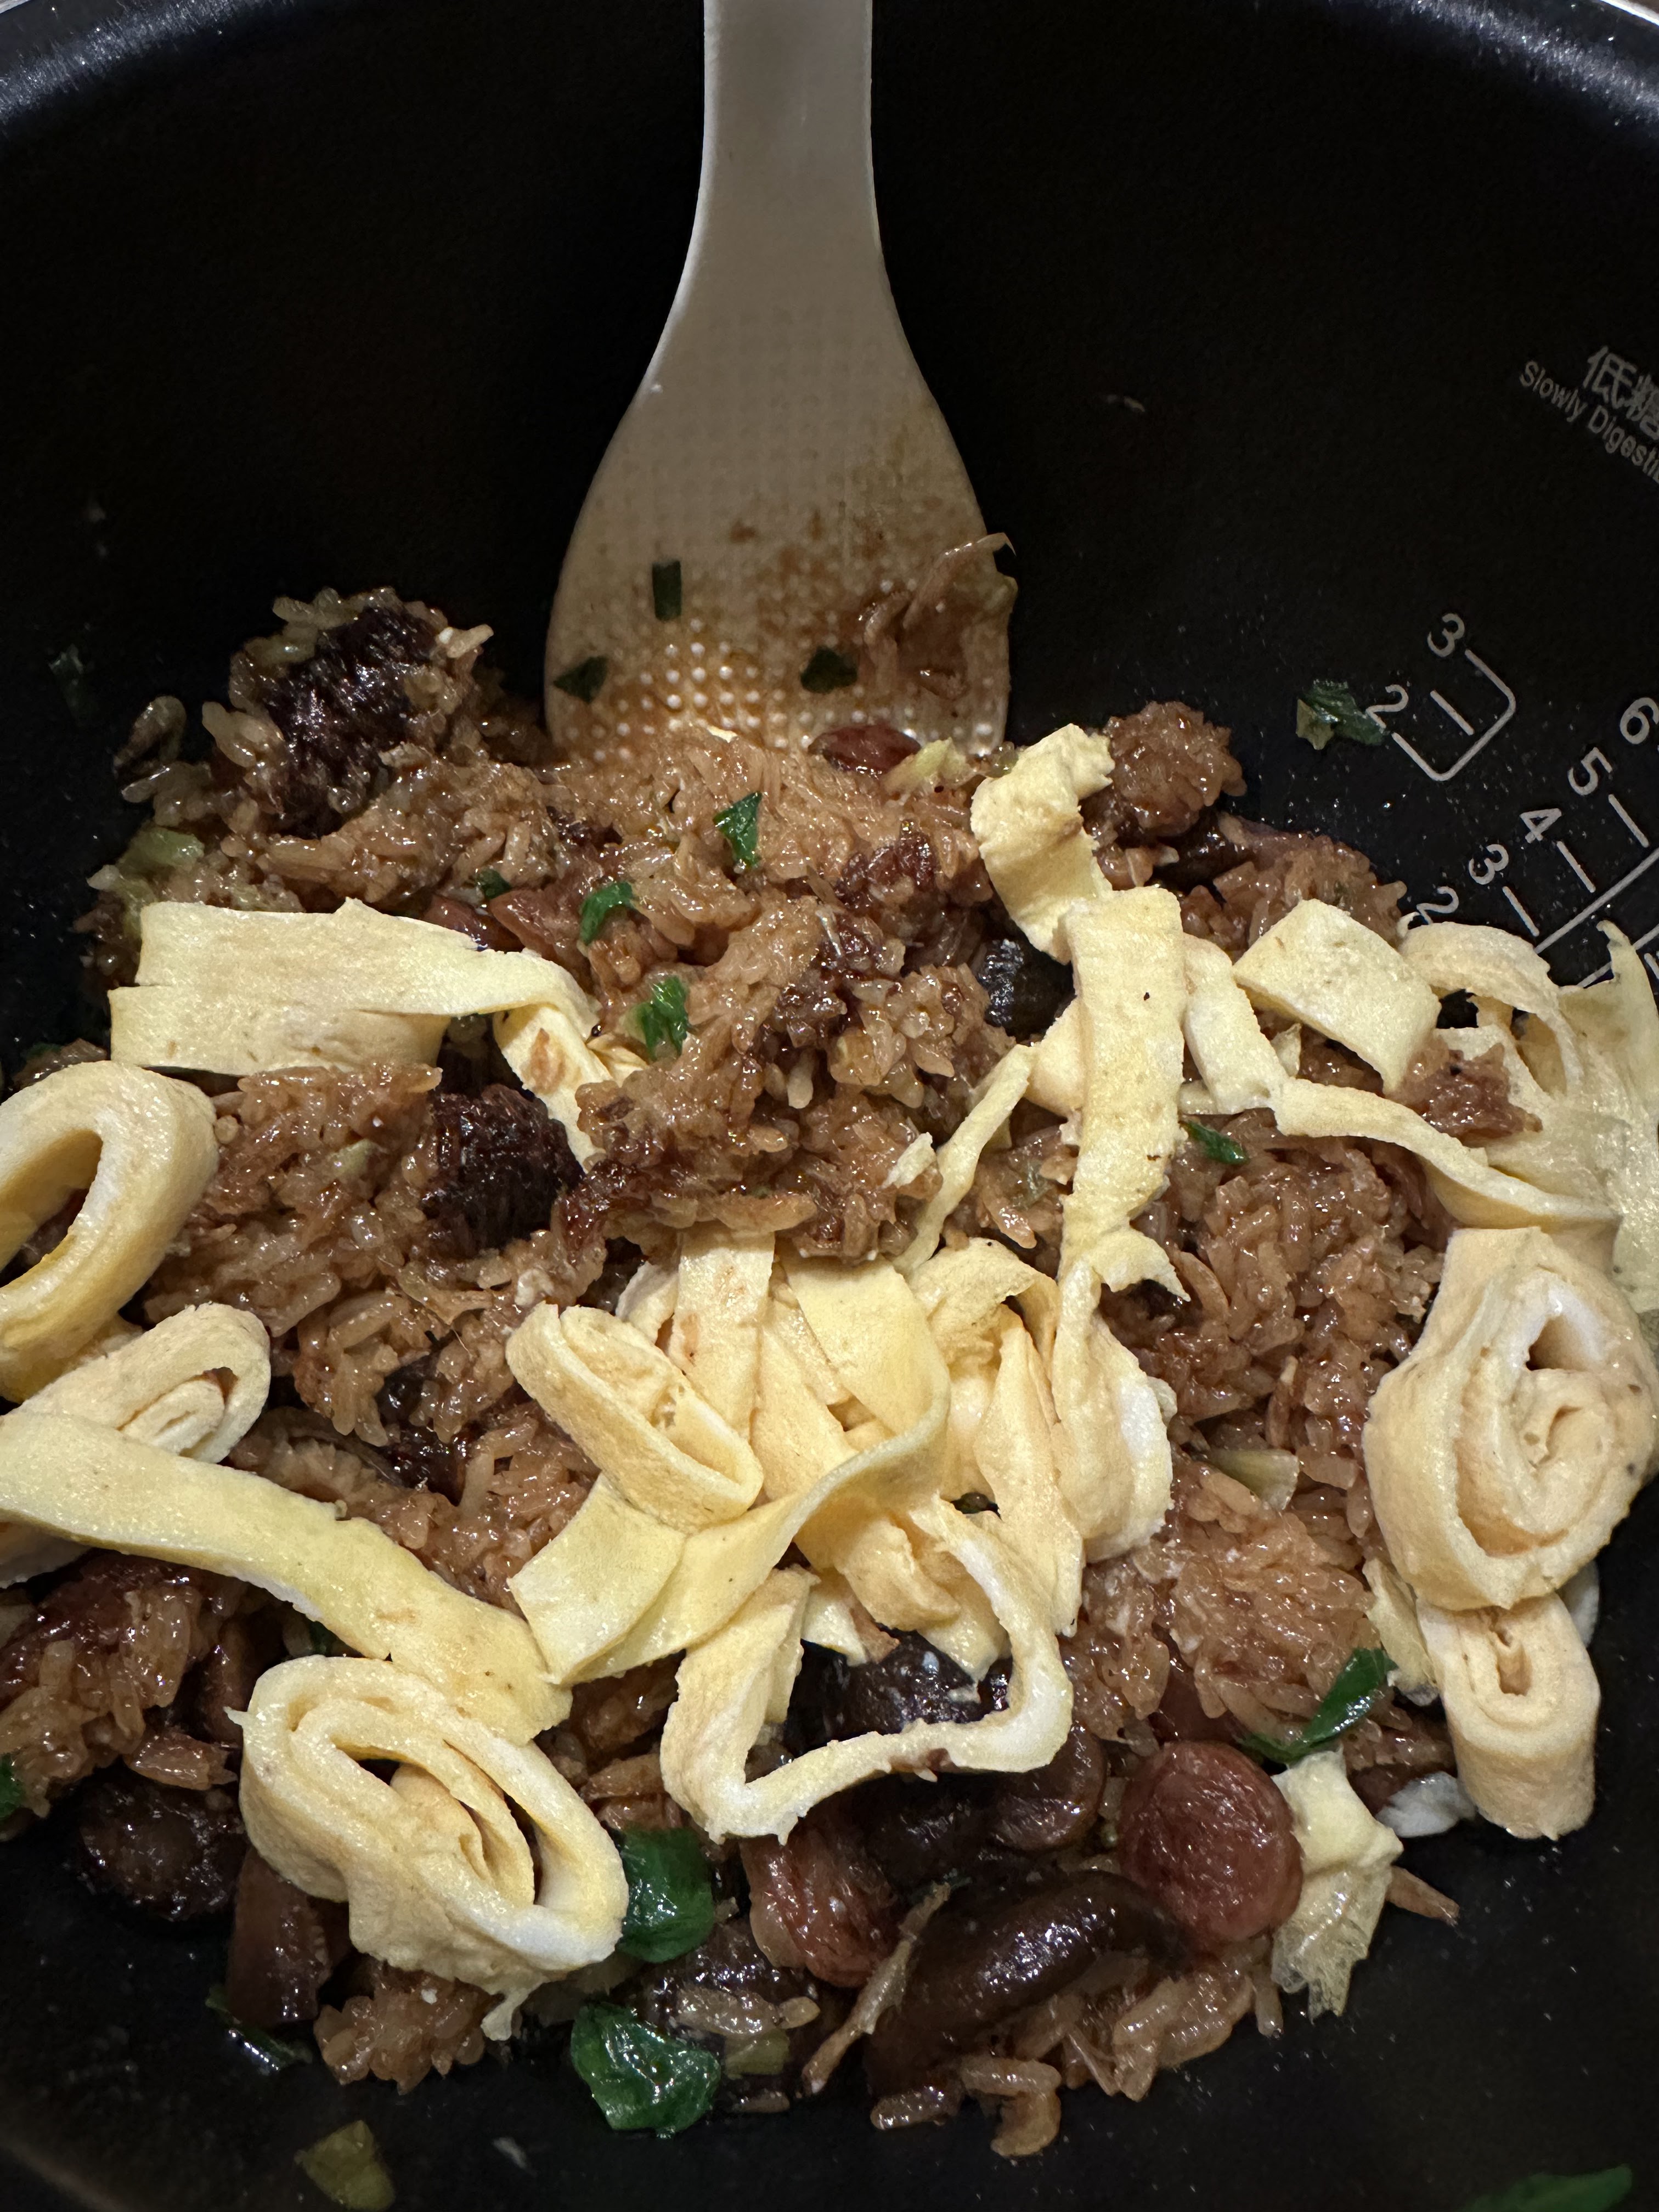
Saturday, September 21, 2024

Rice cooker 'Claypot' glutinous rice

Since my earliest attempts to recreate the claypot effect in a rice cooker,  and then I tried to cook lor mai gai in the IP (and even bought an IP suitable pot to do so), I could never get the texture of the rice just right or get the chicken correctly cooked (neither over nor under cooked).  My suspicion was that the water and oil content exuded from the chicken is a wildcard that is very hard to accurately gauge.

After reading and trying out this method for glutinous rice where the key lay in NOT overly soaking the rice, I decided to try again but this time in a proper upscaled rice cooker. I realised that most recipes that required soaking glutinous rice for 4 hours or even overnight was because they wanted to steam the rice. In a rice cooker, it's immersed in water and boiling in water, so the glutinous rice can easily turn to mush. 

I decided not to include in too many elements and ditched the chicken, just working with lap cheong and mushrooms for flavouring. In addition, my rice cooker has a special pot which apparently can re-create the burnt bottom of a clay pot. It was either the Claypot setting or the Firewood setting and I decided to try the latter setting. Success!

Ingredients

2 cups of glutinous rice, soaked for 1.5 hour only

About a handful of dried shitake mushrooms, soaked

2 tbsp of shrimp skins or rehydrated dried shrimp

1 Chinese rice bowl of water (not all will be used)

1 tbsp light soya sauce

1 tbsp dark soya sauce

2 tsp oyster sauce

1 tsp sugar

1 tsp chicken bullion powder

1 tbsp Chinese rose wine (to give it a special flavour that goes well with pork)

4 links of lap cheong, sliced thinly

4 cloves of garlic, sliced into thin cross-sections

1 stalk of spring onion, chopped and separate white from green parts

2 eggs, beaten

Pinch of salt

1 tsp sesame oil for garnishing

Method

1. Wash and soak the glutinous rice for 1 to 1.5 hours; no more than 1.5 hrs. At the same time, soak the dried mushrooms in the bowl of water. Also soak the dried shrimp now if using.

2. Prepare the mixing sauce, mixing the soya sauces, sugar, and oyster sauce. 

3. Once the mushrooms have softened, remove the stalks and slice if too large. Mince the dried shrimp if using. Reserve the soaking water.

4. Lightly fry the white parts of the chopped spring onion, drained mushrooms, lapcheong and shrimp skins/dried shrimp until fragrant.

5. In the rice cooker, lay the sliced garlic cross-sections at the bottom of the pot. This causes the garlic to go jammy from the pot's heat.

6. Layer on the lapcheong, shrimp skins/shrimp and mushroom slices. Try to keep them in 1 layer.

7. Drain and add the drained rice. Try to flatten into a concave layer (flatten against the ingredients). The aim is to keep the rice as far above the water as possible so that it's steaming rather than boiling. For 2 cups of rice, use 1⅓ C of mushroom soaking water. If there isn't enough liquid, top up with water. (for 3 cups of rice, use 2 C of water). Set to Claypot function. 

8. Once the rice cooker beeps (only beeps when using the Claypot Pot function), drizzle on the mixing sauce but DO NOT mix. Careful, the steam is hot!

9. Meanwhile, make an omelette with the eggs and pinch of salt. Allow to cool then slice into ribbons and set aside.

10. Once the rice is cook, use the Stay Warm function and allow to rest for another 5 to 10 minutes.

11. Mix well. Garnish with the greens of the spring onion, drizzle on sesame seed oil, and top with omelette ribbons. Serve immediately.

Recipe feedback

- Success! The Claypot function worked beautifully and I even had a burnt bottom and jammy sweet garlic slices!

Thursday, February 22, 2024

Glutinous rice

I have tried different ways to cook glutinous rice and stir fry it. I tried the IP version several times but I never got it right. It was always too sticky. I learnt from Meatman recently that there was no need to soak the rice for so long if cooking it in a rice cooker. I decided to give it a try.


The Meatman recipe called for soaking 30 minutes. The ratio was glut rice+ jasmine rice 500g : 500ml liquid (sauces + ingredients).

I decided to try cooking with brown rice without soaking at all but using the burnt rice function on my rice cooker. Instead of following the recipe, I used the finger indication. 

The outcome? The rice was washed very cleanly but was still a bit mushy and yet the brown rice was undercooked. I switched off the electricity and left it to steam on its own in the heat. After 1 hour, the brown rice was finally just cooked but the glut rice was still too soft.

I fried it up with sauce and ingredients (mushrooms, egg, garlic) but it was still a bit too soft and sticky.

In future, I will use less water. The recommended is ⅔C water to 1 cup glut rice.

Wednesday, August 09, 2023

IP Lor Mai Gai

Tried Amy+Jacky's recipe and adapted to my tastes, to see how it'll work as it doesn't require soaking.

Ingredients

2 cups Thai glutinous rice (washed) - soaked for 2 to 3 hours

8 dried shitake mushrooms, rehydrated in 250ml (1C) water and sliced

2 tbsp dried shrimp, rehydrated in 125ml (½ C) water and chopped

2 chinese lap cheong, sliced

188ml (¾ C) chicken stock

2 tbsp light soya sauce

1 tbsp dark soya sauce

1 tbsp oyster sauce

1 tbsp sugar

1 tsp sesame seed oil

1 tbsp cooking wine

3 shallots, chopped

1 stalk spring onion

1 thumb sized ginger, sliced

3 cloves garlic, minced

Optional: 4 chicken bone-in thighs or 12 chicken wings and drumlets. Remove as much excess fat as possible (otherwise it becomes too oily)

Method 1

1. In the IP using the Saute function, fry the lap cheong followed by shrimp, shallot, ginger, spring onion (white parts) in that order. Pour on the glutinous rice and stir in. Remove from the IP. If using chicken, add it now to brown then remove.

2. Deglaze with the 2 tbsp of cooking wine and scrub the bottom of the pot. Pour into the rest of the ingredients.

3. Add 1 cup of water (for steaming) into the IP with the trivet. 

4. Arrange the ingredients into the pot-in-pot in the following order: mushrooms at the bottom, lap cheong, followed by rice. Top off with chicken if using. 

5. Pour in the liquids (soaking water and stock) into the pot-in-pot together with leftover marinade sauces. Ensure that rice is submerged.

6. Place the pot-in-pot into the IP. Seal and cook using Steam function. Natural release 6-7 minutes.

  • No chicken: 1⅓ C for 2 C rice; PIP 25 mins (metal) or 30 mins (glass)
  • Wings: 1¼C for 2 C rice; PIP 30 mins (mental) or 35 mins (glass)
  • Bone-in thigh: 1C for 2C rice; PIP 40mins (metal) or 45 mins (glass)
Method 2
Follow up to step 3. 
4. Try as best as possible to arrange the chicken pieces in 1 layer. Pour in the marinade but reserve 2 tsbp for the rice. Pour in ¾ cup of water and add a trivet on top of the chicken.

5. Pour glutinous rice into a metal container. Pour in 1⅓  cup of liquid comprising the soaking water from the mushroom and dried shrimp and top up with additional water if required. Pour in the remaining 2 tbsp of marinade and mix well until uniform. Pat down the rice so that it's a flat surface.

6. Place the mushrooms on top of the rice.

7. Seal and cook using Rice function (12 mins). Natural release 6-7 minutes.
Rice comes out perfect because I separated it from the chicken and lap cheong, so it doesn't become overly wet from the excess water and oil released by the chicken and lap cheong. The sauce from the chicken is separate and can be used to drizzle on the rice.


Wednesday, August 02, 2023

IP Steamed glutinous rice Chicken comparison recipes

There are three different styles and it can be confusing for the uninitiated. There is lotus leaf rice 荷叶饭which is Cantonese style and emerging from HK that comes wrapped in a lotus leaf, and lor mai gai 糯米鸡 is a simple version cooked in a metal bowl that seems to have emerged out of Malaysia (I could be wrong). No leaf involved. There is also nuo mi fan which is simply steamed glut rice in Mandarin and often a stir fried version with no leaf and no bowl. However, the ingredients are basically the same. These are different to bak zhang which is primarily pork belly and wrapped in a totally different leaf - bamboo leaf. In this recipe, I'm concentrating on the IP version simply because I don't want to soak the rice overnight.

Lotus leaf rice

1. Taste Asian Food

- Debates the difference between he ye fan and lor mai gai.

- How to prepare lotus leaf.

- No need to soak rice as it will be cooked separately then steamed afterwards in the leaf but stir fry with other ingredients. Steaming in lotus leaf mainly to impart flavour.

2. Woks of Life

- Soak rice for 2 hours. Stir fry with ingredients. Wrap and steam. Steaming here fully cooks the rice.


Lor mai gai 

1. Taste Asian Food

- Use stainless steel bowls. Use chicken thighs. Place mushrooms face down on the bowls. Add the gravy. Cover bowls with alum foil to prevent condensation from dripping.

- Soak rice for 4 hours or overnight preferred.

2. China Sichuan Food

- soak rice for 2 hours. Steam for 20 minutes.

3. What to cook today - IP

- soak rice for 4 hours. Stir fry with ingredients. 

- Uses 7 inch round pan. Cook 30 to 45 mins. Steam release 10 mins.

4. Spice and pans - Rice cooker (video)

- Soak rice for 4 hours.

- Marinate chicken and mushroom together. Pour ingredients with marinade on top of rice, no stir frying.


Nuo mi fan - No lotus leaf

1. Casually peckish

- Soak rice for 3 hours. Stir fry everything including rice. Steam for 45 mins.

2. Dingoozatfood - IP

- Soak rice 1 to 2 hours

- Uses pork belly. Stir fry everything. Pressure cook 3 minutes, natural release 10 mins.

3. Amy + Jack - IP (Tried here)

- No need to soak. Stir fry with ingredients. Use PIP method using 3 quart bowl. Cook 35 mins then 15 mins natural release.

Sunday, September 08, 2019

Sik hye 식혜

Sources
1. https://mykoreankitchen.com/sikhye/ : Most comprehensive recipe, describes using the course malt barley, the powder, and the teabag
2. https://www.maangchi.com/recipe/sikhye: I mostly used this method but it also describes making it a slushie

Generally, the recipes are pretty aligned. The difference between these two and other recipes is whether they use the course malt barley or the powdered type. While Maangchi uses the powder, Korean Kitchen thinks that the powdered type doesn't help the rice grains to float to the surface. However, I used the powder and didn't have a problem so I think it's because Korean Kitchen left the powder in a cheesecloth.

Ingredients
1 cup malted barley
18 cups of water
1 cup of cooked rice (short grain or glutinous rice)
1 cup sugar
pine nuts and red dates for garnishing (optional)

Method
1. Add the water to the malted barley and stir well. Soak the malted barley 2 to 3 hours in a large bowl and let the sediment settle. The clear water should have separated to the top.
2. Meanwhile, cook the rice with slightly less water so that it's a bit undercooked.
3. Once the rice is cooked, carefully strain the malted barley water with the help of a cheesecloth, into the rice. The sediment should have settled at the bottom. Be careful not to stir up the sediment at the bottom.
4. With the sediment, pour in the remaining 4 cups of water and leave to steep.
5. Leave to ferment in the rice cooker using the Keep Warm function at between 55 to 60 deg C. After 4 hours, check to see if a dozen or so rice grains have floated to the top. If they have, sik hye is ready. It only took me 3 hours. If grains haven't, leave it to ferment for another hour.
6. Once the grains has floated, again carefully pour the malted barley water into the pot, once again, with the help of the cheesecloth. Throw away the sediment.
7. Bring the sik hye to a boil and add the 1 cup of sugar to dissolve. Skim off the foam and boil for 10 minutes.
8. Once finished boiling, leave to cool. Strain off the rice grains and wash it in cold water to wash off the starch. Keep the rice grains in a separate air tight container with some cold water. If the grains are left in the sik hye, the whole liquid turns grey.
10. Strain off the sik hye into a glass bottle.
11. Serve hot or chilled in a bowl, topped with red date and pine nuts if using, and about two tablespoons of rice grains.
12. Keep the rice grains and sik hye refrigerated for up to a week. Once it goes sour, it's time to throw it away.

Malted barley soaking
Floating rice grains!
Sik hye with rice grains and topped with red date
Recipe feedback
The grains delighted me because they felt so light on the tongue. I was expecting porridge-type of stodgey rice but the grains here were light and fluffy!

Saturday, April 06, 2019

Red bean porridge with gula melaka glutinous rice balls

This is an adaptation of the Korean red bean porridge, 팥죽. I've read some versions that use salt but I'm not a fan of something salty.

Ingredients
300g red bean paste (I used canned)
10 knotted pandan leaves
10 cups water
¼ cup lotus seeds
100g glutinous rice
5 to 6 tbsp water (use more if necessary)
300g gula melaka


Method
1. Knot the pandan leaves and add to the water. Bring to a boil and boil for 10 minutes.
2. Meanwhile, prepare the lotus sees by soaking in boiling water for 5 to 10 minutes until softened. Remove the internal bud of the lotus seed which is bitter. Add to the boiling water.
3. Add the red bean paste to the water and stir until combined. Continue to simmer on low.
4. In a separate bowl, add the flour and put in a tbsp spoon of water at a time until the flour barely comes together. You may need more than 6 tbsp if the flour is really too dry (depending on how you've stored the flour and ambient humidity too). Once you are able to gather most of the dry flour, stop and start to knead. It should all come together, if not, wet your hands and continue to knead. Knead for approximately 5 minutes. Cover with a damp cloth and set aside.
5. Pinch off little bits of dough to make balls.
6. Cut the gula melaka into cubes. Make a hole in the middle of each dumpling and insert the cubes. Close up the ball and ensure that each seam is well sealed otherwise they will burst during cooking.
7. The balls can be cooked in the soup (makes the soup more starchy) or in a separate pot of boiling water, depending on personal preference. To cook the balls, ensure that the liquid is at a rolling boil. Add the balls. They will sink. Use a spatula to stir so that they don't get stuck to the bottom. When they float, give them another 2 to 3 minutes and they're ready. If they were cooked in water, ladle them out with a sieve and add to the red bean soup.

Saturday, July 18, 2015

Red bean tang yuan

Simple recipe, Chinese tang yuan is even easier to make than mochi. Adapted from this red bean recipe by Rice and Roti and this black sesame seed recipe by Gumdrop button, this recipe is really more intuitive and instructive. Everyone has a recipe that works for them. I am starting to understand why such recipes are passed on from grandmothers to mothers to daughters. Unfortunately, neither gran nor mom cooked this while they were alive. We pretty much just had store bought.

However, this week being the coldest winter week of the year (and previous decade apparently), it seemed fitting to cook this, and also to use up my leftover Anko. Note btw, 1 can of Anko goes a really long way. So far I've done dorayaki (4 dorayaki ie 8 hotcakes sandwiched), 15 tang yuan, and I still have 1/4 can left!

Ingredients (makes 15 ping pong sized tang yuan)
1 cup glutinous rice flour
1/2 cup warm (but not hot or boiling water)
1/4 can anko
2 cm piece of ginger
rock sugar to taste
2 to 3 pandan leaves, tied in a knot
4 - 5 Chinese rice bowls of water


Method
1) Prepare the syrup first as it will take some time. In a pot, add the water, ginger, pandan leaves, and rock sugar. Bring to a boil then turn down and simmer for 10 minutes. Switch off the fire and leave it to steep.
2) In a mixing bowl, pour in the glutinous rice flour. Slowly add water a bit at a time, using a spatula to mix it till well combined. It should just come together, so you may not need to use all the water. After it has come together, knead it into a smooth dough with your hand, which takes about 2 to 3 minutes. The dough should leave the sides of the bowl. If it's too sticky, add flour. Alternatively, if it's too dry, add just a touch more water.
3) Pinch off around 1 tbsp of dough and flatten it on a well-floured palm. Put about 1/2 tsp of the anko in the centre, and bring the sides of the dough around the ball of anko to cover it. Ensure that it is well sealed and that no bean paste is visible, otherwise cover with a bit more dough. Roll the dough in your hand to reform the ball. Roll each ball in flour and place on a well-floured plate, with plastic wrap. Ensure that the balls don't touch each other.
(I'm not very precise about this but if you really wanted to form similar sized balls, you could roll out the dough into a log on a well-floured surface, then chop off similar sized nuggets and even weigh them if you want)
4) In a separate pot of bring water to a rolling boil. You should have at least 3 inches of water otherwise the balls will sink to the bottom and stick. Drop in the balls and keep stirring to ensure that the balls don't stick to each other and don't stick to the bottom of the pot. When they float to the surface, they're cooked. (Hence I'm not really precise about the balls since equal cooking time isn't important because it's pretty clear which are cooked and which aren't). Lift them out with a sieve and drain them, then place them straight into the syrup.
5) Serve immediately. The extra unused balls can be frozen on their plate. Next time, cook from frozen.