Showing posts with label custard. Show all posts

Sunday, October 05, 2025

HK custard steamed bao

I don't really know what the difference is between this recipe and the one which involves more ingredients such as 3 flours and salted butter that i used here but until I have time to try both (and i'm not really a fan of making custard from scratch), I thought I'd give this recipe a try. It is by the same blogger who gave me this highly successful black sesame bao that only needed one proofing, so I'm more keen to try this recipe. This recipe by LinXianShen again.

Being so easy to wrap, my shape is perfect!
Filling is a bit dry rather than the runny custard I was expecting

Custard 

Ingredients

4 egg yolks

150ml milk

30g corn starch

30g normal flour

1 tbsp sugar

30g oil or lard

Method

1. Pour ingredients into a non-stick saucepan or pot. Stir on a small fire. Stir until it comes together and is workable and can be folded, much like a dough. It should not stick to the pan.

2. Wrap with plastic wrap and it should touch the surface so the custard doesn't form a skin. Chill for at least 3 hours.

3. Divide into 10 portions and roll into balls.

Bao (makes 10)

Ingredients

400g flour (normal or bao flour)

5g sugar

4g yeast

200ml warm water

(Note: My flour package was 500g so I added in the extra 100g with 50g milk, which makes extra 2 kosong bao)

Method

1. Pour ingredients into a mixing bowl. With a pair of chopsticks, stir until the dough comes together into a claggy ball.

2. Knead until smooth, about 10 to 15 mins. Form a ball and tuck underneath to promote a smooth surface, 

3. Roll out into a rectangle, around ½ inch thick. Use a cutter to cut out circles of around 5cm diameter. [Alternatively, divide into 10 portions, roll into balls, then using the usual bao method to roll out a disc with thinner edges than at the centre.]

4. Wrap each custard ball in the disc and crimp together using bao wrapping technique. Turn it seam facing downwards. With palms, use a cupping motion to create a rounder ball.

5. Place each bao straight onto parchment into the steamer. Allow to proof for around 25 mins until the baos expand to about 1.5 times. Press a finger gently on the bao surface and the indentation should spring back.

6. Place the steamer on top of a wok of room temp water and turn up the flame to maximum. Steam for 15 minutes then turn off the fire and leave covered for 3 minutes. Serve immediately.

Recipe feedback

- Again another great recipe from LinXianShen! The filling is the BEST, so easy to wrap. However, it is very dry, but perhaps that is the cha chan ting type of custard bao.

- The dough isn't as pliable as the black sesame bao even though it's pretty much the same recipe but I still did about 13 to 14 minutes of kneading, this time in 29 deg weather compared to 23 deg weather. Maybe that makes all the difference. 

Friday, September 26, 2025

3-flour Custard bao redux

This blog is littered with bao disasters, including this custard creamed bao that went so wrong (dense, raw and ugly and collapsed, using single proofing) I never tried custard or creamed corn-fillings again. I had also tried a milk bao that used 2 flours (cake and plain) but needed 2 proofings of about an hr each. It was nothing to write home about but relatively easy to work with. There was also a char siu bao dough that used normal flour, wheat starch, vinegered water with baking power but despite all that work, it looked ugly. While easy to work with, it was too stretchy and tore easily, and instead of rising, it grew sideways and was too flat. 

This recipe by Ruyi attempts to remedy all these attempts which uses 3 flours, oil and baking powder in an attempt to create fluffy dim sum bao. The video is particularly helpful with how to wrap and shape so that the buns come out round and smooth. 

Ingredients

Custard filling

3 room temp egg yolks, try to remove as much white as possible

150ml milk

75g sugar

20g cake flour

50g salted butter (it must be salted or the butter will separate from the custard)

1. Whisk the egg yolks then add sugar and whisk till pale.

2. Add the cake flour and mix well then set aside.

3. Heat up the salted butter and milk on medium heat and stir once in a while until small bubbles form. Do not boil. Remove from the stove.

4. Quickly whisk the yolk mixture and slowly drizzling in half the scaled milk in a steady stream. Continue to whisk and pour back into the pot and back onto a medium heat.

5. Once the mixture starts to thicken, switch to low heat. Continue to whisk until lump and remove into a bowl. Cover with cling film right onto the custard to prevent it forming a skin.

6. Fridge for min 3 hrs or even overnight.

Alternatively just make instant custard filling

170ml milk

3 tbsp custard powder

2½ tbsp sugar

1. Combine the custard powder, milk and sugar in a pot. Bring to a boil but stirring constantly otherwise it will boil over.

2. Alternatively use a microwave at small increments at 50 to 80% power otherwise it boils over, been there done that! 1min 30s at 1000W.

3. Also keep in the cover and keep in the fridge for at least 3 hours or best overnight. 

Dough (makes 10)

160g superfine (9.5% protein)/HK/Bao flour (normal flour will yield a chewier dough)

40g cake flour

30g wheat starch

45g icing sugar

½ tsp baking powder

¾ tsp instant yeast

130ml room temp water

30ml veg oil

1. In a large bowl, add all the ingredients except the oil. Use a chopstick to ensure all the ingredients are combined.

2. Add the cooking oil in 3 batches and knead in until dough feels smooth, about 10 mins.

3. Divide the dough into 30 equal portions of around 43-44g each. Cover with damp towel and rest for 5 minutes.

4. Roll out one ball at a time with a thicker centre. Flatten to around 9.5 cm disc.

5. Divide the custard into 10 balls and roll each roughly into a ball.

6. In the centre of each dough disc, flatten the custard into the centre and cupping your hand, use a spoon to push the filing into the 'cup' formed by your hand. Pleat to seal and turn over onto the table. Using your sides of your palms, rotate to form a tall cylindrical shape rather than round ball. As it proofs, it will expand sideways and become the bao shape we want instead of a flattened mess.

7. Transfer to a lined steaming rack. Allow to proof until 1.5 to 2x. When depressed gently, the dough should spring back.

8. Place straight onto a steamer and turn on to high heat and steam for 15 minutes from room temp. Once done, turn off the fire and leave covered for another 10 minutes.

9, Best served warm but remove from the water to avoid getting soggy.

10. Keep in the fridge and steam for 10 minutes on high heat to reheat. Else store in the freezer and steam on high heat from frozen for 15 minutes. Custard sld be eaten when the bao is warm otherwise it is hard.


Saturday, December 12, 2020

Custard creamed corn bao

Quite disappointed with this recipe but am unsure cos there are too many new variables. First of all, the this is a new recipe and looks really simple - 7 minutes kneading, 7 minutes resting, and only proving 20 minutes. It was meant to solve all my past issues with ugly looking bao that are lop sided and have wrinkly skin. Second, my dough was a bit wetter than intended, which made handling the bao and sealing up the filling really difficult. Third, I follow the recipe and used the microwave to make the custard, but perhaps because I'm using a different brand and doubling the portions, it came out really lumpy. Next time I'll go back to using the stove even though it may be more work. Fourth, I used my new bamboo steamer so I'm wondering if that affected? I had my metal steamer side by side and also following the instructions, started steaming from cold so that affected all the timing and made it dry out yet uncooked inside. Comparing the bao from the metal to the bamboo steamer, the metal steamer seemed to keep the moisture in better and also there was more lift. Fifth, I doubled all the portions so perhaps it is still my fault in the end!

I might not try the recipe again for the bao dough but stick to the red bean bao dough recipe.

Recipe adapted from: https://mykitchen101en.com/steamed-corn-custard-pao-chinese-steamed-bun/

Ingredients for custard filling (makes 10) (makes 19)
170ml milk (240ml)
3 tbsp custard powder (6 tbsp)
2½ tbsp sugar (5 tbsp)
90g cream style corn (180g)
1 slice cheddar (2 slices)

Method 
1. Combine the sugar, milk, custard powder in a pot on the stove. Bring to a boil and stir until smooth. Remove from stove. (Original recipe uses microwave, 1min 30seconds at 1000w)
2. Pass through a sieve to get rid of lumps.
3. Add the cream corn and stir until combined.
4. Cut up the sliced cheddar and stir until combined.
5. Leave to cool for 10 minutes. Cover with cling film, ensuring that the film touches the surface of the custard so that it doesn't form a skin. Leave in the fridge to cool for 30 minutes.


Ingredients for bao (upsized to 500g)

280g (2¼ + 4 tbsp) bao flour (500g)

20g (2½ tbsp) cornstarch (5 tbsp)

1 tsp instant yeast (2 tsp)

65g (⅓C) fine sugar (less 2x at 120g)

200ml milk (350 to 400ml)

20g (1½ tbsp) veg oil (3 tbsp)

pinch of salt


Method

1. Combine the flour, cornstarch, salt, and sugar and stir well. Add the yeast and stir.

2. Gradually pour the milk until a dough is formed. Do not use up all of the milk but only until the dough just comes together with a few dry spots.

3. Pour in the oil and knead until blended. If there are still dry spots, add as much milk as needed to moisten the spots

4. Knead for 6 to 7 minutes until the dough is shiny and smooth and no longer sticky. 

5. Cover and rest for 6-7 minutes.

6. Roll out the dough into a rectangle and fold into thirds. Roll out again and then roll up into a cyclinder.

7. Cut into 10 portions. Cover half of the dough.

8. Roll into a circle with a thicker centre. Fill with 1½ tbsp filling. Seal proper so that the filling doesn't leak out. Put on prepared parchment (Original recipe uses flattened muffin cases)

9. Prove for 20 minutes. (Original recipe has a complicated method of bringing to a boil 500ml of water, then adding 1 l of water and putting the steaming basket on top). Try to prevent over-proofing otherwise the skin will wrinkle after steaming.

10. Steam on medium heat for 15 minutes, then turn off the flame and let it rest for 3 minutes before removing.

Recipe feedback

Comparing this recipe with my red bean bao which also used 500g of bao flour, this recipe used only 2 tsp of yeast (so only 1 proofing) compared to the 2 tbsp yeast (Edit: this sld be 2.5 tsp) and the nearly 1 hour of total proofing time for the red bean bao. While the red bean had a wrinkly skin, the bao was fluffier than my corn bao, but still not as fluffy as seen in the corn bao video.

Aside from being very dense, the dough still tastes a bit raw and the taste of the oil is very strong. This recipe didn't work probably mostly because of the short or negligible proofing time and insufficient kneading. 

I learnt from China Sichuan's char siu bao recipe that has more sugar, liquid, and yeast that uses a single proofing method (like Kitchen101 here) because it saves time and leads to more fluffy and less chewy buns. This differs from her red bean buns which proofs for 1 hour. 

Single proofing method

- Her mantou recipe says to obtain a smooth surface, buns have to be well kneaded, not over-proofed, and controlled fire which differs between steel and bamboo. 

- The second 'proofing' (after shaping) for 10 to 20 minutes until it slightly puffs up is actually just resting the gluten rather than proofing. The steaming water should start from cold and then rapidly brought to a boil on high heat. Start the count and turn down to medium flame only when you the steam escaping. The cooking time after from this point can take 20 to 25 minutes depending on the size of the buns and filling. 

- Bamboo steamer has to be on medium fire but steel has to be high fire all the time and cooking time for bamboo steamer has to be longer ie between 25 to 30 mins (including bringing to a boil). 

- The single proofing method requires a longer cooking time so that it can puff up. I made the mistake of turning down both steel and bamboo down to medium fire and assuming it's 15 mins for everybody. No wonder my buns from the steel steamer came out better cooked than the bamboo which was undercooked. I might also need to switch the steamer baskets around halfway. Kitchen101 used a bamboo steamer but her timings and single proofing method don't work for me! 

Monday, October 05, 2020

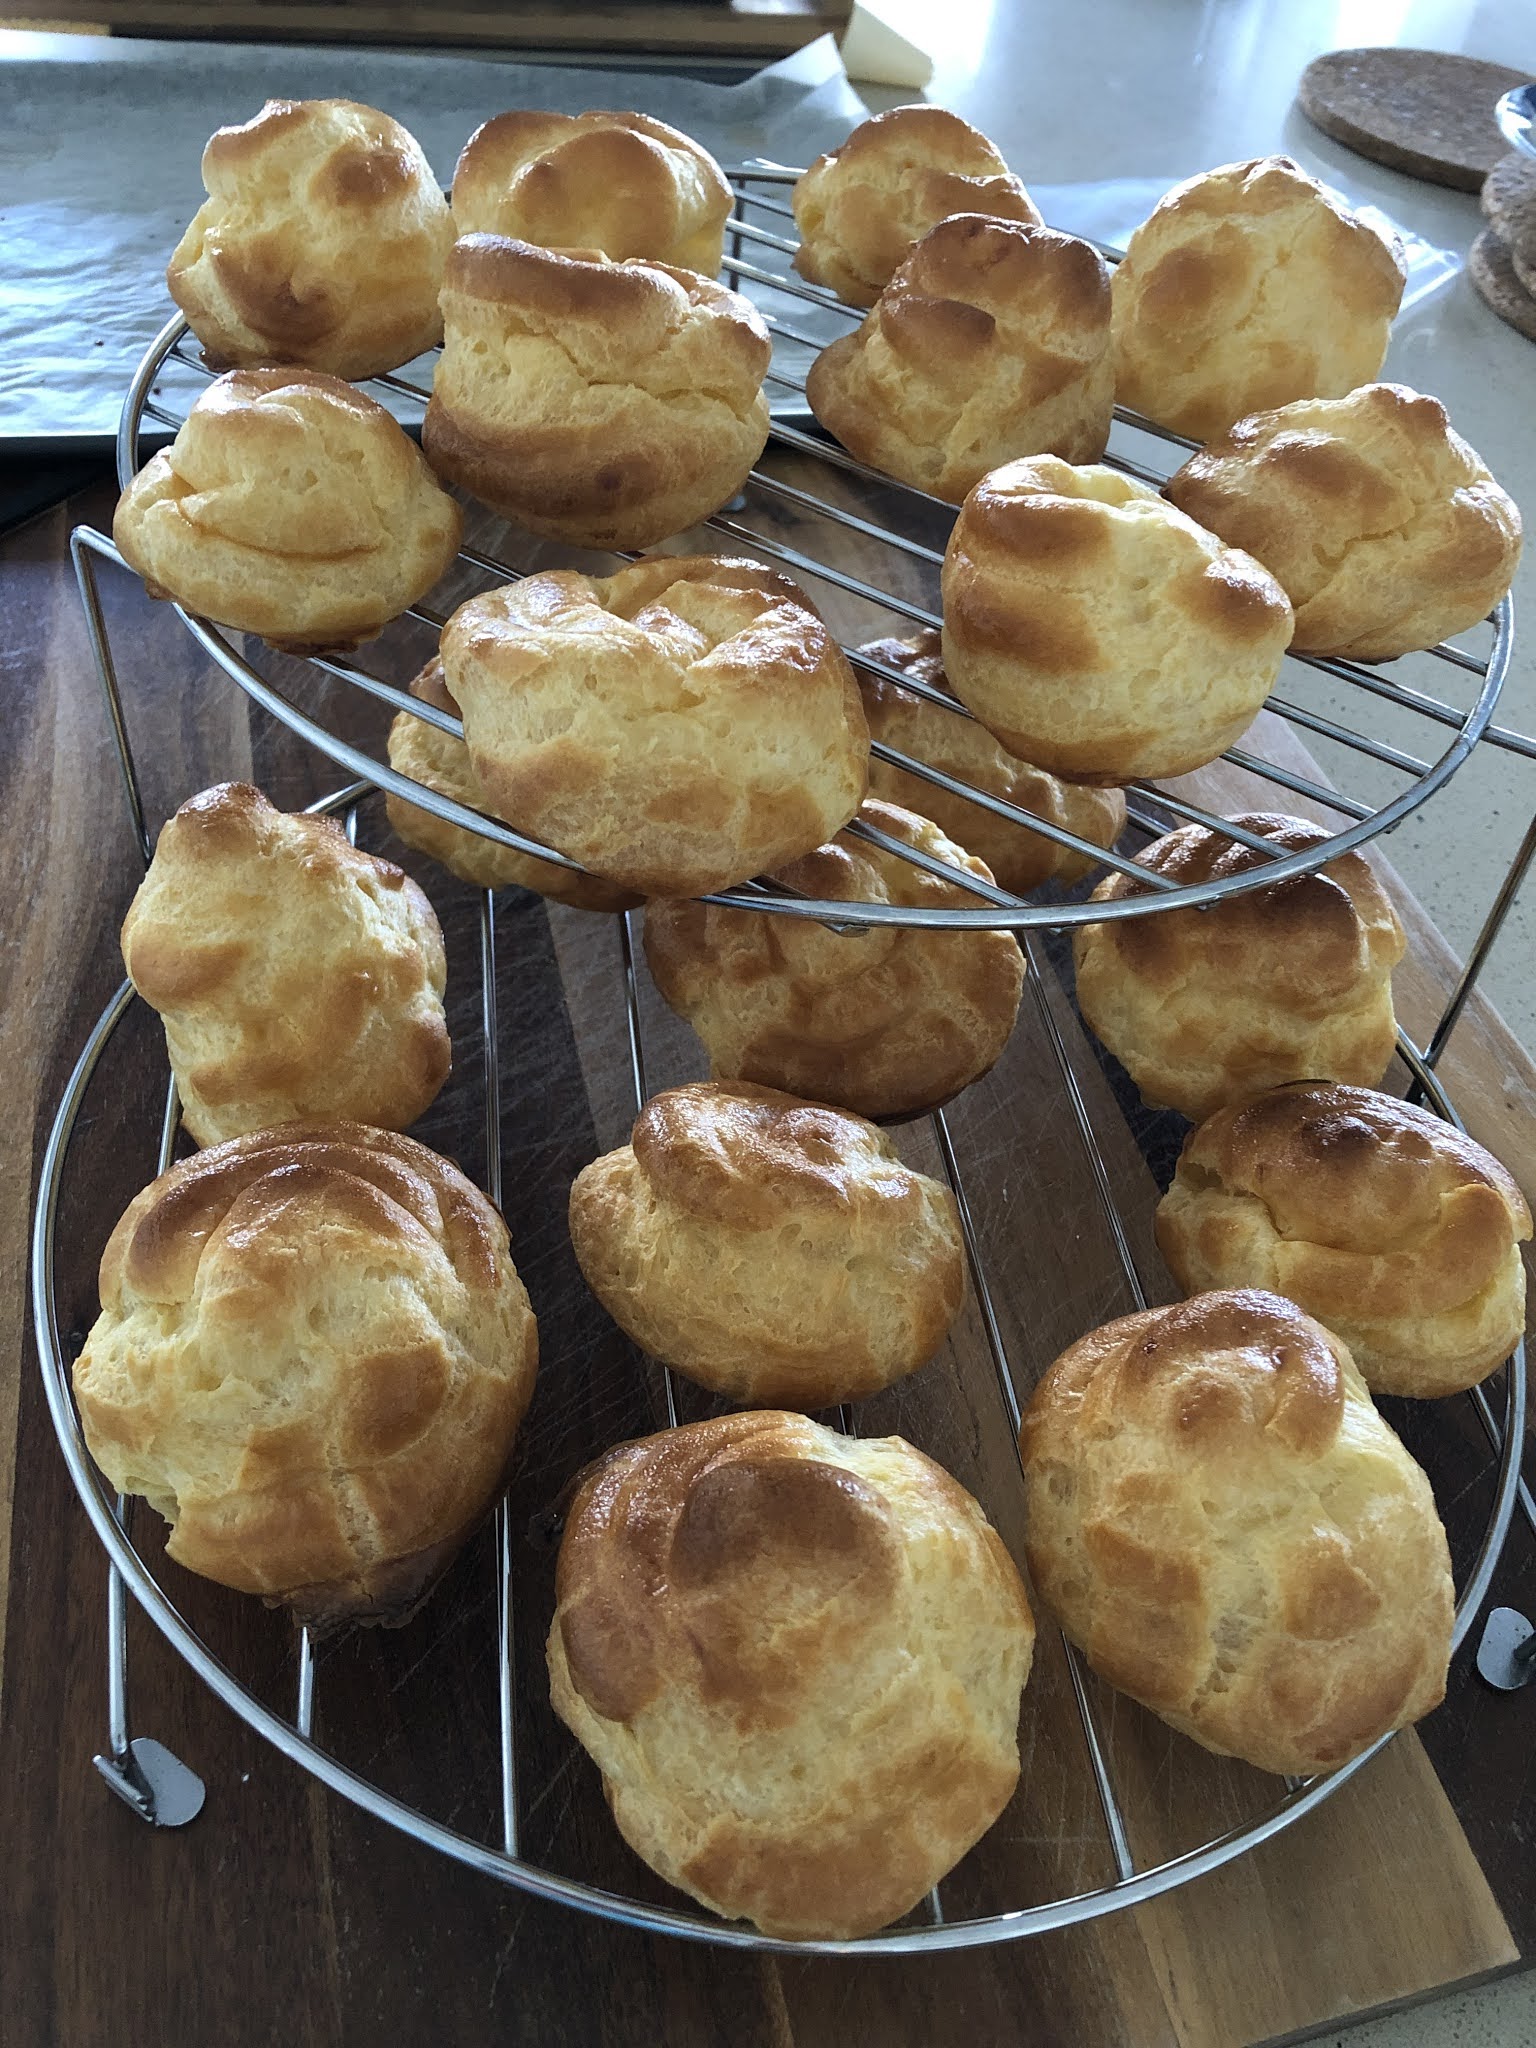
Custard cream puff

Retried the profiterole recipe from here with an improved custard using custard powder.

Ingredients (Makes 23 to 27 puffs, each one and a half inch wide by half inch tall cream puffs)

Cream puffs

½ C water

½ C whole milk

½ C (118g) butter or 8 tbsp

¼ tsp salt

1 C flour

4 large eggs, room temp, beaten

Splash of milk (for glaze)

Custard 

5 tbsp Foster Clark's custard powder 

500ml milk

2 to 3 tbsp sugar (to taste)

Method

Make the Choux pastry

1. Combine the water and milk in a pot with the butter. Melt the butter and bring to a gentle simmer (very small bubbles appear at the edge of the pot).

2. Remove from the stove and add the flour. Using a whisk if preferred (I found it helped but was really difficult to wash), add all the flour at once and stir until well combined.

3. Return to the stove and press down the batter onto the bottom of the pot to cook off the raw flour taste. Cook for about 2 to 3 minutes until a film forms at the bottom of the pot. Remove from the heat and allow to cool.

4. Beat the eggs in a Pyrex measuring jug. While the dough has cooled slightly, drizzle the egg a bit at a time into the dough and stir well with a wooden spoon. It will start off as a curd and split but continue beating. A KitchenAid can be used at this point but I didn't bother due to the washing up. Pour on as much egg as needed to make a thick ribbon when the spoon is lifted. Leave a few teaspoons behind to glaze the puffs.

5. Spoon into a piping bag and use a ½" round tip. 

6. I pre-prepared my parchment by drawing 1½" rounds on the wrong side of the parchment and then turned it right side up and placed it on the cookie sheet. Ensure there is space between each for them to grow.

7. Using the drawn guides, pipe 1½" wide by 1" tall. Use a moistened finger to pat down the tips of any piped batter and to smoothen the tops if necessary. Sprinkle the rest of the water onto the parchment around the puffs. This will give it the steam to give the puffs a sudden lift.

8. With the leftover beaten egg, add a splash of milk and brush the tops of the puffs.

9. Bake at 200 deg C for 10 minutes, then turn down to 170 deg C and bake for a further 20 to 22 minutes until golden brown. Do not open the oven door ever or the puffs will collapse.

10. Once it has finished baking, turn off the oven and open the door ajar. Leave the puffs inside for 10 to 15 minutes to cool slightly and dry out.

11. Remove from the oven and remove each puff to a cooling rack to cool completely. To test if completely cooked, break one apart and it should be dry and hollow inside, not cakey and spongey. It is better to over-bake than underbake.

12. Make the custard as per instructions on the box. Cool completely in the fridge. (Easier to make this the day before)

13. Assemble puff by cutting a hole at the side of each puff or cutting off the top. Then either pipe or fill the puff with a teaspoon. Serve immediately with strawberries and dusting of icing sugar if required.

Profiteroles

Topped with 1 bar of cooking chocolate, melted over a bain marie


Saturday, August 22, 2020

Choux pastry: Comparison recipes

 I have shortlisted several bloggers with videos and who do the entire range of pastries associated with choux pastry using slightly different methods. I've found out that the difference between profiteroles, cream puffs, and eclairs is dependent on the shape, topping, and filling. 

1. Bigger Bolder Baking cream puffs (Christmas profiterole recipe) (Easy choux pastry)

- Starts with whisk to whisk the flour in, then changes to spoon. Leaves it on the stove while beating the flour in. 

- Beats up the egg. Doesn't use KitchenAid when incorporating batter and egg.

- Uses wettened finger to smooth down the tips after piping the cream puffs

- Sprinkles water on the baking parchment around the cream puffs (to create the steam to give them a poof)

- Garnish with chocolate ganache and strawberries, filled with fresh cream, dusted with sugar

- Bake at 200 deg C for 25-30mins or at 220deg C for 20 mins then 10 mins with heat turned off.

- Store in fridge with filling, or freeze.

2. Sally's Baking Addiction cream puffs

- Eclairs are filled with custard (Americans call it pastry cream) and topped with ganache, cream puffs are filled with whipped cream and dusted with icing sugar, profiteroles are filled with ice cream and topped with ganache

- Easiest recipe. Uses 1 cup cream for ganache and 1 cup cream for cream filling

- Uses KitchenAid. Doesn't pour in all the beaten egg (only till the point it's combined) but leaves some for egg wash.

- Also paints the parchment with water

- Bake at 204 deg C for 20 mins, reduce to 177 deg C for 10-15 mins until golden brown

- Store unfilled or freeze.

- For the ganache, advises against using buttons. Use equal portions of double cream and choc by weight. Chop the choc finely, use a stove to heat up the cream just to simmering (never boiling), and pour onto the choc. Use only a glass or metal bowl (never plastic), and let it sit for 5 minutes before stirring. Stir with a metal spoon or silicon spatula (never a whisk or worst, wooden spoon) from the centre working outwards. Leave to cool for 15 minutes before using. Store unused at room temp for up to a day as the fridge will harden it into a spoonable fudge.

3. Natasha's Kitchen cream puffs (Eclairs wh includes pastry cream recipe)

- Also mentions the differences between eclairs with ganache, profiteroles, and cream puffs.

- Takes milk mixture off the stove to add in the flour and then incorporates it off the stove before putting it back on the stove to cook for a few minutes (2 to 3 minutes) until a film forms at the bottom.

- Uses Kitchenaid hand beater to beat for a while to cool it down, then adds whole eggs.

- Bake at 218 deg C for 10 mins, reduce to 162 deg C for 20 to 22 mins until golden brown.

- Store unfilled or freeze but can also store and freeze them with filling following her tips.

- For the ganache, uses chocolate buttons

Choux pastry tested here.

4. Pretty Simple Sweet - Ganache tips

- Play around with ratios to get it as a glaze or spreadable consistency or hard like truffle. Only cream and chocolate. Other additions such as butter and corn syrup for added creaminess or shine.