Showing posts with label pork. Show all posts

Thursday, July 24, 2025

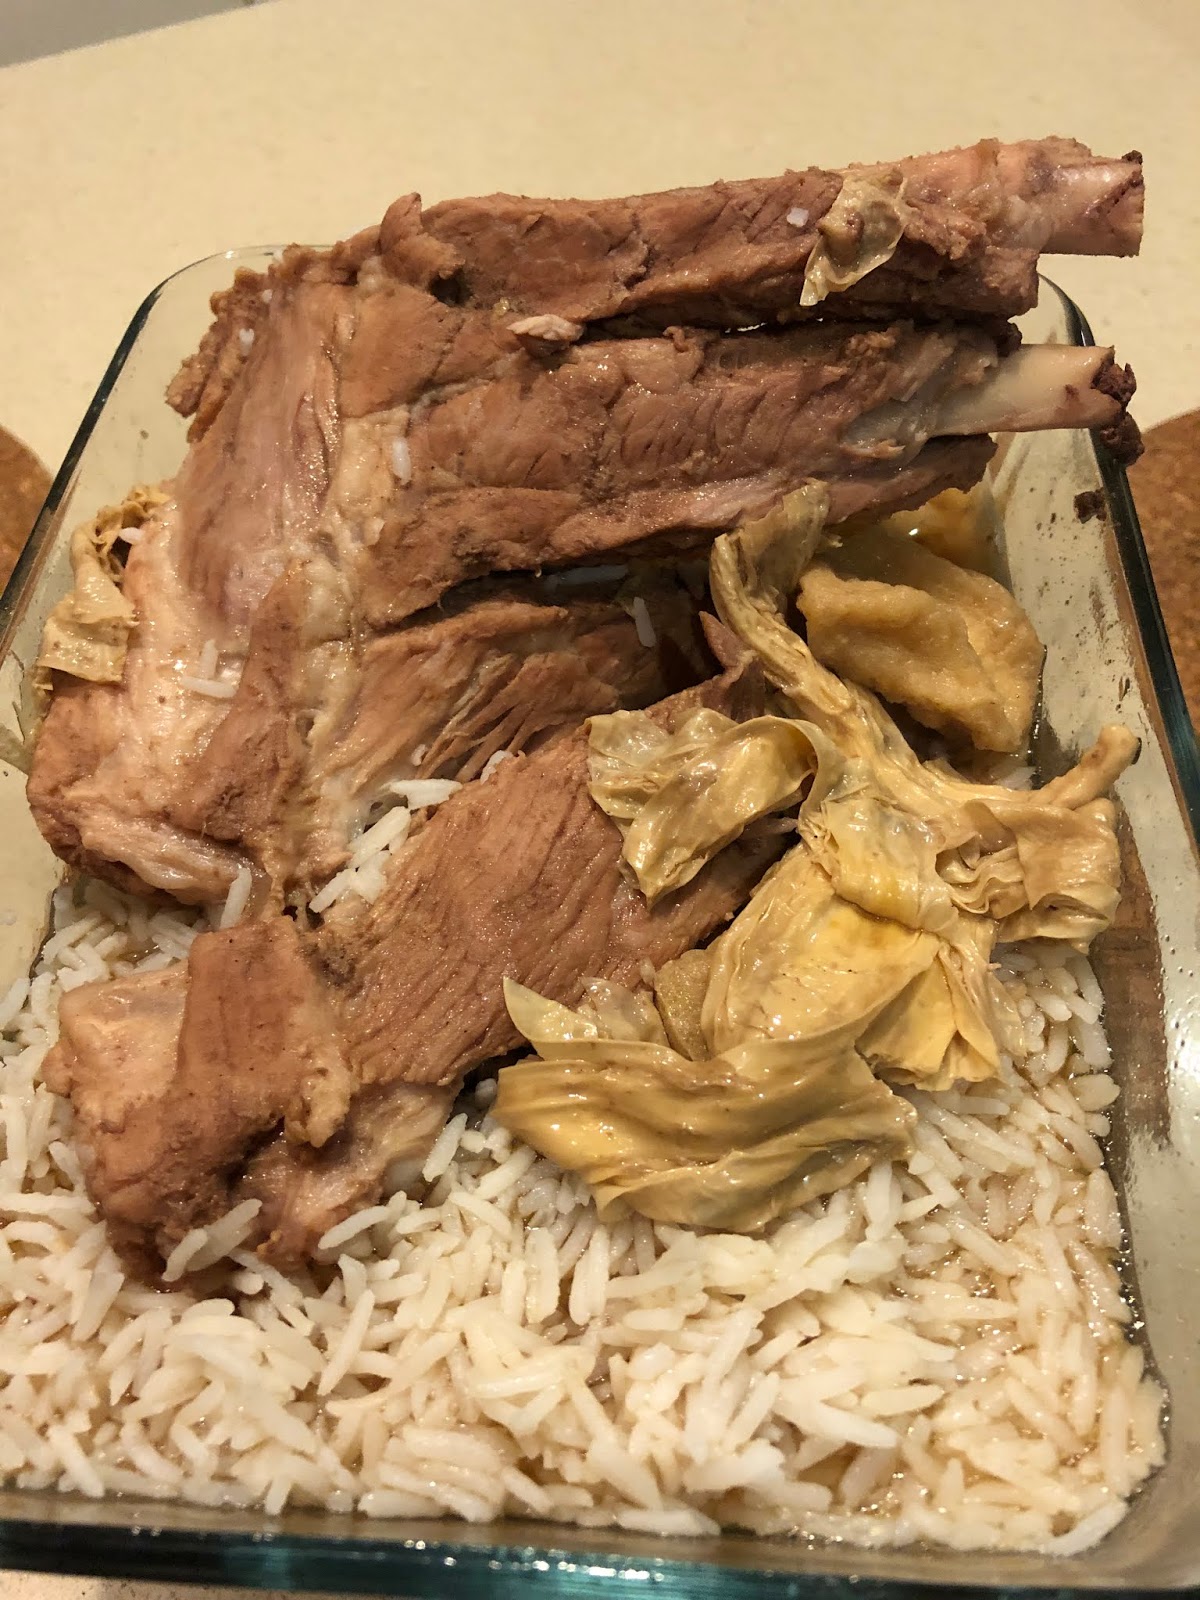
Black vinegar pig trotters

This is my favourite dish and also my dad's. I even wanted to eat it so much that I bought a claypot specifically for it, as vinegar has a disastrous effect on metal. Even though it's supposed to be safe on stainless steel (even the bloggers differ on this), I don't want to be subjecting my precious pots that I got when I got married and are meant to last me a lifelong, on this. Although it's traditionally for confinement ladies and thus considered very 'heaty', it's great for winter. I also found out from various blogs that it only becomes heaty when brewing the ginger and keeping it in black vinegar like a herbal tincture, and using old vinegar. It's less heaty when using young vinegar.

For me, these are the most seminal recipes: Burning Kitchen (has video) and Christine's talk about the herbal tincture method, BeautifulVoyager (has video) used it for her confinement but modernised the method, but Spice'N'Pans (has video) did it for everyday eating. Interestingly, Annielicious even cooks it the traditional way over the charcoal stove in a clay pot, and adds wine-soaked red dates! I might try that one day. Here is a compilation of all their tips but for everyday eating rather than confinement. 

Ingredients

500g to 1kg ginger - mix of old and young (Bentong ginger if possible is more aromatic)

1 to 2 full front trotters, chopped into pieces (around 700g to 1.5kg). The front trotters are preferred for their meat and the back for collagen. Possibly use a mix of both ie 1 front and 1 back foot..

3 tbsp sesame seed oil

6 hard boiled eggs, peeled

750ml of black sweet vinegar, Chan Kong Thye (bulldog picture, use Pink double strength) or 1 bottle of 2 bottles (600ml each) Pat Chun sweetened vinegar (the only one I could find in my Asian grocer)

5 tbsp brown sugar (or more to taste) or 100g gula melaka or palm sugar

Pinch of salt

Coarse salt (for washing the trotters)

2l water (for boiling)

Method

1. Prepare the ginger. Scrub it clean and cut into chunks. If using young ginger, skin doesn't need to be removed, but do remove loose bits. (Extra step: dry in the sun for a week to absorb the vinegar) Smash/bruise it to release the flavour.

2. Prepare the trotters. Rub the trotters with coarse salt while washing. Wash to remove any blood. Blanch the trotters. In a big pot, add 2l of water or enough to cover the trotters. Add the trotters to the cold water and bring to boil. If adding trotters to boiling water, the trotters will be sealed and the blood remains. Boil for 10 to 15 mins. Discard the water. Wash the trotters again to clean off the scum.

3. Optional way to prepare trotter from SoupedUpRecipes braised trotters: Soak for 2 hrs in water with sliced ginger, crushed spring onion, 2 tbsp of chinese cooking wine. Using the same water, bring to a boil and then boil for 10 minutes. Discard everything and wash the trotters clean of scum.

4. Pat dry and use the knife to scrape off any hair or pluck them out with tweezers. It's easier to pluck after being blanched.

5. The confinement method is to fry in a dry wok at medium low heat, fry the ginger until very dry. Once dry, add the 3 tbsp sesame seed oil and continue to fry but be careful not to burn. Alternatively for everyday eating, add sesame oil. Without needing to warm up the pot and oil, and fry the ginger until dry. 

6. Optional: lightly brown the trotters, then add the sugar at this point and lightly caramelise the sugar.

7. In a clay pot, pour in the entire bottle of black vinegar and use the bottle to measure 1 bottle's worth of water (enough to cover the trotters), and pour that in. Bring to a boil. Transfer the trotters and ginger to the claypot. The trotters should ideally go into hot liquid or skin will shrink and turn hard. Once boiling, add in the brown sugar (if didn't do step 6).

8. Turn down to medium low and simmer for 1 to 1.5 hours until soft. (if using the stainless steel pot or wok, 30 minutes of simmering suffices). Stir every 30 minutes or so. You should be able to poke through the trotter with a chopstick. If intending to steep and store, don't cook for too long as the trotters will continue to soften in the vinegar. *Also possible to use IP and cook for 10 minutes for tender trotter and 15 mins for fall off the bone.

8. Check seasoning and add salt if needed. Add the hard boiled eggs in the last 15 minutes only. Let the eggs soak in the sauce for at least 4 hrs. The trotters (without eggs) will taste better the next day and can be soaked for up to 3 days and will taste even better.

9. To store, remove the eggs and store separately from the sauce or they will dehydrate and harden. Store the sauce in a glass or ceramic vessel, not metal. The pork will continue to soften as it steeps in vinegar so depending on how soft they were cooked to begin with, consider whether to store together. 

10. To reheat, reheat only enough to each time (few eggs, few trotters and enough vinegar) over the stove. The microwave will only cause the trotters to harden. This can be stored in the fridge for up a month but the trotters must remain submerged. If keeping for that long, take out the sauce every week and reboil then cool down and re-store.

Monday, July 24, 2023

IP one-pot meatball macaroni

This is a IP macaroni cooked in one pot with a decidedly Asian flavour. It is surprisingly easy and quick and very tasty and didn't even have aromatics!

Ingredients

250g beef mince

250g pork mince

2 tbsp corn starch

2 eggs, beaten

2 tsp curry powder

1 tsp mustard powder

1 tbsp light soya sauce

1 tsp salt

Dash of pepper

1 tsp cardommon powder

1 tsp cumin powder

1 tsp coriander powder

4 tbsp mirin

4 tbsp cooking sake

1 bottle of passata

½ to 1 C water

250g pasta (macaroni or similar short tubular pasta)

2 cloves smashed garlic

½ onion, chopped

1 tsp ginger, minced

1 beef stock cube

Salt and pepper to taste

Method

1. Mix the beef and pork minces together. Add the corn starch, beaten egg, cornstarch, curry powder, mustard powder, salt and pepper. 

2. Mix well. Knead the mince until it's sticky and leave to marinate for at least 30 minutes.

3. In the IP, turn to high Saute heat mode. Add oil and heat up. 

4. Form meatballs (about ¼ C each) and roll into meatballs. In batches to avoid crowding and thus stewing rather than frying, pan fry the meatballs. Once meatballs are nicely browned on all sides, remove and start on the new batch. Really take time with this to develop the flavour. Remove from pot and set aside.

5. If using aromatics, lightly fry until fragrant. Add the sake and mirin and scrub the bottom to remove the brown bits. 

6. Add the meatballs back preferably in one layer and allow the alcohol to boil away.

7. Pour on the passata. Add about half a bottle of water and rinse out the bottle. 

8. Add the spices and beef stock cube and stir. 

9. Pour the pasta into the pot. If the liquid doesn't cover the meatballs and pasta, top up until just covered.

10. Close the lid and seal. Cook in 'chilli/bean' mode for 3 to 4 minutes (depending on pasta package instructions. E.g. take the cooking time divide by 2 minus 1).

11. Allow graduate release for 5 minutes. Taste and season if necessary. Serve immediately, with cheese if preferred.


Saturday, June 17, 2023

Traditional char siu bao (Sponge method)

I saw this video by Kat Kwa and got really excited. I have been attempted bao-making since 2015 (my very first attempt) and it's never been really successful. With the earlier recipes, I focused on getting the technique and ingredients (e.g., adding milk or wheat flour) correct. However, as long as I continued to use flour (or even cake flour), it always failed. The skin was tough and chewy, or very dense. 

The first breakthrough came when I changed to pao flour where the texture was fluffy, and I had even more success when I changed to KA to beat and also used the bao packet's own recipe. However while I got a satisfactory bao (not char siu bao) texture, the issue was that shape was wrong as the buns were always too flat. Some recipes have suggested that this spread may happen because the dough has been over-proved or because the filling was too wet.

For char siu bao, the main issues were getting the right pillowly texture and to get it to split open on top and 'smile'. Desperate, I even tried to compare the different recipes and methods. For char siu baos, the main 'trick' seemed to be using shortening (or lard) as opposed to oil and a little bit of baking powder. I even saw one blogger cut across the top of the bao to get it to 'smile' but that's definitely the wrong approach.

The main difference from Kat Kwa's recipe is that she not only uses shortening and baking powder, her proofing is all upfront rather than along the way. She only allows short resting periods to let the dough relax once she starts working with it. In terms of looks, she still closes it tight using the traditional bao wrapping technique rather than tries to get it to split open and 'smile' like what dim sum restaurants do. In fact, she even crimps the bao skin very tightly closed to ensure no leakage.

I decided to try her recipe but augmented to pork because I don't have char siu on hand (400g mince pork, 1 egg, salt and pepper, 1 tbsp corn starch, 1 tbsp potato starch, 1 chopped spring onion). More importantly, I wanted to focus on the getting the correct texture and shape first.

Ingredients (makes 12) and methods

Yeast dough

150g bao flour

1 tsp yeast

½ tsp sugar

125 ml warm water

1. Mix sugar with water until dissolved. 

2. Add the bao flour and mix. Batter will be very sticky. Cover and allow to proof for 2 hours in a warm place.

Filling and sauce

350g char siu, diced

3 tbsp toasted sesame seeds

1 spring onion, chopped

3 shallots, flattened

2 tbsp oyster sauce

1 tsp dark soya sauce

1 tbsp light soya sauce

3 tbsp sugar

¼ tsp pepper

1 tbsp tapioca starch

1 tbsp corn starch

125 ml water

Method

1. Prepare everything by chopping, toasting, etc. Fry aromatics in a little oil.

2. Pour in the ingredients for the sauce. 

3. Once the sauce gets sticky, add the cubed char siu. Fold in. The whole mixture will be very gloupy and sticky.


Bao dough

40g (2 ½ tbsp) sugar

150g bao flour

1 tsp baking powder

3 tbsp water

1 tbsp lard or veg shortening or cooking oil

1. Once the yeast dough has finished proofing, add the sugar and mix well until dissolved.

2. Add the lard and 3 tbsp of water. Combine well. It will be difficult to do at first but persist. It will be very sticky and wet at this stage.

3. Finally, add the flour and baking powder. The dough will start off claggy but continue to beat. The dough will start to stretch and 'clean' the side of the bowl. At the end you will have a clean bowl.

4. Transfer to a lightly floured surface and knead until smooth and no longer sticky. Cover and rest for 10 minutes.

5. Roll out into a rectangle, then fold. Roll out again and then roll up into a log (see video). Cut into 12 equal pieces and cover under a damp cloth.

6. With each piece, gently tug and tuck until a smooth ball forms. (see video) Cover with damp cloth.

7. Take out one at a time to work on. Using a round rolling pin, rotate the dough as you flatten the edges, leaving the centre unrolled (and thicker than the edges). Roll out all the dough in a similar manner and cover with cloth.

8. Taking one out to work on, flatten the edges between the thumb and index. Cup one hand and drape the dough on top. Fill the centre with approx 1 chinese soup tbsp of balled up filling, and then gently press the filling down into the cupped hand (watch video). 

9. Pleat to close the bun and ensure tightly sealed. (watch video). After each bao has been filled, place into a bamboo steamer. Once all the steamer has been filled, cover and allow to rest for 10 minutes.

10. Meanwhile, bring a wok of water to a rolling boil. After resting the buns, steam on high heat for 12 to 15 minutes.

11. At the end of the cooking time, switch off the flame and open the lid to leave it slightly ajar for the steam to escape.

12. Remove from steamer and serve. For the uneaten ones, allow to air dry (so bottoms don't get soggy).

Feedback: This recipe is a success!

- I used lard but the porky smell was very obvious when working the dough. After steaming, there was also a strong porky smell but it was hard to say if it came from the bun or the meat.

- The texture is soft and fluffy! However, the pleats didn't stay because the dough is very stretchy. I decided to change my usual wrapping style to momo style and that seemed to produce more pronounced pleats.

- I took the time to roll the dough ball to make the skin smooth before flattening and filling, and it shows. The skin looks less dimpled and rippled than normal.

- I kept the filling very dry and balled it up and the bao didn't spread and flatten! It helped that all the proofing was done at the beginning so it becomes harder to over-proof.


Wednesday, June 22, 2022

Sun Right pork bun

I am naming this recipe the Sun Right pork bun because the bao flour comes from the Sun Right brand and this is the recipe printed on the packet. The packet's recipe is based on 350g of flour (to make 20 buns using 500g of minced pork). However because the packet is 1kg, I decided to use 500g so that it's easier the next time so here are my adjustments.

Ingredients (Makes 36*3" baos or 18*4.5" baos)

500g bao flour

¼ tsp salt

1 tbsp instant yeast

3 tsp sugar (because this is a savoury recipe; the packet says 3 tbsp sugar for 350g flour which I feel is a tad sweet unless you're using char siu?)

1 tbsp oil

1 cup milk, warmed to 40 deg C

1 cup + ¼ cup water, warmed to 40 deg C

Filling

500g pork mince

2 tsbp of water

1 tbsp oil

3 tbsp corn starch

1 tbsp minced ginger

1 tbsp light soya sauce (add another 1 tsp salt if not on a low salt diet like me)

Dash of white pepper

Method

1. In the KA bowl, mix the bao flour, salt, yeast, and sugar. Try to ensure that the salt doesn't come into direct contact with the yeast or it will deactivate the yeast. I usually mix both into the flour separately before incorporating everything.

2. Make a well in the centre of the flour. Using a dough whisk or chopsticks, slowly pour the oil into the centre of the well. Mix. Next, slowly pour the milk in and mix. Similarly, slowly pour the 1 cup of water in. Check for how wet the dough is. If there are still dry spots, pour in the leftover ¼ cup about a tbsp of a time. You may not need to use all of the ¼ cup of water.

3. Put on the KA dough hook. Turn on to Speed 1. At this point, if there are still dry spots, add in 1 tsp at a time until just enough to wet all the dry flour. 

4. Turn up to Speed 2. Stop periodically (perhaps every minute initially) to scrape the dough off the hook and down back into the bowl. Otherwise the dough may climb up the hook and into the motor.

5. Once the dough looks smooth and shiny, check using the window pane method. Another sign is that the dough separates into smaller balls in the bowl. Remove the bowl from the KA. Remove the dough and oil the bowl. Ball up the dough and return to the bowl. Cover the bowl with cling film and then a tea towel and set aside in a warm place to proof for about 45 mins to 1 hr until the dough doubles in size.

6. Punch down the air and remove the dough. Divide into 36 lumps (about 32 to 33g per lump). Flatten and roll out, leaving the centre slightly thicker than the edges. Add about 2 tsp of pork mince (if making 4.5" inch bao, use 3 - 4 tsps of filling). Stack it up as tall as you can. This will look like a cylinder rather than a ball.

7. Allow to proof for 45 minutes. When the time is almost up, bring water to a rolling boil. Once the steamer is put on, turn down to a medium high flame. (Ensure that the cover is wrapped in a tea towel or use a bamboo steamer otherwise the condensation will drip on the bao and ruin its 'face'.) Steam the buns for 10 minutes. Turn off the flame and leave it to rest for a further 2 minutes.

8. Serve immediately.

Wednesday, May 19, 2021

Fried Bak Teow (Beancurd rolls)

I first tried to make this and air fry it but it was never successful because I had the wrong type of beancurd skin. Adapted the Spice and Pans recipe including the correct method of wrapping. 

(Turn on the sound!)

Ingredients
1 packet of beancurd skin, cut into rectangles
500g minced pork
300g prawns, cut into 4 to 6 pieces
2 tsp five spice powder
3 carrots, cubed
250g canned bamboo, cubed
250g canned water chestnut, cubed
½ red onion, chopped
2 eggs, beaten + 1 for brushing
Pepper to taste
Salt to taste
3 tbsp corn starch

Method
1. Other than the beancurd skin, mix minced pork and prawns with the beaten egg. Mix in one direction only until sticky. Add the cornstarch and mix well. Set aside to marinate for minimum 1 hour.
2. Prepare the vegetables. When ready to wrap, add to the meat mixture
3. Prepare the beancurd skin. Wipe down with a damp cloth or paper towel to make it more pliable.
4. Wrap according to the video. Use about 1.5 tbsp of mixture (depending on the size of the beancurd sheet that you've cut) and flatten. Then seal sides and wrap the edge of the skin over the mixture and pull it into a roll.
5. Seal with egg.
6. Deep fry or shallow pan fry at 180 deg C for 4 to 5 minutes until golden brown. 
7. Serve immediately.

Monday, February 15, 2021

BBQ Bak kwa

I've tried bak kwa on several occasions (in 2012 and 2018) but it was never perfect. It never tasted correct as in it tasted like bbq meat and while that was nice in itself, it was not bak kwa. Ingredients from Burning Kitchen and method from Lazy Awesome Dad and adapted for the amount of meat we had. The bacon was my suggestion.


Ingredients

500g minced pork

200g maple smoked bacon

10 tbsp sugar

2 dashes of pepper

1½ tbsp Chinese rose cooking wine

¼ tsp five spice powder

1 tbsp oyster sauce

2 tbsp dark soya sauce

1 tbsp light soya sauce

2 tbsp honey

1 tsp sesame oil

Glaze

1 tbsp hot water

2 tbsp honey or maltose

Method

1. Chop up the bacon into little pieces. In a food processor, process the bacon until ground.

2. Mix the bacon and the minced pork. Add all the ingredients and mix very well. Use a chopstick and mix in one direction only until sticky.

3. Cover and refrigerate to allow it to marinade for at least 8 hours or overnight.

4. The next day, put parchment onto baking tray. This is very important otherwise clean up will be impossible.

5. Measure out the parchment of paper and double that. Fold in half and score the end. Open the parchment and put on ⅓ of the mixture. Close the parchment on top and using a combination of your hands and the rolling pin, roll it out to about 1 to 2mm thick (see Lazy Awesome Dad's video). Try to avoid rolling until the ends and leave a gap at each end. Once you're done, transfer onto the parchment and lift off one half of the parchment and cut it off. Repeat for the other 2 trays.

6. Bake at 175 deg C for 7 minutes. Use a pizza cutter and cut into slices, around 10 by 10 cm. Flip. 

7. Return to cook for another 10 minutes but swap the upper and lower trays going back into the oven. 

8. To really create that BBQ flavour, it has to be grilled on the BBQ. Brush with the diluted honey/maltose glaze and flip until nicely charred. Serve immediately.

Side by side comparison of glazed and bbq (below) vs non-glazed from oven


Friday, September 04, 2020

Airfried Taiwanese beancurd rolls

Been going back and forth with friends and family about the correct type of bean curd skin to use for wrapping ngor hiang/bak teow. While they insisted that the correct type is dried beancurd skin rehydrated with a wet cloth to make it pliable, I noticed that they always showed me Singaporean or Malaysian brands of beancurd skin.

All I have in my Taiwanese supermarket is refrigerated beancurd skin (yuba) which none of them seemed to understand. Here is my video of how the skin looks and feels.


Came across this Taiwanese video which exactly uses yuba in Taiwanese cuisine in place of dumpling skins, and even something cylindrical which looks like bak teow!

Also improved my previous recipe with the addition of beaten egg and cornstarch which helps the vegs to 'stick' to the mixture and not fall out, and also helps with a QQ texture. Learnt this from Spice N'Pans ngor hiang. Interesting how they flatten out the filling then roll and pull back into a cigar shape so that it helps to stick the skin to the filling. Following the Taiwanese video, I've also made the rolls shorter than traditional 6 to 8" bak teow because it's easier to cook.

Ingredients (makes 50*4 inch rolls)
1 kg minced pork
500g minced prawns
2 eggs, beaten
3 tbsp of corn flour
4 cloves of garlic, minced
1 thumb-sized ginger, grated or juiced
2 tbsp cooking wine
2 tbsp soya sauce
2 tsp five spice
1 small can of water chestnuts, drained
1 small can of sliced bamboo, drained
2 medium carrots, diced
Dash of pepper and salt
1 packet of yuba

Method
1. Combine the minced pork and prawns with the ginger, garlic, cooking wine, soya sauce and give spice. Mix in one direction until gluey. Add the beaten egg and corn flour. The mixture should be slightly wet but not overly sloppy. Set aside in the fridge to marinade.
2. Prepare the vegs but chopping and dicing into fine cubes. Salt each set of veg separately with a sprinkle of salt each.
4. Prepare the yuba skin but cutting into rectangles.
3. After the meat has had time to marinade for at least an hour, combine with the veg.
5. Place about 1 tbsp of mixture at the short end of the yuba skin and roll.
6. Place on an oiled tray and steam until cooked. Due to the need for a quick turnover, I steamed in the microwave for 3 minutes.


7. Place on a tray or in the fridge to cool, or I froze each roll separately for longer storage.
8. To airfry, spray a lined foil tray. Spray each roll. 

Try 1: Airfry at 160 deg C for 5 minutes, then 200 deg C for 5 minutes. If frozen, add another 2 minutes to the 160 deg C.

Try 2: Airfry 180 deg C for 8 minutes (from fridge) or 10 to 12 minutes from frozen.

Updated: See the correct beancurd skin and fried attempt.

Try 3: Steamed to cook then airfry 8 mins 200 deg C then 3 mins 220 deg C


Try 4: I did not guess that oil was the issued! So without oiling, airfry seam down, not overlapping, for 10 minutes at 180 deg C to cook. Brush oil on the non-seam side (the face) then turn around and brush oil on the seam side now facing up. Airfry seam side up for 5 mins at 200 deg C. Turn again to the face side and without further oiling, airfry for a further 5 mins at same temp. 

Sunday, August 16, 2020

Airfried Teochew meat rolls (Bak tiao)

There are different versions of this meat roll depending on the Chinese dialect group they come from, and while some use pork, fish can also be used, but there are even dedicated liver rolls. The more famous version is the Hokkien version that uses pork and five spice called gor hiong 五香 but I'm not particularly keen on the taste of the spice. It also comes fried or steamed, which is more common in Dim Sum. What's common however is the use of beancurd skin. I usually buy the refrigerated beancurd skin rather than the dried one, which needs to be rehydrated but ends up a lot more fragile and prone to tearing compared to the fridged one. Other than pork mince, the ingredients are entirely personal preference. I like adding everything I can get my hands on in my store cupboard, I use it as an excuse to clear out my dried and canned goods.

Ingredients (makes 16 rolls)
1 packet of refrigerated beancurd skins (*Avoid using dried beancurd skins)
500g minced pork
2 or 3 big pieces of wooden ear, soaked
15 water chestnuts, peeled and chopped
4 cloves of garlic, minced
Thumb sized ginger, grated
3 spring onions, chopped
300g prawns, roughly chopped
3 medium carrots, peeled and shredded finely
2 tbsp light soya sauce
1 tbsp five spice powder
Dash of pepper
2 eggs, beaten
Oil (for brushing)

Method
1. Mix all the ingredients except the water and tapioca starch, carrots, and water chestnuts. Mix well and then knead until it becomes a thick paste. Set aside in the fridge to marinade for 1 to 2 hours.
2. Prepare the beancurd skins. Cut to size (approx 25cm by 20cm). 
3. After marinading, add the water chestnuts and carrots and mix them in.
4. Prepare the starch solution by mixing the water and tapioca starch
5. Place 2 to 3 tbsp of the mixture near one of the short edges. Fashion it into a cigar shape. 
6. Apply the beaten egg to the edges of the bean curd skin. Fold the sides in over the meat and roll. Apply more egg wash as needed. Roll tightly and ensure that there are no trapped bubbles.
7. Lay flat on a steaming tray, do not stack on top of each other. 
8. Steam for 7 minutes until cooked. Remove from the steamer and let it cool down completely (e.g., stick it in the fridge overnight). They also freeze well.
9. Air fry at 220 deg C for 10 to 12 minutes, turning halfway. If airfrying from frozen, it will take 12 - 14 minutes.

Try 1: I tried airfrying without steaming and these were the results. I was told that it's because the meat and beancurd skin cook at different rates, so I cannot omit the steaming step!
Try 1: Airfry without prior steaming

*Try 2: This time, I did steam, but cheated because I used the microwave and steamed for 4 minutes. This picture shows after steaming. It's a bad idea to use rehydrated dried bean curd skins (see bottom rolls in the second picture) as they're very brittle to begin with. After briefly dunking the dried beancurd skins in hot water to rehydrate, the skins then tore and fell apart when I tried to wrap and roll!

Try 2: Bottom 2 rolls used rehydrated beancurd skin. Top 2 rolls used refridgerated beancurd skins
After steaming for 4 mins in microwave: Fridged beancurd skin are the top 2 rolls and rehydrated beancurd skin are the bottom 2 rolls
After brushing with oil and airfrying for 12 mins: Bottom and left are fridged beancurd skins; cut open and the one under it are the rehydrated skin

Verdict: The fridged skins were very easy to work with and roll but after airfying, the skin became chewy rather than crispy. The dried beancurd skins were horrible to work with but perhaps I used the type meant for dessert! The texture however was correct, flakey, puffy and crispy!

Update: a good video recipe by Spice N' Pans of the Teochew prawn version with tips on how to get a qq texture and how to roll.


Friday, June 12, 2020

Char siu bao 'smiling'

I have several pork bao recipes but for char siu bao, I've never really found the trick. I have recently found that the trick is wheat starch. This recipe is very detailed and has researched several sites, including the 'seminal' recipe by Lydia Teh. Everybody eats well. I also found another recipe by RasaMalaysia but it seems that someone is copying someone... not sure who. The instructions are very similar (sometimes even word for word) and the ingredient list and weights are exactly the same.

The advice is also similar (rephrased here):

1. The baking powder must be well dissolved in the cold water, otherwise it will leave yellow spots.
2. To get a white bao, first, use lard rather than oil. It just happened that I have some lard sitting around after a roost pork crackling dinner. Second, use HK flour or cake flour rather than normal flour. Cake flour has a lower gluten level than HK flour. Both are bleached. I don't have HK flour on hand (without running out to the Asian grocer) and I've tried cake flour and it was terrible to work with. So I'll probably stick to normal flour (which EEW doesn't recommend).
3. Use some vinegar in the steaming water, also for apparently whiter baos. I've tried this both with and without and no difference.
4. Only steam the baos when the water has come to a rolling boil, otherwise the baos won't rise properly. Do not open the lid during steam and cover the lid with a cloth so that the condensation doesn't drip on the surface of the buns.
5. Spray the buns with a water mist after proofing but before steaming to produce even fluffier baos.

I realised I used this exact char siu bao recipe from Rasa Malaysia when I adapted for Kimchi Pork Buns but this time I'm following the recipe more closely.

Smile or burst?
Ingredients 
For Bao (16x3" bao)
2.5 tsp (8g) instant yeast
280g normal flour, remove 4 tbsp of the flour and add 4 tbsp corn flour
100g wheat starch
160ml warm water (warm to the touch)
½ tsp white vinegar
2 tbsp sugar (original recipe was 90g icing sugar)
Pinch of salt
30g shortening (I used lard)
2 tsp (10g) baking powder
10ml cold water

Char siu: I had leftover from here and even the sauce.
250g char siu
1 chopped small shallot
approx 175ml of sauce (char siu sauce, including 150ml water and 1.5 tbsp corn starch)

Prepare: 3 by 3" parchments. Prepare steaming wok. Wrap the cover in a cloth.

Method
1. Sift together the flours and add the sugar. Mix well. Add the yeast and salt (do not put one on top of the other or the salt deactivates the yeast). Mix well.
2. Create a well in the middle. Pour in the water and vinegar. Bring together with a spatula or chopstick.
3. Add the shortening and knead for 10 to 15 minutes until smooth and no longer sticky.
4. Cover with cling film and proof until doubled in size (about 40 mins to 1 hour).
5. Dissolve the baking powder in the COLD water. Ensure there are no lumps and well dissolved. Sprinkle onto the surface of the buns and knead well. Rest for 10 minutes.
6. Divide dough into 16 portions. Roll out into 4" circle. Using the Asian rolling pin, leaving it slightly thinner at the edges and thicker in the centre.
7. Spoon one heaped tbsp into the centre and pleat. Place on pre-prepared parchments of 3 by 3". Cover and rest for at least 15 minutes.
8. Meanwhile your water should already be heating up. When it has come to a rolling boil, steam the buns on high heat for 10 to 12 minutes. Turn off the fire and rest for 5 minutes.
9. Remove and serve immediately. Best eaten hot. Store in fridge for up to 4 days. EEW doesn't recommend freezing but I find no problem, as long as they are frozen immediately when cool (rather than left lingering in the fridge). They can be reheated from frozen, approx 2 minutes on one side and turn.

Recipe feedback
- Misting the bao was definitely the wrong idea because it made the bao soggy.
- The mix of flour, corn starch and wheat starch made the bao very flat, no different to when cake flour was used.
- However, the use of wheat starch meant that the dough was a lot more manageable and handleable. It was very stretchy and I could make very nice pleats. Problem is that it was so thin that it tore, which is also why I couldn't seal it properly.
- The bao was already leaking before I even put it in the steamer, so it didn't really burst. I was probably too generous with the sauce.
- Was the dough fluffy like dim sum char siu however? It wasn't. It was a great fluffy bao but it wasn't the dim sum bao. For the first time, I actually think there wasn't enough dough on top! Maybe I should do what I've seen in some other receipe and put my pleats facing down instead so that if it leaks, it will leak onto the paper. The top may or may not open up and 'smile' but at least it wouldn't leak.

Friday, May 29, 2020

Cantonese char siu belly pork

I chose this recipe from Rasa Malaysia because it uses belly pork and more importantly, nam yu and rose wine which I had bought specially for the recipe. Most other char siu recipes either use hoi sin sauce - which I can accept - but the most egregious are those that just use store bought ready made char siu sauce (usually Lee Kum Kee!) I really reduced the amount of sugar she used from 8 tbsp to 8 tsp because there were already so many sweet ingredients inside!

Ingredients
500g pork belly, skinless (I left the skin on)
4 garlic cloves, skinned and minced
2 pieces of nam yu
1 tbsp maltose or honey
1 tbsp light soya sauce
1 tbsp thick dark soya sauce (I used cooking caramel)
1 tbsp oyster sauce
1 tsp 5-spice powder
¼ tsp ground white pepper
8 tsp sugar

Method
1. In a disposal bag, mix the marinade and let the pork belly sit to marinate for 4 hours or best, overnight.
2. Next day, drain and reserve the marinade. Pat dry the pork belly with kitchen towels.
3. Place the pork belly on a wire mesh (skin down down) over a baking tray and roast for 15 minutes.
4. Brush the marinade over the meat and flip over to the skin side to roast for another 15 minutes. Check that the meat is done, if not, continue roasting until cooked.
5. Either crank up the oven and char grill until slightly charred or toss it on the barbecue skin down down to grill for some char.
6. Strain the sauce of garlic bits and microwave or cook in a small pot and reduce till thickened. Serve the sauce on the rice with the char siu on the side.


Wednesday, May 27, 2020

IP Bak ku teh from scratch

I've always relied on bak ku teh spice packets bought from the shop but since it became difficult to go to the Asian shops, I decided to make my own. After some research, I found that there are two styles of BKT, Msian style which is darker, more herby, and Hokkien influenced, and S'pore style which is lighter, more peppery and taste of spices rather than herbs. I've always liked the latter.

I found this recipe from the Burning Kitchen. It consists of mostly spices.
All the soup had been sucked up by the rice!
Ingredients
2 star anise
10 cloves
½ stick cinnamon
2 tsp white pepper
1 tsp black pepper
12 cloves of garlic, smashed and paper removed.
1 kg pork ribs (I used prime ribs)
2l water
½ tsp dark soya sauce
2 tbsp light soya sauce

Method
1. Parboil the ribs for 10 minutes. Discard the water and wash the ribs. This step is necessary if you want a clear soup.
2. Toast the pepper until aromatic.
3. Bruise all the spices. If the peppers are pound very finely, the soup will be very peppery. Pour the spices into a spice packet.
4. Add the spice packet to the water and the pork bones. Add the smashed garlic, dark and light soya sauce.
5. Set the IP to cook on Meat for 40 to 50 minutes. Allow to naturally depressurise.
6. Serve with you tiao and sauce of red chill slices in 5 tbsp of dark soya with 3 tbsp of light soya.

Recipe feedback
It doesn't 100% taste like my favourite brand of pre-mix BKT which I can't find here, it I had cheated and added fennel seeds, which gave the soup a very earthy and 'homely' taste that was nice for the unusual cold autumn nights we'd been having. However, the taste was pretty close and certainly worth making again.

Thursday, January 24, 2019

IP Char siu

Also known as cha siu or char siew because this is a cantonese name, so it cannot be spelt using hanyu pinyin. A long time ago, my close staff taught me to make char siu in my pots with pork butt (twui bak) and equal parts of sugar, oyster sauce, light soya sauce, and dark soya sauce. While that gave a really nice flavour, it didn't taste anything like soya sauce pork nor char siu. I decided to look for a recipe and came across these two recipes which I've adapted for my purposes. With the pork you can also use pork shoulder or even pork belly, depending on how fatty you like the pork. (https://www.chinasichuanfood.com/roasted-pork-belly-with-honey/)

Ingredients list: This link tastes the most authentic and because the other link uses char siu sauce. Why would I want to make char siu sauce from scratch if I already have the pre-made version?
http://www.curiousnut.com/chinese-bbq-pork-char-siu/

Method: This link uses IP method which is my preference to cooking in the oven and splattering everywhere and basting (and basting and basting), although this method is two-step ie cook in IP then grill in oven.
https://www.pressurecookrecipes.com/char-siu-chinese-bbq-pork-pressure-cooker/

Ingredients
500g of pork butt
2 tbsp garlic, finely minced
3 tbsp light soya sauce
3 tbsp honey (or maltose)
2 tbsp hoisin sauce
2 tbsp oyster sauce
1 tbsp juice of red fermented beancurd (nam yu)
2 tbsp light soya sauce
3 tbsp brown sugar (reduced from 5)
2 tsp sesame oil
1 tsp five spice powder
½ tsp white pepper
½ tsp salt (optional, depends on how salty the other sauces are, which depend on the brands used)
1 cup (250ml) of water
Glaze
2 tbsp light soya sauce
3 tbsp honey

Method
1. Prepare the pork by slicing down the centre until it makes 2 long strips of pork. If preferred, poke holes in the meat for the marinade to penetrate. Mix the marinate and marinate the pork in the mixture for min 2 hours or best overnight, up to 2 days.
2. Drain the marinade and pour into the bottom of the IP. Add the cup of water and stir until combined. Try to remove as much of the marinade from the pork and especially the garlic pieces or these will burn later on.
3. Place the pork in a steam basket. Cook on high pressure for 18 minutes, and natural release for 12 minutes.
4. Mix the glaze. Brush onto the pork.
5. Preheat to 230 deg C or Grill function. Place pork on a grilling rack (over a roasting tin lined with foil for easy clean up) and grill for 4 to 6 minutes per side (I did 5 min). Watch like a hawk. Once the surface turns slightly charred from the sugars in the honey and soya sauce, flip the pork or remove from the oven as necessary.
6. Serve chopped up with rice with the cooked gravy, or use in other meals e.g. wanton mee, char siu buns, fried rice, etc.


Beauties after grilling

Looks a bit dry but tasted ok after drizzling on the gravy

Recipe feedback
1. The meat came out a bit dry but looked correct. I wonder if it's the twui bak (pork butt) which was used instead of pork shoulder. I also recall that some char siu that I've eaten was very dry but because it was sliced wafer thin, you couldn't really tell. It might also be because I sliced it across the grain rather than with the grain, or because it was overcooked in the IP (I added an extra minute because one slab was really thick). I might try pork shoulder in future just for a comparison.
2. BK added that he'd like it sweeter and I did reduce the brown sugar from 5 to 3 tbsp, however, when I tasted the gravy, it tasted correct to me. The only thing is that it needs to be reduced like a sauce, which I was in too much of a rush for time to do.

Thursday, January 17, 2019

Siew mai (Shumai)

I have long thought that siewmai were very difficult to make until I watched a few videos. It's quite easy to wrap, just hold hand in a cupping motion and push the filling in. The wrapper pleats itself. The trick comes in flattening the bottom on a flat surface, then using your thumb and ring finger to create a waist near the top of the dumpling. This uses considerably more filling (probably about 1.5 to 2x more) than I anticipated given my experience with other dumplings, so I had under-estimated the amount of filling needed.

This is the best link for wrapping siewmai that I could find: https://www.theburningkitchen.com/shrimp-and-pork-dumpling-siew-mai/

Ingredients (makes 20)
500g minced pork
100g dried black cloud fungus
20 prawns, shelled and deveined and chopped into chunks
4 sliced small to medium carrots
Enough frozen peas for decoration
2 tsp salt
2 tsp soya sauce
Dash of pepper
1 tbsp chinese rice wine
2 tsp minced garlic


Method
1. Soak the cloud fungus. While waiting, mix the minced pork and prawns. Marinate with soya sauce, pepper, rice wine, and minced garlic. Leave to marinate for at least an hour.
2. Drain the cloud fungus and squeeze out any excess water. Slice into short strips.
3. Prepare the carrots by slicing into rounds. Line a steamer with a parchment with holes cut out. Place the carrot rounds on top of the parchment, using the carrots as a lining so that the dumplings don't stick together.
4. When prepared to wrap, mix in the cloud fungus. Wrap each siew mai as described above and place the wrapped siew mai into the steam on top of the carrot rounds.
5. Bring a steamer to a rolling boil and steam the dumplings (about 10 to 12 each time) for 10 minutes.
6. Serve hot with sweet chilli sauce or sambal as desired.


Friday, February 16, 2018

Bak kwa (take 2)

I attempted to make BW couple of years ago but it just didn't taste right. Tried this time but with 1kg of minced pork. Not quite there but it will do.

Adapted from:
http://www.malaysianchinesekitchen.com/bak-kwa-chinese-pork-jerky/ (ingredients)
http://mykitchen101en.com/homemade-bak-kwa-chinese-pork-jerky/ (method)

Ingredients
1 kg of minced pork (makes about 32 big 'regular' bak kwa rectangles, which I further cut into 4)
⅔ cup sugar + 1 tbsp
2 tbsp cooking wine
1 tbsp dark soya sauce
1 tbsp light soya sauce
½ tsp five spice powder

Method
1) Mix the ingredients. Using your hand or a stiff cooking implement (e.g. wooden spatula), mix well in 1 direction until it comes together and is slightly gluey and paler in colour.
2) Leave to marinade in the fridge for at least 4 hrs or overnight.
3) Take out a baking sheet or sheet pan (mine was 17" by 12".) Line with foil followed by parchment.
4) Place the meat and using a offset spatula, distribute it. Cover the top with cling film and using a rolling pin, press as flat as possible, at least 3mm thin or thinner if you can. My sheet pan was not large enough so I might need to transfer say 200g to another third sheet.
5) Bake at 120 deg C for 15 minutes. It would have shrunk and oozed oil. Slice up and flip over. Increase the temp to 220 deg C and bake on one side for 8 minutes before flipping and repeating.
6) Prior to serving, grill it for best effect.

Recipe feedback
Compared to the previous recipe, this one tastes ok but there's a strong piggy smell. It really helps to microwave 30s on each side before serving which makes it seem more like the caramelised taste of bak kwa and it has to be consumed hot. Texture however seems wrong, as the minced meat texture is quite obvious (lumpy) but it does make the bak kwa more tender. On balance, I think next time I'll use this recipe but the old method of baking at 150 deg C for 1 hour which dries it out better instead of having 2 sets of temperatures.

Thursday, April 06, 2017

Pork bao (in milk bun)

My pleats are now more regular

I've tried various bao recipes. These include using cake or bao flour which was very hard to shape, original recipe using flour only, and this one that uses a mix of cake and normal flour and milk.

This recipe uses normal flour and milk and so far, gives the best result in terms of soft and spongey bun that still retains distinctive pleats. The speciality of her recipe is rising 3 times. However, it is strange because there's a lot more yeast than other recipes and leaves a slightly 'winey' taste. I'm wondering if the extra yeast has reacted with the milk. On a side note, I must say my bao wrapping skills have improved after watching the video, at least my pleats are more regular but now I just have to learn to make the goldfish lip. The dough is also great; it's not sticky at all and didn't even require additional flour and it held its shape.

Bun recipe: http://seonkyounglongest.com/chinese-steamed-buns-mantou/
The only change in upsizing to 3 cups of flour.

Ingredients (makes 12)
3 cups of flour
¾ cup warm milk
⅓ cup warm water (may not use all)
2 ½ tbsp oil
1 tbsp yeast
¼ cup sugar
1 ½ tsp salt

Filling
500g minced pork
2 carrots, diced finely
2 spring onions, chopped
2 tbsp soya sauce
2 tbsp water

Method
1) To the dry flour, add the yeast, salt (on the opposite side), and sugar. Combine.
2) Create a well and add the warm milk, oil, and enough water for the dough to come together. (I actually needed a tsp more water)
3) Knead for 5 minutes. Meanwhile, prepare the parchment pieces.
4) Place in an oiled bowl and cover with cling film. Let it prove for 1 hr.
5) After 1 hr, beat out the air, reform into a ball, and let it prove for another hour.
6) Knead and divide out into 12 balls. Cover half of the balls with cling film and place in the fridge.
7) Prepare the filling. Combine the minced pork, soya sauce, spring onions, and carrot. Knead the meat or use a chopstick and stir in 1 direction. Add the water and continue stirring. The mince should be sticky.
8) Roll out the each balled dough into 3 inch diameter rounds. Form the bao: Best video I've found
9) Let the buns prove for another 25 to 30 minutes.
10) Cover the lid with a cloth to prevent condensation from dripping on the bao and ruining its surface. When the water has come to a rolling boil, steam bao for 10 minutes. DO NOT open the lid to peak. Switch off the heat and let the bao sit for another 5 minutes so that the shape stabilises.
11) Serve hot. Uneaten baos keep very well in the freezer.

Friday, January 06, 2017

Pork and beef bao

This is my third time making bao as I was not satisfied with the past 2 attempts because the bao dough was never tight. The first one used only plain flour and it was rather tough although the dough was a joy to handle. The second one used only cake flour because while it was very fluffy, the dough was horrible as it was very difficult to work with, and the addition of baking powder was obvious to the tastebuds.
Note the stock that seeped out.
Desperate, I decided to look for another recipe and discovered that some Chinese cooks use wheat starch which I read has very low glutein. I don't think I can find that here. Maybe cake flour would work, so the best alternative seemed to be mix plain and cake flour. You never would have guessed it but I found that exact recipe from an ang mo source that uses half of each.

http://www.foodnetwork.com/recipes/brian-boitano/pork-steamed-buns-recipe.html

His bao look so ugly but the recipe works a dream - the dough is the right amount of fluffiness but still a dream to work with - see my distinct pleats! It's also got a slight 'smile' probably due to the self-raising agent in my self-raising cake flour.
My bao pleating skills have improved

This is my adaptation for 16 bao with the original recipe for 12 in brackets, because I always feel that 12 is too few after all the work! I also added the mantou method of this blogger who did 3 rises.

Ingredients for 16 * 3" bao (12 in brackets)
2 ¼ tsp yeast (no change)
½ + ⅓ C water (½ C)
½ + ⅓ C milk (½ C)
2 C plain flour (1 ½ C)
2 C cake flour (1 ½ C)
3 tbsp sugar (no change)
1 ⅓ tbsp oil (1 tbsp)
pinch of salt (no change)
(½ tsp baking powder from original recipe omitted because my cake flour is self-raising)

Filling: approx 600g (approx 450g) Refer to this recipe

Method
1) In a big bowl, add the flours, yeast, salt on the opposite side, and sugar. Use a wooden spoon to stir to incorporate.
2) Create a well in the middle and pour in the oil. Stir to roughly incorporate.
3) Microwave the milk and water till it reaches blood temperature, about 30 to 40 seconds. Pour in the liquid slowly. I didn't use up all the liquid because of the high humidity of my present conditions. You want a shaggy dough but without dry spots of flour but should not be so sticky that it coats and sticks your fingers.
4) Work the dough for 10 minutes until it leaves the bowl clean. Cover with cling film and let it prove for 45 to 60 mins until doubled in size.
5) To test, stick a finger in the dough and the hole should not close. On a lightly floured surface, knead the dough for 5 mins until smooth and shiny.
6) Cover with cling film and let it prove again for 45 to 60 mins.
7) Meanwhile, prepare your filling, and cut approximately 4" square parchments.
8) Cut the dough into 16 equal pieces and refrigerate half.
9) Fill the dough with 2.5 tbsp of filling and pleat to close. Remember to crimp the top close - I never understand bloggers who leave a hole on top. Why do you want the filling to dry out? Transfer the completed bao into a square of parchment. 
10) Let the bao prove for about 15 minutes. Towards the end of that time, start the water boiling. Remember to cover the lid with a cloth secured with a rubber band so that the condensation doesn't drip on the bao and ruin its pretty smooth face.
11) When the water has come to a rolling boil, steam 4 to 5 bao at a time for 10 minutes on medium high heat. Resist any urge to open the lid. Turn off the flame and let it rest for 5 minutes for the shape to stabilise.
12) While each batch is steaming, I prepare the next batch and cover the ones that are ready. The timing is about right ie 15 minutes is sufficient proofing time.
13) Best eaten immediately but if not, let the beauties cool on a wire rack to prevent any soggy bottoms.
14) Freeze and they keep well! Reheat by steaming in the microwave from frozen, approx 5 to 6 minutes in a steaming tray.


Wednesday, December 07, 2016

Pressure cooked BBQ pork ribs

My first attempt using the pressure cooker. The recipe isn't important, what's more important are the learnings.

Based on some research of pork ribs, I used the Meat function with a cooking time of 30 minutes based on the thickness of the ribs. Beef ribs would probably take 40 mins and korean short ribs would probably take about 20 minutes. This excludes the time taken to come up to pressure. I read that if the ribs were put in frozen, first, they must be covered in a liquid and second, the cooking time remains the same because it just takes longer to come up to pressure e.g. 20 mins instead of 10 minutes.

Despite marinating the ribs in a dry rub for 6 hours, it wasn't very tasty. I placed the ribs at the bottom, then layered on the hard vegs (potatoes and carrots), poured on a homemade bbq sauce (brown sugar, HP sauce, mustard, Worcestershire sauce, tomato paste) and finally, layered on the soft vegs (tomatoes and broccoli). I left the hard vegs very chunky.

The result? The ribs were fall off the bone soft, I was amazed. However, the gravy was very watery, perhaps due to the 4 tomatoes I put in. Some recipes recommend using the Saute function to reduce this. The hard veg came out ok and could be easily forked through. However, the broccoli was dismal - overly soft and discoloured. I might need to steam this separately in future.

Overall, not bad for 30 mins (+ 10 mins to come up to pressure) work!

Wednesday, October 26, 2016

Kimchi pork bao

Since I tried this meat bao recipe over a year ago, I thought I'd try to use up my cake flour. When I found that my particular brand of cake flour could double up as bao flour, how excited and happy I was! The original recipe used plain flour, and came out a bit yellowish. Bao flour (HK flour to be exact) is supposed to be whiter. Aside from the filling, the difference between this recipe and the original one is that the baking powder is worked into the dough just before forming the buns. This makes sense as baking powder should be cooked as soon as possible, the longer it is left out (ie during the proofing time), it loses it efficacy.

Source for bao dough: http://www.malaysianchinesekitchen.com/char-siu-bao-steamed-barbecue-pork-buns/ Since this recipe is for char siu bao which tends to be sweetish, I've reduced the sugar. Also, compared to using normal flour, bao flour is supposed to make the bao spread out more so it's less upright and 'peaky' but flatter.

This recipe also has a lot longer proofing time (1 hour compared to 30 minutes total).

Ingredients
3.5 cups (450g) cake flour
1 tbsp sugar
1/2 tsp salt
2 tsp yeast
1 1/4 cup (300ml)
40 deg C water
3 tbsp vegetable oil
2 tsp baking powder

Filling
250g pork 4 prawns, minced
5 water chestnuts, chopped finely
1.5 tbsp light soya sauce
1 tbsp cooking wine
Dash of pepper ½ cup kimchi + 1 tbsp kimchi juice

Method
1) Combine the flour, sugar, and salt. On the opposite side of the salt, add the yeast. Mix well.
2) Add the warm water and mix well with a wooden spatula until there are no dry pockets of flour. Add in the oil.
3) Oil your hands (I forgot to do this and it was a messy, sticky disaster). Remove from the bowl and knead until the dough is smooth and leaves the surface/bowl/your hands clean. I also alternated with slapping the dough on the surface. This whole process takes about 10 to 15 minutes until you reach the window pane stage.
4) Leave it in a oiled bowl, cover with cling film and a towel. Let it proof for 1 to 1.5 hours until it has doubled in size.
5) Take out the dough and sprinkle on the baking powder in batches. Work it in until the baking powder is finished. If the dough is too dry, wet your hands.
6) While the dough is proofing, prepare the filling. Combine all the filling ingredients together in the bowl and set aside.
7) Prepare the parchment, I simply cut squares of about 4".
8) Roll the dough into a cylinder and cut the dough into 12 discs.
9) Keep half of the dough covered and in the fridge so that the baking powder doesn't activate.
10 ) Flatten each disc into and roll out into 4" wide discs. I use an asian rolling pin for this and ensure that the sides are thinner than the middle.
11) Portion out the filling (a cookie scoop helps). In the centre of each disc, place the filling and crimp to seal. Place on the square of parchment. Again, I place the prepared buns covered into the fridge to prevent them from proofing too fast and at a different rate from the second batch.
12) While preparing the buns, bring a pot of water to a rolling ball.
13) Fill the steaming basket with 5 buns and ensure that they have enough space to spread out without sticking to each other. You would need to steam all the baos in batches. Steam for 10 to 12 minutes. Turn off the fire and rest for 5 minutes so that the shape stabilises. After 5 minutes, remove to a baking rack to cool so that it doesn't get a soggy bottom.
14) Best eaten hot. Uneaten bao should be refrigerated. They can also be wrapped in cling film and frozen. Reheat in the microwave steamer.

Recipe notes
1) The taste of baking powder is discernible but the sudden expansion gave the signature 'smile'. Great if this was a csb but unnecessary for other types of bao. 
2) The dough was very sticky and difficult to work with, and didn't hold its shape, as u can tell from the lack of folds.
3) The texture was not as fluffy as the csb in dim sum restaurants. Instead, it was chewy despite using cake flour. The original recipe still seemed better.

Might try this recipe next time for bao because it mixes cake and bread flour which might be easier to work with.

Wednesday, October 19, 2016

Char siu soh

Fantastic recipe!
http://thedomesticgoddesswannabe.com/2014/05/char-siu-sou-chinese-bbq-pork-puff-pastry/

Here's my interpretation with some adaptations, eg I can't be bothered to cut circles. The thawed pastry is too soft to handle.

Ingredients (makes 16)
4 sheets of puff pastry
350g char siu
1 tbsp flour
1 tbsp corn flour
2 tbsp hoisin sauce
1 tbsp light soya
1 tbsp dark soya
2 tbsp sugar
1 cup water
2 stalks spring onions, chopped
2 eggs, beaten
1 tbsp sesame seeds

Method
1) Thaw the puff pastry in the fridge, about 15 minutes before using.
2) Make the sauce. Pour the flour, corn flour, sauces and sugar into a pot. Add the water and stir till there are no lumps left. Add the spring onions.
3) Put it on the stove and whisk till it boils and thickens. Once thick, set aside to cool.
4) Prepare 2 baking trays by lining with parchment. Preheat oven to 200 deg C.
4) Chop the char siu into cubes. Pour on the sauce and mix together.
5) Take 1 sheet and cut into 4. Do not remove the plastic sheet.
6) Place 1.5 tsp of the mixture in the centre of each square.
7) Using the egg wash, brush each edge of the square. Fold the pastry in half: into a triangle or the more traditional rectangle.
8) Using a fork, crimp all open sides shut.
9) Transfer onto the parchment and egg wash each pastry. Sprinkle on the sesame seeds.
10) Bake for 15 minutes at 200 deg C. (I rotated the tray at 9 minutes to ensure even browning).
11) Leave on the tray for 10 minutes to cool then transfer to a wire rack to cook completely. Don't eat it straight out of the oven, the sauce is scaldingly hot!


Thursday, September 22, 2016

Strewed pork and cabbage bee hoon

Felt really tired after the annual (or biannual) weed spraying but still needed to prepare dinner. Have a sad half a head of cabbage sutting in the fridge and a can of stewed pork specially bought some time back just for such an occasion. 

Adapted from this recipe: http://thedomesticgoddesswannabe.com/2013/06/fried-bee-hoon-with-cabbage-and-stewed-pork/
I didn't stir fry the noodles but tossed it like a salad. Used the microwave to heat up the stewed pork and cook the cabbage.

Ingredients
1 can of stewed pork
½ head of cabbage, chopped
1 tsp garlic, minced
1 tsp ginger, minced
3 tbsp light soya sauce
2 tbsp Chinese rice cooking wine

Method
1) Boil a kettle of water and pour into a big bowl. Soak the bee hoon for 10 minutes, not too long or it will fall apart when u toss it. 
2) Pour the can of stewed pork into a deep microwavable bowl. I used a pyrex. Remove as much oil as possible. It would have coagulated on the top.
3) Add the minced garlic and ginger to the stewed pork, along with the cabbage. Toss through and microwave on high for 5 minutes. Stir and microwave for another 5 minutes on medium high. Stir to incorporate.
4) Drain the bee hoon but reserve 1 cup of the soaking water.
5) In the big bowl, toss through stewed pork mixture with the bee hoon till well incorporated but be careful not to break up the bee hoon.
6) Serve immediately.