Showing posts with label steam. Show all posts

Saturday, July 11, 2026

Tangzong dumpling-inspired tall mantou and bao

I tried 5 different bao recipes in 2025, probably my most prolific trial of bao methods. I shall exclude the 5 Black grain mantou attempt which is not directly comparable because cooked blended grain mixture was integrated into the bao dough itself rather than the filling. Otherwise it's a standard mix and one-proof receipt. I'm also excluding the Custard recipe which I didn't try but noted it down because of the filling, where oil is added in 3 stages like brioche. 

The next three are all hand kneading. There is the summer yeasted mantou which adds the yeast water in after the dough has been kneaded. It has a shorter proofing time due to summer and will apparently make taller beautiful buns. The last 2 trials are by the same blogger which focuses on the fillings. First is black sesame filling which has a milk bun with very short proofing time. The second focuses on the custard filling using the same method and a short proofing time.

This latest mantou recipe ZhenMaDaiWaJi uses the scalded flour method often used with making the stretchy skin associated with dumplings. Basically tangzhong. This is also hand kneading with minimal proofing time. This method is similar to Little Goose Food mantou recipe who also uses scalded flour. Goose explains that adding just boiled water introduces a fragrance to the scalded flour and cooks the gluten. However, Goose kneads the dough and rests it for 10 mins, then kneads to smooth surface. Then she separately kneads in yeasted water and knead for 2 mins to incorporate. This 'later yeasted method', she explains, results in a smoother skin.

Both videos describes a better method of making tall beautiful buns.

Ingredients (makes 14)

30g flour

250g just boiled water

500g flour

3g instant yeast

Method

1. Mix the 30g flour with just boiled water. 

2. Once dissolved, add in 500g flour. Use chopsticks to stir and make a claggy dough.

3. When the dough is warm to the touch (ie not scalingly hot still), prepare the yeast. Add the yeast to 1 tbsp of water and stir to dissolve. Add the yeast mixture to the dough and mix to form a claggy dough.

4. Knead on a benchtop until the skin is smooth. Better yet, let it relax for 10 minutes after kneading.

5. Without needing to proof, go ahead and form the balls. Roll and knead each and tuck into a ball so that it forms a smooth skin. Here's the main tip - form tall cylinders using the cupping action. (see the videos, Little Goose gives a better step-by-step tutorial. Form a ball first then put on the surface and roll between the palms to form tall cylinders.)

6. Place each on parchment. Put in a steamer, on top of a wok filled with warm water. Let it proof until 1.5x the size. The bao would have grown without flattening and expanding sideways. When you lightly indent the side with a finger, it will spring back out.

7. The water should have returned to room temp by now. Turn on the heat and steam for 15 mins counting from once the water boils. 

Pretty pleats and the inside is moist and even has 'gravy'!

If using filling, a very similar method by QiaoXieXXiaoYu with different proportions.

Bao ingredients

50g flour 

250g boiling water (slightly more if flour is too dry)

450g flour

3-5g instant yeast

Filling ingredients

500g minced pork

2 tbsp light soya sauce

1 tbsp dark soya sauce

1 tbsp oyster sauce

1 tsp sugar

1 tsp bullion powder

Pinch of salt

Dash of white pepper

30g lard, liquid

50g spring onion, chopped

100g infused water (ginger, spring onion infusion, sichuan peppercorn)

Method

1. Add the just off the boil water to the 50g flour and mix.

2. Add in the 450g flour and mix. Add in the yeast (she didn't let it cool down!). Knead for about 10 minutes (far from windowpane and smooth). Depressing the finger indentations into the dough doesn't cause the indentations to spring back up. Cover and proof until 2x the size, approx 70mins.

3. Meanwhile prepare the filling. Mix all the ingredients except the water. Mix the meat with chopsticks in one direction until sticky.

4. Add in the water a bit at a time and continue stirring in 1 direction.

5. Add in the liquid lard and chopped spring onions. Refrigerate.

6. The bao sld have proofed sufficiently. Knead to degas on the benchtop surface. The surface should be very smooth now and a depressed indentation springs back. 

7. Roll into a long log. Cut into chunks. Roll each chunk flat to degas then roll into a ball. (See the video).

8. Roll each wrapper flat with a chinese rolling pin. I used this method by Ah Cheen to make dumpling skins which involves applying pressure on alternating sides to automatically produce a very round-shaped dumpling skin. This only works if you don't need a skin with a slightly thicker centre and thin edges.

9. When adding filling, I used this very detailed bao wrapping method by LiFenFen to produce many uniform crimps. Cup to smoothen the surface and then roll between both palms to form a tall cylinder.

Documenting my attempts over the years (not exhaustive), where I nearly gave up around 2023-2024 and just didn't bother pleating anymore. I finally did it thanks to this video!

10. Place in a steamer on parchment. Place steamer over a wok with hot water to proof for 10 to 15 mins. Once a finger indentation springs back, it's time for steaming. (basically I just waited until I finished wrapping all the remaining bao).

11. Once the water has boiled, steam for 12 mins. Turn off the heat and allow to rest for further 3 minutes before opening the cover. Skin will be super elastic and bouncy (like dumpling skin).

Recipe feedback

- Definitely a keeper as far as ease of handling the dough, keeping the pleats distinct, and minimal proofing time required! As far as a hand kneading recipe goes, this is pretty close to prefect. Sure the bao isn't as bouncey and fluffy as with longer proofing but frankly, this is pretty close!

- Because the dough is more elastic than fluffy, it more closely resembles dumpling dough. This bao would make a great bao jian fried and steamed on the pan, with crispy bottom.

- Update: There's a recipe that combines both the scalded flour AND post-yeasted method. The scalded flour traps the moisture whereas adding the yeast afterwards is supposed to make the dough more easy to knead and thus produce a smoother (less dimplied) shinier skin.

Saturday, September 27, 2025

Summer yeasted Mantou (后酵母 method)

This mantou dough XiaoHong uses a different method with single proof by adding the yeast AFTER the dough has been kneaded. 

Ingredients

500g bao or regular flour

270g warm water

5g instant yeast + 5g water

Method

1. Mix the flour and water and knead until a dough forms. Cover and allow to rest for 15 minutes. The dough already comes out smooth.

2. In a small bowl, add 5g of instant yeast to 5g water. Mix until combined and bloomed.

3. Create a well in the dough and pour in. Slowly pull and fold from outside in and knead until combined for about 2 minutes.

4. Roll into a log and divide into around 10 pieces. Flatted and continue kneading and then form balls.

5. Place in a steamer lined with paper. Cover and allow to proof until 1.5 to 2x, until the dough springs back when gently depressed with a thumb.

6. With the steamer on top, turn on the flame to high and steam for 15 minutes. Turn off the fire and allow to rest for 3 minutes. The bao should be fluffy and moist.

Ingredients

250g just boiled water

500g bao or regular flour

3g yeast

Method (makes 6)

1. Into the hot water, grab a handful of flour and put into the water. Use chopsticks to stir into paste.

2. Add the remaining flour and stir with chopsticks. This will yield a claggy dough. Use hands to gather into a ball. The hot water will break the gluten structures to make the buns more soft and bouncy.

3. Cover to rest for 10 mins.

4. Once it's relaxed, knead for 10 to 15 minutes until the surface is smooth. 

5. Press it flat into a rectangle and make an indentation in the centre. Add the yeast into the centre. Add around 1 to 2 tbsp of water just to dissolve the yeast. Roll up the dough and knead until the yeast is well incorporated, around 5 minutes. Using this method, it's easy to form a dough with a smooth surface.

6. Roll into a log and divide into 6 pieces. Knead each piece to release the gas, and form a ball with your palm. Then, roll to form a tall cone.

7. Place directly into the steamer onto parchment. Cover and allow to rest until 1.5x or until a finger indentation on the surface springs back.

8. Start a wok with water on high. Only when the water is rapidly boiling, put the steamer on top and steam for 15 minutes. Turn off the flame and rest for 3 minutes.

Similarly Chui Jie uses this recipe for summer. This recipe has 5g yeast with 250g water and 500g flour. She kneads 3x for around 5 minutes each, but rests in between each kneading. The dough is easier to knead than 15 mins upfront. She says using this method of adding yeast later, all the buns rise at the same time to the same size. She also starts the steaming from cold water.

Saturday, August 31, 2024

Minimal kneading Black sesame bao

Ugly sesame bao. Nearly all had burst!

Black sesame filling: https://www.facebook.com/reel/472716605688076

For Tangyuang and Bao fillings which are more flowy (compared to mooncake).

Ingredients

160g roasted black sesame powder

80g glut rice flour

150g sugar

180g water

80g pork lard (would usually be hardened)

Method

1. Mix the black sesame powder, flour and sugar well and set aside. 

2. To the water, add the pork lard. Bring to a simmer until the hardened pork lard melts.

3. Pour the liquid lard into the powders. Mix well.

4. Place in the fridge for several hours until it is less runny and roll/portion into desired filling portions. 

Recipe feedback - the filling is VERY flowy, making it difficult to wrap. It might be easier to freeze it for a few hours. There was lots of filling left if this bao recipe is used.


Bao skin https://www.facebook.com/watch/?ref=saved&v=1631050780771945

Needs 500 to 600g of filling. Makes 12 to 13.

Makes a very wet dough but requires very little handling. Original video uses partially cooked fatty pork filling. (half cooked pork mince mixed with uncooked pork mince so that the filling is not one whole lump)

Ingredients

300g flour (for starter) + 100g 

3g instant dry yeast

1 tsp sugar

20g pork lard

230g warm water

Method

1. Combine ingredients. Use a chopstick to combine by stirring in one direction only. The dough has a high moisture content so no need to knead the dough. 

2. Once all the dough has come together and there are no more dry spots, form a ball (with the chopsticks) and cover with clingfilm. Allow to prove until it has doubled in size.

3. Uncover and use chopsticks to stir in one direction to dispel the gas. Pour in a small chinese rice bowl (around 100g) of flour. Use a spatula to mix, scraping down the sides of the bowl. 

4. Scrape the dough into an oblong shape and lift out onto a work surface.

5. Form a long rectangular shape gently with your hands. Using a dough cutter, cut into 2 finger wide strips.

6. No need to roll out. Use palms to flatten into a ball and use fingers to flatten the dough into a disc. (If the dough still feels too sticky to the touch, dust hands with flour). Should make about 2 to 3 inch wide bao.

7. Wrap the filling, about 2 tsp full. Ensure to seal well. 

8. Place wrapped baos into a steamer rack on top of a wok. Do not switch on the flame yet. Allow to prove the second time until the baos are visually larger. (a trick: put a ball of leftover dough in a bowl of water in the same steaming rack. When the ball floats, all have proved sufficiently).

9. Once sufficient proved, turn on the flame to high, and steam for 15 minutes (from boiling). Turn off the flame and leave it to rest for 2 minutes before removing the cover.

Recipe feedback: The skin was very soft and difficult to work with due to the high moisture content. It was impossible to seal properly and shape. 

- Further, the filling was so flowy so it kept spilling onto the seam. Once the filing fouled the wrapper, it was impossible to seal to encase the filling, not to mention it mucked up the pristine look of the wrapper.

Wednesday, July 17, 2024

IP Steamed light egg cake (松糕)

I have been searching for a steamed egg cake (kai dan gao) for a very long time because that's what my Kao Mo used to make. I've documented comparison recipes, tried Fatt Gao,  Malay cake, and even the real deal 鸡蛋糕. While some were good in their own right (eg malay cake), none really hit the spot. They all use traditional ingredients which can be difficult to find eg Fanta orange. Transcribed recipe from Small Tang Cat reel on FB which uses yeast. Interesting! 

This is my adapted recipe which comes out with a chewy but tender crumbed texture like Castella. The original recipe called for 300g normal flour but I only had 200g and substituted cake flour for the last 100g. It works a treat! I've included honey in the recipe (honey) for a tea/coffee time treak else leave it without for a breakfast cake. See feedback note below.

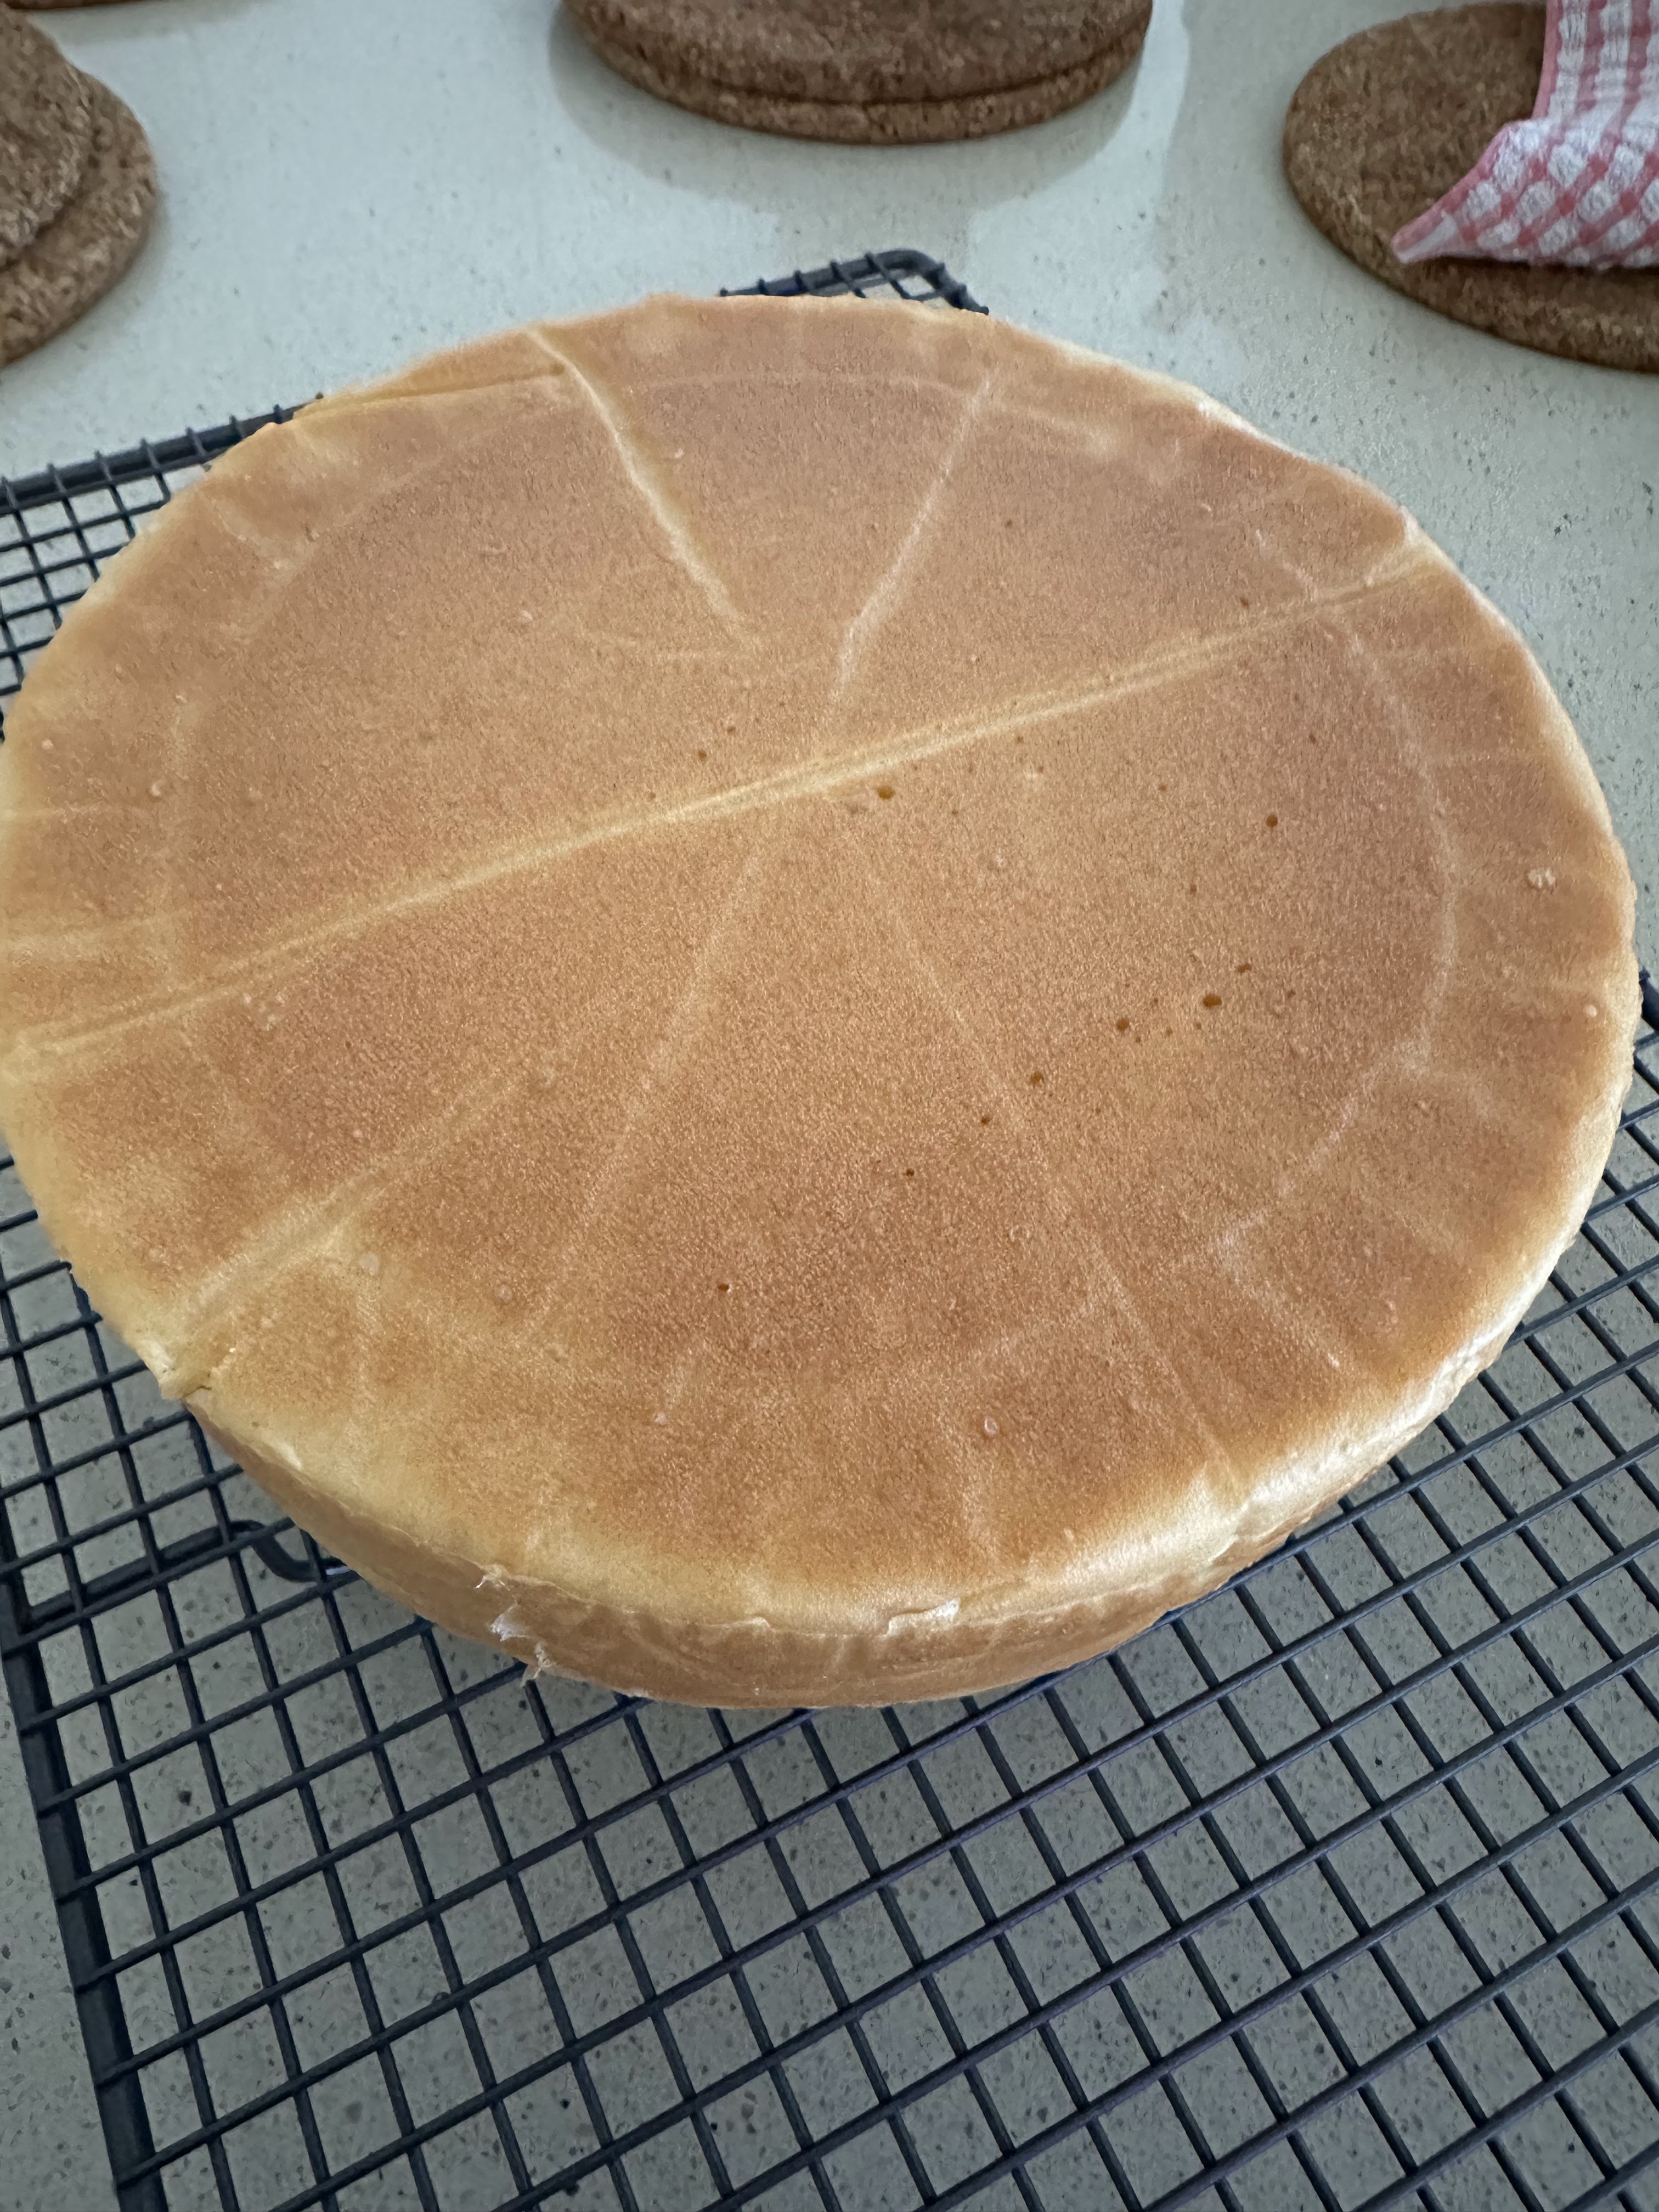
Slice is soft and fluffy
Top side was bloated despite loosely tenting with foil

Ingredients

200g plain flour

100g cake flour*

3 eggs

3g instant yeast

30g sugar

1 tsp vanilla extract (optional)

30g honey (thinned in 1 - 2 tbsp of the warm water (below) if too thick)

180g warm water (finger warm)

Method

1. Whisk all ingredients together until a smooth batter emerges.

2. Cover and allow to rise in a warm place for 30 minutes.

3. Remove the cover and whisk to deflate and remove air.

4. Pour into a pre-oiled deep glass container. (I can't tell the size but I'm going to say 8" pyrex cake 'tin')

5. In a bamboo steamer on top of a wok, warm up the water and switch off the flame. The water should not be too hot. Place the glass container in the steaming rack. Allow to rise again for 10 minutes Once the batter has risen about 80 to 90%, it's ready to steam.

6. Turn on the flame on high and bring to the water in the wok to steaming point. (He doesn't seem to have removed the cake tin while waiting for the water to reach boiling point). Steam for 20 minutes.

ALTERNATIVELY

5. Place back in a warm place to rise for 10 minutes until 80 to 90% risen.

6. Pour 1 C water into the base of the IP pot. Cover top of cake tin loosely and tent with foil. Put the steaming rack on and steam for 15 minutes, with 10 to 15 minutes natural release.

First attempt yesterday - using salt by accident! Straight to the bin
Underside looks golden!

Recipe feedback: 
* I only used 100g cake flour and 200g normal flour. The texture is very much like Castella - chewy yet tender crumbed. This is a happy accident and the unlikely outcome of wasting flour on the salt version yesterday. Traditionally Castella is difficult to make cos they cook it in a wooden box and then have to wrap in plastic and let the moisture seep back in overnight. I prefer this method chiefly because I more often have cake flour in my cupboard alongside normal flour than bread flour (which castella uses). The recipe above has been adjusted to include the cake flour.
- The original recipe only calls for 30g sugar, which is just enough for the yeast to 'eat'. This is more like a breakfast cake as it is not sweet at all and needs additional sweeteners like eating with honey, butter or jam. I've included 30g honey and vanilla to the recipe above for a more tea/coffee time treat.

Wednesday, August 09, 2023

IP Lor Mai Gai

Tried Amy+Jacky's recipe and adapted to my tastes, to see how it'll work as it doesn't require soaking.

Ingredients

2 cups Thai glutinous rice (washed) - soaked for 2 to 3 hours

8 dried shitake mushrooms, rehydrated in 250ml (1C) water and sliced

2 tbsp dried shrimp, rehydrated in 125ml (½ C) water and chopped

2 chinese lap cheong, sliced

188ml (¾ C) chicken stock

2 tbsp light soya sauce

1 tbsp dark soya sauce

1 tbsp oyster sauce

1 tbsp sugar

1 tsp sesame seed oil

1 tbsp cooking wine

3 shallots, chopped

1 stalk spring onion

1 thumb sized ginger, sliced

3 cloves garlic, minced

Optional: 4 chicken bone-in thighs or 12 chicken wings and drumlets. Remove as much excess fat as possible (otherwise it becomes too oily)

Method 1

1. In the IP using the Saute function, fry the lap cheong followed by shrimp, shallot, ginger, spring onion (white parts) in that order. Pour on the glutinous rice and stir in. Remove from the IP. If using chicken, add it now to brown then remove.

2. Deglaze with the 2 tbsp of cooking wine and scrub the bottom of the pot. Pour into the rest of the ingredients.

3. Add 1 cup of water (for steaming) into the IP with the trivet. 

4. Arrange the ingredients into the pot-in-pot in the following order: mushrooms at the bottom, lap cheong, followed by rice. Top off with chicken if using. 

5. Pour in the liquids (soaking water and stock) into the pot-in-pot together with leftover marinade sauces. Ensure that rice is submerged.

6. Place the pot-in-pot into the IP. Seal and cook using Steam function. Natural release 6-7 minutes.

  • No chicken: 1⅓ C for 2 C rice; PIP 25 mins (metal) or 30 mins (glass)
  • Wings: 1¼C for 2 C rice; PIP 30 mins (mental) or 35 mins (glass)
  • Bone-in thigh: 1C for 2C rice; PIP 40mins (metal) or 45 mins (glass)
Method 2
Follow up to step 3. 
4. Try as best as possible to arrange the chicken pieces in 1 layer. Pour in the marinade but reserve 2 tsbp for the rice. Pour in ¾ cup of water and add a trivet on top of the chicken.

5. Pour glutinous rice into a metal container. Pour in 1⅓  cup of liquid comprising the soaking water from the mushroom and dried shrimp and top up with additional water if required. Pour in the remaining 2 tbsp of marinade and mix well until uniform. Pat down the rice so that it's a flat surface.

6. Place the mushrooms on top of the rice.

7. Seal and cook using Rice function (12 mins). Natural release 6-7 minutes.
Rice comes out perfect because I separated it from the chicken and lap cheong, so it doesn't become overly wet from the excess water and oil released by the chicken and lap cheong. The sauce from the chicken is separate and can be used to drizzle on the rice.


Char kway kak (fried cubed rice cakes)

Recipe from Geok Ping. Tripled the recipe for the 2 tier metal tingkat.

I topped off with paper shrimp/shrimp 'skin'

Ingredients - makes just the right 1 inch deep cake for my steamable IP tiffin tin

220g rice flour

4 tbsp tapioca flour (or cornflour)

2 tbsp wheat starch

1 C cold water

2½ C boiling water

2 tbsp oil

½ tsp salt

Method

1. In a mixing bowl combine rice flour, tapioca flour, wheat starch, salt and cold water together. 

2. Stir in oil. 

3. Pour boiling water into the batter and stir until batter is smooth. 

4. Divide equally and pour into the 2-tier tin tingkat steamer. Pour 1 cup of water (250ml) into the bottom of the IP pot. Steam using the IP for 14 minutes with 10 minutes natural release.

Alternatively pour into 20cm round pan and steam over boiling water in wok for about 25 minutes. 

5. Cool the rice kueh and chill in the fridge for at least 6-8 hours or overnight before cutting into cubes.


Ingredients for frying chai kway kak

3 tbsp chopped pickled radish (chai poh)

3 cloves garlic, minced

2 tbsp dried shrimp, rehydrated and chopped

3 eggs

a few sprigs of chinese parsley

beansprouts (about 3 handfuls)

oil and 2 tsp lard

Seasoning (to taste)

2 tbsp dark soy sauce (cooking caramel if available)

1 tbsp fish sauce

3 tbsp light soy sauce

1 tsp sugar

salt & pepper

4 eggs

bean sprouts

Method

1. With about 2 tbsp of oil and the lrad, pan fry the chai kway (cubic noodles) until golden brown. Chop up and continue to fry. Transfer to a plate and set aside. 

2. Stir fry the pickled radish and rehydrated shrimp with garlic until aromatic. 

3. Return the cubic noodles to the wok. Push the cubic noodles to the side of the wok then crack eggs into the centre and scramble until egg is just set. 

4. Pour in seasoning. Toss well to combine. 

5. Add in beansprouts and chinese parsley. Toss until well combined and heated through. 

6. Serve while it is hot.

Sunday, August 06, 2023

Angku kueh with mung bean

Basic angku kueh mix from Kat Kwa. (Old video uses carrot and beetroot powders for colour and traditional method of cooking part of the dough then adding it back to the rest of the dough to help form gluten, otherwise ingredients remain the same). Other flavours from Kat Kwa to try: Red bean paste, Black sesame kueh with peanut filling.

Interestingly for the skin, Rasa Malaysia uses wheat starch in the dough. Meatman (video) and adds wheat starch but they also use mashed sweet potato. What to Cook Today (video) and Kitchen 101 only use glut rice flour.

My mom's mould is 6*8cm.

Ingredients - kueh (makes 18 kueh each 50 - 55g)

Banana leaves

Oil for brushing

250g glutinous rice flour

1 tbsp tapioca starch

2 tbsp sugar

150ml boiling water

60ml water room temp

2 tbsp oil

1 drop pandan essence

Method

1. Cut the banana into ovals and brush with oil. Use lotus leaf or parchment if unavailable (WTCT).

2. Add the tapioca to the glut rice flour. Add the sugar and stir.

3. Create a well and pour in the boiling water. Stir to incorporate with a spatula.

4. Once gluggy resembling bread crumbs, add the room temp water and stir until a dough forms. You may not need to use all the water. You may need to use your hands at the end to form the dough.

5. Add the oil and knead until no dry flour remains.

6. Remove ⅓ of the dough and add 1 drop of pandan essence. Knead the colour in. 

7. Add back the remaining dough and knead but not thoroughly to give it that 'tie dye' look. (see video). What to Cook Today suggests rolling dough into balls, covering with cling film and letting rest 10 minutes.

8. I got 501g skin batter. Divide and roll into 18 balls of about 27-30g each. 

Filling - Mung bean

200g dried split mung bean 

70 ml water

3 pandan leaves, cut up

110g sugar

¼ tsp salt

2 tsp fried shallot oil 

A. Steaming method

1. Wash mung bean until water runs clear. Soak for 4 - 5 hours or overnight. What to Cook Today suggests soaking in hot water for 1 hour then steaming only takes approx 20 mins.

2. Drain and pour onto a flat tray. Spread out. Add the water. Put cut pandan leaves on top and steam using medium to high heat for 25 - 30 minutes until soft. 

3. Mash with a hand masher while still hot. Add the sugar and mix well.

4. Add salt and oil and mix. Use a stick blender to blend till really smooth. Set aside to cool.

5. Divide and roll into 18 balls of about 20-25g each. (Other recipes say that to be able to roll into balls that don't stick to your hands, cooking in a pan is necessary. Kat doesn't cook because she much less liquid used. Her water:beans ratio of 1:3 but everyone else has the converse of 3:1.)

Note on proportionsWTCT says 50g mould can use 30g dough with 20g filling or 25g dough with 25g filling. Other mold sizes include 30 and 60g molds. For reference, My Kitchen 101 mould is small but also makes 18 kueh. Her 35g mold measures 6*5.5cm, and makes 18 kueh from 240g paste (13g balls) and 400g dough (22g balls). She starts using 75g mung bean with 350g water, 1½ tbsp oil, 65g or 4½ sugar to make 240g paste or 13g balls. 400g dough begins from 200g of glut rice flour (no other flours) making 22g balls. WTCT says can even omit mould and just make oval pattys.

B. IP method - adapted from https://whattocooktoday.com/mung-bean-paste.html and Kitchen 101 

200g dried mung beans (yields 640g cooked paste)

140ml water

110g sugar

⅛ tsp salt

2 tbsp oil + 1 tsp lard 

1. Place a trivet with 1 cup of water in the IP.

2. Put beans in the tray with the cut pandan leave on top and the water. Set the tray on the trivet.

3. Steam on manual, High Pressure, for 10 minutes and 10 min gradual release release. [I used my two-tiered metal steamer with around 100g per tier and enough water to cover beans aka around 70-75ml.] 

4. Drain any excess water. Stick blend while hot. Fry in IP on med heat for 6 mins then turn down and fry med-low heat for 6-7 mins until non-sticky. 

5. Set aside to cool then divide into 18 balls of 35g each (depending on mould).

500g dried beans with approx 150ml water yields approx 1600g paste if no wastage (12 mins steam at high pressure + 10 mins natural release)

C. Boiling methodhttp://themeatmen.sg/ang-ku-kueh/

250g dried mung mean

600ml water (When cooking paste, 180g sugar, 110ml peanut oil)

1. Soak 250g dried mung bean for 2 hours.

2. Cook in 600ml water with knotted pandan. Simmer until dry and mung beans soft.

3. Cook on stove over low heat until paste is thick and dry.

Wrapping the filling

1. Prepare the steamer. Bring a wok of water to a rolling boil on high heat.

2. Flatten one ball of dough in your palm. Place a ball of filling in the centre. Working the sides of the dough, slowly work dough upwards to cover up the filling and close the seam. Roll into a ball. (see video)

3. Place the kueh ball in a bowl of glut rice flour, dust off, and press it into the angku kueh mould.

4. Tap and invert kueh onto an oiled banana leaf and place onto the steamer basket. Leave about ½ inch apart between kuehs.

5. Bring steaming basket to the sink. Use a bit of water to rinse excess flour off each kueh. 

6. Place steaming basket in the wok and steam. Steam for 8-10 mins on high (10 - 12 mins on med heat) until cooked. If steaming on high, lift the lid every 2 - 3 mins to release the steam and wipe cover (or cover cover in cloth) to prevent dripping. Also high heat will distort the shape/pattern of the kueh. 

Notes on steaming from Nonya Cooking: Steam at medium heat. Once the kueh is inside, turn down to steam at low to medium heat. If the heat is too high, lift the lid to release midway otherwise the pattern is lost. Cover lid with cloth so condensation doesn't drip on the keuh. Alternatively, What to Cook Today suggests leaving ½ inch steamer lid ajar and steaming on medium for 10 - 15 mins depending on size of kueh.

Only Kitchen 101 uses bamboo steamer to avoid condensation and steams at medium for 8 minutes. Her mold is small, ie 35g AKK mold of 6*5.5cm.

7. While still hot, remove the kueh and brush with oil. 

Saturday, August 05, 2023

Chwee Kueh

Decided to adapt from Happy Flour and What to eat today combined.


Ingredients (makes 13 kueh)

150g rice flour

20g tapioca flour

25g wheat flour

½ tsp salt

200ml water

600ml hot water (boil and then let cool for 15 minutes)

2 tsp cooking oil

Topping

2 tbsp cooking oil

1 tsp lard

3 cloves garlic

7-8 shallots (I substituted with 2 stalks of spring onion, white parts only as I didn't have shallots)

150 - 200g salted chai po

50 g dried shrimp, chopped (optional - I saw these in some other recipes and I ran out of chai po)

1 tbsp dark soya sauce (cooking caramel)

2 tbsp sugar (to taste)

½ tsp pepper

Method

1. Preparation: Boil the water and let it cool for about 15 minutes. Grease the traditional tin moulds with oil. Start the wok/steamer with water and bring to a rolling boil. Prepare the steamer.

2. Topping: Prepare the chai po. Rinse once and then soak for 10 minutes. Drain into a sieve and use a teaspoon to press down to squeeze dry. Set aside.

3. In a frying pan, add the cooking oil. Stir fry the shallots until on low heat until soft and fragrant.

4. Add the garlic, chai po and dried shrimp if using. Stir fry until the garlic is just golden. Add the seasoning. Set aside.

7. Grease the moulds. Place them in the steamer to pre-heat about 1 - 2 mins after the water has come to a rolling boil.

8. Batter: Place the flours and salt into a pouring bowl with a spout or measuring jug. Add the room temp water and stir, the mixture will be thick. Add the hot water and stir. (This helps the flours to mix but don't use boiling water as it will cook the flours and turn it gluey).

7. Stir the flours and then pour into the prepared moulds. Fill till about 3mm from the top. Cover and steam at high heat for 15 mins. They may very soft and have a pool of water in the dimple in the centre, that's normal. Steam uncovered for 2 mins.

8. Let the kueh cool in the tins for 10 mins before removing with a spatula, palette knife or tooth pick run round the rim.

9. Serve with toppings in the dimple.

Using microwave for the leftover. 1min 40 seconds. Doesn't look great but tastes ok.

Recipe feedback

- I was worried that because my mould had scalloped edges, that my kueh would stick to the mould. I really slathered with oil was not necessary as when I poured on the batter, it caused the oil to 'float' up and mix with the batter.

- You really do have to wait until totally cool to remove and it's best done with a toothpick to go around the edges, then a small spatula to scoop out from the bottom. When the kueh is still warm, the spatula inevitably cuts into the kueh so best to wait until the mould is totally cool.

- This batter remains soft even when totally cold so worth the extra effort of mixing 3 different flours. Whether hot or cold, the kueh is soft rather than chewy. When hot, it is too soft to handle.

- I did 6 per steamer level in my bamboo steamer, 15 mins for lower level, then removed that level and checked water level before steaming top level for another 5 mins. The steam cannot be too intense as I found out when the batter puffed up and over-flowed. When there is only 1 level left, turn down the fire to medium high. NOT advisable to open the lid every 2 - 3 minutes to release the steam so that the batter can deflate back into the mould on its own.

- The leftover batter went into the microwave safe bowl for microwaving.

Chwee kueh comparison recipes

I have never been a fan of chwee kueh but I wanted to buy rice flour to make kimchijeon and needed a way to use up the flour. Other than making chee cheong fun and bak tang gao and this - all of which I don't eat - I thought the least 'evil' and potentially fastest recipe would be chwee kueh. At least i like chai po.

The base of all of the recipes is rice flour but then it vastly differs - those adding only tapioca flour (seems to be softer) or wheat flour (seems to keep its shape better), and those mixing e.g., adding corn flour with wheat flour or even one recipe mixing everything! I don't really know if there's any value adding all four flours since I have them all (by some fluke), why not? And I would never get the chance to use wheat flour otherwise! [Interestingly all the recipes start with 150g rice flour]

1. Best traditional recipe Kitchen Tigress (video)

- Rice, wheat, corn

- This is the best method for making stove-top chwee kueh where the mixture has to be partially cooked before steaming. 

- Great explanation of the pool of water in the dimple that forms in the centre when the correct mixture is made, to show how the kueh (called 'water' cake) really exudes water that will evaporate when cool. The dimple is correct meaning that the cake is soft enough.

- Kueh need to be completely cooled before removing from the tin. However, Chwee Kueh has to be eaten hot. Go figure.

- Chaipo should be the salted not the sweet kind, which when washed, the sweet one becomes tasteless.

2. What to cook today (video) (tried here)

- Best recipe because suggests tapioca flour or wheat + corn flour. She says when hot, texture seems the same. One commenter said tapioca only seemed softer but mixture of wheat + corn kept shape better.

- Uses sweet chai po. Fry 2 mins and add garlic, fry 30 seconds until garlic just golden. Also makes sambal.

- Must allow water to come to rolling boil then cool for 15 mins before mixing.

- Uses mini muffin tin. Must pre-heat the cups and steamer must be rolling boil before pouring batter into cups. Steam 15 mins (traditional tin) and 20 mins (muffin tin).

- Normal for it to have water inside the dimple, steam 2 mins steamer uncovered to evaporate the water. Cool 10 mins before removing.

3. Daily cooking quest

- Rice and wheat starch

- Mix sweet and salted chai po. Takes 15 mins of frying at low fire to turn brown.

- Uses steamer (10 mins in traditional cups) or microwave (1.5 - 2 mins) with silicon or ceramic cups. 

4. Happy Flour (tried here)

- 150g rice flour yields 28 kueh. Adds tapioca and wheat flour.

- Mixes flours and set aside for 2 hours! Adds hot water and keep stirring otherwise flour will separate. Don't add boiling water otherwise mixture turns gluey.

- Uses plastic chwee kueh cups. Steam for 15 to 20 mins. Leave to cool.

5. Away of Mind

- Adapts from Anncoo Journal.

- Simmers salty chai po with water to really embed the soya sauce flavour

- Mix tapioca, corn and wheat starch (blogger's first attempt but suggests corn starch may be unnecessary)

- Uses traditional mould. Preheat mould and steam for 12 - 15 mins. Allow to cool before removing

Wednesday, August 02, 2023

IP Steamed glutinous rice Chicken comparison recipes

There are three different styles and it can be confusing for the uninitiated. There is lotus leaf rice 荷叶饭which is Cantonese style and emerging from HK that comes wrapped in a lotus leaf, and lor mai gai 糯米鸡 is a simple version cooked in a metal bowl that seems to have emerged out of Malaysia (I could be wrong). No leaf involved. There is also nuo mi fan which is simply steamed glut rice in Mandarin and often a stir fried version with no leaf and no bowl. However, the ingredients are basically the same. These are different to bak zhang which is primarily pork belly and wrapped in a totally different leaf - bamboo leaf. In this recipe, I'm concentrating on the IP version simply because I don't want to soak the rice overnight.

Lotus leaf rice

1. Taste Asian Food

- Debates the difference between he ye fan and lor mai gai.

- How to prepare lotus leaf.

- No need to soak rice as it will be cooked separately then steamed afterwards in the leaf but stir fry with other ingredients. Steaming in lotus leaf mainly to impart flavour.

2. Woks of Life

- Soak rice for 2 hours. Stir fry with ingredients. Wrap and steam. Steaming here fully cooks the rice.


Lor mai gai 

1. Taste Asian Food

- Use stainless steel bowls. Use chicken thighs. Place mushrooms face down on the bowls. Add the gravy. Cover bowls with alum foil to prevent condensation from dripping.

- Soak rice for 4 hours or overnight preferred.

2. China Sichuan Food

- soak rice for 2 hours. Steam for 20 minutes.

3. What to cook today - IP

- soak rice for 4 hours. Stir fry with ingredients. 

- Uses 7 inch round pan. Cook 30 to 45 mins. Steam release 10 mins.

4. Spice and pans - Rice cooker (video)

- Soak rice for 4 hours.

- Marinate chicken and mushroom together. Pour ingredients with marinade on top of rice, no stir frying.


Nuo mi fan - No lotus leaf

1. Casually peckish

- Soak rice for 3 hours. Stir fry everything including rice. Steam for 45 mins.

2. Dingoozatfood - IP

- Soak rice 1 to 2 hours

- Uses pork belly. Stir fry everything. Pressure cook 3 minutes, natural release 10 mins.

3. Amy + Jack - IP (Tried here)

- No need to soak. Stir fry with ingredients. Use PIP method using 3 quart bowl. Cook 35 mins then 15 mins natural release.

Tuesday, July 18, 2023

Spring onion Flower buns

This 花卷 is a northern Chinese bun used in place of noodles and rice, unlike southern Chinese cuisine. There are several ways of rolling the bun but the ingredients and method are pretty similar. However, I've not had good experience with the standard 包 method so I prefer to use the revolutionary recipe I've found except the pleats may not come out so nicely.

Here are several video recipes I've found with bun rolling techniques and also standard recipes. 

1. Deliholic: Three different ways of cutting or rolling the buns

2. Revy loves big apple: cautions that adding soda to spring onion can ensure the colour stays green but the powder stains the bun yellow.

: cautions against buns that aren't well-rested won't roll into nice flowers but will tear.

: Combine then rest 10 minutes while preparing the scallions, knead 5 minutes and rest 10 minutes, roll into buns then rest until buns have proved to twice their size (no time given), steam 15 minutes.

3. Magic ingredients: Most comprehensive video

: says that no special flour or yeast

: Combine then knead 10 minutes or rest 15 minute before kneading if the bun is too 'tight'. Rest 1.5 hours and prepare scallions. Pan fry the onions with salt and cool. After proving, knead for 3 minutes before rolling into buns. This 3-minute kneading can be omitted but will result in smoother buns. However, this will cause the buns to tighten up again, which will require 15 minutes resting before forming the buns. If the buns prove too hard to form into the flower shape, rest 5 minutes. Prove 1 hour. Steam 15 minutes but let steam escape 5 minutes.

4. Cook with Bin

: nothing really special about this except the use of salt and pepper or other taste to the bun and fold 4 times rather than 3.

: highlights that you know the buns have proofed correctly when they feel light rather than dense


Ingredients (makes 12 to 14)

Followed this recipe but increased to 500g of flour in total

Starter

250g bao flour

2 tsp yeast

1 tbsp sugar

200ml warm water

1. Mix sugar with water until dissolved.

2. Add bao flour and mix. Sticky batter. Cover and allow to rise for 2.5 hours in a warm place.

Filling

1 spring onion, finely chopped

2 tbsp oil

2 tsp sesame seeds (optional)

salt and pepper to taste (or 5 spice powder)

When the starter is proofing, chop up 1 spring onion finely. Add a pinch of baking soda and fry in 2 tbsp oil until just fragrant. Add optional 2 tsp sesame seeds. Set aside to cool.

Main bao

250g bao flour

3 tbsp sugar

2.5 tsp baking powder

3 to 4 tbsp of water (just enough to bring dough together)

1 tbsp + 2 tsp lard or veg oil

¼ tsp salt

1. Mix the flour, sugar, baking powder and combine.

2. To the starter, add the lard and water. Combine. It will be very sticky and wet.

3. Add the dry mixture and mix well. Beat (if using KA) until it cleans the side of the bowl. If using hand, mix in the bowl until the bowl comes clean. Transfer onto flour surface and knead for 10 minutes. Shape into a ball. Allow to rest, covered, for 10 minutes before shaping if the dough is too taut.

4. Roll out the dough until about 1cm thick and rectangular. Layer on the spring onion oil. Less is more! Sprinkle on salt and pepper. Fold on the long edge 3-4 times (width of each fold should be length of index finger) and pat down after each fold.

5. Cut strips, about 2cm wide alternated with 1.5cm wide. Lay the thinner strip on top of the thicker strip. Pull both ends then twist around a chopstick twice (watch the video). Lay the rosette down on the table and hold it between third and fourth fingers,  pin down the seams and carefully withdraw the chopstick.

6. Let the buns rest in a covered steamer for 10 minutes. You know they're ready when you pick them up and they feel light rather than dense. Heat up the water from cold with the buns on top. Once the water starts to boil, steam for 10 to 12 minutes.

7. Turn off the fire and open a side slit to let the steam escape. After 5 minutes of resting, serve.

Recipe feedback

- Less really is more with the filling. Following one blogger, I chopped up the spring onions as much as I could. Also, following another blogger, I tried to spread a very thin layer of oil but still was too enthusiastic. This meant the bun was very hard to twist (because it was oily and going everywhere) and form into a nice tight rosette. However it kept the 'petals' fairly separate and pretty.

- It's important to salt the bun either in the mixture or in the bun itself.

Saturday, September 04, 2021

KA Pork bun 肉包

Finally found the prefect recipe. And it was off the bao flour packet! Can't go wrong with this. Recipe was originally for 350g of flour but I wanted to use up all 500g of flour so have adapted accordingly.


Recipe (makes 20)

500g bao flour

¾ C warm water (approx 40 deg C)

5 tbsp milk

1 tbsp instant yeast

1¼ tbsp oil

3 tbsp sugar

½ tsp salt

Meat filling

750g minced pork

½ tbsp sesame seed oil

1 tbsp corn starch

¼ tsp salt

1 tbsp light soya sauce

Dashes of pepper to taste

½ tbsp minced ginger

2 chopped scallions

Method

1. In the KA bowl, mix the flour, warm water, milk, yeast, oil, and sugar. Combined until no more dry spots. Add more water if necessary to combine.

2. Turn on the KA at Speed 2. Beat for a while until everything leaves the bowl then turn up to Speed 4. Beat for about 7 to 9 minutes until the bowl is clean. You should be able to stick your finger through the dough and leave a clean edge rather than a jagged one.

3. Remove the dough hook. Oil the bowl and put the ball of dough back. Cover and proof until the dough has doubled in size, approx 45 to 60 mins at 23 deg C.

4. While waiting for the dough to proof, prepare the filling. Add everything into a mixing bowl and mix well. Mix well with a wooden spoon or pair of chopsticks and stir in one direction only until the meat mixture is sticky. Cover and refrigerate.

5. Cut out parchment squares for the baos to sit on, or prepare the steaming basket.

6. Divide the dough and meat into 20 equal portions. I kept half of the dough in the fridge so it wouldn't proof so fast. Roll and wrap each of the buns. Seal tightly so that the meat is not exposed. This equates to approximately 1 chinese tbsp of filling per bao.

7. Place the wrapped baos on the parchment and into the steamer basket. I'm using bamboo, so around 5 bao per steamer. Cover and allow to proof for 40 minutes.

8. Towards the last 10 minutes of proofing the first batch, warm up the wok and bring to a rolling boil. steam for 10 minutes. Once you can see the steam escaping from the top lid, turn down the flame to medium. After the 10 minutes, switch off the flame and let the buns rest for 2 minutes.

9. Allow to cool fully on a cooling rack before storing in the fridge.

Recipe feedback

Everything about this recipe was spot on! It really helps to use the correct flour and also the recipe that comes recommended. The size of the buns was also correct. 

- The buns were easy to work with and came out very fluffy. However, the pleats would not stay, so it was easier to just make the buns as round as I could.

- It's important to shape the filling into a nice slightly peaked dome ball as this helped to hold up the bun's dome.

- My bun skin wasn't smooth but that's probably due to over-proofing during the first session and insufficient deflating, and maybe an overly high steaming temperature. But one battle at a time.

Sunday, August 16, 2020

Airfried Teochew meat rolls (Bak tiao)

There are different versions of this meat roll depending on the Chinese dialect group they come from, and while some use pork, fish can also be used, but there are even dedicated liver rolls. The more famous version is the Hokkien version that uses pork and five spice called gor hiong 五香 but I'm not particularly keen on the taste of the spice. It also comes fried or steamed, which is more common in Dim Sum. What's common however is the use of beancurd skin. I usually buy the refrigerated beancurd skin rather than the dried one, which needs to be rehydrated but ends up a lot more fragile and prone to tearing compared to the fridged one. Other than pork mince, the ingredients are entirely personal preference. I like adding everything I can get my hands on in my store cupboard, I use it as an excuse to clear out my dried and canned goods.

Ingredients (makes 16 rolls)
1 packet of refrigerated beancurd skins (*Avoid using dried beancurd skins)
500g minced pork
2 or 3 big pieces of wooden ear, soaked
15 water chestnuts, peeled and chopped
4 cloves of garlic, minced
Thumb sized ginger, grated
3 spring onions, chopped
300g prawns, roughly chopped
3 medium carrots, peeled and shredded finely
2 tbsp light soya sauce
1 tbsp five spice powder
Dash of pepper
2 eggs, beaten
Oil (for brushing)

Method
1. Mix all the ingredients except the water and tapioca starch, carrots, and water chestnuts. Mix well and then knead until it becomes a thick paste. Set aside in the fridge to marinade for 1 to 2 hours.
2. Prepare the beancurd skins. Cut to size (approx 25cm by 20cm). 
3. After marinading, add the water chestnuts and carrots and mix them in.
4. Prepare the starch solution by mixing the water and tapioca starch
5. Place 2 to 3 tbsp of the mixture near one of the short edges. Fashion it into a cigar shape. 
6. Apply the beaten egg to the edges of the bean curd skin. Fold the sides in over the meat and roll. Apply more egg wash as needed. Roll tightly and ensure that there are no trapped bubbles.
7. Lay flat on a steaming tray, do not stack on top of each other. 
8. Steam for 7 minutes until cooked. Remove from the steamer and let it cool down completely (e.g., stick it in the fridge overnight). They also freeze well.
9. Air fry at 220 deg C for 10 to 12 minutes, turning halfway. If airfrying from frozen, it will take 12 - 14 minutes.

Try 1: I tried airfrying without steaming and these were the results. I was told that it's because the meat and beancurd skin cook at different rates, so I cannot omit the steaming step!
Try 1: Airfry without prior steaming

*Try 2: This time, I did steam, but cheated because I used the microwave and steamed for 4 minutes. This picture shows after steaming. It's a bad idea to use rehydrated dried bean curd skins (see bottom rolls in the second picture) as they're very brittle to begin with. After briefly dunking the dried beancurd skins in hot water to rehydrate, the skins then tore and fell apart when I tried to wrap and roll!

Try 2: Bottom 2 rolls used rehydrated beancurd skin. Top 2 rolls used refridgerated beancurd skins
After steaming for 4 mins in microwave: Fridged beancurd skin are the top 2 rolls and rehydrated beancurd skin are the bottom 2 rolls
After brushing with oil and airfrying for 12 mins: Bottom and left are fridged beancurd skins; cut open and the one under it are the rehydrated skin

Verdict: The fridged skins were very easy to work with and roll but after airfying, the skin became chewy rather than crispy. The dried beancurd skins were horrible to work with but perhaps I used the type meant for dessert! The texture however was correct, flakey, puffy and crispy!

Update: a good video recipe by Spice N' Pans of the Teochew prawn version with tips on how to get a qq texture and how to roll.


Red bean bao 豆沙包


I have been wanting to use proper bao flour for the longest time but never really bought it. After my investigation into the different types of flour for bao buns, I tracked down some bao flour, although the packet states 'wheat flour' (not the same as wheat starch), the picture is that of bao buns, so I think I'm in the right place. I am unsure if wheat flour is really the same as bao flour, because although the articles claim that the protein level of bao flour is about the same as cake flour, my KitchenAid had a really hard time trying to beat the flour. The dough continually climbed up the dough hook and it required far more liquid than the original recipe called for. In the end, after 10 minutes, I put my KM out of its misery and hand kneaded the dough for another 5 minutes. It certainly didn't reach the window pane stage nor was it smooth and shiny, so I think I've been undone. (Tip: Found out that to prevent the dough from climbing the hook, alternate wet with dry in 3 batches, instead of dumping everything (wet and dry) into the bowl at once. Source)

Recipe adapted from China Sichuan to upsize to 500g, which is the size of my wheat flour packet. I don't want leftover flour and then I have no idea what to do with it next!

Ingredients (makes 10 big or 14 small baos)

500g bao flour (wheat flour)

60g sugar

2½ tbp yeast

pinch of salt

250 - 280ml milk, warmed to the touch

2 tbsp oil

400g red bean paste

Method

1. Pour all the bao ingredients into a KitchenAid and with the dough hook incorporate at Speed 2.

2. Continue to beat for about 8 to 10 minutes, watching like a hawk to ensure that the dough doesn't climb up the hook and into the motor.

3. Check using the window pane for gluten development. If the dough is not yet shiny and smooth, hand knead for another 5 to 10 minutes. 

4. Form into a ball and put in a oiled bowl. Cover the bowl with cling film and allow to proof for 25 (in a 30 to 35 deg C room) to 45 minutes, depending on the temperature of the room.

5. While proofing, prepare the parchment papers, measure out the red bean paste. Use an ice cream scoop and put on a tray to freeze for a few minutes, and also the steamer. Wrap the cover of the steamer in a cloth so that the condensation doesn't drip on the buns.

6. Divide into 14 pieces. Cover half and put in the fridge to prevent them for proofing. Flatten each piece of dough, and using a rolling pin, roll the edges but leave the centre slightly thicker. 

7. Put approx 1 tbsp or the pre-measured red bean paste in the centre, gather and pinch the edges together. Gently reshape the ball and put the bun down on the parchment, seal side down.

8. Allow buns to re-proof for 15 to 20 minutes, while bring the steamer to a rolling boil. 

9. Steam for 12 to 15 minutes, and then turn off the flame and rest for 5 minutes before opening.

10. Serve hot or re-heat in a steamer to serve.

Recipe feedback

- Texture is finally correct!

- Despite using bao flour, it hasn't come out white. Maybe that's HK flour which is supposed to be bleached

- Dough was very easy to work with however, a bit dry. I have increased the oil by ½ tbsp to make it more pliable. I used the char siu bao pleating to properly seal the bao filling and turned it upside down to obtain the round face. However, the dough's dryness meant that the pleats stayed distinct (you can see the 'butt cracks' on the underside) instead of the rounder shape. It also made sealing the bun difficult, and there were a lot of wrinkles where I had gathered the dough.

- I learnt a little tip! Using a bit of leftover flour mixed with milk or water, I 'painted' the creases or holes and this helped to give it a smoother 'face'!

- How to wrap round bao buns: Use Maangchi's method to create rounder buns where the filling is centered in the middle.

Friday, June 12, 2020

Char siu bao 'smiling'

I have several pork bao recipes but for char siu bao, I've never really found the trick. I have recently found that the trick is wheat starch. This recipe is very detailed and has researched several sites, including the 'seminal' recipe by Lydia Teh. Everybody eats well. I also found another recipe by RasaMalaysia but it seems that someone is copying someone... not sure who. The instructions are very similar (sometimes even word for word) and the ingredient list and weights are exactly the same.

The advice is also similar (rephrased here):

1. The baking powder must be well dissolved in the cold water, otherwise it will leave yellow spots.
2. To get a white bao, first, use lard rather than oil. It just happened that I have some lard sitting around after a roost pork crackling dinner. Second, use HK flour or cake flour rather than normal flour. Cake flour has a lower gluten level than HK flour. Both are bleached. I don't have HK flour on hand (without running out to the Asian grocer) and I've tried cake flour and it was terrible to work with. So I'll probably stick to normal flour (which EEW doesn't recommend).
3. Use some vinegar in the steaming water, also for apparently whiter baos. I've tried this both with and without and no difference.
4. Only steam the baos when the water has come to a rolling boil, otherwise the baos won't rise properly. Do not open the lid during steam and cover the lid with a cloth so that the condensation doesn't drip on the surface of the buns.
5. Spray the buns with a water mist after proofing but before steaming to produce even fluffier baos.

I realised I used this exact char siu bao recipe from Rasa Malaysia when I adapted for Kimchi Pork Buns but this time I'm following the recipe more closely.

Smile or burst?
Ingredients 
For Bao (16x3" bao)
2.5 tsp (8g) instant yeast
280g normal flour, remove 4 tbsp of the flour and add 4 tbsp corn flour
100g wheat starch
160ml warm water (warm to the touch)
½ tsp white vinegar
2 tbsp sugar (original recipe was 90g icing sugar)
Pinch of salt
30g shortening (I used lard)
2 tsp (10g) baking powder
10ml cold water

Char siu: I had leftover from here and even the sauce.
250g char siu
1 chopped small shallot
approx 175ml of sauce (char siu sauce, including 150ml water and 1.5 tbsp corn starch)

Prepare: 3 by 3" parchments. Prepare steaming wok. Wrap the cover in a cloth.

Method
1. Sift together the flours and add the sugar. Mix well. Add the yeast and salt (do not put one on top of the other or the salt deactivates the yeast). Mix well.
2. Create a well in the middle. Pour in the water and vinegar. Bring together with a spatula or chopstick.
3. Add the shortening and knead for 10 to 15 minutes until smooth and no longer sticky.
4. Cover with cling film and proof until doubled in size (about 40 mins to 1 hour).
5. Dissolve the baking powder in the COLD water. Ensure there are no lumps and well dissolved. Sprinkle onto the surface of the buns and knead well. Rest for 10 minutes.
6. Divide dough into 16 portions. Roll out into 4" circle. Using the Asian rolling pin, leaving it slightly thinner at the edges and thicker in the centre.
7. Spoon one heaped tbsp into the centre and pleat. Place on pre-prepared parchments of 3 by 3". Cover and rest for at least 15 minutes.
8. Meanwhile your water should already be heating up. When it has come to a rolling boil, steam the buns on high heat for 10 to 12 minutes. Turn off the fire and rest for 5 minutes.
9. Remove and serve immediately. Best eaten hot. Store in fridge for up to 4 days. EEW doesn't recommend freezing but I find no problem, as long as they are frozen immediately when cool (rather than left lingering in the fridge). They can be reheated from frozen, approx 2 minutes on one side and turn.

Recipe feedback
- Misting the bao was definitely the wrong idea because it made the bao soggy.
- The mix of flour, corn starch and wheat starch made the bao very flat, no different to when cake flour was used.
- However, the use of wheat starch meant that the dough was a lot more manageable and handleable. It was very stretchy and I could make very nice pleats. Problem is that it was so thin that it tore, which is also why I couldn't seal it properly.
- The bao was already leaking before I even put it in the steamer, so it didn't really burst. I was probably too generous with the sauce.
- Was the dough fluffy like dim sum char siu however? It wasn't. It was a great fluffy bao but it wasn't the dim sum bao. For the first time, I actually think there wasn't enough dough on top! Maybe I should do what I've seen in some other receipe and put my pleats facing down instead so that if it leaks, it will leak onto the paper. The top may or may not open up and 'smile' but at least it wouldn't leak.

Thursday, May 21, 2020

IP Cai tow kway (black and white)

Recipe verbatim from FB by Sally Choo

Recipe for cubic noodles (chai kuih kak or chai tow kuay)
Top box was covered but bottom box
 was left loosely covered to facilitate checking of doneness.

Ingredients (makes 2 containers of 17*10cm)
110g rice flour
2 tbsp tapioca flour (or cornflour)
1 tbsp wheat starch

1/2 cup cold water1 1/4 cup boiling water1 tbsp oil1/2 tsp salt

Method
1. Combine rice flour, tapioca flour, wheat starch, and salt.
2. Stir in cold water. Mix well. Stir in oil.
3. Pour boiling water into the batter and stir until batter is smooth.
4. Pour into the 2 containers suitable for IP. Pour in 2 cups of water (1 cup evaporated after 15 mins). Cover. Steam on high pressure for 25 minutes. Alternatively if steaming on the stove, pour into 17cm round pan, cover and steam over boiling water for 25 to 30 minutes. In either case, steam until skewer inserted comes out clean.
5. Cool the rice cake thoroughly before cutting into cubes. 


White
Ingredients
2 tbsp chopped pickled radish (chai poh)
3 cloves garlic, minced
bunch of garlic chives (optional)
2 eggs
a few sprigs of chinese parsley or chives
beansprouts (about 3 handfuls)
oil
Seasoning: (to taste)
2 tbsp light soya sauce
1 tsp fish sauce
Dash of salt and pepper

Method
1. Soak the chai poh in hot water for 10 minutes. Rinse and drain. Taste, it should not be salty. If it is, continue to soak, wash, and drain.
2. Stir fry the pickled radish and garlic until aromatic.
3. Pan fry the kway until golden brown. 
4. Push kway to the side of the wok then crack eggs into the centre and scramble until egg is just set. 
5. Pour in seasoning. Combine well. 
6. If using, add in beansprouts and garlic chives. Toss until well combined and heated through. 
7. Garnish with parsley and serve immediately.

Black 
Ingredients
2 tbsp chopped pickled radish (chai poh)
3 cloves garlic, minced
bunch of garlic chives (optional)
2 eggs
chives
oil
Seasoning: (to taste)
2 tbsp caramel dark soy sauce
1 tbsp light soy sauce
Dash of salt and pepper
2 tsp Oil

Method
1. Same step as above regarding chai poh. Mix the caramel and light soya in the oil otherwise the caramel is very sticky.
2. Stir fry the pickled radish and garlic until aromatic.
3. Pan fry the kway until golden brown. 
4. Push kway to the side of the wok then crack eggs into the centre and scramble until egg is just set. 
5. Pour in seasoning. Combine well. 
6. If using, add in beansprouts and garlic chives. Toss until well combined and heated through. 
7. Garnish with parsley and serve immediately.

Radish cake (萝卜糕)

I first tried a radish (also called big carrot or turnip) cake recipe probably around 2005. It was a lot of work and involved stir frying stuff, which I hate as it greases up my kitchen. I wasn't satisfied with the outcome either because it used only rice flour. I found it very dense. When I brought it to work, my cheffy staff told me that I should add corn flour. I have since done some research and found that wheat starch is a common addition.

Bear Naked Food: Uses corn flour as an addition and makes 2x20cm square trays

The recipe that I'm trialling here belongs to Christine because she uses wheat starch which I specially went out to buy. Wheat starch seems to be the magic 'softener' ingredient in many Chinese dim sum pastries including char siew pao so it felt like a worthy investment. Christine uses a round 20cm (8inch) cake tin. Christine also has an IP version (comes with video) of this recipe but the steaming time isn't very much reduced. While the regular wok steaming takes 45 to 60 minutes, the IP version takes 40 minutes. Considering I don't have the correct cake tin or pyrex to fit into the IP, it hardly seems saving the 5 minutes of steaming time. Christine's recipe also seems closest to the traditional Cantonese recipe that my late Kao Mo used to send over ever so often. My adaptation because I was lacking in a few ingredients.


Ingredients 
1kg of radish/turnip, shredded
4 to 5 dried shitake, rehydrated and cubed (reserve the soaking water)
55g dried shrimp, rehydrated and finely chopped (omitted because I ran out and I never did like it in my radish cake anyway)
60g salted radish (I don't normally see this but I'll give it a try. I did have to soak in hot water and throw away the water to reduce the salt.)
2 chinese sausages (lap cheong), cubed
1 tsp chicken stock powder
¾ C reserved water used to soak the mushrooms (more water may be needed depending on how fresh the radish is, see below)
Pinch of white pepper
170g rice flour
4 tbsp wheat starch
4 shallots, thinly sliced (I didn't have this)
Pinch of salt to taste.


Method
1. Mix the two flours in a bowl.
2. Saute the lap cheong, salted radish, and dried shrimp until fragrant. Set aside.
3. Saute the shallots. Add the grated turnip and stock and cover to cook until tender and translucent. (I needed another ½ C of water to cook because the water quickly evaporated.) Taste and add salt if needed. Remove from heat.
4. Add the flours and mix well to combine into a thick batter (see video for an indication of how thick the batter should be). It is just until all the flour has been moistened and no dry flour spots. It shouldn't be drippy. (I needed another 2 tbsp of water) Add back the lap cheong et al. and stir until combined.
5. Transfer the batter into an 20cm (8inch) square tin (which I find easier to cut into regular rectangles later). Steam for 45 to 60 minutes until a skewer inserted comes out clean. (It took me the full hour with a water top up halfway even tho my radish was only 770g)
6. Cool down and refrigerate.
7. To serve, cut up slices and either re-steam to heat up or pan fry. Some recipes coat with tapioca starch and fry up with lots of oil for the added crispy layer.

Recipe feedback
- Definitely a winner! The wheat starch made all the difference, it wasn't dense.
- Even though my radish was only 770g, it was just enough flour to bind everything together. I wonder how the recipe's 1kg of radish will hold up, will 170g rice flour be enough?
- A 20 inch square tin holds more volume than a 20 inch round tin. My cake was very flat, about 1.5 inch thick. Perhaps enough if I just want to fry up? More crispy edges. But certainly much thinner than my late aunt's. But if it were thicker, then I'd need to double the cooking time, no?

Update #1: This is an IP version of the recipe. I'm skeptical how she got such a big foil tray into the IP and also how 12 minutes is really enough (given my experiences with the IP chai kway). It's also not very delicious how everything goes in without frying. 
http://www.myinstantpotlife.com/turnip-cake/?fbclid=IwAR3U6xSpwz_RMAxE_rLC1iudK9dQYuW-xbH8jgje7D0P0n7zz5Efj9sIOEM

Update #2: I tried using the IP. Basically used the same recipe above except used 1 chinese bowl of rice flour, 4 tbsp wheat flour, and 2 tbsp corn flour. IP in 2 trays for 15 mins and 15 minutes de-pressurise.

Result? It was too rubbery! The addition of corn starch isn't a good idea, it makes it too gummy and dry, the bits were falling apart. It was probably also over-steamed. While the original IP says 12 minutes, 15 minutes with max 10 mins depressurise should be the max. When fried up it was still very dry and not any more or less crispy compared to the above non-IP recipe recipe.

Update #3
This time I also used the IP but I used my glass containers, covered with foil. The radish was particularly juicy and exuded a lot of water so I used 3 rice bowls of rice flour with the 4 tbsp of wheat starch, and another ¾C of soaking liquid to cook the other ingredients. IP in the two glass 1 litre containers, steam for 20 minutes with natural release for 10 minutes. It came out just a bit overdone (dry) so next time 18 minutes with natural release 10 minutes.


After air frying for 10 minutes at 210 deg C (turning halfway), it came out slightly crispy at the edges but not as pretty golden brown as panfrying. A healthier alternative to frying but not as good of course!

Update #4: I used IP to do half a portion in tingkat - so 16 minutes high pressure with 10 mins natural release was perfect! The kueh didn't come out hard and dry.