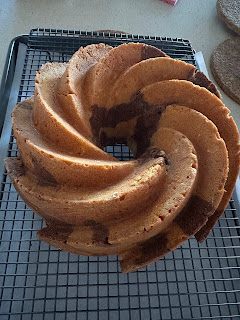
Saturday, December 14, 2024

Hokkaido milk bread loaf

I am quite a fan of soft and fluffy breads such as milk bread and Tangzong. I have researched various versions including preferments comparison, milk bread comparison post and also Tangzong and cream comparison post. The condensed milk version was difficult to work with, the Korean version was fabulous but took 3 proves so very time-consuming, and sponge method (also very time-consuming) worked for speciality filling breads but failed for bread loaf perhaps due to either over-working or over-proofing.

I decided to try this recipe by Bear Naked Food as it only has 2 proves and uses a mix of cake and bread flour to achieve the soft pillowy texture. It is very similar to this more voluminous Chinese milk loaf recipe which uses both types of flours and heavy cream, but that method was more complicated and a little dry and denser without the oil. This recipe uses milk powder and whipping cream with total 300g of flours (yielding between 560 to 610g dough), it will fit nicely into my Pullman tin!


Ingredients

270g bread flour

30g cake flour

5g instant yeast

40g sugar

4g salt

15g milk powder

25g egg (save the rest of the egg for egg wash + 1tbsp milk)

140ml milk (additional if required)

75ml whipping cream

Method

1. Mix flours, sugar, salt and milk powder with balloon whisk in KA bowl. Add instant yeast and mix again.

2. Create a well and pour in the 25g egg, milk and whipping cream. Combine with wooden spatula until mixed. Cover with cling wrap to rest for 20 mins at room temp.

3. Turn on the KA at low until mixed in. Turn up to medium and mix for 10 to 15 mins. If it seems too dry, drizzle in more milk slowly. Keep scraping down so the dough doesn't climb up the hook.

4. When the dough is shiny and not tacky, as well as passes the window pane test, it's ready.

5. Invert out onto the bench top and slam it against the benchtop 10 times. Ball up and put back into the oiled KA bowl and cover. Allow to prove for 45 to 60 minutes until doubled in size.

6. When doubled, invert onto dusted benchtop. Divide and shape into 4 balls. Cover and rest for 5 mins. During this time, prepare the bread loaf tin by buttering inside.

7. With a rolling pin, poll into rectangular disc and turn over. Repeat so both sides are smooth.

8. Roll into a cigar shape and roll out. Repeat. (see video for method) for each of the dough balls.

9. Place into lightly greased bread tin.

10. Cover and allow to rise for 40 to 50 minutes in a warm place.

11. Mix leftover egg with 1 tbsp milk and gently egg wash the top. Be sparing so as the top doesn't burn and be careful not to deflate.

12. Bake at 170 deg C for 30 - 40 minutes until puffed up and golden brown; turning halfway. Tent the top if it's browning too quickly.

13. Once out of the oven, brush with whipping cream (optional).

14. After about 10 mins cooling in the tin, invert bread onto a cooling rack. Allow to fully cool before slicing.

14. Bread can be stored at room temp for up to 3 days. Otherwise, cling wrap and store in the fridge for up to a week.

Friday, November 22, 2024

Polo bun topping comparison recipes

Rotiboy style

Coffee topping on ready-made bun with choc chip filling (makes 6): yoon noong: uses ready made bread and pipe on. Stuff choc chips in bread. Can't get topping recipe as text obscured.

Coffee topping on normal white bread slices (makes 2): Lenardy: 60g butter, 50g icing sugar, 1 egg, 2 tsp instant coffee powder mixed with ½ tsbp hot water and dissolved; 70g flour => pipe over 4 slices of bread

Mexican mocha Brioche bun in KA (makes 6): xiaochuniang. Bread flour brioche. Topping 1tsp instant coffee dissolve in 20ml warm water. Cream 60g butter, 50g icing sugar and pinch salt. Add coffee in several batches. Add 30g beaten egg. Fold in 70g cake flour and 5g cocoa. Pipe on the topping. Note smooth and rough sides, roll ⅓ dough into a ball then wrap ⅔ dough over the ball. This keeps the ball tall rather than flattening out when proofing.

Coffee bun by hand (makes 6): Delicious day Bread flour brioche. Uses 36g or 3tbsp butter, 36g sugar, pinch salt, 28g/half egg, 4tbsp/42g bread flour, 2g instant coffee, 1tbsp/6g warm water. Pipe on.

HK style

HK style by hand: Ali's kitchen Brioche Bread flour. Milk powder with plain flour to make cookie

HK polo bao in mixer (in cantonese) with butter inside: Anchor Sarah reel Brioche Bread flour. Need to keep the bun dough cold (below 28 deg C). Change from dough hook to scraper beater (because bowl is cold). Cookie dough topping has to be rolled out and pasted on top.

Soft milk bread using sponge method with bread flour (makes 9 buns) by Miki Food and she adds red bean filling topped up with what she calls souffle milk topping which is creaming sugar and butter but no flour added. Unfortunately the recipe is very brief and method isn't very clearly articulated so doesn't say to pipe on the topping or to roll it out (which is very difficult!)

Saturday, November 16, 2024

All-in yoghurt banana muffins

Last week I tried tweaking my banana loaf by incorporating tea cake with banana bread. It was a sticky disaster that hardly rose, and it got more slimey by the day. (According to BK, that is. I didn't think it was slimey, to me, it was just what fruit did as it matured over time).

Today, I thought I'd try a yoghurt recipe because I had heard so much about the properties of yoghurt in creating an impossibly moist tender crumb. After checking out a few recipes, I settled on this one by Mom's Dinner because it didn't involve too much hard work like hauling out my stand mixer or even the weighing scale. It just used simple American cups. This recipe has been upsized for 16 to 17 muffins (depending on how full you fill each muffin cup), and some little changes eg reduced sugar and swapped half brown sugar and half white sugar


Ingredients

4 bananas, mashed

3 eggs

⅛ tsp salt

1 tsp vanilla extract

6 tbsp (85g) butter, softened at room temp

½ C brown sugar

½ C white sugar

½ C Greek yoghurt

2¼C flour

1½ tsp baking powder

1½ tsp baking soda

¼C raisins

¼C mini or chopped up choc chips (reserve a few wholes ones for deco)

¼C chopped walnuts (reserve a few whole ones for deco)

Method (makes 16 to 17 muffins)

1. Prepare the muffin tin either with home made muffin papers or cupcake liners.

2. In a bowl (I housed everything in my sifter), combine and sift in the flour, baking powder, and baking soda.

3. In another bowl, mash up the banana until no big chunks left. Add the salt.

4. In a third bowl, cream the butter and sugar by hand until pale using a wooden spoon. Add in the yogurt and mix. It will seem to curdle but do your best.

5. (Optional step: helps the ingredients 'suspend' in the batter rather than sinking to the bottom) In a fourth bowl, mix the choc chips, nuts, and raisins with 2 tbsp of flour and toss through.

6. Combine the wet ingredients: add the creamed mixture to the bananas and mix well. Fold through the floured nuts, raisins and choc chips.

7. Sift in the flour in several goes, folding only twice or three times each after each addition. After everything is done, it's ok to have some pockets of dry flour. Try not to overmix otherwise the batter becomes over-worked and you get a tough muffin.

8. Using a ½C ice cream or cookie dough scoop, scoop out into line muffin tins. Fill till about ⅔ full (17 muffins) for the muffins to rise up just till the top edge of the cupcake liner, or all the way if you want a peak overflowing dome (16 muffins).

9. Distribute the whole walnuts and choc chips and gently push them into the top of each muffin.

10. Bake at 175 deg C for 16 to 17 mins until golden brown on top. A skewer should come out dry except for a few crumbs (be careful not to stab a banana or choc chip).

11. Allow to cool in the tin for about 10 minutes then remove to a cooling rack. Best eaten 10 to 15 minutes out of the oven. If eaten when cool, it would be nice to reheated around 10s in the microwave, and even further lashings of butter! 


Wednesday, October 02, 2024

Beef hor fun/wat tan hor

Recipe from Marion but adapted

Key tricks: 
- Marinade the beef with corn starch AND baking soda (not too much of either)
- Coat noodles with soya sauces etc beforehand instead of in the pan
- Use beef dashi for the stock. Equal parts stock and starch slurry (mix 3 tbsp tapioca or corn starch to 3x water)


Saturday, September 28, 2024

Raisin tea loaf

From Liliforberg 


Ingredients

200g (approx 1C) raisins

1C (approx 240ml) black tea or substitute with 1C orange juice

⅓ C (70g) brown sugar

1 large egg

1 tsp mixed spice

1 tsp vanilla

80g butter

250g self-raising flour

½ tsp salt

Method

1. Make 1 cup of tea or use 1 C orange juice. Soak 1 C raisins. (use same coffee mug-sized cup to measure) 

2. Once the mixture is cool, add in the egg.

3. Add and mix the rest of the ingredients. Fold in the flour.

4. To lined loaf tin, pour in the mixture. Bake in a loaf tin on 170deg C for 47 mins (up to 60 mins depending on oven) until skewer comes out clean.

5. Cool completely before cutting otherwise it gets crumbly! Serve with more butter. Can keep outside fridge in cool weather. Toast to reheat and slather with butter!

Saturday, September 21, 2024

Claypot glutinous rice

Since my earliest attempts to recreate the claypot effect in a rice cooker,  and then I tried to cook lor mai gai in the IP (and even bought an IP suitable pot to do so), I could never get the texture of the rice just right or get the chicken correctly cooked (neither over nor under cooked).  My suspicion was that the water and oil content exuded from the chicken is a wildcard that is very hard to accurately gauge.

After reading and trying out this method for glutinous rice where the key lay in NOT overly soaking the rice, I decided to try again but this time in a proper upscaled rice cooker. I realised that most recipes that required soaking glutinous rice for 4 hours or even overnight was because they wanted to steam the rice. In a rice cooker, it's immersed in water and boiling in water, so the glutinous rice can easily turn to mush. 

I decided not to include in too many elements and ditched the chicken, just working with lap cheong and mushrooms for flavouring. In addition, my rice cooker has a special pot which apparently can re-create the burnt bottom of a clay pot. It was either the Claypot setting or the Firewood setting and I decided to try the latter setting. Success!

Ingredients

2 cups of glutinous rice, soaked for 1 hour only

About a handful of dried shitake mushrooms, soaked

2 tbsp of shrimp skins

1 Chinese rice bowl of water (not all will be used)

1 tbsp light soya sauce

1 tbsp dark soya sauce

2 tsp oyster sauce

1 tsp sugar

1 tbsp Chinese rose wine (to give it a special flavour that goes well with pork)

4 links of lap cheong, sliced

4 cloves of garlic, minced

1 stalk of spring onion

2 eggs, beaten

Pinch of salt

1 tsp sesame oil for garnishing

Method

1. Wash and soak the glutinous rice for 1 hour. At the same time, soak the dried mushrooms in the 1 bowl of water.

2. Prepare the marinade, mixing the soya sauces, sugar, and oyster sauce. 

3. Once the mushrooms have softened, remove the stalks and slice if too large. Reserve the soaking water

4. In the rice cooker, drain and add the rice, For 2 cups of rice, use 1⅓ C of mushroom soaking water. If there isn't enough liquid, top up with water. 

5. Pour in the marinade and mix well. Set to the Claypot function. 

6. After around 5 minutes, place the mushroom slices on top of the rice. Do not mix.

7. Meanwhile, in a pan or wok, fry the lap cheong lightly until the oil comes out.

8. Add the whites of the spring onion, minced garlic, and shrimp skins. Briefly fry until aromatic. 

9. Pour the panfried lapcheong etc into the pot on top of the mushrooms. Do not mix or disturb the rice but layer evenly on top. Top up with enough water to just cover the rice (the toppings need not be immersed in water). Leave to cook.

10. Meanwhile, make an omelette with the eggs. Allow to cool then slice into ribbons and set aside.

11. Once the rice is cook, use the Stay Warm function and allow to rest for another 10 minutes.

12. Mix and garnish with the greens of the spring onion, drizzle on sesame seed oil, and top with omelette ribbons. Serve immediately.

Recipe feedback

- Success! The Claypot function worked beautifully and I even had a burnt bottom!

Saturday, September 14, 2024

Red bean snowskin mooncakes

Trying out different skin flavours - blueberry (boiling 1 tbsp of frozen blueberry without water then mashing and using the juice to colour), cocoa, pandan (essence) and red colouring.

Wrapper filling recipe adapted from DessertGirlFirst which uses custard filling with custard powder and egg yolks. While the proportions for this recipe were prefect for 75g mooncake molds, it used condensed milk which I don't have lying around. The previous recipe which was my first trial has a very sturdy skin and also used equal proportions of skin to filling. In this recipe, I try to use less skin to filling. Method is mostly the same.

Ingredients (810g dough makes twenty-three 75g mooncakes)

920g filling 

110g GRF

86g rice flour

49g wheat starch or cornstarch

98g icing sugar

455g milk

44g veg oil

⅓C GRF cooked, for dusting

Method

1. Mix the sugar, milk and oil in a large bowl. Sift in the flour. Mix until no lumps.Optional: if adding colour to the skin, make sure to do it before cooking the dough as there will be no further cooking. Check out the tie-dye doughs here with Emily Lu.

2. Microwave the dough to cook it. Cover the microwave safe bowl. Microwave in several increments (around 1.5 min, 1.5 mins, 1 min, then 30 seconds; total 4.5 mins full power). Mix each time with spatula until no liquid remains. 

5. Allow to cool slightly for 10 to 15 mins then knead with gloves for about 5 mins until oil is fully incorporated. It may be easier to transfer to plastic wrap or bag and work it. If easier, transfer onto a flat surface (not floured!) and knead until dough is smooth and non-stick. The dough is easier to work with when still warm. Cover with clingfilm and chill dough in fridge for between 30 mins to 2 hours. Maximum chill for 4 hours. On a cool day, the dough can also be left on the counter. If the dough is too hard after leaving the fridge, leave it on the counter to come up to room temp so it's easier to work with.

6. While waiting for the dough to rest, portion out the filling into 40g balls. Cover with clingfilm with the plastic touching to prevent drying out and forming a skin. Leave in the fridge for at least 2 hrs to harden or max 2 hrs in the freezer so that it's easier to work with later.

7. Fry the ⅓ C glutinous rice flour until slightly brown for 6 - 7 mins on medium heat. Set aside to cool.

8. Portion out dough into 35g balls. Roll dough balls out into about 3.5 inch diameter (for 3 inch diameter for 50g mould; 4 inch diameter for 100g mould). Either flatten out between 2 pieces of parchment using rolling pin or flatten out between palms. Press around the edge with your finger to thin the edge.

9. Dust the molds well with cooked flour. To really prevent the dough ball from sticking, lightly coat the ball too. (Note that too much flour will blur the pattern). Encase the filling ball in the flattened dough (see videos). 

10. Roll the ball into the cylindrical shape and flatten the top with thumb slightly so it doesn't budge out (see video). Place flattened top into the upturned mould and gently fit the dough ball into the mould without forcing it in. Mould the bottom of the cylinder into the mould gently with a thumb so it doesn't bulge out. Place the mould with dough ball right side up on parchment. 

12. Ensure to firmly press the mould down onto the parchment before pressing the lever down. Press the lever down until you feel resistance. Press for about 15 seconds to establish the shape. Press down several more times gently to really imprint the design. Release the mooncake and dust off excess flour with a pastry brush.

13. Chill for a few hours and keep stored in fridge. Best consumed within 3 days.

Feedback

- This dough is super soft! It doesn't really keep its shape (as u can see all the misshappen ones)

-  35g dough with 40g filling is just enough dough to cover. However, don't roll too thin and leave it thicker in the centre and thinner at the edges. I find using palms to flatten the ball into a pancake, and then using fingers to flatten the edges to be easiest.

- For the red bean, really works best when fridge cold. So I put in the fridge to harden in order to portion, the took out only a few portions each time to wrap, then after wrapping that batch, I immediately imprinted otherwise the filling starts to go soft and the wrapper isn't stiff enough to hold its shape.

- When using odd shape moulds (see pink dragon and cocoa love lock in the front row), stamp down and do not rock. Make sure to dust both mould and mooncake very well with flour. Stamp down several times but do not rock the stamp, straight up and down. My filing got stuck to the stamp because I rocked it and ruined the imprint.

- It is best consumed after 4 hrs in the fridge and good for up to 1 day after. On Day 2, the skin became hard. On Day 3, the filling (?) started to exude water!

Saturday, August 31, 2024

Minimal kneading Black sesame bao

Ugly sesame bao. Nearly all had burst!

Black sesame filling: https://www.facebook.com/reel/472716605688076

For Tangyuang and Bao fillings which are more flowy (compared to mooncake).

Ingredients

160g roasted black sesame powder

80g glut rice flour

150g sugar

180g water

80g pork lard (would usually be hardened)

Method

1. Mix the black sesame powder, flour and sugar well and set aside. 

2. To the water, add the pork lard. Bring to a simmer until the hardened pork lard melts.

3. Pour the liquid lard into the powders. Mix well.

4. Place in the fridge for several hours until it is less runny and roll/portion into desired filling portions. 

Recipe feedback - the filling is VERY flowy, making it difficult to wrap. It might be easier to freeze it for a few hours. There was lots of filling left if this bao recipe is used.


Bao skin https://www.facebook.com/watch/?ref=saved&v=1631050780771945

Needs 500 to 600g of filling. Makes 12 to 13.

Makes a very wet dough but requires very little handling. Original video uses partially cooked fatty pork filling. (half cooked pork mince mixed with uncooked pork mince so that the filling is not one whole lump)

Ingredients

300g flour (for starter) + 100g 

3g instant dry yeast

1 tsp sugar

20g pork lard

230g warm water

Method

1. Combine ingredients. Use a chopstick to combine by stirring in one direction only. The dough has a high moisture content so no need to knead the dough. 

2. Once all the dough has come together and there are no more dry spots, form a ball (with the chopsticks) and cover with clingfilm. Allow to prove until it has doubled in size.

3. Uncover and use chopsticks to stir in one direction to dispel the gas. Pour in a small chinese rice bowl (around 100g) of flour. Use a spatula to mix, scraping down the sides of the bowl. 

4. Scrape the dough into an oblong shape and lift out onto a work surface.

5. Form a long rectangular shape gently with your hands. Using a dough cutter, cut into 2 finger wide strips.

6. No need to roll out. Use palms to flatten into a ball and use fingers to flatten the dough into a disc. (If the dough still feels too sticky to the touch, dust hands with flour). Should make about 2 to 3 inch wide bao.

7. Wrap the filling, about 2 tsp full. Ensure to seal well. 

8. Place wrapped baos into a steamer rack on top of a wok. Do not switch on the flame yet. Allow to prove the second time until the baos are visually larger. (a trick: put a ball of leftover dough in a bowl of water in the same steaming rack. When the ball floats, all have proved sufficiently).

9. Once sufficient proved, turn on the flame to high, and steam for 15 minutes (from boiling). Turn off the flame and leave it to rest for 2 minutes before removing the cover.

Recipe feedback: The skin was very soft and difficult to work with due to the high moisture content. It was impossible to seal properly and shape. 

- Further, the filling was so flowy so it kept spilling onto the seam. Once the filing fouled the wrapper, it was impossible to seal to encase the filling, not to mention it mucked up the pristine look of the wrapper.

Saturday, July 27, 2024

Orange chocolate marble bundt

When I was reading up on this, there are two kinds of orange chocolate cakes. There is the Jeffa cake, which combines the chocolate and orange. The one I want has to split up orange and chocolate components, because I want to taste them differently. So I chose the marble cake from Pies and Tacos. But I do want a granache glaze so I used Smitten Kitchen's recipe which was to suit a 10C bundt cake.


Ingredients (recipe is for 12C but I've downgraded to 10C for my bundt)

398g flour

27g cocoa powder

15g baking powder

¼ tsp salt

236g butter, softened

416g sugar

4 eggs

1¼ tbsp orange zest

1.46 C orange juice  

Glaze

1 tbsp butter

1 tsp orange zest

2 tbsp orange juice

¾ sugar OR

Granache (from Smitten Kitchen)

225g semisweet choc chips or chopped choc

120ml (½C) heavy cream


Method

1. Grease bundt.

2. Divide flour into 2 bowls (approx 199g per bowl). Add half of baking powder (7.5g). Add half of the salt (ie about ⅛ tsp).

3. Add cocoa powder to just one bowl. 

4. Sift both bowls (separately of course).

5. Cream butter in stand mixer for 2 minutes. Add sugar gradually and keep creaming for 2 - 3 mins until pale and fluffy.

6. Add eggs one at a time and ensure each is fully incorporated before adding the next. Scrape down after each addition.

7. Add orange zest and mix to combine.

8. Weigh cake batter and divide into 2 bowls. Divide orange juice. 0.8C (slightly more than ¾C) for orange batter. Remainder for chocolate batter.

9. Work in each bowl separately. Sift dry ingredients in each bowl.

a. To orange batter, add 0.8C orange juice. Sift in the dry ingredients and whisk to fold in. To avoid curdling, start with flour, then juice. Alternate flour and juice and fold after each addition. Start and end with flour.

b. To the chocolate batter, add remainder of orange juice. Sift in the dry ingredients. Similar to above, start and end with flour by alternating dry, wet, dry until all the ingredients have been used up.

10. To assemble, pour ⅓ of orange batter at the bottom. Top with ½ of choc batter. Top with ⅓ of orange batter. Pour on remaining half of the choc batter. Finish with remaining orange batter.

11. Bake at 175 deg C for 60 minutes (recipe said 40 to 50 minutes, that was so wrong!) Tent if top becomes too brown. Cake is ready when toothpick inserted comes out clean. Cake should spring back when you touch the top with your finger.

12. Remove from oven and allow to cool in pan for 10 minutes over a rack.

13. Make the glaze or granache. If using granache, cake has to be completely cool before pouring on the granache.

14. To make the glaze: put in a small saucepan and combine until sugar is melted.

15. To make the granache, add hot (not boiling) cream to the choc. Allow to stand for 3 minutes before stirring with a metal spoon only!

16. Unmold the cake after 10 minutes in the pan (not too much longer or the cake will stick to the pan) and flip onto the cake rack. If using glaze, brush on the glaze. If using the granache, allow cake to totally cool before pouring on. Only cut the cake when the cake is cool.


Feedback
- The receipe called for 40 to 50 min baking time but I tried inserting a skewer at 45 minutes (totally wet!), 52 minutes (still somewhat wet) and at 60 minutes, it was finally dry and as the recipe said, when I pressed a finger down on top, it sprung back up. However, the 'fins' of the bundt have become crusty. Next day, it turns soft but overall, the cake is dry esp the formerly crusty outside bits. 
Possible solutions:
- Perhaps instead of glazing with granache, I will use the orange glaze to add a bit of moisture to the fins.
- Placing a cookie sheet underneath? My bundt is golden so probably it cooks faster than inside. Also, possibly lowering the temp and cooking longer.
- Feedback on granache: this recipe means the choc isn't very flowly and will slowly dribble down the side. Nice consistency for glazing and piping on. However, next day in the fridge, it is very hard - scrapeable with a spoon but not margarine spreadable. Maybe more like butter consistency?
- After doubling the amount of cream, it is too flowly to use as glaze but next day in the fridge, it becomes margarine spreadable.

Wednesday, July 17, 2024

IP Steamed light egg cake (松糕)

I have been searching for a steamed egg cake (kai dan gao) for a very long time because that's what my Kao Mo used to make. I've documented comparison recipes, tried Fatt Gao,  Malay cake, and even the real deal 鸡蛋糕. While some were good in their own right (eg malay cake), none really hit the spot. They all use traditional ingredients which can be difficult to find eg Fanta orange. Transcribed recipe from Small Tang Cat reel on FB which uses yeast. Interesting! 

This is my adapted recipe which comes out with a chewy but tender crumbed texture like Castella. The original recipe called for 300g normal flour but I only had 200g and substituted cake flour for the last 100g. It works a treat! I've included honey in the recipe (honey) for a tea/coffee time treak else leave it without for a breakfast cake. See feedback note below.

Slice is soft and fluffy
Top side was bloated despite loosely tenting with foil

Ingredients

200g plain flour

100g cake flour*

3 eggs

3g instant yeast

30g sugar

1 tsp vanilla extract (optional)

30g honey (thinned in 1 - 2 tbsp of the warm water (below) if too thick)

180g warm water (finger warm)

Method

1. Whisk all ingredients together until a smooth batter emerges.

2. Cover and allow to rise in a warm place for 30 minutes.

3. Remove the cover and whisk to deflate and remove air.

4. Pour into a pre-oiled deep glass container. (I can't tell the size but I'm going to say 8" pyrex cake 'tin')

5. In a bamboo steamer on top of a wok, warm up the water and switch off the flame. The water should not be too hot. Place the glass container in the steaming rack. Allow to rise again for 10 minutes Once the batter has risen about 80 to 90%, it's ready to steam.

6. Turn on the flame on high and bring to the water in the wok to steaming point. (He doesn't seem to have removed the cake tin while waiting for the water to reach boiling point). Steam for 20 minutes.

ALTERNATIVELY

5. Place back in a warm place to rise for 10 minutes until 80 to 90% risen.

6. Pour 1 C water into the base of the IP pot. Cover top of cake tin loosely and tent with foil. Put the steaming rack on and steam for 15 minutes, with 10 to 15 minutes natural release.

First attempt yesterday - using salt by accident! Straight to the bin
Underside looks golden!

Recipe feedback: 
* I only used 100g cake flour and 200g normal flour. The texture is very much like Castella - chewy yet tender crumbed. This is a happy accident and the unlikely outcome of wasting flour on the salt version yesterday. Traditionally Castella is difficult to make cos they cook it in a wooden box and then have to wrap in plastic and let the moisture seep back in overnight. I prefer this method chiefly because I more often have cake flour in my cupboard alongside normal flour than bread flour (which castella uses). The recipe above has been adjusted to include the cake flour.
- The original recipe only calls for 30g sugar, which is just enough for the yeast to 'eat'. This is more like a breakfast cake as it is not sweet at all and needs additional sweeteners like eating with honey, butter or jam. I've included 30g honey and vanilla to the recipe above for a more tea/coffee time treat.

Thursday, April 11, 2024

Soya sauce Korean rice cakes


I have leftover Korean rice cakes and don't want to eat them as tteokbokki again. Inspired by the following, I decided to make the soya sauce version - Gungjang tteokbokki 궁중떡볶이 which is supposed to originated as royal court food.

Some recipes cook the garaetteok or tteokbokki tteok first and season with soya and oil before stir frying. Then like japchae where it's tossed like a salad, each veg and meat are cooked separately, everything goes into a bowl and tossed with the sauce. Other recipes just soak the garaetteok/tteokbokki tteok for 20 to 30 minutes in cold water, then stir fry with everything. Being lazy, I chose the later method.

Dry fried spicy version 

1. Beyond Kimchee Gireum Tteokbokki using only chilli flakes for spice.

2. Beyond Kimchi - uses onion, cabbage, chives, and gochugaru

Non-spicy

1. A Day in the Kitchen - uses beef, garlic, onion, carrot, cabbage

2. KimchiMari - uses beef, mushroom, onion, carrot. Garnish with honey in addition.

3. Korean Bapsang - uses beef, mushroom, zucchini, carrot

Ingredients for rice cakes

Rice cake sauce

500g rice cakes, cylindrical 가래떡

1 tbsp soya sauce

1 tbsp sesame seed oil

Method - cooking rice cakes

1. For dry and frozen rice cakes, soak in room temp water for 30 minutes then drain.

2. For fresh and frozen rice cakes, cook in boiling water until they float. Drain.

3. If cooking in water first, marinate with a bit of the rice cake sauce and sesame oil otherwise the rice cakes will stick together.

4. I decided to cook the rice cakes in the pan (see below).

Ingredients 

Marinade

300 beef, sliced into thin strips

3 tbsp soya sauce

1 tbsp mirin or cooking wine

1 tbsp sugar (if not using mirin)

1 tbsp sesame seed oil

½ grated Korean pear

1 tsp sesame seeds (garnish)

Dash of pepper

1 grated garlic clove

Handful of brown or oyster mushrooms (any type). 

Rehydrated shitake mushrooms in ⅓ C water (reserve the water)

1 carrot, sliced into matchsticks

1 to 2 zucchini, sliced

¼ napa cabbage, shredded

½ white onion, sliced

For garnish: spring onions, 1 tsp sesame seeds, pine nuts and more sesame seed oil

Method

1. Slice the drained beef into matchsticks. Marinade in 1 tbsp of sauce for minimum 20 minutes or best overnight.

2. Prepare the veg.

3. In a frying pan on medium heat, add oil and sear the beef until ¾ cook. Remove from heat. 

4. Add more oil and fry the vegetables in turn until cooked. Add 1 tbsp of the rice cake marinade and toss. Remove from heat.

5. Add the rice cakes and the mushroom water, and any leftover marinade sauce. Add just enough liquid to allow rice cakes be ¾ submerged so it can cook (if not previously cooked). Turn down heat and allow to cook uncovered for approximately 5 minutes or until the rice cakes are soft, turning the rice cakes occasionally. Most of the liquid should have evaporated.

6. Add back the veg, toss to combine. Add back the beef, toss to combine.

7. Garnish with a drizzle more of honey if desired, pine nuts, sesame seeds and spring onions.

Tuesday, March 26, 2024

Buchujeon (Garlic chives pancake)

I have tried various recipes for jeon but have never really succeeded in keeping the jeon crispy unless I used a lot of oil. For the first time ever, I have garlic chives. Based on Korean Bapseng, I added bacon. Although she uses ready made batter, she also suggests a batter with ice cold water.

Unfortunately was cooking indoors so couldn't crisp up the jeon. But the recipe works!

Ingredients

¾ C flour

2 tbsp corn starch

2 tbsp rice flour

½ tsp salt

1C icy cold water

¼ medium onion

1 tbsp light soya sauce

3 ounces garlic chives

½ tbsp gochujang (if not using bacon, use 1 tbsp for spicy finish)

4 slices of bacon, sliced

Dipping sauce

1 tbsp soya sauce

1 tsp vinegar

½ tsp sugar

pinch black pepper

Method

1. Prepare the chives by cutting into 2 inch long batons. Slice the onions.

2. Prepare the batter. It should be thin.

3. Add oil. Fry the veg until charred.

4. Pour on the batter. Make 1 big pancake or smaller ones. Add more oil to the sides if required. Press down to char. Flip and repeat 2 to 3 mins each side.

5. Serve immediately.

Saturday, March 23, 2024

Fried fish kway teow

I have been wanting to cook this for the longest time but never had the wok! So finally here it is. I didn't have fish so had to substitute with prawns and fishballs but everything else is the same.

Inspiration from I Cook I Bake I Blog and Meatman. These are the 'wet' versions. Importantly, both recipes cook the fish slices in stock so that they don't break up. Everything is blanched including the noodles. The stock is cooked with wine and soya sauce, thickened with starch slurry and this gravy poured over the noodles. These look bland - who wants to eat boiled fish?

I am attempting the 'dry' version which the fried prawns, noodles, sprouts and chives are all fried. The main highlight is the fried mackerel which I happened to stumble upon in Coles while looking for white sliced fish! 

Ok this is not exactly what I meant by san lor hor fun but it's still stir-fried kway teow!


Haven't eaten curry fried mackerel for 20 years!

The difference the char kway teow recipe is:

1. Coat the kway teow only with light soya and dark soya, no cooking caramel.

2. Marinated the pat dried mackerel in Japanese cooking sake for 10 mins. Pat dry and coat with 4 tbsp potato starch mixed with 2 tsp curry powder. Fry for 7 to 10 minutes, turning occasionally.

2. I fried the prawns (coated in corn starch) individually instead of stir frying, removed, then add the egg and scrambled, instead of sort of doing a prawn omelette. This used the leftover oil from frying the fish.

3. When I fried the noodles, I didn't use any extra oil! Just what was available from the noodles itself and also what had been used for frying the fish, oil, and eggs. Added the drizzle sauce (leftover fish marinade, 1 tbsp light soya, 1 tbsp dark soya, tsp of chicken powder).

4. I added bok choy.

Friday, March 22, 2024

Dry-style Char Kway Teow

I've always wanted to wok. However, my previous wok was unwieldly and difficult to upkeep. I decided to invest in an expensive wok, hoping it would be non-stick with usage and not too much upkeep. However, my carbon steel work has rusted and even though I've restored it, it requires continual upkeep.
Dry-style

Lo and behold, after getting Hexclad, I am finally digging into my throve of recipes to try. I haven't followed any specific recipe but worked around the key principles. My main purpose was not to be too oily (didn't end up so) and not to have the noodle break up too much. 

BONUS wet-style below.

Ingredients (serves 2)

500g fresh kway teow 

3 lap cheong, sliced diagonally

3 eggs, beaten

9 to 10 prawns

8 -9 fishballs, halved or sliced fish cake

small bunch of bu chu (8 to 10 stalks)

handful of bean sprouts (roots removed if preferred)

2 tsp of baking powder

1 tbsp corn starch

2 tsp fish sauce

2 tbsp Dark soya sauce + 1 tbsp (wet)

1 tbsp Light soya sauce

1 to 1.5 tbsp cooking caramel (enough to coat) + 1 tbsp (wet)

5 cloves of garlic, smashed

1 tbsp Hsaosing cooking wine (wet)

1 tbsp rose cooking wine (wet)

Salt and pepper to taste

Method

1. In a bowl, separate the noodles. Peel off noodle by noodle. Depending on the brand, there might be enough oil to do so, if not, heat up in microwave 1 min to loosen then peel off one noodle at a time. Do not soak in water! 

2. Prepare all the ingredients so that stir frying can be a rapid process. First, coat the noodles with light soya, dark soya and cooking caramel. Toss the noodles gently to coat and be careful not to break up. Ensure well coated and add more cooking caramel if required so the colour is dark enough. Cooking caramel is not salty (unlike soya sauce) and not very sweet so can use more.

3. Next, to marinate the prawns, coat with 1 tsp of baking powder. Leave for 5 minute then wash off and pat dry. Add the fish sauce, corn starch, dash of pepper and mix well. 

4. Beat the eggs with a pinch of salt and pepper.

5. Cut the other ingredients - slice lap cheong diagonally, smash the garlic, clean and trim the bean sprouts. For the bu chu, cut off the white ends and keep them separate. Then, cut the green stalks into thirds.

6. Heat up a wok on medium heat. When heated enough, add 2 tbsp of oil. Add the prawns and leave to cook for 1 minute on one side before flipping. After another minute, toss.

7. Pour the egg on top and leave to cook for about 2 minutes. Once the edges are dry, push the cooked egg curds to the centre of the wok so that the uncooked liquid egg is able to flow out to the edge of the wok and cook. Once prawns and egg are both ¾ cooked, remove from the wok.

8. Without adding any more oil, add in the lap cheong. Once the oil has rendered, add the garlic and fry till aromatic (about 10 seconds). Don't let them burn. 

10. Add the fish balls and stir fry until warmed up. Remove lapcheong, garlic, and fishballs from the wok.

11. Finally, add 2 tbsp of oil and pre-heat. Add the white talks of the bu chu and stir until fragrant. 

12. Add the noodles and toss to coat with oil. Allow to slightly char, turning up the heat if required but don't burn the wok! (Hexclad prefers medium high heat to high heat, when stuff starts to stick).

13. Add the leafy green stalks of the buchu and bean sprouts and toss until well mixed. Add back all the other ingredients and toss to mix well.

14. Remove from wok and serve immediately.

Wet-style (in this style, I omitted Lap Cheong)

WET-style

To make the noodle slightly more saucy and KL style, following changes are required:

1. Add baking powder to the prawns. Leave for 15 mins. Wash and pat dry. Marinade prawns in hsaosing, cornstarch, pepper and fish sauce. After 15 minute, drain the prawns and pat dry. Reserve the marinade and add 1 tbsp rose cooking wine.

2. To the kway teow and rice/Hokkien noodles, add 1 tbsp light soya sauce, 2 tbsp dark soya sauce and 2 tbsp cooking caramel.

3. Follow the same steps to stir fry as per Dry-style but strain out the noodles from the marinade and be careful not to pour the noodle marinade sauce into the wok.

4. After the bean sprouts and chives have been added to the noodles, stir fry for a few minutes. Drizzle the leftover prawn marinade and noodle marinade around the edge of the wok and continue to stir fy.

Thursday, February 22, 2024

Glutinous rice

I have tried different ways to cook glutinous rice and stir fry it. I tried the IP version several times but I never got it right. It was always too sticky. I learnt from Meatman recently that there was no need to soak the rice for so long if cooking it in a rice cooker. I decided to give it a try.


The Meatman recipe called for soaking 30 minutes. The ratio was glut rice+ jasmine rice 500g : 500ml liquid (sauces + ingredients).

I decided to try cooking with brown rice without soaking at all but using the burnt rice function on my rice cooker. Instead of following the recipe, I used the finger indication. 

The outcome? The rice was washed very cleanly but was still a bit mushy and yet the brown rice was undercooked. I switched off the electricity and left it to steam on its own in the heat. After 1 hour, the brown rice was finally just cooked but the glut rice was still too soft.

I fried it up with sauce and ingredients (mushrooms, egg, garlic) but it was still a bit too soft and sticky.

In future, I will use less water. The recommended is ⅔C water to 1 cup glut rice.

Friday, February 16, 2024

Seafood vermicelli (woon sen)

I've come across several versions of this, but this seems the easiest. I am not one for Thai vermicelli so this recipe is preferred.

Adapted from Meatman who use black pepper prawns and a claypot.

Ingredients

2 basa fish fillets, sliced

5 to 6 prawns

5 - 6 squid rings

2 cakes of vermicelli noodles

8 garlic cloves, minced

1 tsp coriander powder (or fresh roots if you have it)

200ml stock (chicken or fish) or water and stock powder

3 tbsp oyster sauce

1 tbsp Chinese rice wine

1 tbsp Mirin

1 tbsp Japanese cooking sake

1 tbsp fish sauce (divided use)

3 tbsp water

dash of black pepper

dash of white pepper

1 tbsp corn starch

½ tsp black powder, ground

spring onion (to garnish)

Method

1. Rehydrate vermicelli with warm water for 5 - 10 minutes. Do not use boiling water or the noodles will turn mushy. Drain and set aside.

2. Marinate the seafood with half tbsp fish sauce and white pepper, and 1 tbsp corn starch.

3. Marinate the vermicelli with oyster sauce, chinese cooking wine, black pepper, half tbsp fish sauce and stock powder.

4. Preheat a claypot with oil. Fry the garlic and coriander roots if using. Be careful not to burn.

5. Deglaze with water or stock. Add marinated vermicelli and toss to coat.

6. Add cayenne and black pepper and toss to coat.

7. Top with seafood, cover and cook for 2 minutes.

7. Garnish with spring onions.

Christine's recipes also has a more authentic steamed prawn with vermicelli version.

Thursday, February 15, 2024

Air Fry Har Jeong Gai (prawn paste chicken)

I have been trying to perfect my Har Jeong Gai for very long now. It started with oven baked but never very correct. While I've almost nailed the taste, the batter has always escaped me.

Now that I have an air fryer, I thought I'd try a new recipe culled from ideas off the internet. I'm not concentrating on the taste here but on the batter.

You can see two wings in the top left corner which I attempted to squash and flatten the batter and 'paint' onto the wing, they looked better

To dredge 

This chicken breading recipe is revolutionary not because it's tasty but because it reduces waste. Basically, 1 egg for every 1 tbsp of flour. I used corn starch or potato starch which I find to be lighter than flour.

To coat

It's 1 tbsp of rice flour + 1 tbsp of oil per drumlet or wing, plus one (for up to 10 wings) or two more (for more than 10 wings) of each for the road because who likes under-battered wings? The rice flour really is the game changer. Using the AF to 'fry' any other batter (other than panko) crumb will not make it crispy but in some cases, can be like eating raw flour.

The trick is to combine the rice flour and oil until it resembles bread crumbs. Then, the dredging slurry of egg and corn starch gives it the liquid that binds the rice flour + oil mixture into a light and dryish 'liquid' batter that just coats the wing and adheres to it. You can try 'painting' it onto the wing (I did) so that it is smoother than just lumpy bits of batter but other than looks, it really doesn't matter.

Then, airfry the wings skin side up at 220 deg C for 5 minutes to bind the batter to the skin. Do not turn or the batter will fall off! 

Turn down to 200 deg C and fry 8 to 10 minutes until cooked (when the skin bubbles). The oil from the skin also helps the batter to stick to the skin.

Feedback

I had originally turned down to 180 deg C for 8 minutes and it came out undercooked. The batter was just cooked but like eating uncooked bread crumbs. After re-cooking for another 2 minutes at 200 deg C, it was perfect. The batter tasted very mealy and more crunchy than crispy, but the clumpy rice batter just tasted like rice biscuit. [Temps adjusted above.]

Other recipes for future:

Noob Cook - no flouring in AF

Spice N Pans - uses baking powder and corn flour in marinade, then coat in plain flour and spritz with oil before AF (which I tried but didn't work?). His temps were 160 deg C for 15 mins then turn and 200 deg C for 3 - 5 mins. I should try these temps next time.


Saturday, February 10, 2024

Lace skirt gyoza (potstickers), homemade wrappers and folding

This SBS recipe for has the best method (video). This Curious Nut recipe has the most standard ingredients but I've tried the method and it doesn't work for my equipment. However, it does say that the type of flour for the lace makes a difference - rice flour makes it most crispy but can mix rice, all purpose and cornstarch.

I won't go into the ingredients for dumpling and dumpling wrapper but focus on the lace-skirt/wing method. The trick is in adding the oil to the lace mixture.

Underside of dumplings with the lace skirt

Ingredients (updated for my HappyCall after testing SBS recipe)

1/3C water (approx 10 tbsp)

4 tbsp flour or cornstarch or mix of starches.

4 tbsp oil

1. Mix ingredients. Add to a squeezie bottle.

2. In a non-stick pan with a tight lid, pre-heat on medium heat. 

3. Once hot, squirt a thin later of dumpling lace. Arrange dumplings on top in a circular pattern.

(I put the dumplings directly onto the hot pan and then squirted the slurry in and around the dumplings. Seemed to work too)

4. Reduce heat to medium and clamp on the lid.

5. Cook for 6 minutes, checking every 2 to 3 minutes. 

6. Once the water has almost boiled away leaving the lace, remove the lid. 

7.  Turn down heat and cook until water has evaporated and bottom is even golden brown. Once cooked, turn off the heat, drain away the oil and invert onto a serving plate. Serve with dipping sauce.

Wrapping

1. Modern Pepper 16 styles: Includes 2 different styles of ingot and one cigar shape but otherwise all other shapes included in Souped Up Recipes. Very helpful spoken descriptions and not just demonstration.

2. Souped up recipes 24 styles: Best video ever! Includes simple pleats I've never seen before and complex pleating, also includes open-face dumplings with inserted veg (eg corn, peas, wood ear mushroom etc) that are more suitable for steaming.

2 different styles of ingots for CNY, and trying curry puff, round pasty, and leaf shapes

Homemade wrappers

Wrappers cut using third largest (left) and second largest cutters

This time I decided to cut circles so I don't have to bring out my weighing machine. It worked a treat! I had regular shaped dumplings and didn't need to leave wrapped dumplings standing for so long while I rolled out each wrapper (I usually roll and wrap, roll and wrap, roll and wrap). I am horrendous with rolling the wrappers and can never roll out into a regular round or oval shaped wrapper.

I did take extra time to roll out the dough really thinly before stamping out circles. I only rolled out half of the dough at a time and kept the unused dough and stamped out wrappers well wrapped in cling film. I dusted each wrapper with corn starch so they didn't stick to each other. I made sure not to use corn starch when rolling out the dough and stamping out the wrappers, otherwise any excess starch gets onto the dough and then it becomes impossible to recombine the dough again. 

So I had ended up with really thin skin wrappers (using the hot water dumpling recipe) compared to when I rolled out each wrapper individually. Total time taken to produce each wrapper would probably work out to be the same.

Homemade wrappers have a higher moisture content compared to store-bought wrappers, so can fold into more complicated shapes without tearing.

I used the 3 largest of my cookie dough cutters. Here's what I learnt:

- The 3rd largest cutter is tiny and difficult to work with so can only be used with shapes that start from a closed half-moon basis e.g., triangle, square, half-moon with no pleats, Chinese Ba Gwa coin, curry puff, round curry puff using 2 wrappers, ingots

- The 2nd largest cutter is slightly easier to work with without tearing so can fold shapes with simple pleats eg wavy crimp, up to 3-a-side pleats, buddha belly. Open faced shapes are possible but probably require tools (e.g. chopstick) to help make the folds.

- The largest cutter is a good size for complex pleats e.g. soup bun, 6-a-side pleats, leaf shape, and open face dumplings. The downside is that a lot of filling and dough is required.

- Note when preparing the filling: veg and other additions such as prawns need to be thoroughly drained and dried off (e.g. salting veg and squeezing out juices) and finely minced or diced. Otherwise wrapping becomes difficult and the cubed veg will tear the thin skin.

- Magic ratios: 2 cups of flour to 1 cup boiling water to 0.5 C room temp water (or less depending on how dry the flour is, stop when all the dry flour comes together. For ingredients, use 500g meat, 2 tbsp corn/potato flour, 1 egg, 1C packed prawn/seafood and 1C of packed chopped veg. Everything (both wrappers and filling) will be used up!

- Do not add oil to dough for fried dumplings. Adding oil to hot water dough means skin with oil isn't very stretchy and will tear easily. BUT if making dumpling for steaming, add about 1 to 2 tbsp of oil (to the 2C of flour) makes the skin super easy to roll very thin! On the contrary, dough for soup is just normal water and flour, do not use hot water.


Update: use oil:water:starch ratio of 1:5:2 and use a squeezee bottle.

  • Preheat pan on medium
  • Place dumplings on top (no oil!). Let sit for around 30 seconds.
  • Squeeze mixture onto and around the sides of the pan, not onto the dumplings. Use only as much as is necessary to cover the bottom of the pan with a thin layer, otherwise it becomes a corn starch flurry that will never dry up.
  • Turn down to medium low and let water evaporate, checking often
  • Whole process should take about 7 to 10 minutes. Don't clamp lid shut (use a wooden spoon to keep ajar) because water needs to evaporate.
  • Frozen dumplings from frozen work best because of extended cooking time needed to dry out and brown the lace

Hokkaido milk bread loaf