Wednesday, April 11, 2012

红油抄手 (Sichuan red oil wanton)

Got the recipe from Rasa Malaysia and adapted it because it was just too involved.

Ingredients
Wantons (I used 10 to 12 that I previously made)
1/4 cup soya sauce
2 tbsp black vinegar (I used balsamic as a pretty good substitute)
1 tbsp sesame oil
1 tsp sugar
2 tsp sichuan pepper corns, crushed
3 tbsp chilli oil
Cilantro
1 stalk spring onion
Fried garlic (optional)

Method
1) Cook the wantons.
2) Mix up the vinaigrette and mix the wanton in it. Garnish with cilantro, chopped spring onion and fried garlic.

Khow Yok (Steamed pork with yam)

Got this recipe from a new Malaysian neighbour, who got it off the internet and made it. The result was pretty good, brought tears to my eyes from the memory of what gran used to make! This could be the long lost recipe which my family has been trying to replicate for years since her passing. Although every family probably has its family secret, but the fundamentals of the recipe are here, so it's a matter of tweaking to taste from memory and going from there!

Ingredients
300g pork belly
1 taro
1/2 tbsp thick dark soya sauce
2 tsp Chinese 5-spice powder
Chopped garlic or shallots (optional)

Marinade
1 1/2 cubes nam yue (fermented bean paste)
1 tbsp taucheow
1 tsp sugar
1 tbsp thick dark soya sauce
1 tsp cooking oil

Sauce
3/4 cup - 1 cup water
1 tbsp oyster sauce
dash of pepper
1 tsp 5-spice powder
1 tsp soya sauce
1 tsp sugar
1 tsp shao hsing wine
1/2 cube nam yue
1/2 tsp thick dark soya sauce
1 tbsp corn flour

Method
1) Marinate the pork belly, preferably overnight. Drain the pork, pat dry and deep fry the whole piece of pork belly. Alternatively, you can buy roast pork belly. Set aside.
2) Slice the yam into 3 cm thick slices. Deep fry the slices and set aside.
3) Combine all the ingredients for the sauce, without the cornflour, and bring to a simmer in a pan. Once the sauce and reduced and thickened slightly, add the cornflour to a bit of water and pour into the sauce to thicken. Once it has thickened, take it off the heat and set aside to cool slightly.
4) In a deep steaming dish, alternate the pork with yam slices. Pour over the sauce and ensure all the pieces are well coated. Steam on a very low heat for 2.5 to 3 hours, checking to ensure that the yam is cooked all the way through with a fork (breaks easily). Serve with fried garlic or chopped shallots. 

Monday, April 02, 2012

Tips on salt

I never knew there were so many kinds of salt! I made the mistake of buying iodized salt for doing kimchi.  It made my kimchi limp and now I know why! My last batch of salt lasted me over 7 years untll I threw out the remainder. How long is ths one going to last me?

Interesting article on salt

This article gives more specific instructions and comparisons between the types of salts and also advises which salt to use and when. http://www.vox.com/2016/5/15/11409808/when-to-use-sea-salt-kosher-salt

Sunday, April 01, 2012

Home made chocolate chip rum raisin ice cream

I basically used this recipe from the One Pot Chef and adapted it. I also like this link for introducing other flavours.

Ingredients (makes about 1.5ml)
400 ml of condense milk (1 can - I found this way too sweet. Next time I might reduce this by maybe 50 to 100ml to 350 or 300ml? Not sure what effect this would have on the consistency of the ice cream though)
600 ml of thick cream (says 'suitable for whipping' on label)
300g chocolate buttons (white, milk or dark chocolate are all fine)
3 tbsp rum (might increase this to 4 tsp in future because I couldn't taste any rum!)
1/2 cup raisins


Method
1) Soak the raisins in the rum.

2) Melt the chocolate in a microwave. Heat for 30 seconds, stir, repeat until all the chocolate is melted. Set aside to cool.

3) Combine the condensed milk, cream and cooled melted chocolate in a bowl. Use an electric beater and beat until thick. (consistency should be enough to draw a line on the surface which stays for several seconds)

4) Pour into a tub and freeze for at least 6 to 8 hours or better still, over night.

5) Home made ice cream is usually harder than store bought. If it's too hard, leave it on the counter to defrost a little. 

Feedback on the recipe
I initially wanted to make 2 different flavours - rum and raisin, and regular chocolate. I put an aluminium foil to create 2 compartments in the 2l container. The ice cream mixture held, but unfortunately, the rum soaked through to the other compartment, so I decided to mix everything up anyway. Note to self, next time use 2 containers!

After letting the melted chocolate cool, for some reason, it actually 'split' and hardened into little flakes. That's how I ended up with chocolate chip, not by design! I'm not sure if it's my brand of cooking chocolate, or whether I let it get too cool, or whether I stirred through the chocolate rather than beating it through but I don't think this should make a difference since the beater beats, not blends. I'm not particularly keen to use cooking chocolate again. Maybe I should try cocoa but that will give it a chalky texture.

Also, I didn't know what stage to beat it till and my mixture actually 'fell' and deflated! I was rather upset. To compromise (and only because I had a lot of time on my hands), although the beauty of this recipe was not having to run a fork through or use an electric beater to break up the ice crystals every 1.5 hours or so, I still did it anyway (about 4 times in total) in an attempt to make the mixture more smooth. I don't think it broke up the chocolate but it certainly made the ice cream smoother!

Finally, my ice cream was still soft (edible) the next morning! I don't know whether the alcohol interrupted the freezing process, or whether it's because my fridge isn't cold enough. But it's a good kinda soft, I can scoup it out straight without waiting for defrosting!

Notes on the seizing up of chocolate
1) Never use a wooden spoon to stir melted chocolate. It retains moisture, which causes chocolate to seize up. The same with any left over moisture in the bowl. Use a metal spoon to stir, and ensure the bowl is completely dry. (I wasn't using a metal spoon but I was using a silicon sputula, so I doubt this caused it)

2) Over heated chocolate can seize up too. That's why the double boiler or bain marie is more fail safe, but it does use more equipment. To melt chocolate in a microwave, use short bursts of 30s. In my case, I might try not using full power (eg use 70%) next time. Also don't heat the chocolate till all is melted. There will still be some residual lumps, use the spoon to stir till everything is melted. The residual heat will melt any lumps.

3) Adding milk or water to a seized chocolate mixture will not revive it. Adding melted butter will kept it molten and it won't set again, whether in the oven or fridge. Good for chocolate sauce though.

4) Also, use small pieces of chocolate, so choco buttons are great, or chop up the cooking choc (don't use regular eating choc!) into little nuggets to melt faster and prevent over-heating.

Friday, March 30, 2012

Gelatine tips


Two very useful websites:

http://homecooking.about.com/od/specificfood/a/gelatintips.htm

http://www.davidlebovitz.com/2009/04/how-to-use-gelatin/

Saturday, March 24, 2012

Perfect oven fried chicken

I have finally perfected the recipe. After observing/researching and testing a lot of different techniques from various sources, this seems to work best for me - ie given my unique environment of oven and utensils. So it may not work as well for you, or you may need to tailor it and find one that does.
Ingredients
4 chicken thighs
1/4 cup all purpose flour
1 egg
1/2 cup panko bread crumbs
1 tsp salt
1 tsp pepper
1 tsp give spice powder
2 tbsp oil (peanut is best for crunch if you have it)
Butter to dot


Method
1) Preheat oven to 220 deg C. Pat the thighs dry with kitchen paper. Beat the egg and add the flour. Mix well till you get a claggy mixture. Add the salt, pepper and five spice powder and mix well. Some recipes call for coating the chicken with flour then dipping in egg wash. After watching what Koreans do with fried chicken, I find it doesn't make a difference. In fact, battering it seems to help.

2) Coat with panko bread crumbs. Dust off the excess. Set in the fridge for about 20 mins for it all to come together. This step is very important so that the panko and batter adhere to the skin of the chicken.


3) Pour 2 tbsp oil into a baking dish. Put that in the oven to heat up (at least 5 minutes). Once it is ready, carefully place the chicken thighs in. Be careful as the oil could splatter and spit. It should sizzle when you place the chicken in the hot fat. Place it straight in the oven at 220 deg C for 10 minutes.

4) Turn over chicken. Place dots of butter on the skin. Bake for another 5 mins at 220 deg C then turn down to 200 deg C and bake for another 15 to 20 minutes until chicken is done. I test for doneness either by pricking the thickest centre of the chicken to see if the juices run clear. Or, I can tell eg the juices run out from the bone, and it's no longer bloody (see my picture)

5) Let rest for 5 minutes (for juices to reincorporate) and not to burn yourself. Serve immediately!


Updated: Newer method which seems to work better. http://simmetra.blogspot.com.au/2013/03/oven-chicken.html

Wednesday, March 21, 2012

Perfect roast potatoes

I never thought I'd get it but it really does work!

Recipe from here: http://www.onepotchefshow.com/

The difference really is in using the right potatoes. I used Deserrie, which are prefect for roast and baked potatoes because it is very floury.
The tips from the video really help to. Here's what I did.

1) Chop the potato into equal sized chunks. I did mine like a 1 to 1.5 inches cube so that it would only take 20 to 25 minutes to cook. That's about slicing the potato (hand sized) into about 3 lengthwise. Pat down to dry with kitchen towels.

2) Important : use a fork to score them all over. This increases the crisp factor.

3) Salt generously, or about 1 tbsp of salt for 2 potatoes. Sounds like a lot, but salt is important to the crispy element. Add about 1 tbsp of oil (avoid olive oil which has a low smoking point). Lard or duck fat is best if you have it. Add herbs (I used rosemary and sage). Toss together well.

4) Arrange on a cookie sheet (preferably a pan which doesn't have high edges which will keep the moisture in. Try to keep them separate to ensure good airflow and crisping on all sides, so that the potato chunks don't stew together. This next step is very important: dot with butter.

5) Put cookie sheet into a hot 220 deg C oven. Bake for about 25 minutes, checking at 20 mins. Turn the potato chunks at 15 mins. For some reason, I put it on foil but the potatoes still stuck to the foil despite all the oil! I used a spatula to loosen them.

6) Serve IMMEDIATELY because it does get soft really fast!

Friday, March 16, 2012

Mandu

Highly adapted from this recipe because the original mandu recipe was just too involved! I couldn't find a lot of ingredients. Anyhow, I did follow the soup quite closely and it tastes brilliant! I'm surprised.

Ingredients
For the filling
1 cup pork mince (about 600g)
5 to 6 dried shitake mushrooms, soaked in about a cup of water
3 tbsp soya sauce
4 to 5 cloves of garlic, minced
40 mandu skins (I could only get Shanghainese dumpling skins at the supermarket)
Black pepper (several dashes)

For the soup
Leftover water used to soak the mushrooms
Enough water to make about 4 cups of liquid in total
8 to 10 ikan billis
3 cloves of garlic, roughly chopped
2 tbsp fish sauce

Method
1) Mix up the ingredients for the filling and leave to marinate.
2) Fill the mandu skins.
3) To a pot, add all the ingredients for the soup. Bring to a boil and simmer for about 20 minutes. Strain the soup. Add the fish sauce.
4) Meanwhile, cook the mandu by dropping them in boiling water. They will float once they are cooked. Drain and pop into the soup.
5) Serve either with noodles, or as a dumpling soup.

Sunday, March 11, 2012

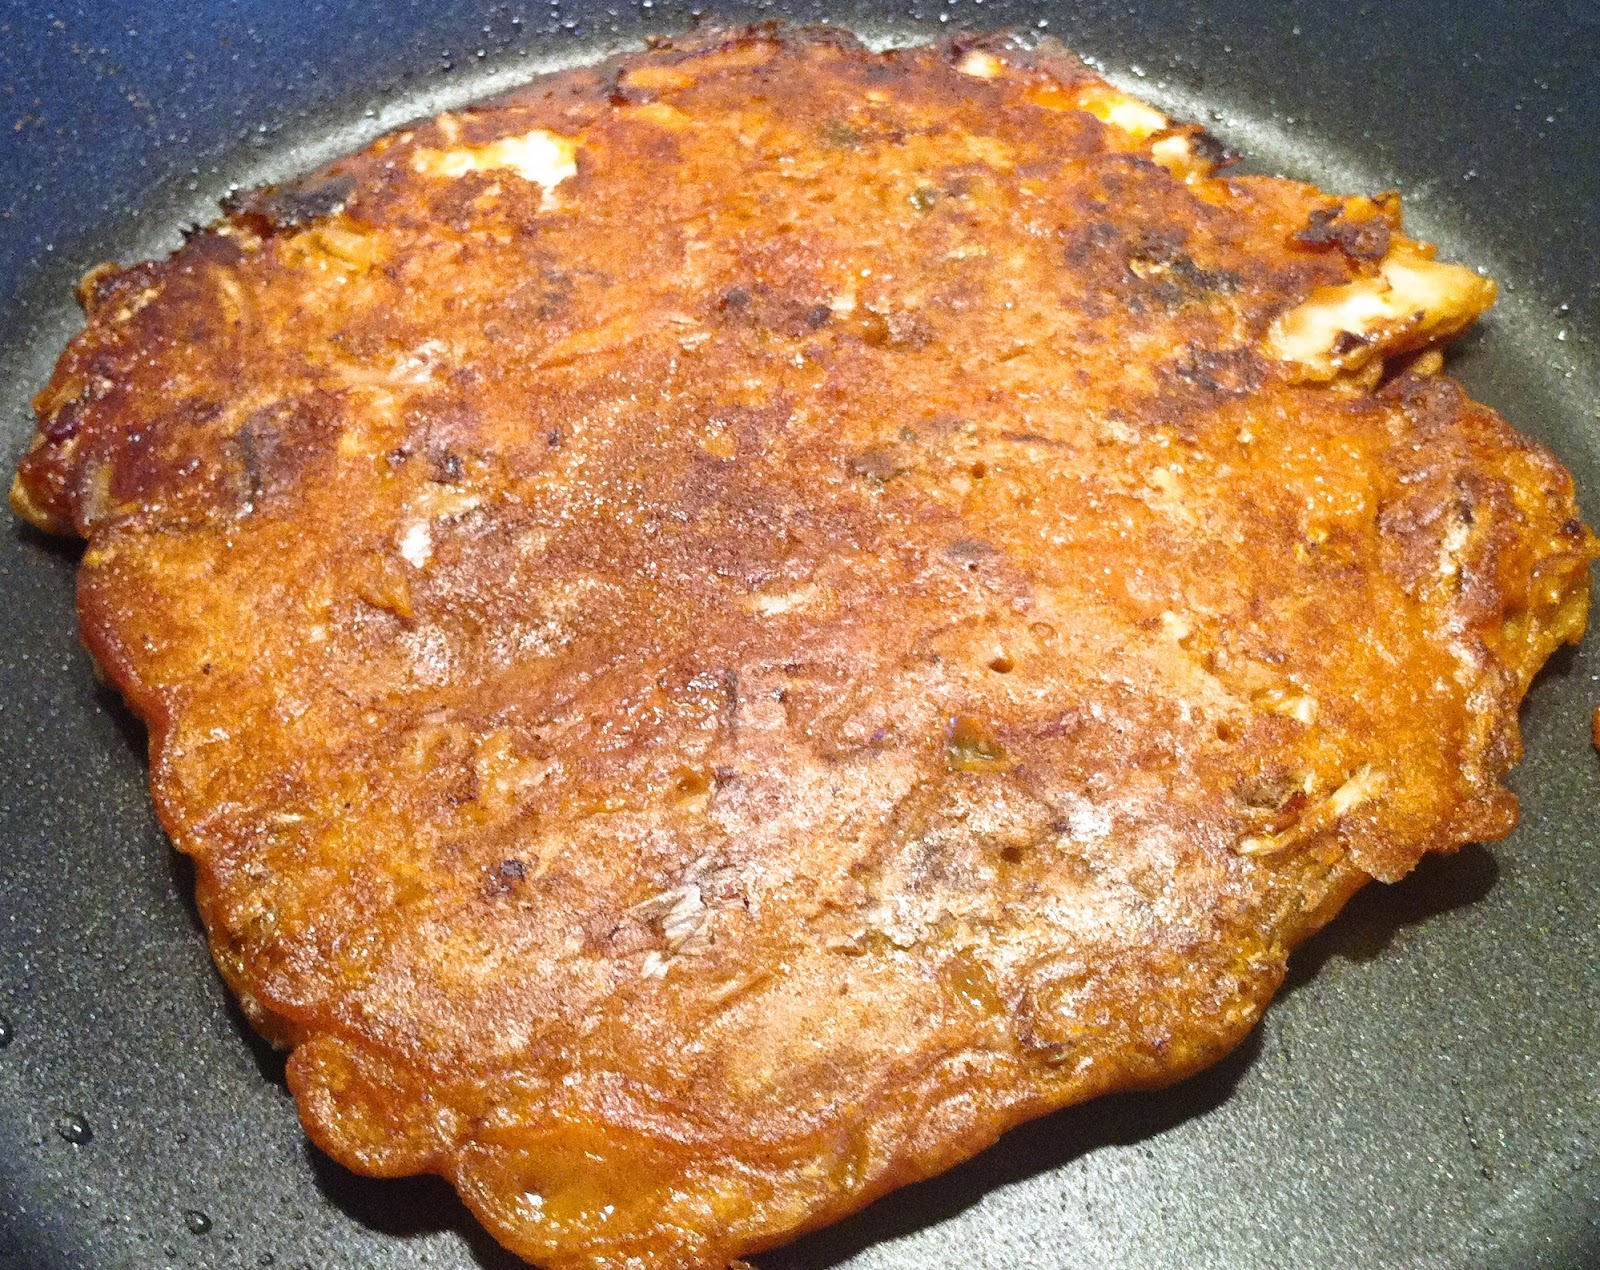
Kimchijeon

http://www.maangchi.com/recipe/kimchijeon 

Ingredients (serves 2 to 4)
1 cup kimchi, chopped
3 tbsp kimchi juice
2 tbsp chopped onion
1/2 tsp salt
1/2 tsp sugar
1/4 cup all purpose flour
1/4 cup water

Method
1) Mix all the ingredients in a bowl.
2) Heat up 1 tbsp of oil and pour in the batter. 
3) Fry for 1.5 minutes on each side, or until the pancake slides easily in the pan, and the bottom is golden brown.
4) Serve immediately or chop up into squares.

Saturday, March 10, 2012

Kimchi jigae

http://koreanfood.about.com/od/soupsandstews/r/Kimchichigae.htm
Ingredients: (serves 4)
  • 3/4 lb beef, pork, or canned tuna*, thinly sliced
  • 1 Tbsp sesame oil
  • 2 cups kimchi (the kind made with Napa cabbage), roughly chopped
  • 1/2 onion, chopped
  • 2 cloves garlic, finely chopped
  • 1 Tbsp kochujang
  • 1 Tbsp kochukaru

  • Preparation:
    1. If using beef or pork, saute in 1/2 Tbsp sesame oil in soup pot for a few minutes. If using pork, you can halve or omit the oil at this point.
    2. Add kimchi to pot and stir-fry for about five minutes.
    3. Add remaining oil, onion, garlic, kochujang, and kochukaru, mixing to combine.
    4. Pour water into the pot and bring to a boil.
    5. Reduce heat to simmer.
    6. Cook for 20-30 minutes, adding tofu after the first 10 minutes and scallions at the very end