I am interested in using up my bread flour and decided to use black sesame paste for a change instead of red bean. This site http://japanesefood.about.com/od/saucecondiment/r/Black-Sesame-Paste.htm gas a great recipe and also explains the difference between Asian (Japanese/Chinese) black sesame paste and black tahini. The Asian version uses roasted seeds and emulsifies using its own oil and adds sugar (either as sugar or honey) but the tahani uses oil to emulsify.
Ingredients
1/2 cup black sesames
3 tbsp honey (if you prefer it sweeter, use 4 tbsp which also makes it less dry and easier to handle)
Method
1) Roast the black sesame seeds in a pan. Swirl them around and watch carefully because they burn easily. Set aside and let it cool.
2) In a food processor that is able to cut very finely (not all models do, you'll have to test), add the sesame seeds and pulse till it becomes very finely ground. The oil should secrete but it takes some time.
3) Once you're happy with the consistency, add the honey.
4) Use within the day or store in an air tight container and use within 2 days.
Sunday, October 30, 2016
Wednesday, October 26, 2016
Kimchi pork bao
Since I tried this meat bao recipe over a year ago, I thought I'd try to use up my cake flour. When I found that my particular brand of cake flour could double up as bao flour, how excited and happy I was! The original recipe used plain flour, and came out a bit yellowish. Bao flour (HK flour to be exact) is supposed to be whiter. Aside from the filling, the difference between this recipe and the original one is that the baking powder is worked into the dough just before forming the buns. This makes sense as baking powder should be cooked as soon as possible, the longer it is left out (ie during the proofing time), it loses it efficacy.
Source for bao dough: http://www.malaysianchinesekitchen.com/char-siu-bao-steamed-barbecue-pork-buns/ Since this recipe is for char siu bao which tends to be sweetish, I've reduced the sugar. Also, compared to using normal flour, bao flour is supposed to make the bao spread out more so it's less upright and 'peaky' but flatter.
This recipe also has a lot longer proofing time (1 hour compared to 30 minutes total).
Ingredients
3.5 cups (450g) cake flour
1 tbsp sugar
1/2 tsp salt
2 tsp yeast
1 1/4 cup (300ml)
40 deg C water
3 tbsp vegetable oil
2 tsp baking powder
Filling
250g pork 4 prawns, minced
5 water chestnuts, chopped finely
1.5 tbsp light soya sauce
1 tbsp cooking wine
Dash of pepper ½ cup kimchi + 1 tbsp kimchi juice
Method
1) Combine the flour, sugar, and salt. On the opposite side of the salt, add the yeast. Mix well.
2) Add the warm water and mix well with a wooden spatula until there are no dry pockets of flour. Add in the oil.
3) Oil your hands (I forgot to do this and it was a messy, sticky disaster). Remove from the bowl and knead until the dough is smooth and leaves the surface/bowl/your hands clean. I also alternated with slapping the dough on the surface. This whole process takes about 10 to 15 minutes until you reach the window pane stage.
4) Leave it in a oiled bowl, cover with cling film and a towel. Let it proof for 1 to 1.5 hours until it has doubled in size.
5) Take out the dough and sprinkle on the baking powder in batches. Work it in until the baking powder is finished. If the dough is too dry, wet your hands.
6) While the dough is proofing, prepare the filling. Combine all the filling ingredients together in the bowl and set aside.
7) Prepare the parchment, I simply cut squares of about 4".
8) Roll the dough into a cylinder and cut the dough into 12 discs.
9) Keep half of the dough covered and in the fridge so that the baking powder doesn't activate.
10 ) Flatten each disc into and roll out into 4" wide discs. I use an asian rolling pin for this and ensure that the sides are thinner than the middle.
11) Portion out the filling (a cookie scoop helps). In the centre of each disc, place the filling and crimp to seal. Place on the square of parchment. Again, I place the prepared buns covered into the fridge to prevent them from proofing too fast and at a different rate from the second batch.
12) While preparing the buns, bring a pot of water to a rolling ball.
13) Fill the steaming basket with 5 buns and ensure that they have enough space to spread out without sticking to each other. You would need to steam all the baos in batches. Steam for 10 to 12 minutes. Turn off the fire and rest for 5 minutes so that the shape stabilises. After 5 minutes, remove to a baking rack to cool so that it doesn't get a soggy bottom.
14) Best eaten hot. Uneaten bao should be refrigerated. They can also be wrapped in cling film and frozen. Reheat in the microwave steamer.

Recipe notes
1) The taste of baking powder is discernible but the sudden expansion gave the signature 'smile'. Great if this was a csb but unnecessary for other types of bao.
2) The dough was very sticky and difficult to work with, and didn't hold its shape, as u can tell from the lack of folds.
3) The texture was not as fluffy as the csb in dim sum restaurants. Instead, it was chewy despite using cake flour. The original recipe still seemed better.
Might try this recipe next time for bao because it mixes cake and bread flour which might be easier to work with.
Wednesday, October 19, 2016
Char siu soh
Fantastic recipe!
http://thedomesticgoddesswannabe.com/2014/05/char-siu-sou-chinese-bbq-pork-puff-pastry/
Here's my interpretation with some adaptations, eg I can't be bothered to cut circles. The thawed pastry is too soft to handle.
Ingredients (makes 16)
4 sheets of puff pastry
350g char siu
1 tbsp flour
1 tbsp corn flour
2 tbsp hoisin sauce
1 tbsp light soya
1 tbsp dark soya
2 tbsp sugar
1 cup water
2 stalks spring onions, chopped
2 eggs, beaten
1 tbsp sesame seeds
Method
1) Thaw the puff pastry in the fridge, about 15 minutes before using.
2) Make the sauce. Pour the flour, corn flour, sauces and sugar into a pot. Add the water and stir till there are no lumps left. Add the spring onions.
3) Put it on the stove and whisk till it boils and thickens. Once thick, set aside to cool.
4) Prepare 2 baking trays by lining with parchment. Preheat oven to 200 deg C.
4) Chop the char siu into cubes. Pour on the sauce and mix together.
5) Take 1 sheet and cut into 4. Do not remove the plastic sheet.
6) Place 1.5 tsp of the mixture in the centre of each square.
7) Using the egg wash, brush each edge of the square. Fold the pastry in half: into a triangle or the more traditional rectangle.
8) Using a fork, crimp all open sides shut.
9) Transfer onto the parchment and egg wash each pastry. Sprinkle on the sesame seeds.
10) Bake for 15 minutes at 200 deg C. (I rotated the tray at 9 minutes to ensure even browning).
11) Leave on the tray for 10 minutes to cool then transfer to a wire rack to cook completely. Don't eat it straight out of the oven, the sauce is scaldingly hot!
Sunday, October 16, 2016
Donut icing ideas
Sources: http://www.biggerbolderbaking.com/no-knead-donuts/
http://www.wikihow.com/Make-Coffee-Icing
http://www.biggerbolderbaking.com/gemmas-cinnamon-roll-pancakes/
http://sallysbakingaddiction.com/2014/09/17/maple-glazed-donuts/
- proportions adjusted for 3 donuts
- unless indicated, add the liquid to the dry and whisk till smooth
1) Chocolate frosting
1/3 cup powdered sugar
1 tbsp cocoa powder
1/2 tsp vanilla
1.5 tbsp milk
2) Vanilla frosting
1/3 cup powdered sugar
1 tsp vanilla
1.5 tbsp milk
3) Coffee frosting
1/3 cup powdered
1 tbsp milk
1/2 tbsp hot water
1/2 tsp espresso powder
4) Cream cheese
1/3 cup powdered sugar
2 tbsp melted butter
1 oz cream cheese, room temp
½ tsp vanilla
- Using a whisk, beat together the cream cheese and butter.
- Stir in the powdered sugar and vanilla and whisk till smooth.
5) Cinnamon sugar
1/3 cup granulated sugar
1 tsp cinnamon
3 tbsp melted butter
- Dunk the donuts straight from the oven into the melted butter and they will soak up the butter
- Roll in the cinnamon sugar.
6) Maple butter
1/3 cup powdered sugar
1/4 cup maple syrup
2 tbsp melted butter
- Melt the maple syrup and butter in the microwave in a microwaveable bowl, at increments of 30 seconds.
- Whisk in the powdered sugar.
No knead donuts
This recipe is more of a logistical (and washing up) nightmare than the making of the donuts itself. The great thing about this recipe is that it's baked not fried, and also that there is hardly any kneading involved. But it is very very very fattening - with lots of butter and sugar, so not something to be eaten by one person but to be shared around!
From this fantastic recipe, watch the video too: www.biggerbolderbaking.com/no-knead-donuts/
I've not made changes to the ingredients but just noted some notes that are specific to me. However, this recipe has taught me that having a proper donut cutter is important, or at least a proper scone cutter! I improvised with a milk jug and it didn't turn out too badly taste-wise but the look could be improved! I initially tried cutting holes in them but gave up. That's one more piece of dough to worry about (the donut holes) in terms of uneven baking, coloring, dunking in frosting, etc.
Ingredients (makes 20 * 3" donuts)
1.5 cups of flour
2 tsp dried yeast
1 tsp salt
4 eggs, beaten, room temperature
1 tsp vanilla
3/4 cup (200ml) milk (warmed to the touch, about 1 minute in the microwave)
3/4 cup (170g) butter, melted
1/4 cup sugar (original recipe used honey)
Melted butter for brushing
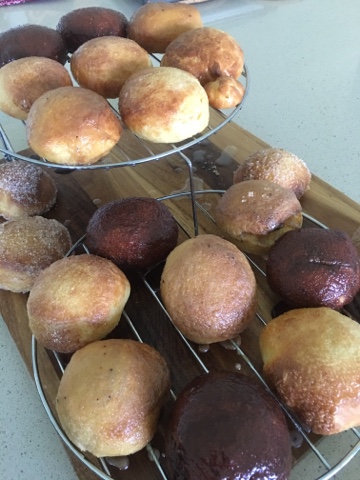 |
| My tower of donuts |
Method
1) Mix the dry in a big bowl: flour, salt, yeast (keep it separate from the salt), and sugar.
2) In a separate bowl, mix the dry: melted butter, milk and beaten eggs.
3) Add the wet to the dry and stir to combine till no pockets of dry flour remain. There may be some lumps but the proved batter will be fine. The batter is on the soggy and sticky side.
4) Cover with cling film and a towel and set aside to proof for 2 to 3 hours until doubled in size. Then stick it in the fridge for at least 12 hours (best overnight) and up to 3 days. The size doesn't change much after putting it in the fridge, instead, I noticed that it deflated a bit. It must have the 12 hours and cannot be used after just the 3 hours.
5) The next day, remove it from the fridge to warm up a bit so that it is easier to roll out. At this time, I start preparing my icing but I don't add the final liquid yet otherwise the frosting may set by the time I'm ready to glaze. I also prepare my baking trays by placing parchment on them.
6) On a floured surface, take out half the dough (keep the other half covered) and lightly knead. Roll out to 1/4 inch thick. Cut out the donuts with a donut cutter if using, or a 5" scone cutter and a piping nozzle for the centre. I decided to stick with just a 3" milk jug with no centre hole to worry about.
7) Lay the donuts on the parchment and cover with clingfilm and put it back in the fridge so that both batches rise at the same rate.
8) Take out the other half of the dough and continue to make the donuts. (halfway through, I remove the first tray of donuts to warm up so that they don't get too cold and stop proofing)
9) Leave to proof for 30 to 45 minutes until doubled in size.
10) Brush with melted butter.
11) Bake at 190 deg C for 15 minutes. (I usually bake for 9 minutes, then rotate the trays to ensure even browning and continue with another 6 minutes, including an extra minute or 2 to compensate for the loss of hot air if they haven't browned enough). While waiting, I finish up my frosting by adding the liquid to make the paste.
12) Once out of the donuts are out of the fridge, glaze immediately while the donuts are still warm as they tend to absorb the sugar better.
Friday, October 14, 2016
Lamb osso bucco with pumpkin
I have never seen or known that lamb had osso bucco too but then I saw it at the supermarket ladt week.
Ingredients
500 to 600g lamb osso bucco
2 to 3 cups of water
2 tbsp onion chopped onion
1 tsp minced ginger
1 tsp minced garlic
1 tbsp rosemary leaves
1 tsp dried oregano
1 tsp dried sage
1 tbsp soya sauce
1 tbsp Chinese cooking wine
1 tbsp mustard
1 tbsp worchester sauce
½ pumpkin, cubed
2 medium potatoes, cubed
Methods
1) Brown the osso bucco on all sides. Add the onions, ginger and garlic and fry till fragrant.
2) Add all the herbs and sauces, and the water. Bring to a boil and skim off any scum. Turn down and simmer for 3 hours. The water should just cover the meat.
3) In the 4th hour, add the pumpkin and potatoed. Top up with water is required.
4) Serve with crust bread or over rice.
Thursday, October 13, 2016
Sausage broiche rolls
Since making this quick sausage rolls a year back, I've been reading up. Although the recipe is great in a pinch, it's for eating on the day itself. The bread uses a lot of yeast which may taste too yeasty (I didn't think so) but my main bug bear was that it tasted really dry and sand-papery the next day. On doing some reading up, I found out from this improved 50 minute version that that's a known 'side effect' of the bread, that it hardens. Also, the bread must strictly be proofed only for 10 minutes or it looses its softness, and I'm never a stickler for sticking strictly to recipes. On my last try, I exceeded that 10 minute mark.
I couldn't use the 50 minute recipe because it includes pumpkin, so had to find alternatives. This recipe is adapted from mini sausage rolls (http://nasilemaklover.blogspot.com.au/2014/07/mini-sausage-bread-rolls.html) for the technique, and standard sausage rolls (http://rasamalaysia.com/sausage-rolls/2/) for the ingredients (I converted some of the measurements). Most recipes I came across used Christine's tangzong method for true soft HK buns but I might try that another time.
Ingredients (makes 8 rolls)
300g bread flour (2 cups)
5g (2 tsp dried yeast)
10g (1 tbsp) sugar
6g (1 tsp) salt
30g butter, cubed at room temperature
1 egg
200ml milk
8 sausages
1 egg + dash of milk for egg wash
Sesame seeds to top (optional)
Method
1) Put 1/2 of flour and yeast in the bowl of the food processor with the dough hook attachment. Add the sugar and salt. Combine.
2) Trickle in the egg and milk. Scrape down the sides.
3) Add in the remaining flour mixture and knead until the dough becomes elastic and leaves the side of the bowl. This took about 5 minutes.
4) Add the cubed butter a bit at a time and knead. Continue kneading till the dough becomes stretchy, glossy and soft. Try the window pane test. This took about 10 minutes. I also removed it form the food processor and continued to knead by hand for another 10 minutes. The mixture is sticky but scape it off the surface with a scraper. No additional flour to dust the surface was needed.
5) Place the dough in an oiled bowl and cover with cling film. Leave to proof for 1 to 1.5 hours depending on ambient temperature until it doubles in size.
6) Deflate and cut the dough into 8 pieces. Gently knead by folding it like a book and bring the sides down to form a ball. Return to the bowl to rest for 10 minutes. Prepare the baking trays by lining with parchment.
7) Take out each piece but keep the unused ones covered in the bowl. Roll it out into a long cylinder (about the diagonal of my 40 cm board) and coil it loosely around the sausage. Tuck in each of the ends. Place on the tray.
8) Leave to proof for 30 to 45 minutes until doubled in size. Coat with egg wash and sesame seeds.
9) Bake at 200 deg C (no grill) for 8 minutes, then rotate try and bake for a further 4 to 5 minutes with the grill function on until it has turned golden brown.
Recipe feedback: I really hate the brioche method of making bread because the dough is so sticky. Thankfully however, two things saved my bacon this time. First, I used bread flour, which seemed to find some structure much more easily. Second, thank God for my food processor! I've never used machinery before but when there is this much stickiness involved, it was a life saver. I still had to manually pound it for about 10 minutes to get it to window pane stage but having it help me with the first 30 minutes made a huge difference to my arm muscles and motivation to complete!
Slow cooked Chu hou beef briskit and daikon
Adapted from here. http://themeatmen.sg/braised-beef-brisket-with-daikon/ Really good.
Ingredients
500g beef briskit, cubed
3 tbsp corn starch
1 tbsp chopped onion
1 tsp minced ginger
1 tsp minced garlic
3 bay leaves
1 tsp black pepper corns
2 tbsp chu hou paste
1 tbsp oyster sauce
2 tbsp soya sauce
1 tbsp Chinese cooking wine
1 tsp sugar
1 tsp five spice powder
3 cloves
1 star anise
1 sweet potato cubed
1 daikon cubed
2 cups water
Method
1) Coat the beef in the corn starch. In a pot, brown the beef. Remove.
2) Fry the onion, garlic, and ginger. Return the beef to the pot.
3) Add everything else other than the sweet potato and daikon.
4) Bring to a boil and skim off any scum. Cover and simmer for 3 to 5 hours on low. (My pot retains heat, so I only need to bring it to a boil every ½ hr to 45 mins and switch off the flame to conserve gas). Give it a stir and add more water if required. Continue to skim the scum and oil.
5) In the 5th hour, add the sweet potato. In the 6th hour, add the daikon.

Monday, October 10, 2016
Haemul pajeon
I have repeatedly tried making pajeon and kimchi pajeon with normal flour but it always came out doughey. I read somewhere that the addition of cold water makes all the difference. I came across this recipe and thought it'd be worth a try and not to mention, the use of cake flour should reduce the doughey-ness.
From http://www.justonecookbook.com/korean-pancake/
Ingredients
10 scallions, cut in half
1 large egg, beaten
12 medium shrimps
1-2 tbsp oil for frying
1/2 C cake flour
1/2 C cold water (120ml)
Method
1) In a non stick pan, heat up the oil. Arrange the spring onions in a square. Intersperse with the prawns and fry for 3 minutes.
2) Using a zig zag motion, pour on the batter. Try to cover the prawns and as much spring onion as possible to 'stick' everything together. Pour the egg in between any 'holes'.
3) Fry for about 3 minutes until the sides crisp up, then flip.
4) Flatten down with the spatula. When the bottom is golden, flip again.
5) Serve with dipping sauce. (JOC uses gochugaru I prefer the recipe from Maangchi which I used previously that uses fresh cut chilli).
Recipe feedback: success! The dough was fluffy and crispy. But there was too much flour and insufficient water. *I've update the recipe. It was consumed so that I forgot to take photos. Next time then.
Sunday, October 09, 2016
Tangzong and milk cream breads
I have read a lot about this method as a way of baking really soft yet elastic Japanese bread. It's often used in HK bread, with the most famous being Christine whose posts and methods are cited by many bloggers.
Original tangzong from Christine (uses 1/3 cup of bread flour to yield 240g of tangzong roux): http://en.christinesrecipes.com/2010/03/japanese-style-bacon-and-cheese-bread.html
: This amount of tangzong makes 4 loaves of bread, or 3 loaves and 5 sausage rolls
Best picture of what the tangzong should look like when it's ready at 65 C without a need for a thermometer: http://www.nisahomey.com/2011/08/bread-tangzhong-methodstep-by-step.html
Christine (and bloggers) usually advocate making more roux and then keeping the remainder in the fridge. It can last a few days if clingfilm is placed directly on top so that a skin doesn't form. Once it turns grey, it must be thrown away.
My reluctance to use this method is that it is really messy, and worse if it's combined with brioche method ie adding the butter afterwards. I don't have a breadmaker or KitchenAid, so the thought of kneading everything by hand just fills me with dread. But maybe one day I'll attempt this with my food processor.
Update
Here is a side by side comparison of recipes that use tangzong and new improvement of heavy cream or whipped cream which apparently is easier and produces a softer bun!
1) Christine's sausage rolls: http://en.christinesrecipes.com/2010/03/hong-kong-style-sausage-rolls.html
- makes 4 to 6 rolls using 350g bread flour
- main ingredients of tangzong, bread flour, milk, milk powder, butter
2) Christine's Hokkaido milk toast: http://en.christinesrecipes.com/2010/10/hokkaido-milk-toast-japanese-style.html
- makes 2 loafs from 540g bread flour
- main ingredient of tangzong, bread flour, whipping cream, milk, milk powder, butter
3) Curious Nut's Hokkaido milk bread: http://www.curiousnut.com/hokkaido-milk-bread/
- makes 1 loaf using 12.1 oz (343g or slightly more than 1½ C flour)
- main ingredients of tangzong, bread flour, milk (can include heavy cream), butter
- states proportions of tangzong: tangzong makes up is 5-12% of total flour in the recipe. More tangzong means sticker but softer bun. Liquid for tangzong must be 5X the flour for tangzong.
4) China Sichuan baked cha siu bun: http://www.chinasichuanfood.com/char-siu-bao-baked-buns-recipe/
- makes 8 to 12 buns using total nearly 300g flours
- main ingredients of tangzong, bread flour, cake flour, milk, butter
5) Wok of Life cha siu bun: http://thewoksoflife.com/2014/02/chinese-bbq-pork-buns-cha-siu-bao/
- makes 16 buns using 5C bread flour
- main ingredients of tangzong, bread flour, milk, butter
6) Wok of Life hot dog bun: http://thewoksoflife.com/2015/03/chinese-hot-dog-buns/
- improvement on cha siu bao recipe. Supposed to be easier and produces a soften bun.
- makes 12 buns using total 4C flour
- main ingredients of heavy cream, bread flour, cake flour, milk. No butter.
7) Rice n Flour's Hokkaido milk bread
- makes 2 loafs using total 600g or 4½C of flours
- main ingredients of bread flour, cake flour, milk, milk powder, whipping cream. No tangzong.
General converter for dry ingredients: 1 C = 16 tbsp = 8 oz = 227g = 3 big or 4 small buns/rolls
Subscribe to:
Posts (Atom)

-
 Tried this with chicken wings, only because I love wings so much. I changed the cooking times to 180 deg C at 20 minutes covered, then 10 mi...
 -
 Recipe from Geok Ping. Tripled the recipe for the 2 tier metal tingkat. I topped off with paper shrimp/shrimp 'skin' Ingredients - m...
 -
There are several videos now trending about putting flour in oil when the oil is cold and then putting in bite-sized pieces. Magically the c...