Thursday, January 24, 2019

IP Char siu

Also known as cha siu or char siew because this is a cantonese name, so it cannot be spelt using hanyu pinyin. A long time ago, my close staff taught me to make char siu in my pots with pork butt (twui bak) and equal parts of sugar, oyster sauce, light soya sauce, and dark soya sauce. While that gave a really nice flavour, it didn't taste anything like soya sauce pork nor char siu. I decided to look for a recipe and came across these two recipes which I've adapted for my purposes. With the pork you can also use pork shoulder or even pork belly, depending on how fatty you like the pork. (https://www.chinasichuanfood.com/roasted-pork-belly-with-honey/)

Ingredients list: This link tastes the most authentic and because the other link uses char siu sauce. Why would I want to make char siu sauce from scratch if I already have the pre-made version?
http://www.curiousnut.com/chinese-bbq-pork-char-siu/

Method: This link uses IP method which is my preference to cooking in the oven and splattering everywhere and basting (and basting and basting), although this method is two-step ie cook in IP then grill in oven.
https://www.pressurecookrecipes.com/char-siu-chinese-bbq-pork-pressure-cooker/

Ingredients
500g of pork butt
2 tbsp garlic, finely minced
3 tbsp light soya sauce
3 tbsp honey (or maltose)
2 tbsp hoisin sauce
2 tbsp oyster sauce
1 tbsp juice of red fermented beancurd (nam yu)
2 tbsp light soya sauce
3 tbsp brown sugar (reduced from 5)
2 tsp sesame oil
1 tsp five spice powder
½ tsp white pepper
½ tsp salt (optional, depends on how salty the other sauces are, which depend on the brands used)
1 cup (250ml) of water
Glaze
2 tbsp light soya sauce
3 tbsp honey

Method
1. Prepare the pork by slicing down the centre until it makes 2 long strips of pork. If preferred, poke holes in the meat for the marinade to penetrate. Mix the marinate and marinate the pork in the mixture for min 2 hours or best overnight, up to 2 days.
2. Drain the marinade and pour into the bottom of the IP. Add the cup of water and stir until combined. Try to remove as much of the marinade from the pork and especially the garlic pieces or these will burn later on.
3. Place the pork in a steam basket. Cook on high pressure for 18 minutes, and natural release for 12 minutes.
4. Mix the glaze. Brush onto the pork.
5. Preheat to 230 deg C or Grill function. Place pork on a grilling rack (over a roasting tin lined with foil for easy clean up) and grill for 4 to 6 minutes per side (I did 5 min). Watch like a hawk. Once the surface turns slightly charred from the sugars in the honey and soya sauce, flip the pork or remove from the oven as necessary.
6. Serve chopped up with rice with the cooked gravy, or use in other meals e.g. wanton mee, char siu buns, fried rice, etc.


Beauties after grilling

Looks a bit dry but tasted ok after drizzling on the gravy

Recipe feedback
1. The meat came out a bit dry but looked correct. I wonder if it's the twui bak (pork butt) which was used instead of pork shoulder. I also recall that some char siu that I've eaten was very dry but because it was sliced wafer thin, you couldn't really tell. It might also be because I sliced it across the grain rather than with the grain, or because it was overcooked in the IP (I added an extra minute because one slab was really thick). I might try pork shoulder in future just for a comparison.
2. BK added that he'd like it sweeter and I did reduce the brown sugar from 5 to 3 tbsp, however, when I tasted the gravy, it tasted correct to me. The only thing is that it needs to be reduced like a sauce, which I was in too much of a rush for time to do.

Thursday, January 17, 2019

Siew mai (Shumai)

I have long thought that siewmai were very difficult to make until I watched a few videos. It's quite easy to wrap, just hold hand in a cupping motion and push the filling in. The wrapper pleats itself. The trick comes in flattening the bottom on a flat surface, then using your thumb and ring finger to create a waist near the top of the dumpling. This uses considerably more filling (probably about 1.5 to 2x more) than I anticipated given my experience with other dumplings, so I had under-estimated the amount of filling needed.

This is the best link for wrapping siewmai that I could find: https://www.theburningkitchen.com/shrimp-and-pork-dumpling-siew-mai/

Ingredients (makes 20)
500g minced pork
100g dried black cloud fungus
20 prawns, shelled and deveined and chopped into chunks
4 sliced small to medium carrots
Enough frozen peas for decoration
2 tsp salt
2 tsp soya sauce
Dash of pepper
1 tbsp chinese rice wine
2 tsp minced garlic


Method
1. Soak the cloud fungus. While waiting, mix the minced pork and prawns. Marinate with soya sauce, pepper, rice wine, and minced garlic. Leave to marinate for at least an hour.
2. Drain the cloud fungus and squeeze out any excess water. Slice into short strips.
3. Prepare the carrots by slicing into rounds. Line a steamer with a parchment with holes cut out. Place the carrot rounds on top of the parchment, using the carrots as a lining so that the dumplings don't stick together.
4. When prepared to wrap, mix in the cloud fungus. Wrap each siew mai as described above and place the wrapped siew mai into the steam on top of the carrot rounds.
5. Bring a steamer to a rolling boil and steam the dumplings (about 10 to 12 each time) for 10 minutes.
6. Serve hot with sweet chilli sauce or sambal as desired.


Friday, January 11, 2019

Matcha ice cream

I've made ice cream on several occasions now. I could never quite get the recipe for the basic recipe right until I read a new recipe.

https://www.biggerbolderbaking.com/homemade-ice-cream-party/

The main difference is when the condensed milk is added, whether it is beaten, and also the temp. Gemma put the condensed milk in the fridge and also beat the double cream initially until stiff peaks. I've also read in another of her recipes that she beat them until soft peaks before adding in the condensed milk and then continued to beat till stiff peaks, which is the method I used. I'm always petrified of over beating cream, and then it becomes butter! Below, I've adapted for matcha which I happen to have a tin lying around and need to use up.


Ingredients
1 tin of condensed milk, leave in the fridge overnight
600ml of double cream, suitable for whipping
2 tbsp culinary grade matcha powder
3 to 4 tbsp of hot (not boiling!) water, just enough to make into a paste
2 tbsp of icing sugar

Method
1. In a food processor or mixer/beater, add the chilled double cream. Beat until soft peaks.
2. Pour in the cold double cream and beat until stiff peaks.
3. In a separate bowl, combine the matcha powder and hot water into a smooth paste. To ensure that there are no lumps, you might want to sift the matcha adding the water.
4. Add the sugar to the matcha paste and combine until no lumps remain.
5. Pour the cream mixture into the mixing bowl and fold in carefully until no streaks remain.
6. Transfer to a freezable container (plastic or metal but no glass!) and freeze for at least 6 hours but best overnight.

Thursday, January 03, 2019

IP Nasi Chicken Biryani

Easy recipe last posted here: https://simmetra.blogspot.com/2018/11/ip-nasi-biranyi.html

Found another recipe which seems to have more flavour than the Ministry of Curry because it also fries the dry spices for the rice but I still prefer the method from MoC. The marinade is mostly the same but the difference is in the rice and dry spices. (quantities have been adapted for 1.2 to 1.5 kg of chicken)

https://www.indianhealthyrecipes.com/chicken-biryani-in-pressure-cooker/

Ingredients
8 to 12 pieces of chicken drumstick

Marinade
1 tbsp ginger grated
1 tbsp garlic grated
2 tbsp lemon juice (optional)
2 tsp garam masala
1 tbsp red chilli powder
¾ cup yoghurt (or about 6 tbsp)
2 tsp salt (if required)

Whole dry spices
1 bay leaf
4 cardamom
4 to 6 cloves
1 inch cinnamon
1 star anise
¾ caraway seeds

Pot
3 cups basmati
3 cups of water or thin coconut milk
3 tbsp ghee or oil
1 large onion, sliced
½ cup mint, chopped
1 green chilli, slit
6 tbsp yoghurt
¾ salt to sprinkle in water
1.5 tsp garam masala
2 tbsp fried onion (optional)
Served with tomato raita
Method
1) Marinade chicken for at least 1 hour. Soak rice for 30 minutes.
2) Heat the oil and fry whatever dry spices you have. Fry the onion until light brown.
3) Add the chicken and fry for 5 minutes. Evaporate excess water.
4) Add the additional ingredients into the pot (mint, chilli, yoghurt, garam masala). Deglaze the pot with 1C of water to prevent burning later on.
5) Layer. Ensure the chicken is at the bottom. Spread rice over the chicken (and avoid letting the rice fall to the bottom of the pan where it will burn)
6) Pour 2 cups down the sides of the pot. Pour the remaining cup on top of the rice. Level if necessary.
7) Sprinkle on the mint and fried onions.
8) Set on manual for 10 minutes, natural release for 5 minutes.
9) Fluff up the rice. Serve from the bottom layer. Serve with raita and flat breads.

Recipe feedback
This is much more tasty than the previous recipe and I learnt a very important lesson: that c cup of water per cup of rice is sufficient as far as this recipe goes. In a pressure cooker and also with the addition of chicken, a lot less water is needed to cook the rice than it would in a normal rice cooker or even microwave rice cooker. I know the writer of this recipe did say that basmati esp old rice needs less water than other rice so it does seem true. I will only really know when I cook basmati in the microwave to compare with how I cook with Jasmine.

Otherwise, the recipe is great and the same tricks from the last recipe applies i.e. must deglaze pan so the bottom won't burn, pile rice only on to of the chicken so the rice doesn't burn, and finally, natural release for only 5 minutes.

Monday, December 31, 2018

Ham and bean soup (slow cooker)

We were invited to Christmas Eve dinner and were fortunate enough to take away some leftover ham. I'd been eating this ham for days and other than having it as a cheese toastie, didn't know what else to do with it. I could of course make fried rice, but I'm not a fan of wok cooking especially in this heat. So here is inspiration that I obtained from various food bloggers - obviously it's a common sentiment! Unfortunately though, these food bloggers are all in the Northern Hemisphere where it's really cold now, so a warm soup sounds like a good idea. I decided to slow cook this up but serve it cold. Although the blogger claimed to have cooked up the soup in 15 minutes, I spent an hour and the carrots, celery and potatoes were cooked and still had a bite but were not meltingly soft. I decided to slow cook for an extra hour and it was perfect!


Sources
(1) Ham and potato soup https://cafedelites.com/ham-potato-soup/ (uses a roux base)
(2) Ham and bean soup https://cafedelites.com/ham-bean-soup/ (clear soup)

Ingredients
4 medium carrots, diced
4 stalks of celery, sliced
1 red onion, diced
4 medium potatoes, diced
2 to 3 bay leafs
1 tsp black pepper corns, crushed
1 can of beans
1 litre of chicken stock
200g ham, diced

Method
1) Saute the soffritto (i.e. onion, carrots, celery) until fragrant in a bit of oil. Add in the potato and ham and briefly saute.
2) Pour in the chicken stock, and add the bay leaf and pepper corns. Bring to a boil and skim off the scum.
3) Slow cook for 1 to 2 hours until the vegs have softened to your liking.
4) Serve hot or keep in the fridge overnight and serve cold the next day.

Saturday, November 17, 2018

No-bake Chocolate mousse ripple cheesecake

I have been looking at marbling effects in cakes recently. After my last less than successful cheesecake zebra effect, I decided to try again. Given the hot weather, I didn't feel like slaving in front of a beater and hot oven, so settled for these recipes that call for gelatine. I shortlisted two recipes: one uses matcha (https://www.youtube.com/watch?v=4WSoP6X7_Z8&app=desktop - has video) and another uses chocolate (https://tasty.co/recipe/chocolate-ripple-cheesecake - has video). Both create a very uniform ripple or monochromatic effect. However, the matcha one is only for a 6 inch cake and uses a cake base which I'm reluctant to spend the time baking. The choc one uses a 9 inch pan but uses 4 blocks of cream cheese, which is way too much (and fatty!) for 2 people to finish.

I decided to upsize the matcha cheesecake to a 8 or 9" (using maths) but to use cocoa powder and a biscuit base instead. So here is my amalgamation of these two recipes and also borrowing from the base from Nigella's no-bake cherry cheesecake.

Ingredients (for 8" pan)
Base
125g sweet biscuits (about 24 biscuits e.g. oreo with cream removed, ginger snap, digestives, milk biscuits)
75g softened or melted butter
Mousse filling
6 sheets gelatine, cut into smaller pieces and soaked in cold water
approx tbsp cocoa powder
380g milk
210g sugar
520g double cream
2 boxes of 250g cream cheese (room temp)

Bowl 1: 5 tsp + 180g mouse
Bowl 2: 4 tsp + 240g mousse
Bowl 3: 3 tsp + 300g mousse
Bowl 4:  1.5 tsp + 300g mousse
Bowl 5: 360g mousse or remainder

Method
1) Crush the biscuits either in a food processor or in a bag and then bashed with a rolling pin. Add the softened to melted butter and incorporate well.
2) Grease a biscuit tin. Pour crushed biscuits into the tin and flatten the bottom with a flat surface. Push the mixture up the sides. Place in the fridge to harden while working on the filling.
3) Prepare 4 bowls. Pour in cocoa powder and 2 to 3 tsp of water. Proportions above.
4) Microwave the milk until hot but do not boil. Remove gelatine sheets and squeeze out extra water. Add to the scalded milk. Mix to dissolve.
5) Add the sugar and stir until incorporated.
6) In Bowl 5, cube the cheese cheese. Pour part of the milk mixture and mix well. Add the remaining milk mixture and mix until incorporated. If required, sieve the mixture to remove lumps.
7) Beat the double cream (I used Bowl 4) until the surface is textured.
8) Add beaten double cream to the milk-cheese mixture in Bowl 5 and fold in.
9) In separate bowls, mix the paste for each bowl. Pour in the mousse into each bowl (use a kitchen scale) and fold in to incorporate. Bowl 5 has the remainder.
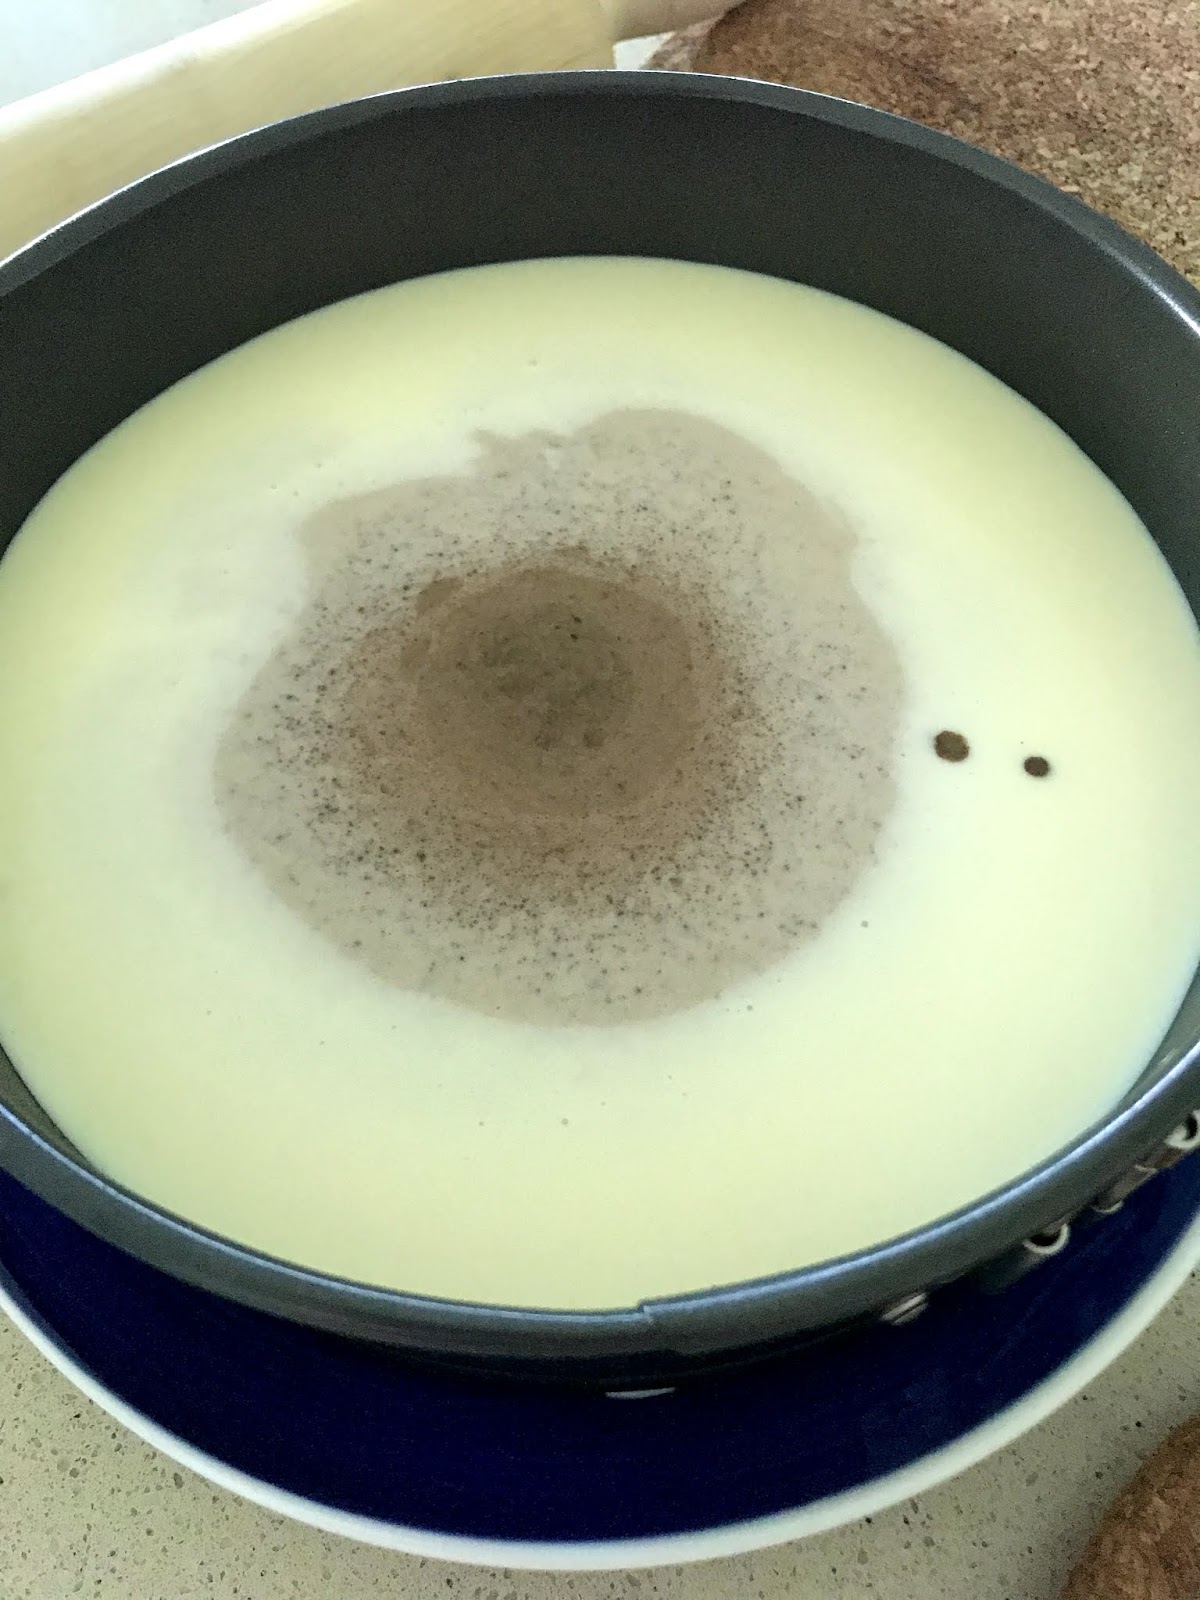
10) Remove the cake pan from the fridge. Starting with Bowl 5, pour in the centre from a height so that it forms a nice circle shape and spreads to the sides. Next, carefully pour Bowl 4 (second greatest volume of mousse and lightest colour) in the centre from a height. Repeat with Bowls 3, 2, 1 in that order (decreasing volumes of mousse and increasing darkness in colour).
11) Cover and leave to cool in the fridge for at least 4 hours or best overnight.
12) To unmould, run a spatula around the edge and test with a finger to ensure that it has detached from the ring. Also use a hairdryer to heat up the rim would help.
13) Serve with more whipped cream. Keep the uncut cake in the fridge or it will melt.
Recipe feedback - updates incorporated above
I made several mistakes.
1. I way under-estimated the gelatine and it turned out too watery so when I poured it on, the colours all blended into each other.
2. Trying to save a bowl for washing up, I decided to beat the cream cheese, sugar, and lastly the double cream all in the processor. Not beating the double cream separately and then folding in the cream cheese seemed to make a difference because once I added in the milk, all hell broke loose when it all became a sloppy messy. (The chocolate ripple recipe beat everything together but on deeper inspection, now I realise that recipe has no milk.)
Try 1 - Colors merged
Try 1 - All messed up inside
Try 1 - Cross section. The white is more distinct because I waited 5 minutes before pouring the first brown but didn't wait thereafter.
3. The colours were not distinct enough and I had to top up each colour with additional cocoa. This made it all lumpy. Even though I used a sieve when pouring in, each color was still speckled.
4. I only used 1 carton of cream cheese which made for a very short 1.5inch cake. I have doubled to 2 boxes of cream cheese.

Updated: A much simpler recipe: https://simmetra.blogspot.com/2019/09/no-bake-chocolate-mousse-gradient.html

Sunday, November 11, 2018

IP Easy Nasi Biryani

Wanted a really simple recipe that I could also cook in my IP. Found this one which is easy and tastes good enough since I don't have a discerning palate.

https://ministryofcurry.com/chicken-biryani-instant-pot/

Ingredients
8 to 12 pieces of chicken drumstick

Marinade 
2 tsp garam masala
1 tbsp red chilli powder
1 tbsp ginger grated
½ tsp tumeric
2 tbsp lemon juice
¾ cup yoghurt
1/4
2 tsp salt

Into the pot
1 bay leaf
Caramelised onion chutney
3 cups of basmati rice
3 cups water
2 to 3 tbsp of caramelised chutney

Garnish
½ cup Sultanas
½ cup cashews

Method
1) Marinate the chicken for min 20 minutes, or best overnight. Wash and then soak the rice for 20 minutes.
2) Press Saute. Drain the chicken and into the pot and briefly fry. Remove chicken and set aside. Pour in the marinade and deglaze the pot.
3) Add the onions at the bottom layer followed by chicken on top.
4) Drain the rice and layer on top, be careful to avoid spilling the rice onto the bottom of the pot. Add the bay leaf and water. Switch on Manual and set 10 minutes.
5) When the alarm beeps, let it release for 5 minutes and then Quick Release. If the top of the rice is not fully cooked, fluff up the rice and mix it into the rest of the rice and let it rest a further 5 minutes.
6) To serve, dig deep into the pot to take some chicken pieces and followed by rice. Garnish the rice with sultanas and cashews if desired.


Recipe feedback
- The recipe uses only garam masala and that was enough spices for me. 
- The use of basmati makes all the difference! The grains were separate and didn't stick to the bottom. The quick release also ensured that the rice didn't cake on the bottom of the pot and burn.
- She caramelised the onions from scratch. I used a store bought chutney!
- She cooked twice. First time 4 minutes for the meat and then release. Next, 6 minutes after adding the rice on top and then release. I couldn't be bothered and I don't think it affected the rice was over cooked. In fact, the rice was perfect.

Found a more 'authentic' recipe although it's not by an Indian. It's by a Japanese blogger who lives in Australia but what I like is that because it's for the Australian context, the ingredients are easily available here. Might try it next time.
https://www.recipetineats.com/biryani/


Updated: A more complicated recipe here https://simmetra.blogspot.com/2019/01/ip-nasi-chicken-biryani.html

Saturday, November 10, 2018

Chocolate zebra cheesecake (Baked)

Method adapted from here: http://www.notquitenigella.com/2010/04/27/zebra-cheesecake/
The method remains largely the same as the usual cheese cake but the difference if pouring it into the pan. Unfortunately my lines aren't as regular as hers and I couldn't remove the bubbles because I couldn't use a spatula to slash the batter. It's a very messy job and towards the end, I got quite bored!

Ingredients
250g cream cheese, room temp
250ml milk
65g butter, room temp
7 eggs, separated
58g cake flour
23g corn flour
133g sugar
1 tsp lemon juice
¼ tsp salt
2 tbsp cocoa
3 tbsp hot water

Method
1) Prepare the cake pan but buttering the sides and bottom. Add the parchment paper to the bottom. Take a roasting tray that the pan can just fit into. Place a thin towel at the bottom so that the pan doesn't slip around. Set aside.
2) In a smaller bowl, mix the cocoa with the hot water until a smooth paste forms.
3) In a saucepan on a very low fire, melt the cubed cream cheese. Add the butter and melt. Mix these together and they will look as if they've split. Pour on the milk and blend into a smooth mixture. If necessary, sieve to get rid of lumps.
4) Beat the yolks with half the sugar until pale and fluffy. Add the cream cheese mixture and whisk until smooth.
5) Sift the flours and salt. Sift them onto the cream cheese mixture and use the whisk to fold in. Ensure no lumps.
6) In a very clean bowl, beat the egg whites until opaque and foamy. Add the sugar in three batches and beat on low so that only small bubbles are created. Periodically scrape down the bowl. Once all the sugar has been added, add the lemon juice. Turn up to high and beat until just after soft peaks but just before stiff peaks.
7) Take a third of the meringue and put it in the yolk mixture. Mix until no white remains. take the second third and this time, very gently fold in with a whisk. Pour this mixture back into the remaining third of the meringue. Very carefully fold in until no whites remain but be careful not to burst all the foam.
8) Pour half of the batter into the bowl with the cocoa paste. Use a spatula to fold until mixed.
9) Alternating the batter, pour into the centre of the pan. I've now learnt that I should pour at least ¼ of the batter at a time otherwise it will take forever! As you get closer to the centre, start pouring less and less each time. This was a messy process and some bloggers have poured the batter into piping bags which seem to make the job far less messy.
10) Drop the pan on the table top a few times to dispel the bigger bubbles. Use a skewer to trace around to burst the bubbles but try not to mix up the colours.
11) Bake at 160 deg C for 30 minutes, 140 deg C for 43 minutes, and then switch off. Leave it in the oven for 25 minutes with the door closed.
Rising nicely at 160 deg C
Continuing to rise at 140 deg C (even though some blogger said you needed the higher temps to rise!)
 12) Remove from the oven and take away the water bath. Place pan back in the oven with the door ajar for 25 minutes to dry out the bottom. Finally, take it out of the oven and let the pan cool on a wire rack until completely cool. Cover and rest in the fridge, preferably overnight.
Final 25 minutes in the oven with door ajar
Cooling on a wire rack. Shrunk from the sides and a few small cracks!
Next morning. No waist but the top shrank inwards slightly. 0.5cm uncooked bottom.. Cracks closed.
Recipe feedback:
- Very good temp control this time at 160 and 140 (slightly about the dial readings on my oven). To achieve 140, I turned it down to 0 and the temp took 5 minutes to drop the 20 degrees.) Didn't affect anything as the cake still continued to rise in the centre. No cracks observed then. Cracks only appeared after the last 25 minutes with door ajar.
- Very very slight uncooked at the bottom, about 0.5cm which could be due to the addition of chocolate. This uncooked bit had no eggy taste. Overall, somehow adding the chocolate gave the cake so much more taste! 
- Finally no waist but it slanted in at an angle! The cracks mostly disappeared the next day after resting in the fridge. Maybe I should remove the water bath once the oven is switched off, instead of waiting the further 25 minutes in the closed door oven?
- I think I will keep the timings and these temps.

Update: This blogger says that after baking, run a knife around the rim of the cake to dislodge it so that it doesn't form a waist. Could this tip be the solution to all my woes?
https://www.anncoojournal.com/recipe/cranberry-cheesecake/
So now I have to (i) drop the cake to prevent shrinking (ii) run a knife around the rim so that it doesn't form a waist or form a crack from sticking to the edge (iii) remove the water bath which I'm thinking also prevents the waist. But should I do these just after turning off the oven or just before the final 25 minutes with the door ajar?

Wednesday, November 07, 2018

Coffee swiss roll

I decided to try a different method this time, the modified genoise method. I always wanted a cake that was a bit more moist so I was looking for something with oil in it. I decided to try Yochana's method because it had 5 eggs as I found that 4 eggs yielded too little volume for my pan even though it fitted what was described. The unique thing about her method not found elsewhere is that she adds the oil after beating the egg and sugar, so the oil is not beaten at all. Another change is this method is associated with the western swiss roll, I decided to roll it when hot as most western recipes suggest. I found this roll a lot more sturdy and cake-like compared to the Asian swiss rolls, so it makes sense to roll it when warm to form the 'muscle memory' and minimise cracking. I realised that I could even be quite heavy handed and roll it more tightly and also shape it into a rounder roll!

This recipe is quite heavily adapted from Yochana because I noticed quite a few people mentioned cracks. When I tried the recipe, I had flipped it to remove the bottom parchment and found that the bottom was still wet after the full 10 minutes even though the top was at the point of burning! I had to add another 6 minutes. So the next time, I will reduce the cooking temp as other recipes recommend. The adjustments have been incorporated within.

Ingredients
5 eggs, at room temperature
90g sugar (do not reduce this amount)
100g plain flour
60g corn oil or melted butter (I use oil)
1 tbsp instant coffee
1 tbsp hot water

Filling
150ml double cream
¼ cup icing sugar (do not reduce this amount)
1 tbsp instant coffee
1 tbsp hot water

Method
1. Take out the eggs and bring them to room temperature. Add the coffee to the hot water and dissolve. Set aside until it cools to room temperature.
2. Prepare the pan by lining it with parchment.
3. Beat the eggs with sugar until pale and foamy, until the ribbon stage. It should triple in volume.
4. Add the 1 tbsp of the coffee mixture and mix until incorporated.
5. Add the oil in batches and also mix until incorporated.
6. Fold in sifted flour.
7. Pour into the prepared pan. Use a spatula to flatten and ensure that it fills the corners of the pan. Drop from a height to dispel big bubbles.
8. Bake at 180 deg C for 18 to 20 minutes until the top springs back when touched.
9. Once out of the oven, immediately take the cake out of the tin and let it cool on a wire rack for 5 minutes.
10. Place a clean baking paper on another larger baking tray. Invert the cake onto the baking tray and remove the backing of the cake. Let it cool further.
The crust. Wrinkly (wonder why?) but the skin is dry enough and doesn't peel off and adhere to the baking paper or cling film the next day. About 0.5cm thicker than the matcha swiss roll. The difference 1 egg makes!
11. Once cool enough to handle, roll the cake up as tight as you can (but be careful not to crack the cake!) using the baking paper to assist. Cover with a cloth and leave to cool completely.
12. While waiting for the cake to cool, beat the double cream with the icing sugar until stiff peaks. Add the coffee and beat on low until just incorporated. Leave covered in the fridge.
13. When the cake is completely cool, unroll it. Cut off 1.5 cm at a diagonal on one of the short ends. This will help the cake to form a nice seam. Spread on the coffee cream with an offset spatula. Re-roll the cake. Make sure that it is resting on the seam.
14. Wrap the cake in the baking paper and then wrap over with cling film. Let it cool and rest in the fridge for a minimum of 1 hour, or best overnight.
Skin didn't peel off
Note to self regarding the lobang: Spread the cream to the short end where the rolling begins!
Recipe feedback
The roll was so moist the next morning! The oil makes all the difference. I read elsewhere that oil works better than butter because although butter is more fragrant, it makes the roll denser.

Sources:
1. Yochana: https://auntyyochana.blogspot.com/2006/10/coffee-swiss-roll.html
- 5 eggs (in 10*14") baked 200 deg C for 8 - 10 mins
- no milk but uses oil
- Beat whole eggs but seems to hv many comments about cracking

2. Coffee swiss roll http://www.bakeforhappykids.com/2018/06/cottony-soft-coffee-chiffon-Swiss-roll.html
- Extra fluffy and thick cake
- Milk and oil
- Separately beat 3 to 4 yolks and 4 to 5 egg whites (in 10*14")
- 180 deg C for 17 mins

3. Mocha swiss roll: https://www.landolakes.com/recipe/19013/mocha-chocolate-cake-roll/
- coffee and cocoa
- no oil but uses water
- Separately beat 4 egg white + 2 yolks (in 10*15")
- Bake 175 deg C for 10 to 15 mins

Monday, October 29, 2018

Matcha panna cotta

Am trying to use up my matcha and this is the final dessert that I will be doing with matcha this time around. Am using gelatine sheets for the first time and I must say that it's easier to use than powder. With powder, there are always lumps but not so with gelatine sheets. Matcha however was a pain to use and without a chasen to whisk the matcha, it was a real pain to ensure no lumps while also ensuring that everything is blended into the water. Somehow a whisk just doesn't work as well, even though I've used my trusty tiny sauce whisk.

Interesting tit bit from JOC is that 2 sheets roughly equals 5g of powder and used to soft set 1 cup or 250ml of liquid.
https://www.justonecookbook.com/cherry-blossom-milk-pudding/

However from other sources, I know that cream and milk need more gelatine powder to set it. As such, my recipe is adapted from these 3 recipes below based on my preferences and the volume of my ramekins but the basic method and ingredients remain the same.

https://www.thelittleepicurean.com/2014/05/matcha-green-tea-panna-cotta.html
https://cookingwithdog.com/recipe/matcha-panna-cotta/
https://www.justonecookbook.com/green-tea-pudding/

Ingredients (makes 4 ramekins)
2 tbsp matcha powder
300 ml of milk
300 ml of cream
50g (1/4C) + 2 tbsp sugar
4 gelatine sheets
2 tbsp hot water
4 tbsp anko (3 tbsp - 40g)

Method
1) Sift the green tea powder. Prepare the ramekins by spraying non-stick spray on the sides.
2) Cut gelatine sheets into smaller strips. Soak gelatine strips in cold water for 5 to 7 mins (instructions from the packet). Fish out of the water and squeeze out additional water. Put into the 2 tbsp of hot water and stir until dissolved.
3) In a pot, bring the milk and cream to just under a boil. You should see small bubbles forming at the side of the pot. Do not boil.
4) Remove from the heat and add the sugar and stir until melted.
5) Add the dissolved gelatine and whisk until incorporated.
6) Make the matcha paste. Add 5 tbsp of the warm liquid to the match and blend until a paste forms.
7) Place the paste into a sieve and using a spoon or spatula, slowly blend the paste into the milk-cream mixture. Whisk to ensure that everything is incorporated.
8) Optional: transfer to a pouring jug to facilitate pouring. Otherwise, pour into the ramekins. Cover with cling film and leave to set in the fridge for 4 hours or best, overnight.
9) Unmould with a plastic knife if desired. Serve with a tbsp of anko each.