Sunday, November 06, 2016

No knead Sticky cinnamon buns

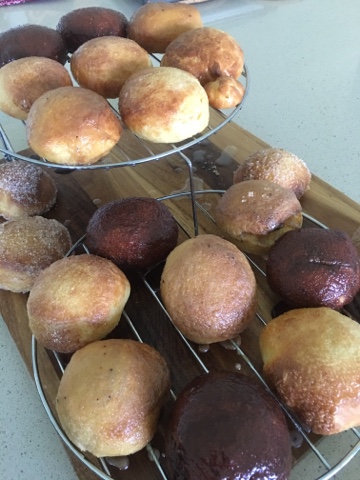
I have been looking for saucy cinnamon bun recipe for a long time. Since I tried this no-knead recipe a year ago, I hadn't given up on finding the prefect saucy recipe. And then the same recipe created came out with this recipe, which is also no-knead, and uses caramel sauce. Together with my new no-leak PushPan, this was a SCORE.

Original recipe: http://www.biggerbolderbaking.com/sticky-buns/
I have tweaked some of the ingredients and technique. The ingredients are similar to Gemma's cinnamon bun recipe.

Ingredients (makes 8 - 9 buns)
3 1/2 cup all purpose flour
2 tsp dried yeast
1 tsp salt
2 large eggs
1/2 tsp vanilla extract
1/4 cup honey
1 cup milk, slightly cold
1/2 cup (115g) butter, melted

Topping/filling
3/4 cup butter, softened. This excludes the butter for buttering the pan.
1 1/4 cup (220g) brown sugar
1/3 cup honey
1/2 tsp salt
1 tsp cinnamon
3/4 cup whole walnuts
3/4 cup raisins


Method
1) In a big bowl, combine the flour, yeast on one side and salt on the other. Mix everything together well. Set aside.
2) Melt the butter and add the milk. The temperature of the liquid should be around 35 deg C. Crack in the eggs one at a time and beat. Add the vanilla and honey.
3) Create a well in the centre of the dry ingredients and pour in the wet ingredients a bit at a time. Combine with a wooden spoon until there is no dry flour left. The mixture should be sticky and slightly wet.
4) Cover the bowl with cling film and a towel and let it prove for 4 hours. At the end of that time, it should have doubled in size. At this time, either continue with the preparation or put in the fridge for up to 3 days.
5) When ready to bake, remove the dough from the fridge to let it come up to room temperature. Meanwhile, prepare the filling (this can keep in the fridge).
6) To the softened butter, add the cinnamon, sugar, and honey and mix well.
7) Butter the 9" pan. If using a regular pan, don't use a springform or one with a loose bottom or the sauce might leak out. Spread half of the filling on the bottom and halfway up the sides of the pan, then set the pan aside. Scatter the walnuts at the bottom of the pan, I try to keep them in a single layer.
8) Pour the dough out onto a well-floured surface (I used a pastry mat). Flour the rolling pin and roll out to 1/8 inch thick and 20 inch long. Try to keep it rectangular.
9) Spread on the other half of the filling but keep a 1 inch border clear of any filing on the top and bottom long edges. Scatter on the raisins.
10) Using a scraper to assist you, roll up the dough, starting with the long edge. Try to roll it as tight as possible. (The pastry mat was fantastic as I was able to use it like a sushi mat, together with the scraper. Bliss unlike the sticky mess the last time.)
11) Pinch the seams close and again on a well-floured surface, place the entire roll seam-side down.
12) The roll is very soft and difficult to handle, but you need that in order to get the fluffy cake-like texture of the bun. Using dental floss, cut 2.5 inch pieces and place into the filling-coated pan. I put the end seam which is less pretty in the centre and surrounded it with the other buns.
13) Cover and let it proof for 45 minutes to 1 hour.
14) Preheat the oven to 180 deg C and prepare a baking sheet with parchment on top. This catches any over-flowing caramel sauce.
15) Bake at 180 deg C for 40 to 45 minutes until golden brown, turning halfway. Once out of the oven, immediately place the serving dish over the pan and invert. Let the sauce flow out. This has to be done as soon as possible after it is out of the oven otherwise the sauce sets quite fast.
16) Best consumed while it is still hot but not when the caramel is scalding!

Recipe feedback:
- The original recipe called for melted butter for the filling but this made the sauce too sloppy and there was no way it could be buttered up the sides of the pan. I've adjusted the recipe to use softened butter which makes it more spreadable.
- After 40 minutes, the outside was nicely brown and crusty but the middle was not fully cooked. I did not bake any further but I might have to tent the outsides next time.
- Not kneading was fantastic because the bread was cake-like rather than bread-like rather than developing tough glutein.

Update (30 Jun 18)
- This time I decided to leave the butter softened instead of melted. Made a whole lot of difference!
- Did 45 minutes and the centre bun was cooked. Tented the last 15 minutes.
- The bread was crusty on the outside. The inside was moist, soft and fluffy. The caramel hardened (almost giving it crispy texture) almost immediately once out of the oven. Luckily I well oiled the sides of the tin and also placed parchment at the bottom. It fell out and slid off the plate and onto the benchtop :( but the caramel had absorbed into the bread. Brilliant.

Update (14 Sep 17)
New recipe that has just been posted. Similar idea of creating a sticky sauce which is not the same as the glaze.
http://www.joyofbaking.com/breads/StickyBuns.html

Slight differences in recipe e.g. the butter is room temp and beaten in like a broiche instead of melted (which is supposed to give it more lift). While Gemma's recipe uses the same cinnamon sugar for the glaze, this recipe has a cinnamon sugar which uses 2 type of sugars (soft brown sugar and normal sugar), and the glaze uses honey with soft brown sugar. I read elsewhere that the meltiness actually comes from the normal rather than the soft brown sugar, which makes sense why my sticky buns are more dry than melty and sticky!

She also puts them into texas muffin tins which is an interesting idea as it gives all the buns a regular round shape.

Might give this recipe a try next time.

Friday, November 04, 2016

Chiffon cake comparisons

I love doing these comparisons as research for my recipes. Having just finally bought an angel food pan for chiffon cakes, I’m eager to try it out. Now that I've had some experience beating meringue, I've also got more confidence to finally try chiffon out. All the baking temps are the same, at 170 deg C.

Earl grey
Here are 3 recipes and their features:
1) JOC
: http://www.justonecookbook.com/earl-grey-chiffon-cake/
- 17cm or 7" pan
- 3 eggs
- adds tea leaves in the cake

2) Domestic Goddess
: http://thedomesticgoddesswannabe.com/2014/08/earl-grey-chiffon-cake/
- She is fantastic, she worked out the proportions for 18cm to 25cm pans.
Now I just have to measure my pan! Oops!
- 18cm: 4 eggs; 21cm: 5 eggs; 23cm: 6 eggs; 25cm: 7 eggs What do I do if my pan is 26 cm?

3) Christine
: http://en.christinesrecipes.com/2014/10/earl-grey-tea-chiffon-cake.html
- makes milk tea
- 20cm or 8" pan
- 5 eggs
- adds tea leaves in the cake
- makes a slash on top halfway thru baking

Pandan
1) Jo the tart queen
https://jothetartqueen.wordpress.com/2012/11/10/pandan-chiffon-cake/
- 23cm pan
- 5 yolks, 6 whites

2) Kitchen Tigress
http://kitchentigress.blogspot.com.au/2011/03/pandan-chiffon-cake.html
- 21cm pan
- measures egg by volume
- bakes at 180 deg C!

3) Christine
http://en.christinesrecipes.com/2011/06/pandan-chiffon-cake.html
- 20cm pan
- 5 eggs

4) Ieatshootpost
http://ieatishootipost.sg/how-to-make-a-pandan-chiffon-cake/
- 25 cm pan
- 9 eggs

Black sesame
1) Christine
http://en.christinesrecipes.com/2013/02/black-sesame-chiffon-cake.html
- 20 cm pan
- 6 egg whites and 6 yolks
- uses black sesame powder. Cake doesn't come out black?

2) Baking language
http://www.bakinglanguage.com/?p=1571
- Adapted from Christine
- Adds charcoal to make cake black

3) Gin's Kitchen
https://ginskitchen.wordpress.com/2013/08/08/black-sesame-chiffon-cake/
- Also adapted from Christine

Orange
The only recipes that I could find with a 10" (ie 25cm) chiffon pan.

1) Mandy
http://mandysbakingjourney.blogspot.com.au/2013/11/orange-chiffon-cake.html
However she bakes at 180 deg C for 1 hour. Maybe because it's more 'wet' since it uses orange juice
- 6 egg yolks, 7 egg whites
- 10" or 25cm pan
- 130g juice

2) Joy of baking
http://www.joyofbaking.com/OrangeChiffonCake.html
- 6 egg yolks, 7 egg whites
- 10" or 25cm pan
- 180 ml juice
- Bakes at 170 deg C for 55 to 60 minutes

3) Rasa Malaysia
http://rasamalaysia.com/orange-chiffon-cake-recipe/2/
- 7 eggs
- Weirdly using self-raising flour rather than cake flour
- 60 ml juice
- 22cm pan

General tips
1) https://jothetartqueen.wordpress.com/2013/09/12/back-to-basics-how-to-make-the-perfect-chiffon-cake/
- the right aluminum pan with removable bottom. Never grease it.
- proper whisking in of egg whites to avoid heaviness or streaks of egg white.
- No opening during the first 20 minutes and don't keep the door open for too long, or it may deflate.
- Foil the top once you have achieved the right colour to prevent over-browning.

2) http://kitchentigress.blogspot.com.au/2012/05/pandan-chiffon-cake-step-by-step-video.html
- Whisk egg whites in bowl with straight not curved sides if you want it more moist!
- Stale egg whites whisk better than fresh ones which turn out grainy
- Skewer inserted should come out clean but needs further 5 to 7.5 baking time for the right crust color.
- Immediately once out of the oven, invert. If it falls out, game over. If it doesn't budge, it's over done. Ideally it should drop a bit but stay on.
- Scrape the pan when cutting out the cake, don't leave the tasty brown bits behind!

3) http://ieatishootipost.sg/how-to-make-a-pandan-chiffon-cake/
- use the right size pan. For a 9 egg recipe, use 25 cm. A pan that is too big will not rise proper.
- cream the egg yolk and sugar instead of just whisking. Also, beat in (with mixer) the sifted flour rather than just mix in with whisk. This makes it easier to fold in the meringue.
- Whisk the meringue to just before stiff peaks otherwise it is difficult to fold in
- Pour in the batter from one side of the pan only. Don't rotate the pan.
- Sharply tap the pan on the countertop but also use a chopstick to go around the sides.
- Elevate the cake far off the counter otherwise there will be condensation. You can drape a wet towel over the tin to speed up the cooling.
- Use a sharp (serrated) knife and press against the side of the pan. Use one movement only, don't saw.
- You can place in the fridge to cool completely before cutting as this helps the cake to stabilise and to cut neat slices.

Thursday, November 03, 2016

Pizza base (bread flour)

Since my last effort at making pizza where I used plain flour, I have read from this source http://pizza.about.com/od/PizzaBasics/a/Best-Flour-For-Making-Pizza-Dough.htm that different flours produce different results and thus different types of pizza dough.  In general, cake flour cannot be used because of the low glutein content. Mutipurpose flour is great for thin crust pizza but tears easily. Bread flour is better for chewiness and deep dish pizza but easier to work with. I thought I’d try this recipes that are for thin crust pizza ie Italian and NY style pizzas.

Recipe (Italian): http://www.sbs.com.au/food/recipes/mauros-perfect-pizza-dough
Method (NY): http://feelingfoodish.com/the-best-new-york-style-pizza-dough/

The tips say to avoid pre-grated cheese which has stabilisers that prevent it from melting properly or to put the tomato sauce on top. Other interesting tips include not punching the dough but using the hands instead of a rolling pin to stretch out the dough and leaving a rim of air at the edges, a well floured surface, and not putting too much oil or it gets soggy.
Salami, peppers, mushroom, cheddar
Corn, pepper, salami, anchovy, olives
Ingredients
3 cups bread flour (makes 2 medium sized pizzas)
1 tsp yeast
1 tsp salt
1 tsp sugar
2 ½ tbsp oil
200 to 250 ml 35 deg C water

Method
1) In a big bowl, add the salt, yeast and sugar to the flour. Keep the salt and yeast separate. Mix each item with the flour then mix everything together.
2) Create a well in the centre and pour in the oil. Add the water a bit at a time until all the flour comes togeter into a shaggy dough. You may not need all the water depending on the ambient humidity. The bowl should be clean.
3) Pour onto a well floured surface and knead for 10 minutes till elastic and smooth.
4) Place back into a well oiled bowl and cover. Set aside to prove for 1 to 1.5 hours till doubled in size.
5) Meanwhile, prepare the toppings. Prepare the baking sheet by sprinkling on cornmeal. Preheat the oven to 220 deg C. 
6) Roll out the dough. I prefer to stretch with my fingers. Transfer to baking dish.
7) Coat the top with a thin layer of olive then spread on tomato paste. Top with desired toppings.
8) Turn down to 200 deg C and bake for 15 to 20 minutes till the cheese has melted and is golden brown. Serve immediately.

Recipe feedback The pizza stays crunchy compared to using plain flour. It stayed crunchy even the next day, cold from the fridge. However, bread flour makes the dough extremely fragile and keeps tearing.

Tuesday, November 01, 2016

Japanese cheesecake (6 eggs)

After the last disaster, I decided to try again using the recipe from Diana's Desserts. Although water wasn’t the reason for the failure, I bought a PushPan anyway after hearing great reviews about its no-leak and no-seepage claims. It’s great for baking cheesecake which uses the water bath method, and in fact, that’s how it’s advertised. Hence, the instructions below have been edited for PushPan, ie any mention of water bath, wrapping the pan in foil, etc etc. have been removed. You can refer to the original disaster recipe for that.

 Ingredients 
 250ml milk 
 250g cream cheese at room temp, cubed  
 60g butter, room temp  
 6 eggs (21 deg C is ideal), separated  
 55g cake flour  
 20g corn flour  
 120g sugar (reduced 10g from original recipe)
1 tsp lemon juice 
1/2 tsp salt 
1 tsp vanilla extract
Method    
1) Butter the bottom and sides of the springform tin. Add a disc of parchment to the bottom of the pan. Cover the outside of the tin with several layers of foil to prevent water seepage later on. (I don’t need to do this as I’m using a PushPan.) Preheat oven to 200 deg C.  
2) Sift the corn flour and cake flour mixture twice. Boil the water. Heat milk hot to the touch.  
3) In a medium bowl, beat butter and egg yolks using a whisk. Beat the cream cheese in until smooth. Add vanilla, salt, milk and lemon juice and whisk till smooth.  
4) Using the whisk, whisk in the flour in 3 batches till no lumps of flour remain. Strain mixture and set aside. 
5) In a very clean bowl (no oil, soap, or water), beat egg whites on low speed until foamy and opaque. Add sugar in 3 batches. Once all the sugar has been added, increase to max speed and beat till stiff peaks (double in volume and glossy) which takes about 4 mins. (A telltale is that just before soft peaks, the volume ‘suddenly’ increases and once again just before stiff peaks). It is best to stop beating at soft peaks to check then repeat beating at 30s intervals because once the meringue is over-beaten, it cannot be used. Beat to just before stiff peaks.  
6) Using the whisk, fold in 1/3 of the meringue to the yolk/flour batter and break up the egg white. You can whisk (but not too vigorously!) and not worry too much about breaking the foam. Use the whisk and add another third of the meringue to the yolk/flour batter but carefully break up the foam. Finally, TRANSFER the entire batter to the bowl with the remaining 1/3 meringue and use the whisk to fold in by scooping then lifting action from the bottom and lift through to the top. Rotate the bowl slowly as you do this. 
7) Pouring slowly from a height of 2 to 3 inches above, pour in so that you don’t get big bubbles. Make slashes in the batter with the spatula or run a skewer in a zigzag fashion in the batter and pierce big bubbles. Gently smoothen the top of the batter. (Update: Previously, I recommended 'dropping' the cake tin on the table but realised that after 2 days, the cake 'separated' ie the cheese sank and the meringue 'floated' to the top. From my experience with chiffons with 'filling' e.g. choc chips, I found that the filling sank when I dropped the batter on the table top.)
8) In a baking tray, place the cake tin and pour in about 1 to 1.5 cups of water to bake in a water bath. It should come up to about 2 cm up the side but up to no more than halfway.   
9) In the lowest rack of the oven, turn down the temp and bake at 155 deg C (without grill) for 50 minutes (it reads halfway between 150 and 175 on my oven’s dial), checking for doneness after 45 mins. The initial burst of hot air helps to brown the top. After the 30th minute (and only then otherwise the cake may deflate), rotate the pan to get even browning. The sides should be set but the centre still slightly wobbly.  
10) Leave cake in the oven with door ajar for 10 to 15 minutes, then place on a wire rack to cool slightly.  
11) Once the the cake has slightly shrunk away from the pan, run a knife around the sides to prevent cracking as it shrinks. Leave to cool completely on the wire rack. 
12) Once completely cooled, do not unmould. Place a kitchen paper on top of the springform and cover with a plate to absorb any further condensation. Place in the fridge to cool for at least 12 hours. 
13) Again, run a knife along the sides. Unmould the side but not the bottom. Serve it on the bottom.

Sunday, October 30, 2016

Black sesame paste

I am interested in using up my bread flour and decided to use black sesame paste for a change instead of red bean. This site http://japanesefood.about.com/od/saucecondiment/r/Black-Sesame-Paste.htm gas a great recipe and also explains the difference between Asian (Japanese/Chinese) black sesame paste and black tahini. The Asian version uses roasted seeds and emulsifies using its own oil and adds sugar (either as sugar or honey) but the tahani uses oil to emulsify.

Ingredients
1/2 cup black sesames
3 tbsp honey (if you prefer it sweeter, use 4 tbsp which also makes it less dry and easier to handle)

Method
1) Roast the black sesame seeds in a pan. Swirl them around and watch carefully because they burn easily. Set aside and let it cool.
2) In a food processor that is able to cut very finely (not all models do, you'll have to test), add the sesame seeds and pulse till it becomes very finely ground. The oil should secrete but it takes some time.
3) Once you're happy with the consistency, add the honey.
4) Use within the day or store in an air tight container and use within 2 days.

Wednesday, October 26, 2016

Kimchi pork bao

Since I tried this meat bao recipe over a year ago, I thought I'd try to use up my cake flour. When I found that my particular brand of cake flour could double up as bao flour, how excited and happy I was! The original recipe used plain flour, and came out a bit yellowish. Bao flour (HK flour to be exact) is supposed to be whiter. Aside from the filling, the difference between this recipe and the original one is that the baking powder is worked into the dough just before forming the buns. This makes sense as baking powder should be cooked as soon as possible, the longer it is left out (ie during the proofing time), it loses it efficacy.

Source for bao dough: http://www.malaysianchinesekitchen.com/char-siu-bao-steamed-barbecue-pork-buns/ Since this recipe is for char siu bao which tends to be sweetish, I've reduced the sugar. Also, compared to using normal flour, bao flour is supposed to make the bao spread out more so it's less upright and 'peaky' but flatter.

This recipe also has a lot longer proofing time (1 hour compared to 30 minutes total).

Ingredients
3.5 cups (450g) cake flour
1 tbsp sugar
1/2 tsp salt
2 tsp yeast
1 1/4 cup (300ml)
40 deg C water
3 tbsp vegetable oil
2 tsp baking powder

Filling
250g pork 4 prawns, minced
5 water chestnuts, chopped finely
1.5 tbsp light soya sauce
1 tbsp cooking wine
Dash of pepper ½ cup kimchi + 1 tbsp kimchi juice

Method
1) Combine the flour, sugar, and salt. On the opposite side of the salt, add the yeast. Mix well.
2) Add the warm water and mix well with a wooden spatula until there are no dry pockets of flour. Add in the oil.
3) Oil your hands (I forgot to do this and it was a messy, sticky disaster). Remove from the bowl and knead until the dough is smooth and leaves the surface/bowl/your hands clean. I also alternated with slapping the dough on the surface. This whole process takes about 10 to 15 minutes until you reach the window pane stage.
4) Leave it in a oiled bowl, cover with cling film and a towel. Let it proof for 1 to 1.5 hours until it has doubled in size.
5) Take out the dough and sprinkle on the baking powder in batches. Work it in until the baking powder is finished. If the dough is too dry, wet your hands.
6) While the dough is proofing, prepare the filling. Combine all the filling ingredients together in the bowl and set aside.
7) Prepare the parchment, I simply cut squares of about 4".
8) Roll the dough into a cylinder and cut the dough into 12 discs.
9) Keep half of the dough covered and in the fridge so that the baking powder doesn't activate.
10 ) Flatten each disc into and roll out into 4" wide discs. I use an asian rolling pin for this and ensure that the sides are thinner than the middle.
11) Portion out the filling (a cookie scoop helps). In the centre of each disc, place the filling and crimp to seal. Place on the square of parchment. Again, I place the prepared buns covered into the fridge to prevent them from proofing too fast and at a different rate from the second batch.
12) While preparing the buns, bring a pot of water to a rolling ball.
13) Fill the steaming basket with 5 buns and ensure that they have enough space to spread out without sticking to each other. You would need to steam all the baos in batches. Steam for 10 to 12 minutes. Turn off the fire and rest for 5 minutes so that the shape stabilises. After 5 minutes, remove to a baking rack to cool so that it doesn't get a soggy bottom.
14) Best eaten hot. Uneaten bao should be refrigerated. They can also be wrapped in cling film and frozen. Reheat in the microwave steamer.

Recipe notes
1) The taste of baking powder is discernible but the sudden expansion gave the signature 'smile'. Great if this was a csb but unnecessary for other types of bao. 
2) The dough was very sticky and difficult to work with, and didn't hold its shape, as u can tell from the lack of folds.
3) The texture was not as fluffy as the csb in dim sum restaurants. Instead, it was chewy despite using cake flour. The original recipe still seemed better.

Might try this recipe next time for bao because it mixes cake and bread flour which might be easier to work with.

Wednesday, October 19, 2016

Char siu soh

Fantastic recipe!
http://thedomesticgoddesswannabe.com/2014/05/char-siu-sou-chinese-bbq-pork-puff-pastry/

Here's my interpretation with some adaptations, eg I can't be bothered to cut circles. The thawed pastry is too soft to handle.

Ingredients (makes 16)
4 sheets of puff pastry
350g char siu
1 tbsp flour
1 tbsp corn flour
2 tbsp hoisin sauce
1 tbsp light soya
1 tbsp dark soya
2 tbsp sugar
1 cup water
2 stalks spring onions, chopped
2 eggs, beaten
1 tbsp sesame seeds

Method
1) Thaw the puff pastry in the fridge, about 15 minutes before using.
2) Make the sauce. Pour the flour, corn flour, sauces and sugar into a pot. Add the water and stir till there are no lumps left. Add the spring onions.
3) Put it on the stove and whisk till it boils and thickens. Once thick, set aside to cool.
4) Prepare 2 baking trays by lining with parchment. Preheat oven to 200 deg C.
4) Chop the char siu into cubes. Pour on the sauce and mix together.
5) Take 1 sheet and cut into 4. Do not remove the plastic sheet.
6) Place 1.5 tsp of the mixture in the centre of each square.
7) Using the egg wash, brush each edge of the square. Fold the pastry in half: into a triangle or the more traditional rectangle.
8) Using a fork, crimp all open sides shut.
9) Transfer onto the parchment and egg wash each pastry. Sprinkle on the sesame seeds.
10) Bake for 15 minutes at 200 deg C. (I rotated the tray at 9 minutes to ensure even browning).
11) Leave on the tray for 10 minutes to cool then transfer to a wire rack to cook completely. Don't eat it straight out of the oven, the sauce is scaldingly hot!


Sunday, October 16, 2016

Donut icing ideas

Sources: http://www.biggerbolderbaking.com/no-knead-donuts/
http://www.wikihow.com/Make-Coffee-Icing
http://www.biggerbolderbaking.com/gemmas-cinnamon-roll-pancakes/
http://sallysbakingaddiction.com/2014/09/17/maple-glazed-donuts/

- proportions adjusted for 3 donuts
- unless indicated, add the liquid to the dry and whisk till smooth

1) Chocolate frosting
1/3 cup powdered sugar
1 tbsp cocoa powder
1/2 tsp vanilla
1.5 tbsp milk

2) Vanilla frosting
1/3 cup powdered sugar
1 tsp vanilla
1.5 tbsp milk

3) Coffee frosting
1/3 cup powdered
1 tbsp milk
1/2 tbsp hot water
1/2 tsp espresso powder

4) Cream cheese
1/3 cup powdered sugar
2 tbsp melted butter
1 oz cream cheese, room temp
½ tsp vanilla
- Using a whisk, beat together the cream cheese and butter.
- Stir in the powdered sugar and vanilla and whisk till smooth.

5) Cinnamon sugar
1/3 cup granulated sugar
1 tsp cinnamon
3 tbsp melted butter
- Dunk the donuts straight from the oven into the melted butter and they will soak up the butter
- Roll in the cinnamon sugar.

6) Maple butter
1/3 cup powdered sugar
1/4 cup maple syrup
2 tbsp melted butter
- Melt the maple syrup and butter in the microwave in a microwaveable bowl, at increments of 30 seconds.
- Whisk in the powdered sugar.

No knead donuts

This recipe is more of a logistical (and washing up) nightmare than the making of the donuts itself. The great thing about this recipe is that it's baked not fried, and also that there is hardly any kneading involved. But it is very very very fattening - with lots of butter and sugar, so not something to be eaten by one person but to be shared around!

From this fantastic recipe, watch the video too: www.biggerbolderbaking.com/no-knead-donuts/

I've not made changes to the ingredients but just noted some notes that are specific to me. However, this recipe has taught me that having a proper donut cutter is important, or at least a proper scone cutter! I improvised with a milk jug and it didn't turn out too badly taste-wise but the look could be improved! I initially tried cutting holes in them but gave up. That's one more piece of dough to worry about (the donut holes) in terms of uneven baking, coloring, dunking in frosting, etc.

Ingredients (makes 20 * 3" donuts)
1.5 cups of flour
2 tsp dried yeast
1 tsp salt
4 eggs, beaten, room temperature
1 tsp vanilla
3/4 cup (200ml) milk (warmed to the touch, about 1 minute in the microwave)
3/4 cup (170g) butter, melted
1/4 cup sugar (original recipe used honey)
Melted butter for brushing

My tower of donuts

Method
1) Mix the dry in a big bowl: flour, salt, yeast (keep it separate from the salt), and sugar.
2) In a separate bowl, mix the dry: melted butter, milk and beaten eggs.
3) Add the wet to the dry and stir to combine till no pockets of dry flour remain. There may be some lumps but the proved batter will be fine. The batter is on the soggy and sticky side.
4) Cover with cling film and a towel and set aside to proof for 2 to 3 hours until doubled in size. Then stick it in the fridge for at least 12 hours (best overnight) and up to 3 days. The size doesn't change much after putting it in the fridge, instead, I noticed that it deflated a bit. It must have the 12 hours and cannot be used after just the 3 hours.
5) The next day, remove it from the fridge to warm up a bit so that it is easier to roll out. At this time, I start preparing my icing but I don't add the final liquid yet otherwise the frosting may set by the time I'm ready to glaze. I also prepare my baking trays by placing parchment on them.
6) On a floured surface, take out half the dough (keep the other half covered) and lightly knead. Roll out to 1/4 inch thick. Cut out the donuts with a donut cutter if using, or a 5" scone cutter and a piping nozzle for the centre. I decided to stick with just a 3" milk jug with no centre hole to worry about.
7) Lay the donuts on the parchment and cover with clingfilm and put it back in the fridge so that both batches rise at the same rate.
8) Take out the other half of the dough and continue to make the donuts. (halfway through, I remove the first tray of donuts to warm up so that they don't get too cold and stop proofing)
9) Leave to proof for 30 to 45 minutes until doubled in size.
10) Brush with melted butter.
11) Bake at 190 deg C for 15 minutes. (I usually bake for 9 minutes, then rotate the trays to ensure even browning and continue with another 6 minutes, including an extra minute or 2 to compensate for the loss of hot air if they haven't browned enough). While waiting, I finish up my frosting by adding the liquid to make the paste.
12) Once out of the donuts are out of the fridge, glaze immediately while the donuts are still warm as they tend to absorb the sugar better.

Friday, October 14, 2016

Lamb osso bucco with pumpkin

I have never seen or known that lamb had osso bucco too but then I saw it at the supermarket ladt week.

Ingredients
500 to 600g lamb osso bucco
2 to 3 cups of water
2 tbsp onion chopped onion
1 tsp minced ginger
1 tsp minced garlic
1 tbsp rosemary leaves
1 tsp dried oregano
1 tsp dried sage
1 tbsp soya sauce
1 tbsp Chinese cooking wine
1 tbsp mustard
1 tbsp worchester sauce
½ pumpkin, cubed
2 medium potatoes, cubed


Methods
1) Brown the osso bucco on all sides. Add the onions, ginger and garlic and fry till fragrant.
2) Add all the herbs and sauces, and the water. Bring to a boil and skim off any scum. Turn down and simmer for 3 hours. The water should just cover the meat.
3) In the 4th hour, add the pumpkin and potatoed. Top up with water is required.
4) Serve with crust bread or over rice.