Thursday, July 24, 2025

Black vinegar pig trotters

This is my favourite dish and also my dad's. I even wanted to eat it so much that I bought a claypot specifically for it, as vinegar has a disastrous effect on metal. Even though it's supposed to be safe on stainless steel (even the bloggers differ on this), I don't want to be subjecting my precious pots that I got when I got married and are meant to last me a lifelong, on this. Although it's traditionally for confinement ladies and thus considered very 'heaty', it's great for winter. I also found out from various blogs that it only becomes heaty when brewing the ginger and keeping it in black vinegar like a herbal tincture, and using old vinegar. It's less heaty when using young vinegar.

For me, these are the most seminal recipes: Burning Kitchen (has video) and Christine's talk about the herbal tincture method, BeautifulVoyager (has video) used it for her confinement but modernised the method, but Spice'N'Pans (has video) did it for everyday eating. Interestingly, Annielicious even cooks it the traditional way over the charcoal stove in a clay pot, and adds wine-soaked red dates! I might try that one day. Here is a compilation of all their tips but for everyday eating rather than confinement. 

Ingredients

500g to 1kg ginger - mix of old and young (Bentong ginger if possible is more aromatic)

1 to 2 full front trotters, chopped into pieces (around 700g to 1.5kg). The front trotters are preferred for their meat and the back for collagen. Possibly use a mix of both ie 1 front and 1 back foot..

3 tbsp sesame seed oil

6 hard boiled eggs, peeled

750ml of black sweet vinegar, Chan Kong Thye (bulldog picture, use Pink double strength) or 1 bottle of 2 bottles (600ml each) Pat Chun sweetened vinegar (the only one I could find in my Asian grocer)

5 tbsp brown sugar (or more to taste) or 100g gula melaka or palm sugar

Pinch of salt

Coarse salt (for washing the trotters)

2l water (for boiling)

Method

1. Prepare the ginger. Scrub it clean and cut into chunks. If using young ginger, skin doesn't need to be removed, but do remove loose bits. (Extra step: dry in the sun for a week to absorb the vinegar) Smash/bruise it to release the flavour.

2. Prepare the trotters. Rub the trotters with coarse salt while washing. Wash to remove any blood. Blanch the trotters. In a big pot, add 2l of water or enough to cover the trotters. Add the trotters to the cold water and bring to boil. If adding trotters to boiling water, the trotters will be sealed and the blood remains. Boil for 10 to 15 mins. Discard the water. Wash the trotters again to clean off the scum.

3. Optional way to prepare trotter from SoupedUpRecipes braised trotters: Soak for 2 hrs in water with sliced ginger, crushed spring onion, 2 tbsp of chinese cooking wine. Using the same water, bring to a boil and then boil for 10 minutes. Discard everything and wash the trotters clean of scum.

4. Pat dry and use the knife to scrape off any hair or pluck them out with tweezers. It's easier to pluck after being blanched.

5. The confinement method is to fry in a dry wok at medium low heat, fry the ginger until very dry. Once dry, add the 3 tbsp sesame seed oil and continue to fry but be careful not to burn. Alternatively for everyday eating, add sesame oil. Without needing to warm up the pot and oil, and fry the ginger until dry. 

6. Optional: lightly brown the trotters, then add the sugar at this point and lightly caramelise the sugar.

7. In a clay pot, pour in the entire bottle of black vinegar and use the bottle to measure 1 bottle's worth of water (enough to cover the trotters), and pour that in. Bring to a boil. Transfer the trotters and ginger to the claypot. The trotters should ideally go into hot liquid or skin will shrink and turn hard. Once boiling, add in the brown sugar (if didn't do step 6).

8. Turn down to medium low and simmer for 1 to 1.5 hours until soft. (if using the stainless steel pot or wok, 30 minutes of simmering suffices). Stir every 30 minutes or so. You should be able to poke through the trotter with a chopstick. If intending to steep and store, don't cook for too long as the trotters will continue to soften in the vinegar. *Also possible to use IP and cook for 10 minutes for tender trotter and 15 mins for fall off the bone.

8. Check seasoning and add salt if needed. Add the hard boiled eggs in the last 15 minutes only. Let the eggs soak in the sauce for at least 4 hrs. The trotters (without eggs) will taste better the next day and can be soaked for up to 3 days and will taste even better.

9. To store, remove the eggs and store separately from the sauce or they will dehydrate and harden. Store the sauce in a glass or ceramic vessel, not metal. The pork will continue to soften as it steeps in vinegar so depending on how soft they were cooked to begin with, consider whether to store together. 

10. To reheat, reheat only enough to each time (few eggs, few trotters and enough vinegar) over the stove. The microwave will only cause the trotters to harden. This can be stored in the fridge for up a month but the trotters must remain submerged. If keeping for that long, take out the sauce every week and reboil then cool down and re-store.

Saturday, July 19, 2025

Double dark choc chip brownies

I have so many brownie recipes that use only cocoa and no chopped cooking chocolate or melted choc chips- a standard recipe with extras like choc chips and nuts or fruit, and a Hershey's dup trying to re-create the recipe from my childhood which came off a Hershey's cocoa box, blondie brownie cheesecake, peanut butter brownie. I've experimented with different types of sugar (white, brown or mix) to try to achieve just the right texture of melting fudge with a crispy top (that remains even the next few days) without it becoming too much like chocolate cake.

I've actively avoided using cooking chocolate and melting choc chips just because it's extra store cupboard items to stock but I've never achieved the right level cake with fudginess without it going over the top to become too raw, and I think that's the limit of using pure cocoa powder. When I encountered the gateau,  it opened up my mind to the possibility of chopping baking chocolate as a fudgey but cakey alternative.

Here comes RecipeTinEat's easy recipe which uses both chopped choc bar and choc chips. Except I don't like melting choc chips with butter as I feel there are other ingredients like stabilisers in the choc chips, so I've swapped them and used the pure block of cooking chocolate as my base. 

Ingredients

200g butter, melted

200g dark choc bar, chopped

1C brown sugar (175g(

3 eggs, beaten

1 tsp vanilla extract

½ C (75g) flour

¼ C (30g) cocoa powder

180g/1C dark choc chips (chopped), leave some for deco on top

¼ C fruit or chopped walnuts (optional)

salt pinch

Method (8 inch square pan)

1. In a microwave or bain marie, melt the butter and chopped chocolate bar. Leave to cool slightly.

2. Combine the sugar, vanilla with the melted choc mixture.

3. Add the beaten eggs and combine.

4. Sift in the flour, cocoa and salt.

5. Mix in the dark choc chips. Mix in any optional chopped walnuts, etc.

6. Pour into the prepared tin (with parchment overhang).

7. Bake at 180 deg C for 24 (very fudgey almost raw), 28 (gooey) to 32 minutes (cake-like). Rest in tin for 10 minutes before removing/lifting out of the tin. It will look too soft and undercooked! Allow to cool at least 20 minutes before slicing up.


Feedback

- Not entirely sure if I read the recipe wrongly as I swapped the add-in chips for the choc bar to melt. However, i did use 20g less of choc bar with the butter as the bar was 180g straight off the packet and I didn't bother topping up the 20g. The result was a very oily brownie with oil oozing out when it first came out of the oven, pooling in the centre but the sides were dry! I slathered the oil onto the sides and it seemed to absorb back in. 

- It was really also very flat, maybe that's normal? Even an additional 20g wouldn't have made much difference to the height.


Saturday, July 05, 2025

Banana, walnut, raisin and choc chip muffins

Using this fruit and nut loaf recipe, I again upsized it to make muffins.

The one perfect muffin!


Ingredients (makes 12 muffins)

3C flour

1½ tsp baking soda

¾ C packed brown sugar

a pinch of salt

1 tsp lime juice or apple cider vinegar

3 eggs, beaten

2 tsp vanilla extract

160 ml melted butter (approximately 0.7C)

4 mashed bananas

½ C raisins (rehydrated in tea, juice or water, then strained)

½ C choco chips

½ C walnuts, chopped; with whole walnuts for decorating

1 tsp cinnamon powder


Method

1. In a big bowl, mix the dry ingredients: flour, baking soda, salt, and cinnamon powder.

2. Add the raisins and toss in the flour to coat so that they don't sink. Add in the choc chips and chopped walnuts. Reserve a few choc chips and whole walnuts for decoration.

3. Add the packed brown sugar and ensure that everything is well incorporated and no big chunks of brown sugar. Set aside.

4. In a smaller bowl, mash the bananas with a fork.

5. Add in the melted butter, beaten egg, lime juice and vanilla extract. 

6. Add the wet to the dry ingredients and gently fold in. Fold until the flour is just mixed in, there might still be some dry bits. Do not over mix. The batter will be quite thick and chunky.

7. With a cookie scoop, fill into lined muffin tin, approximately ¾ to the top.

8. Decorate the with whole walnuts and/or choc chips.

9. Bake at 175 deg C for 31 minutes until cooked through. (Note: the skewer trick doesn't work as the inside batter will be very liquidy from the fruit and choc).

10. Leave in the tin for 5 minutes to cool slightly, then remove muffins and continue cooling on a wire rack. 

Feedback

- Quite dry unlike the original banana loaf, maybe recipe needs more oil. When mixing, it did have lots of dry flour that eventually absorbed the moistness of the banana. However it doesn't fall apart so maybe that's fine. Tender crumb (from not over-mixing and I snuck in ¼ cup of leftover bread flour!)

- I didn't increase the sugar ratio and it was still sweet enough.

- I am not sure if the baking soda really did its job as there was hardly any lift, but at least I didn't taste the baking soda this time. I might try with proper baking powder next time.

- The addition of bread flour adds a crunch that stays even after a few days (after reheating).

Sunday, June 29, 2025

Karaage 唐揚げ

There are several videos now trending about putting flour in oil when the oil is cold and then putting in bite-sized pieces. Magically the chicken is coated with the flour and deep fried!

The first reel I saw by CookingBoBo involves using only a little oil. Put in 2 tbsps or so of potato or corn starch in enough oil to cover the bottom of the pan. Whisk until combined. Marinate the chicken in ginger, soya, etc (wet ingredients possible). Turn on the fire and cook by continually turning each bite-sized piece. Once the pieces are golden brown, remove. Put in more tbsps of flour and repeat.

Next one I saw by leeszekee is similar by starting with enough cold oil to cover the bottom of the pan and mixing in 2 tbsp of corn starch.

This recipe by YumMakers uses midwings. It starts by placing plain flour in hot oil. Marinate chicken in spice powders (eg salt, pepper, garlic) and some wine. Add oil so that the spices can stick onto the wings. Put all the wings in the hot oil. She put a lot in and didn't seem to stir because the pot is almost full! Somehow the wings 'seem' to cook evenly.


Saturday, June 28, 2025

5 black grain mantou

From this FB recipe by MiaoVibe.

Ingredients (makes 12 four-inch wide)

50g black sesame seeds

20g black rice (I substituted with 20g raisins)

20g black beans

20g blackberries (I substituted with 20g frozen blueberries)

10g black goji (I used regular)

10g walnuts

400ml water

600g flour (I used bread flour)

5g instant yeast

1 tbsp white sugar

pinch of salt

1 tbsp lard or butter

Notice the size difference (the bottom 6) of the second batch that had 30 mins extra proofing (due to waiting for the first batch to steam) compared to the first batch

Method

1. Add the grains, walnuts and black fruits to a blender with 400g of water. Using the Soya milk mode, blend. Allow to cool down.

2. Pour the flour on a table. Create a well and add the yeast, sugar and salt (keep salt away from the yeast). Mix well.

3. Pour in the grain mixture. Use hands to knead till no flour is left. Use a scraper to gather the dough if it helps.

4. Place in a bowl and cover. Allow to proof for 1 hr until about it grows to about 1.5x.

5. Turn out of the bowl and deflate. Knead and the longer you do so, the softer the bun.

6. Flour the surface well. Form into a log and cut into equal sized pieces. Form a ball with each. Makes about 12 (approx 108 to 110g of dough each).

7. Place directly in the steamer and place over a wok of warm water to proof for 15 to 30 mins. 

8. Remove the steamer and turn on the fire till it starts boiling. Put the steamer back on the wok and steam on medium high for 30 minutes. Leave covered for 10 minutes after switching off the flame.

Recipe feedback

- Overall a very wet dough. I didn't use mixer and mixed by hand throughout.

- The second batch that had an extra 30 minutes of proofing while waiting for the first batch to steam came out so much fluffier! A definite must-do if time permits.

- So far, those recipes that I used bao flour here and here and here all using KA have been most successful. They have been easy to shape too but the issue is that their 'face' never comes out smooth and they always tend to flatten and crawl out sideways. 

- If only this recipe's dough wasn't so wet and difficult to work with, it would have been great for wrapping bao. Their 'faces' and shape came out smooth and round!

Saturday, June 07, 2025

Lazy chocolate caramel gateau

The original recipe by Ann Coo involves using a small 6 to 7 inch pan, Valrhona chocolate and baking at 170 deg C for 20 mins. She said this was a lazy recipe and she's right, because this is only my 2nd recipe blog post in 2025, I ain't got time for using and washing up a mixer! Further, I decided to go all in and change up the pan size and pan all in once without trialling along the way! I expect this to go horribly wrong but what the heck, I don't have time to experiment and try. As such, all proportions have been increased by ⅓ (aka added an extra egg) to account for the bigger pan size (I used my 8inch round). 


Ingredients 

180g (1 bar) hopped baking chocolate (Valrhona if possible, I only had Cadbury)

40g caramel chips

120g sugar

1.5 tsp vanilla extract

3 large eggs

120g butter

pinch of salt

52.5g plain flour or 80g cake flour

Method

1. Melt butter and chocolate using double boiler. Allow to cool down.

2. Separately, hand whisk eggs and sugar until dissolved. Combine with melted butter and chocolate.

3. Sieve in flour and fold in.

4. Pour the mixture into 8 inch round pan and bake 170 deg C for 30 to 35 mins. (After 30min with good temp control, the top was still wobbly so I switched off the oven and left it inside for a further 5 mins until skewer insert comes out clean.)

5. Let it sit in the pan for 10 minutes then invert onto rack to cool. Serve warm or totally cooled with more granache.

Receipe feedback

By happy accident, my choc bar was only 180g so I topped up with what I thought was meltable choc chips. They turned out to be caramel chips and the result is amazing!

Thankfully I had also cut the sugar otherwise it would be too sweet.

In the end, it was a bit on the sweet side (imagine if I hadn't remove the sugar!) but not cloyingly sweet.

The texture was very fudgey chewy with slight papery crispy top, overall similar to brownie.

I honestly think maybe 6 to 7 inch cake is enough because it's so rich otherwise, it will take a long time for 2 ppl to finish!

Thursday, April 03, 2025

Real fried chicken

I just realised this is my first receipt blog for 2025! 🤯 Why have I been so busy and not tried out new recipes? Because of my Korean? 🤔

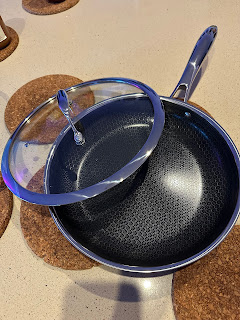
For the longest time, I have wanted a Hexclad fry pan so this year, there was a Mother's Day sale where the 25cm fry pan came with a free lid, and I took it. It's opened up a whole range of culinary experiences that I've totally missed because I don't want to deep fry or even panfry stuff in my house where the kitchen is open plan.


The last time I deep fried anything was probably >20 years ago and BK maybe deep fried chicken >10 years ago when we first got the outdoor stove. That's only half the problem as I've never found a suitable recipe - until now. The secret really is in the batter.

This recipe by chinesefood0805 is actually for airfrying but i'm using the batter for deep frying, and it's a game changer. The basic method is season the chicken (however you want, including adding liquid eg wine). The batter comprises equal parts wheat starch and corn starch (ah hah!), and can add salt and pepper to the flour. 

Pat dry then coat with egg, mixed flours, then egg again followed by mixed flours.

She then sprays with oil and airfrys at 180 deg C for 30 mins. As you can see, I shallow fried until cooked (20 to 30 mins) as I didn't want to use so much oil. Perfection!

I might try the airfryer version another time.

Update: Saw another AF recipe for chicken wings here. Batter is different.
Using midwings only, no need to pat dry. Mix 1 to 2 tbsp of baking powder with salt and dry powders (eg onion or garlic powder). Coat. Next (no egg wash), dredge in a mix of equal parts rice flour and corn flour, mixed with more dry powders (eg paprika, black pepper). (Didn't seem to have spritzed with oil? Maybe it's assumed.) AF at 200 deg C for 20 mins total, flipping halfway.

Black vinegar pig trotters