Saturday, August 26, 2023

Snowskin mooncake comparison recipes

For some reason, all snow skin mooncakes have a custard filling. Maybe because they are best eaten cold and red bean and green bean paste don't lend themselves well to being eaten cold. Standard method is usually to steam the dough for between 20 to 30 minutes depending on volume, and kneading till smooth then chilling in fridge for 30 mins to 2 hrs. Pan fry the dusting GRF for around 5 mins until brown.

Seems that recipes which microwave the dough requires condensed milk.

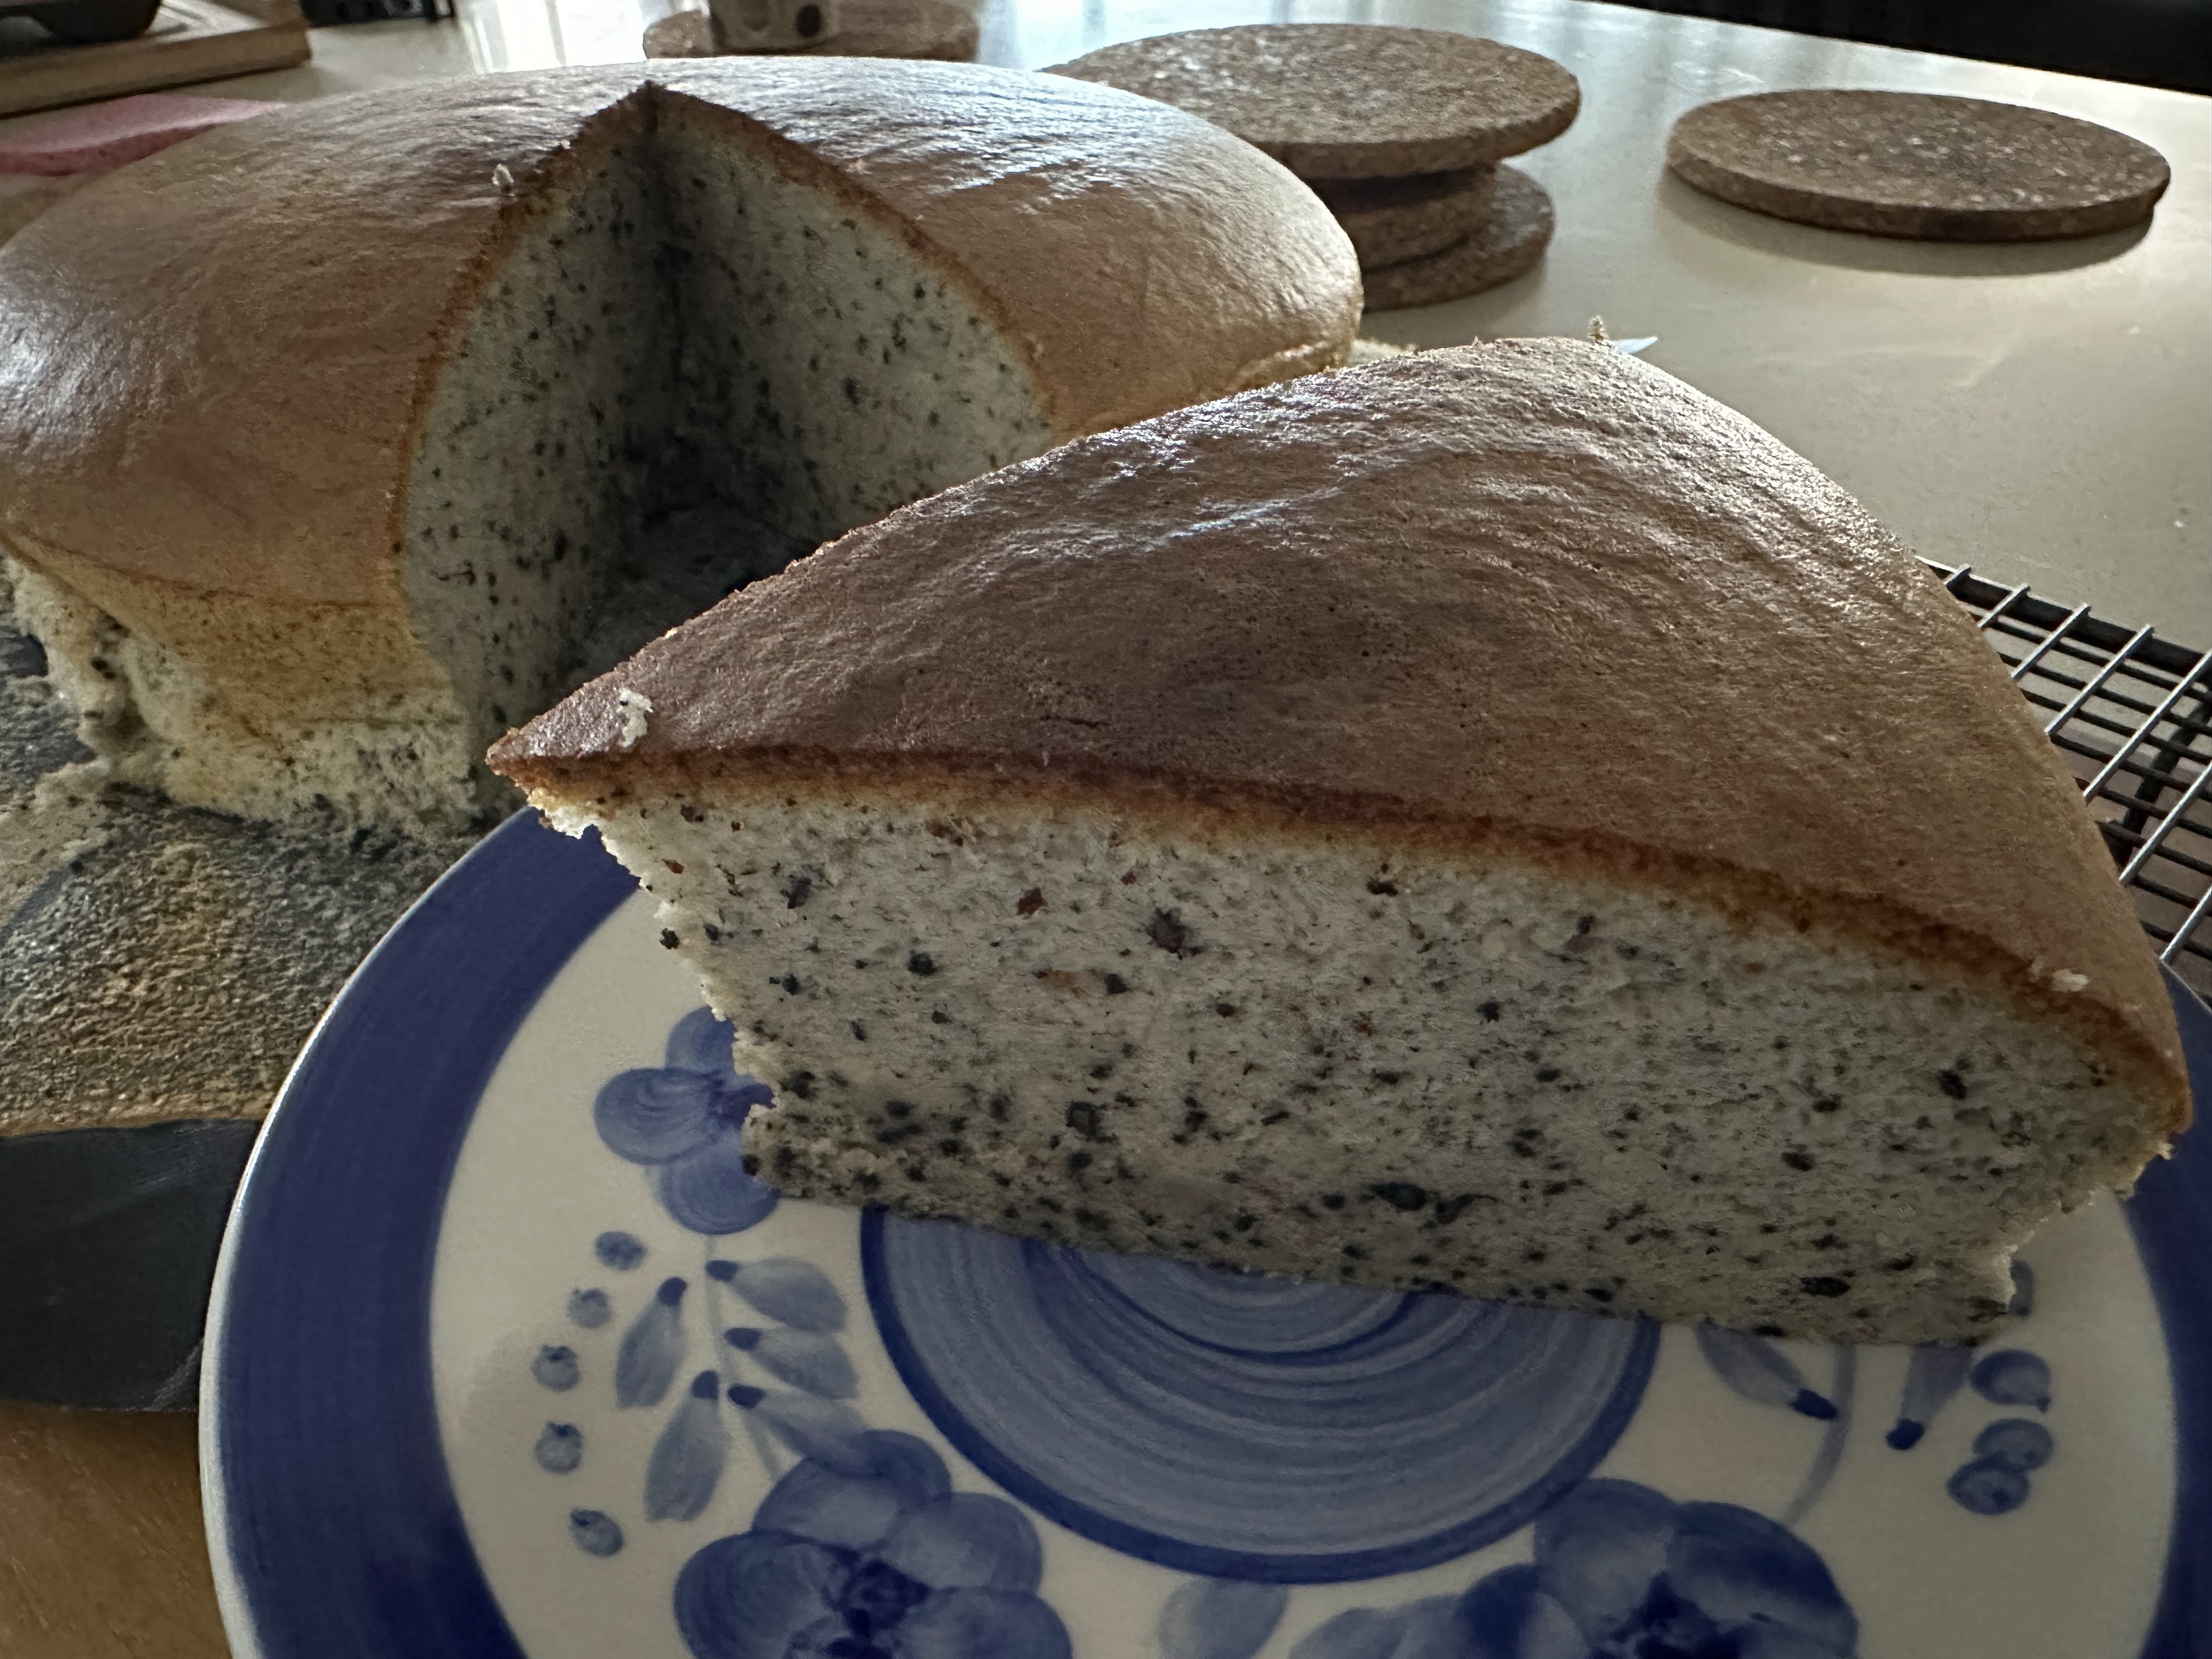
Wheat starch makes the dough more translucent and see-through. As a substitute, corn starch or tapioca starch can be used but it will be more opaque.

1. Taste of Asian Food (video)

- GRF (80g per color), rice flour, icing sugar, WS, milk, veg oil : Mostly equal parts of everything

- For coloring, uses cocoa powder, pandan juice blended with milk, and strawberry milk

- Beats batter with handheld mixer. Steam 10 mins per color (use chopstick to test it comes out clean)

- Uses clingfilm to knead and and chill 30 mins before use. Uses clingfilm to help flatten.

- Presses mold several times to imprint design

2. Cicili (video) - twelve 50g mooncakes

- GRF (75g), rice flour, WS, icing sugar, milk, veg oil.

- Dough to filling ratio is 1:1 so for 50g mold, 25g dough to 25g filling. Freezes filling for 30 mins to make it easier to handle

- Dust mold with icing sugar.

3. Honest food talks - thirty 50g mooncakes

- Can use Jap mochi rather than gaofen so it is more chewy. Gao fen requires shortening but mochiko doesn't require steaming.

- Store snowskin mooncake in fridge or immediately freeze

- GRF (144g), cornstarch, icing sugar, rice flour, milk, oil

- also has other fillings: red bean, choc, green tea mung bean

4. Souped up recipes (video) - makes twelve 50g mooncakes (written recipe is Curated Kitchenware) (tried here)

- GRF (35g), rice flour, wheat starch, milk, icing powder, condensed milk, oil

- microwave in increments totalling 3 mins (depending on power) until no more watery bits

- 20g dough + 30g filling

- uses parchment. Roll dough in between parchment with rolling pin to make skin evenly thin with thinner edges. Roll out to 2 inch diameter.

- toast 2 tbsp GRF

- Gives very detailed instructions how to shape for the mould

5. Red House Spice (video) - makes eight 50g mooncakes

- 3 tbsp GRC, flour, WS (can replace with tapioca or cornstarch to make it gluten free), powdered sugar, condensed milk, milk, oil 

- 2 tbsp GRF for dusting

- Microwave 4 mins on high or steam 30 mins on med heat.

- Store in fridge and consume within 3 days.

6. Woks of life - make eight 100g or sixteen 50g mooncakes (tried here)

- 50g GRF, rice flour, wheat starch, milk, oil, icing sugar

- knead then chill in fridge 1-2 hours.

- 1:1 ratio dough to filling.

- Also uses clingfilm and rolling pin. 

- For 100g mooncake, roll out to 10cm (4 inch)

7. Omnivore's Cookbook - makes 20 mooncakes of 50g each

- 120g GRF and same rice flour, cornstarch, icing sugar, milk, veg oil

- dust mold with cornstarch

- Push mold and hold for 30 seconds to form shape

8. WTTC - Pandan snow mochi mooncake (video) - ten 50g mooncakes (adapts recipe from Kitchen 101)

- GRF/mochiko, milk, rice flour, wheat starch or cornstarch. 

- Avoids using clingfilm cos of condensation. Handle when cool enough with oiled hands or use KA.

9. Emily Lu (video) - twenty 50g mooncakes

- 160g Gao Fen (aka fried GRF by Cock brand), icing sugar, water, shortening.

- Knead until smooth. No further cooking!!!!

- Demonstrates tie-dye dough

10. Kat Kwa - Rose skin, Choc skin with choc truffle filling, Durian filling

- Uses plain flour rather than rice flour with gao fen then no steaming required. Instead, she fries the flour and wheat starch to cook it.

- Uses KC to beat.

11. Lisa's kitchen - lotus seed filling

- includes recipes for other fillings: Taro & sweet potato, chestnut, red bean, mung bean, red date, lotus seed, chocolate, custard

- Also shows how to prepare salted egg yolk: mist with strong liquid, put on baking sheet and bake at 170 deg C for 8 - 10 mins.

Saturday, August 19, 2023

[FAIL] Lemon souffle cheesecake

I have 2 lemons sitting in the fridge. What do I do? I could bake lemon chiffon again (last baked in 2017 but only used half a lemon worth of juice which came out without much lemon taste) or continue my cotton cheesecake exploration. Ingredients from Skyapple uses 2 lemons but weirdly doesn't have tin size, oven temp and baking times. Her cake cracked on top so I wouldn't follow it either. Method from Karen Ling based on this best attempt in my small digital oven with 8 inch tin so I adapted below for 9 inch by increasing baking times.

Ingredients - for 9 inch tin

140g sugar, divided use

6 eggs, separated

50g butter

250g cream cheese

100ml milk

Juice and zest of 2 lemons

Pinch of salt

60g flour + 2 tsp corn starch (I replaced with 80g cake flour)

Method

1. Bring cream cheese, milk, and butter all to room temp. Prepare the tin by lining with reusable silicone parchment (I think this could be one of the the solution to my multiple failed soufle cheesecake experiments that used this 9 inch that didn't keep its height here, here, and here.) even though this is a PushPan.

2. In a bain marie, melt cream cheese and butter, then add milk. Whisk until smooth. 

3. Add in sugar and whisk in until melted. Temp of batter should be about 50-60 deg C now.

4. Remove from heat and add yolks one at a time and whisk in after each addition. 

5. Add in the juice and zest and incorporate in. (save about 1 tsp of lemon juice for meringue)Set aside.

6. Fold in the sifted flour. 

7. In a very clean bowl with clean beaters, beat egg whites on Speed 6 until opaque. Add salt and 1 tsp lemon juice. Beat for another 20 seconds.

8. Add ⅓ of sugar and beat at Speed 4. Continue to beat and add the sugar in 2 more batches. Once all added in, turn up to Speed 6 to 8.

9. When the meringue is shiny, stop to check for soft peaks. If near soft peaks, turn down beater to beat at Speed 2 for 1 to 2 minutes until soft peaks stage has been reached.

10. Add ⅓ of meringue into yolk batter and use whisk to temper in.

11. Return batter to remaining meringue and use whisk to fold in before swapping to spatula to carefully fold in from the bottom. Ensure no more streaks.

12. Pour into 9 inch tin with parchment (and optional foil wrapped around bottom to prevent seepage). Tap the tin on the countertop lightly to dispel bubbles. Run skewer in zigzag pattern to dispel smaller bubble. Place in water bath and pour room temp water to come ⅓ up side of tin. 

13. Bake at 150 deg C for 90 mins (check for centre wobble). Turn off the oven and remove water bath. Leave cake in oven with door closed for another 30 minutes.

14. Unmould cake from tin but leave parchment on. Leave to cool completely in parchment before attempting to remove parchment and cut. Even better, keep in parchment and fridge for 4 hours.

Forgot the milk and slightly overbeat the eggs so very flat.

Small cracks, very flat but no waist!

Recipe feedback

- This recipe was a long shot anyway without proper instructions but leaving out the milk certainly didn't help! Despite that, I tried to achieve 'no waist'. I followed the baking method for a 8 inch souffle cake (Preheat at 175 deg C, turn down to 150 deg C for 30 mins, 130 deg C for 30 mins, off oven for 30 mins, then leave out to cool completely around another 30 mins.) It was undercooked. I probably will not try this recipe again but if I did, I will try for the full 90 mins at 150 deg C. (Note that leaving it in the off oven doesn't cook the cake further. If it is undercooked in the centre bottom, it will still remain undercooked.)

- And since the cake has a high liquid content, it might need 1 tsp of baking powder to give it more lift.

- Puzzlingly, there were still small cracks which is when and why I turned it down to 130 deg C.  

- No waist! So leaving it another 30 min in off oven, then outside to cool completely in the silicone parchment works. 

Friday, August 11, 2023

Black sesame cotton cheesecake

By Kat Kwa. Other flavours of hers are Choc cotton cheesecake and Earl Grey cotton cheesecake which have all been made using 8 inch round tin with removable base and 5 eggs using chiffon method. I am adapting using 6 eggs in 29 inch round removable base pan.

Ingredients

250g cream cheese

60g butter

192ml milk

60g plain flour (or 80g cake flour - I used cake flour because I was very thorough with the whisking to take out the lumps)

48g ground black sesame

6 eggs, separated

⅛ tsp of salt

140g caster sugar

Method

1. Place the cheese, butter, and milk in a bain marie. Gently whisk to melt. Remove from heat.

2. Sift the flour into the bowl and mix with whisk. 

3. Add the black sesame and mix with whisk.

4. Add the yolks. Whisk to incorporate.

5. Whisk the 5 egg whites until opaque. Add salt.

6. Continue to while adding sugar in 3 batches. Beat until soft peaks.

7. Add ⅓ of meringue into black sesame mixture. Use whisk to incorporate.

8. Pour back the mixture into the remaining meringue. Fold in using whisk then spatula to ensure no white streaks.

9. Pour into prepared 9 inch tin with removable base and lined with parchment. Tap on the counter to dispel big bubbles.

10. Place tin into a larger tin and pour in room temp water 1 inch up the side.

11. Bake at 150 deg C water bath for 90 - 95 minutes (depending on temp control).

12. Once done, remove immediately from oven. Drop on counter and unmold, including removing parchment. Allow to cool completely before cutting.

Rose beyond the tin in the oven
Sides started to deflate after cooling.
Recipe feedback
- Sides deflated as it cooled. I wonder if using flour instead of cake flour would have prevented that.
- Middle top was slightly burnt but middle inside was still a bit wet but JUST cooked. I can't turn up the heat or keep it another minute otherwise top will burn. This seemed to solve itself next day once it had set overnight in the fridge.
- Not sweet at all, could add another 20g of sugar. (added to recipe above)
- As usual, this formed a waist when it started to deflate. The instructions said to remove it immediately out of the oven and drop on the counter and then unmould and remove parchment unlike most other cotton cheesecake recipes which ask for leaving the cake in the oven with it off to slowly cool down. 
- This cotton cheesecake recipe by Rice&Flour suggests possible reasons and solutions including improper beating (beat until soft peaks, which I did), baking in a water bath with boiling water straight from the kettle and water going up to ⅓ or ½ way up (which I didn't because I set the cake on a grill in my water bath to elevate it out of the water). I'm not convinced because Kat Kwa's cake sits in a tin to keep it out of the water and then the baking tray. 
- The third and most interestingly, having too small an oven for the cake tin because the tin needs to sit in the middle of the oven. Specially forming a waist, sinking in the middle or deflating is attributed to oven i.e., wrong baking temp or insufficient baking time, or too large pan in too small oven. She bakes at 150-160 deg C using 6 eggs with 20cm pan for 70 to 90 minutes. She advises overbaking is better than underbaking so better to leave it in oven turned off for additional 15-20 mins. She also says that big pan in small oven often leads to uncooked middle so better to turn down temp and bake for longer. She also talks about understanding your oven. Tips include not letting the batter of beaten eggs rest for too long (which weakens rising), place baking pan at centre of oven and use top and bottom heat. Top heat too high causes rapid rise and then collapse/deflate once out of the oven yet top burned and tough but centre heavy and undercooked. If temp is too low, crust will be hard and pale in colour yet interior is dense and wet so cake also sinks when out of oven.

Wednesday, August 09, 2023

IP Lor Mai Gai

Tried Amy+Jacky's recipe and adapted to my tastes, to see how it'll work as it doesn't require soaking.

Ingredients

2 cups Thai glutinous rice (washed) - soaked for 2 to 3 hours

8 dried shitake mushrooms, rehydrated in 250ml (1C) water and sliced

2 tbsp dried shrimp, rehydrated in 125ml (½ C) water and chopped

2 chinese lap cheong, sliced

188ml (¾ C) chicken stock

2 tbsp light soya sauce

1 tbsp dark soya sauce

1 tbsp oyster sauce

1 tbsp sugar

1 tsp sesame seed oil

1 tbsp cooking wine

3 shallots, chopped

1 stalk spring onion

1 thumb sized ginger, sliced

3 cloves garlic, minced

Optional: 4 chicken bone-in thighs or 12 chicken wings and drumlets. Remove as much excess fat as possible (otherwise it becomes too oily)

Method 1

1. In the IP using the Saute function, fry the lap cheong followed by shrimp, shallot, ginger, spring onion (white parts) in that order. Pour on the glutinous rice and stir in. Remove from the IP. If using chicken, add it now to brown then remove.

2. Deglaze with the 2 tbsp of cooking wine and scrub the bottom of the pot. Pour into the rest of the ingredients.

3. Add 1 cup of water (for steaming) into the IP with the trivet. 

4. Arrange the ingredients into the pot-in-pot in the following order: mushrooms at the bottom, lap cheong, followed by rice. Top off with chicken if using. 

5. Pour in the liquids (soaking water and stock) into the pot-in-pot together with leftover marinade sauces. Ensure that rice is submerged.

6. Place the pot-in-pot into the IP. Seal and cook using Steam function. Natural release 6-7 minutes.

  • No chicken: 1⅓ C for 2 C rice; PIP 25 mins (metal) or 30 mins (glass)
  • Wings: 1¼C for 2 C rice; PIP 30 mins (mental) or 35 mins (glass)
  • Bone-in thigh: 1C for 2C rice; PIP 40mins (metal) or 45 mins (glass)
Method 2
Follow up to step 3. 
4. Try as best as possible to arrange the chicken pieces in 1 layer. Pour in the marinade but reserve 2 tsbp for the rice. Pour in ¾ cup of water and add a trivet on top of the chicken.

5. Pour glutinous rice into a metal container. Pour in 1⅓  cup of liquid comprising the soaking water from the mushroom and dried shrimp and top up with additional water if required. Pour in the remaining 2 tbsp of marinade and mix well until uniform. Pat down the rice so that it's a flat surface.

6. Place the mushrooms on top of the rice.

7. Seal and cook using Rice function (12 mins). Natural release 6-7 minutes.
Rice comes out perfect because I separated it from the chicken and lap cheong, so it doesn't become overly wet from the excess water and oil released by the chicken and lap cheong. The sauce from the chicken is separate and can be used to drizzle on the rice.


Char kway kak (fried cubed rice cakes)

Recipe from Geok Ping. Tripled the recipe for the 2 tier metal tingkat.

I topped off with paper shrimp/shrimp 'skin'

Ingredients - makes just the right 1 inch deep cake for my steamable IP tiffin tin

220g rice flour

4 tbsp tapioca flour (or cornflour)

2 tbsp wheat starch

1 C cold water

2½ C boiling water

2 tbsp oil

½ tsp salt

Method

1. In a mixing bowl combine rice flour, tapioca flour, wheat starch, salt and cold water together. 

2. Stir in oil. 

3. Pour boiling water into the batter and stir until batter is smooth. 

4. Divide equally and pour into the 2-tier tin tingkat steamer. Pour 1 cup of water (250ml) into the bottom of the IP pot. Steam using the IP for 14 minutes with 10 minutes natural release.

Alternatively pour into 20cm round pan and steam over boiling water in wok for about 25 minutes. 

5. Cool the rice kueh and chill in the fridge for at least 6-8 hours or overnight before cutting into cubes.


Ingredients for frying chai kway kak

3 tbsp chopped pickled radish (chai poh)

3 cloves garlic, minced

2 tbsp dried shrimp, rehydrated and chopped

3 eggs

a few sprigs of chinese parsley

beansprouts (about 3 handfuls)

oil and 2 tsp lard

Seasoning (to taste)

2 tbsp dark soy sauce (cooking caramel if available)

1 tbsp fish sauce

3 tbsp light soy sauce

1 tsp sugar

salt & pepper

4 eggs

bean sprouts

Method

1. With about 2 tbsp of oil and the lrad, pan fry the chai kway (cubic noodles) until golden brown. Chop up and continue to fry. Transfer to a plate and set aside. 

2. Stir fry the pickled radish and rehydrated shrimp with garlic until aromatic. 

3. Return the cubic noodles to the wok. Push the cubic noodles to the side of the wok then crack eggs into the centre and scramble until egg is just set. 

4. Pour in seasoning. Toss well to combine. 

5. Add in beansprouts and chinese parsley. Toss until well combined and heated through. 

6. Serve while it is hot.

Monday, August 07, 2023

Easy food-processor scones

Recipe from RecipeTin Eats really makes this easy because it's all done in a food processor and has very three (or four if you don't have self-raising flour) ingredients. Not messy rolling, kneading and cutting too, in fact, the less handling the better!

Scones with chunky apple sauce made the day before

Ingredients (makes 17*5-cm or 2-inch scones)

3 cups self-raising flour (or 3 cups plain flour remove 6 tsp flour and replace with 6 tsp baking powder)

¼ tsp salt

80g cold butter, cubed

1 C fridge cold milk

Method

1. Into a food processor, add the flour, butter and salt. Pultz for 6-8 seconds.

2. Distribute the milk all over the mixture and pultz for 8 seconds until it just comes together.

3. Empty out onto a lightly floured surface. Using no more than 10 strokes, knead to combine all the dry flour.

4. Gently pat and flatten into a disc, about 2cm thick. If using a rolling pin, just 1 or 2 rolls to flatten.

5. Dust a 5-cm cutter in flour and stamp out the scone rounds. Use a swift cut down action, do not twist!

6. Place on a parchment covered baking tray and leave a gap between scones. Glaze with milk.

7. Bake at 200 deg C for 10 to 12 minutes until top is golden brown.

8. Serve when slightly cooled with jam or butter or clotted cream or whatever you prefer.

Sunday, August 06, 2023

Angku kueh with mung bean

Basic angku kueh mix from Kat Kwa. (Old video uses carrot and beetroot powders for colour and traditional method of cooking part of the dough then adding it back to the rest of the dough to help form gluten, otherwise ingredients remain the same). Other flavours from Kat Kwa to try: Red bean paste, Black sesame kueh with peanut filling.

Interestingly for the skin, Rasa Malaysia uses wheat starch in the dough. Meatman (video) and adds wheat starch but they also use mashed sweet potato. What to Cook Today (video) and Kitchen 101 only use glut rice flour.

My mom's mould is 6*8cm.

Ingredients - kueh (makes 18 kueh each 50 - 55g)

Banana leaves

Oil for brushing

250g glutinous rice flour

1 tbsp tapioca starch

2 tbsp sugar

150ml boiling water

60ml water room temp

2 tbsp oil

1 drop pandan essence

Method

1. Cut the banana into ovals and brush with oil. Use lotus leaf or parchment if unavailable (WTCT).

2. Add the tapioca to the glut rice flour. Add the sugar and stir.

3. Create a well and pour in the boiling water. Stir to incorporate with a spatula.

4. Once gluggy resembling bread crumbs, add the room temp water and stir until a dough forms. You may not need to use all the water. You may need to use your hands at the end to form the dough.

5. Add the oil and knead until no dry flour remains.

6. Remove ⅓ of the dough and add 1 drop of pandan essence. Knead the colour in. 

7. Add back the remaining dough and knead but not thoroughly to give it that 'tie dye' look. (see video). What to Cook Today suggests rolling dough into balls, covering with cling film and letting rest 10 minutes.

8. I got 501g skin batter. Divide and roll into 18 balls of about 27-30g each. 

Filling - Mung bean

200g dried split mung bean 

70 ml water

3 pandan leaves, cut up

110g sugar

¼ tsp salt

2 tsp fried shallot oil 

A. Steaming method

1. Wash mung bean until water runs clear. Soak for 4 - 5 hours or overnight. What to Cook Today suggests soaking in hot water for 1 hour then steaming only takes approx 20 mins.

2. Drain and pour onto a flat tray. Spread out. Add the water. Put cut pandan leaves on top and steam using medium to high heat for 25 - 30 minutes until soft. 

3. Mash with a hand masher while still hot. Add the sugar and mix well.

4. Add salt and oil and mix. Use a stick blender to blend till really smooth. Set aside to cool.

5. Divide and roll into 18 balls of about 20-25g each. (Other recipes say that to be able to roll into balls that don't stick to your hands, cooking in a pan is necessary. Kat doesn't cook because she much less liquid used. Her water:beans ratio of 1:3 but everyone else has the converse of 3:1.)

Note on proportionsWTCT says 50g mould can use 30g dough with 20g filling or 25g dough with 25g filling. Other mold sizes include 30 and 60g molds. For reference, My Kitchen 101 mould is small but also makes 18 kueh. Her 35g mold measures 6*5.5cm, and makes 18 kueh from 240g paste (13g balls) and 400g dough (22g balls). She starts using 75g mung bean with 350g water, 1½ tbsp oil, 65g or 4½ sugar to make 240g paste or 13g balls. 400g dough begins from 200g of glut rice flour (no other flours) making 22g balls. WTCT says can even omit mould and just make oval pattys.

B. IP method - adapted from https://whattocooktoday.com/mung-bean-paste.html and Kitchen 101 

200g dried mung beans (yields 640g cooked paste)

140ml water

110g sugar

⅛ tsp salt

2 tbsp oil + 1 tsp lard 

1. Place a trivet with 1 cup of water in the IP.

2. Put beans in the tray with the cut pandan leave on top and the water. Set the tray on the trivet.

3. Steam on manual, High Pressure, for 10 minutes and 10 min gradual release release. [I used my two-tiered metal steamer with around 100g per tier and enough water to cover beans aka around 70-75ml.] 

4. Drain any excess water. Stick blend while hot. Fry in IP on med heat for 6 mins then turn down and fry med-low heat for 6-7 mins until non-sticky. 

5. Set aside to cool then divide into 18 balls of 35g each (depending on mould).

500g dried beans with approx 150ml water yields approx 1600g paste if no wastage (12 mins steam at high pressure + 10 mins natural release)

C. Boiling methodhttp://themeatmen.sg/ang-ku-kueh/

250g dried mung mean

600ml water (When cooking paste, 180g sugar, 110ml peanut oil)

1. Soak 250g dried mung bean for 2 hours.

2. Cook in 600ml water with knotted pandan. Simmer until dry and mung beans soft.

3. Cook on stove over low heat until paste is thick and dry.

Wrapping the filling

1. Prepare the steamer. Bring a wok of water to a rolling boil on high heat.

2. Flatten one ball of dough in your palm. Place a ball of filling in the centre. Working the sides of the dough, slowly work dough upwards to cover up the filling and close the seam. Roll into a ball. (see video)

3. Place the kueh ball in a bowl of glut rice flour, dust off, and press it into the angku kueh mould.

4. Tap and invert kueh onto an oiled banana leaf and place onto the steamer basket. Leave about ½ inch apart between kuehs.

5. Bring steaming basket to the sink. Use a bit of water to rinse excess flour off each kueh. 

6. Place steaming basket in the wok and steam. Steam for 8-10 mins on high (10 - 12 mins on med heat) until cooked. If steaming on high, lift the lid every 2 - 3 mins to release the steam and wipe cover (or cover cover in cloth) to prevent dripping. Also high heat will distort the shape/pattern of the kueh. 

Notes on steaming from Nonya Cooking: Steam at medium heat. Once the kueh is inside, turn down to steam at low to medium heat. If the heat is too high, lift the lid to release midway otherwise the pattern is lost. Cover lid with cloth so condensation doesn't drip on the keuh. Alternatively, What to Cook Today suggests leaving ½ inch steamer lid ajar and steaming on medium for 10 - 15 mins depending on size of kueh.

Only Kitchen 101 uses bamboo steamer to avoid condensation and steams at medium for 8 minutes. Her mold is small, ie 35g AKK mold of 6*5.5cm.

7. While still hot, remove the kueh and brush with oil. 

Saturday, August 05, 2023

Chwee Kueh

Decided to adapt from Happy Flour and What to eat today combined.


Ingredients (makes 13 kueh)

150g rice flour

20g tapioca flour

25g wheat flour

½ tsp salt

200ml water

600ml hot water (boil and then let cool for 15 minutes)

2 tsp cooking oil

Topping

2 tbsp cooking oil

1 tsp lard

3 cloves garlic

7-8 shallots (I substituted with 2 stalks of spring onion, white parts only as I didn't have shallots)

150 - 200g salted chai po

50 g dried shrimp, chopped (optional - I saw these in some other recipes and I ran out of chai po)

1 tbsp dark soya sauce (cooking caramel)

2 tbsp sugar (to taste)

½ tsp pepper

Method

1. Preparation: Boil the water and let it cool for about 15 minutes. Grease the traditional tin moulds with oil. Start the wok/steamer with water and bring to a rolling boil. Prepare the steamer.

2. Topping: Prepare the chai po. Rinse once and then soak for 10 minutes. Drain into a sieve and use a teaspoon to press down to squeeze dry. Set aside.

3. In a frying pan, add the cooking oil. Stir fry the shallots until on low heat until soft and fragrant.

4. Add the garlic, chai po and dried shrimp if using. Stir fry until the garlic is just golden. Add the seasoning. Set aside.

7. Grease the moulds. Place them in the steamer to pre-heat about 1 - 2 mins after the water has come to a rolling boil.

8. Batter: Place the flours and salt into a pouring bowl with a spout or measuring jug. Add the room temp water and stir, the mixture will be thick. Add the hot water and stir. (This helps the flours to mix but don't use boiling water as it will cook the flours and turn it gluey).

7. Stir the flours and then pour into the prepared moulds. Fill till about 3mm from the top. Cover and steam at high heat for 15 mins. They may very soft and have a pool of water in the dimple in the centre, that's normal. Steam uncovered for 2 mins.

8. Let the kueh cool in the tins for 10 mins before removing with a spatula, palette knife or tooth pick run round the rim.

9. Serve with toppings in the dimple.

Using microwave for the leftover. 1min 40 seconds. Doesn't look great but tastes ok.

Recipe feedback

- I was worried that because my mould had scalloped edges, that my kueh would stick to the mould. I really slathered with oil was not necessary as when I poured on the batter, it caused the oil to 'float' up and mix with the batter.

- You really do have to wait until totally cool to remove and it's best done with a toothpick to go around the edges, then a small spatula to scoop out from the bottom. When the kueh is still warm, the spatula inevitably cuts into the kueh so best to wait until the mould is totally cool.

- This batter remains soft even when totally cold so worth the extra effort of mixing 3 different flours. Whether hot or cold, the kueh is soft rather than chewy. When hot, it is too soft to handle.

- I did 6 per steamer level in my bamboo steamer, 15 mins for lower level, then removed that level and checked water level before steaming top level for another 5 mins. The steam cannot be too intense as I found out when the batter puffed up and over-flowed. When there is only 1 level left, turn down the fire to medium high. NOT advisable to open the lid every 2 - 3 minutes to release the steam so that the batter can deflate back into the mould on its own.

- The leftover batter went into the microwave safe bowl for microwaving.

Chwee kueh comparison recipes

I have never been a fan of chwee kueh but I wanted to buy rice flour to make kimchijeon and needed a way to use up the flour. Other than making chee cheong fun and bak tang gao and this - all of which I don't eat - I thought the least 'evil' and potentially fastest recipe would be chwee kueh. At least i like chai po.

The base of all of the recipes is rice flour but then it vastly differs - those adding only tapioca flour (seems to be softer) or wheat flour (seems to keep its shape better), and those mixing e.g., adding corn flour with wheat flour or even one recipe mixing everything! I don't really know if there's any value adding all four flours since I have them all (by some fluke), why not? And I would never get the chance to use wheat flour otherwise! [Interestingly all the recipes start with 150g rice flour]

1. Best traditional recipe Kitchen Tigress (video)

- Rice, wheat, corn

- This is the best method for making stove-top chwee kueh where the mixture has to be partially cooked before steaming. 

- Great explanation of the pool of water in the dimple that forms in the centre when the correct mixture is made, to show how the kueh (called 'water' cake) really exudes water that will evaporate when cool. The dimple is correct meaning that the cake is soft enough.

- Kueh need to be completely cooled before removing from the tin. However, Chwee Kueh has to be eaten hot. Go figure.

- Chaipo should be the salted not the sweet kind, which when washed, the sweet one becomes tasteless.

2. What to cook today (video) (tried here)

- Best recipe because suggests tapioca flour or wheat + corn flour. She says when hot, texture seems the same. One commenter said tapioca only seemed softer but mixture of wheat + corn kept shape better.

- Uses sweet chai po. Fry 2 mins and add garlic, fry 30 seconds until garlic just golden. Also makes sambal.

- Must allow water to come to rolling boil then cool for 15 mins before mixing.

- Uses mini muffin tin. Must pre-heat the cups and steamer must be rolling boil before pouring batter into cups. Steam 15 mins (traditional tin) and 20 mins (muffin tin).

- Normal for it to have water inside the dimple, steam 2 mins steamer uncovered to evaporate the water. Cool 10 mins before removing.

3. Daily cooking quest

- Rice and wheat starch

- Mix sweet and salted chai po. Takes 15 mins of frying at low fire to turn brown.

- Uses steamer (10 mins in traditional cups) or microwave (1.5 - 2 mins) with silicon or ceramic cups. 

4. Happy Flour (tried here)

- 150g rice flour yields 28 kueh. Adds tapioca and wheat flour.

- Mixes flours and set aside for 2 hours! Adds hot water and keep stirring otherwise flour will separate. Don't add boiling water otherwise mixture turns gluey.

- Uses plastic chwee kueh cups. Steam for 15 to 20 mins. Leave to cool.

5. Away of Mind

- Adapts from Anncoo Journal.

- Simmers salty chai po with water to really embed the soya sauce flavour

- Mix tapioca, corn and wheat starch (blogger's first attempt but suggests corn starch may be unnecessary)

- Uses traditional mould. Preheat mould and steam for 12 - 15 mins. Allow to cool before removing

Wednesday, August 02, 2023

IP Steamed glutinous rice Chicken comparison recipes

There are three different styles and it can be confusing for the uninitiated. There is lotus leaf rice 荷叶饭which is Cantonese style and emerging from HK that comes wrapped in a lotus leaf, and lor mai gai 糯米鸡 is a simple version cooked in a metal bowl that seems to have emerged out of Malaysia (I could be wrong). No leaf involved. There is also nuo mi fan which is simply steamed glut rice in Mandarin and often a stir fried version with no leaf and no bowl. However, the ingredients are basically the same. These are different to bak zhang which is primarily pork belly and wrapped in a totally different leaf - bamboo leaf. In this recipe, I'm concentrating on the IP version simply because I don't want to soak the rice overnight.

Lotus leaf rice

1. Taste Asian Food

- Debates the difference between he ye fan and lor mai gai.

- How to prepare lotus leaf.

- No need to soak rice as it will be cooked separately then steamed afterwards in the leaf but stir fry with other ingredients. Steaming in lotus leaf mainly to impart flavour.

2. Woks of Life

- Soak rice for 2 hours. Stir fry with ingredients. Wrap and steam. Steaming here fully cooks the rice.


Lor mai gai 

1. Taste Asian Food

- Use stainless steel bowls. Use chicken thighs. Place mushrooms face down on the bowls. Add the gravy. Cover bowls with alum foil to prevent condensation from dripping.

- Soak rice for 4 hours or overnight preferred.

2. China Sichuan Food

- soak rice for 2 hours. Steam for 20 minutes.

3. What to cook today - IP

- soak rice for 4 hours. Stir fry with ingredients. 

- Uses 7 inch round pan. Cook 30 to 45 mins. Steam release 10 mins.

4. Spice and pans - Rice cooker (video)

- Soak rice for 4 hours.

- Marinate chicken and mushroom together. Pour ingredients with marinade on top of rice, no stir frying.


Nuo mi fan - No lotus leaf

1. Casually peckish

- Soak rice for 3 hours. Stir fry everything including rice. Steam for 45 mins.

2. Dingoozatfood - IP

- Soak rice 1 to 2 hours

- Uses pork belly. Stir fry everything. Pressure cook 3 minutes, natural release 10 mins.

3. Amy + Jack - IP (Tried here)

- No need to soak. Stir fry with ingredients. Use PIP method using 3 quart bowl. Cook 35 mins then 15 mins natural release.

Soya sauce Korean rice cakes