Saturday, September 28, 2019

No-bake Chocolate mousse gradient cheesecake

From the first attempt which was the no-bake choc mousse ripple cheesecake, I decided to perfect my technique. I found the proportions in this first version excessive (e.g. 520g of double cream) which is what happens when you use maths. I decided to go with my gut feel and also what's available in the supermarket (e.g., I can buy a 250ml double cream bottle but would have to buy a large 500ml double cream and add 20g from a new packet). The measuring was also too fiddly and while I'm a perfectionist, I can live with less than equi-distant circles.


Ingredients (8 inch round tin)
15 ginger snap biscuits or similar sweet biscuit
2*250g blocks of Philly cream cheese, softened + 4 tbsp powered sugar
75g butter, softened
250ml double cream + 3 tbsp powdered sugar
cold 350ml milk + 4 tbsp powdered sugar
2 tbsp gelatine powder
5 tbsp cocoa powder

Method
1. In a food processor, process the biscuits until a fine crumb forms. Add the butter and chop till it forms the texture of wet sand.
2. To make the cheesecake base, line the bottom of a 8 inch springform tin with parchment. Oil the sides of the tin with butter. Pour in the sandy crumbs and press down with a spatula or the bottom of a glass. Press it in until the layer is flat. Leave in the fridge to firm up.
3. Sprinkle the gelatine powder onto the surface of the cold milk and leave it to bloom.
4. After about 5 minutes, microwave the milk for a minute (until warm to the touch) and whisk in the gelatine until no lumps remain.
5. In a clean food processor bowl, beat the philly with the powdered sugar until smooth. Pour in the milk and pulse until smooth. Pour into a big mixing bowl.
6. In the food processor bowl, beat the double cream with the powdered sugar until textured but not yet stiff. Pour into the cheese mixture and fold in. Set aside.
7. In a smaller mixing bowl, add a few tbsp of the batter and 3 tbsp of cocoa powder. Whisk until smooth and pour in more batter (total should be less than ⅓ of the total batter) until you attain a dark chocolate colour.
8. In a medium mixing bowl, repeat the method with the 2 tbsp of cocoa powder. Pour in the batter, this should be about half of the remaining batter. You would be left with the remaining half of the batter that has no cocoa (i.e. cream colour) in the big bowl. Store the big and medium bowls in the fridge for about 5 minutes to firm up slightly, otherwise the batter is too runny and the pattern will not be distinct.
9. Take the cheesecake base out from the fridge. Pour in the batter from the big bowl onto the base. Return to the fridge to chill for 5 minutes.
Looking much neater than my first attemp. Note how thick the batter in the centre is
10. Carefully pour the batter from the medium bowl from a height (5cm) onto the centre of the colour. This allows the batter to spread and fill slowly.
11. Pour in the final darkest colour in the small bowl. This batter is slightly thicker due to the high concentration of cocoa powder, so ladle it to fill the centre but do so slowly and carefully. Carefully use a palette knife to smoothen the top.
12. Drop the cake tin from a height of 5 cm to dispel big bubbles. If desired, swirl the colours with a palette knife.
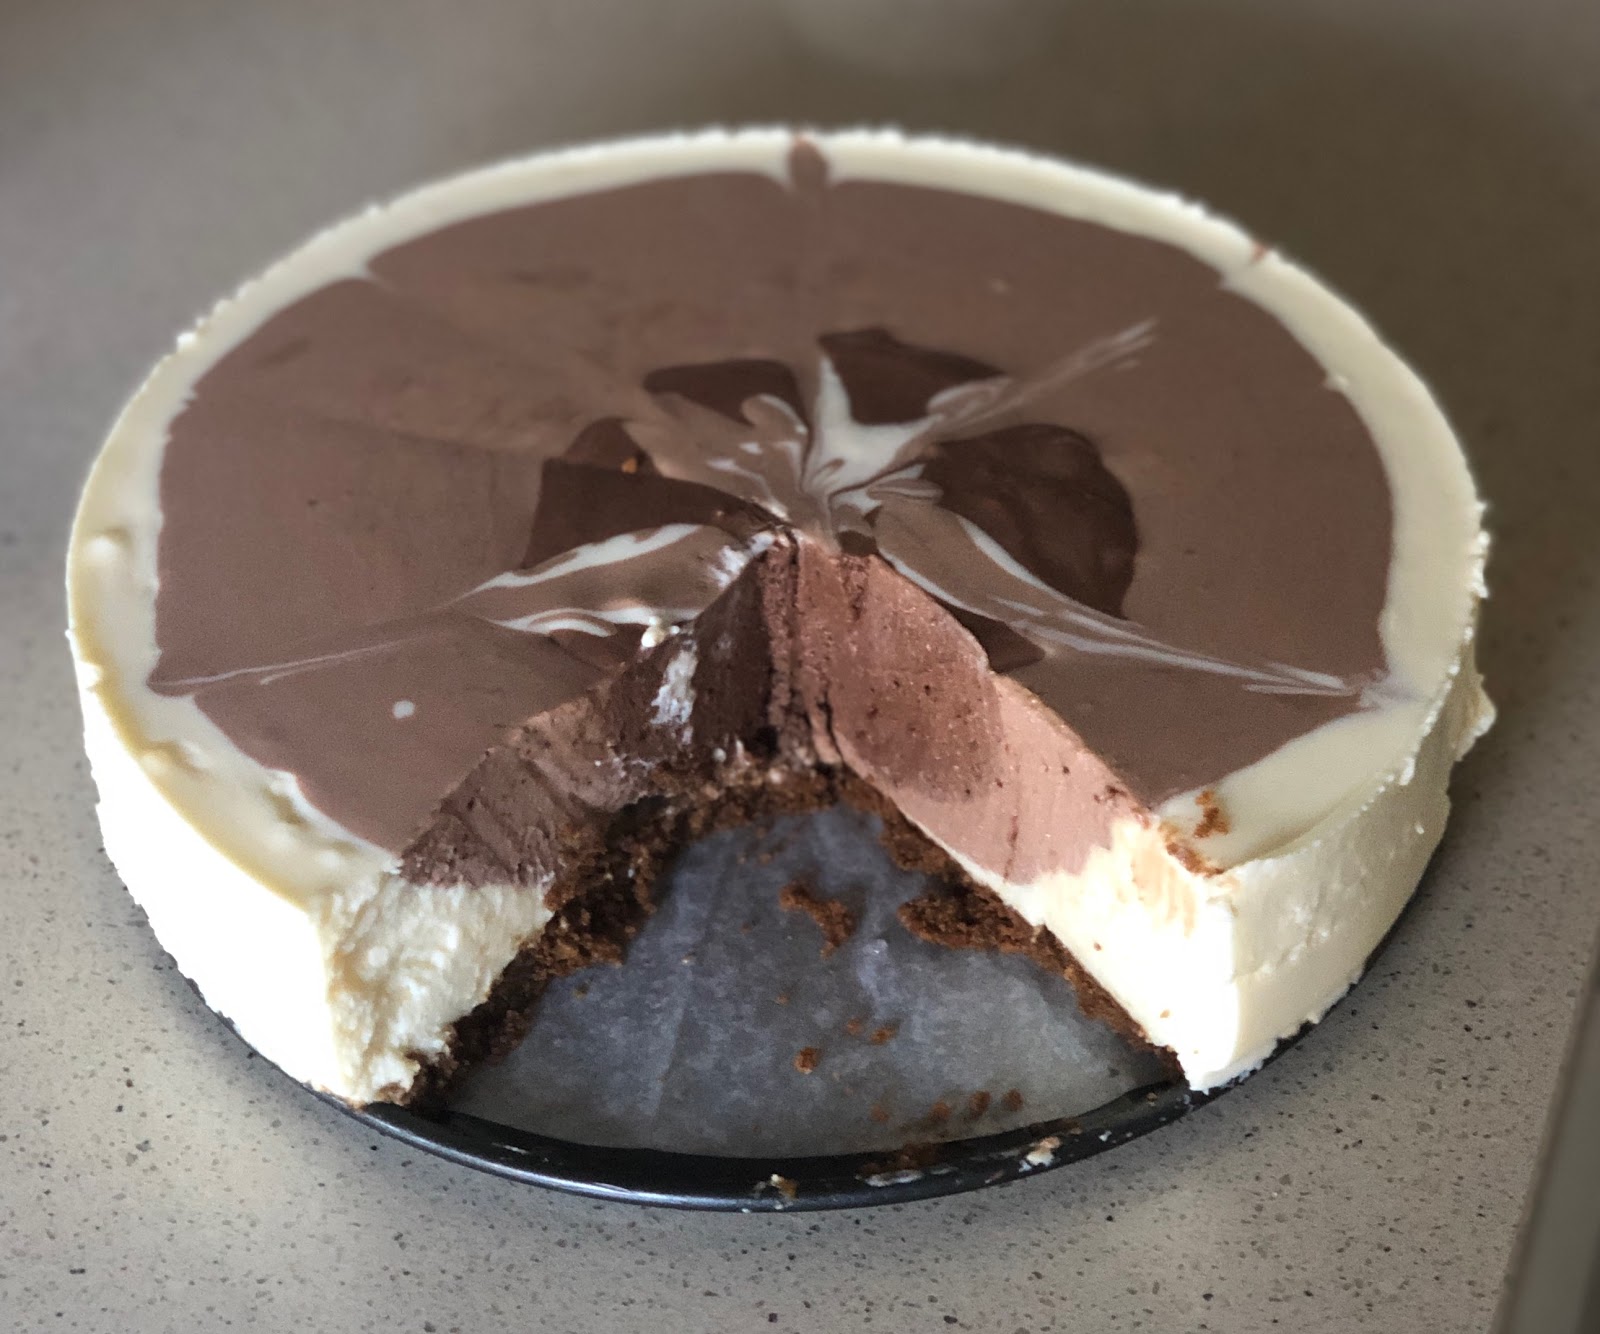
After swirling
13. Return to the fridge to chill for at least 4 hours until firm. To unmould, run a knife around the edge of the tin to loosen from the side. (I forgot and the cake tore trying trying to dislodge itself from the tin!) To serve, use a cold knife and wipe the blade with a damp cloth after each cut.

Sunday, September 08, 2019

Sik hye 식혜

Sources
1. https://mykoreankitchen.com/sikhye/ : Most comprehensive recipe, describes using the course malt barley, the powder, and the teabag
2. https://www.maangchi.com/recipe/sikhye: I mostly used this method but it also describes making it a slushie

Generally, the recipes are pretty aligned. The difference between these two and other recipes is whether they use the course malt barley or the powdered type. While Maangchi uses the powder, Korean Kitchen thinks that the powdered type doesn't help the rice grains to float to the surface. However, I used the powder and didn't have a problem so I think it's because Korean Kitchen left the powder in a cheesecloth.

Ingredients
1 cup malted barley
18 cups of water
1 cup of cooked rice (short grain or glutinous rice)
1 cup sugar
pine nuts and red dates for garnishing (optional)

Method
1. Add the water to the malted barley and stir well. Soak the malted barley 2 to 3 hours in a large bowl and let the sediment settle. The clear water should have separated to the top.
2. Meanwhile, cook the rice with slightly less water so that it's a bit undercooked.
3. Once the rice is cooked, carefully strain the malted barley water with the help of a cheesecloth, into the rice. The sediment should have settled at the bottom. Be careful not to stir up the sediment at the bottom.
4. With the sediment, pour in the remaining 4 cups of water and leave to steep.
5. Leave to ferment in the rice cooker using the Keep Warm function at between 55 to 60 deg C. After 4 hours, check to see if a dozen or so rice grains have floated to the top. If they have, sik hye is ready. It only took me 3 hours. If grains haven't, leave it to ferment for another hour.
6. Once the grains has floated, again carefully pour the malted barley water into the pot, once again, with the help of the cheesecloth. Throw away the sediment.
7. Bring the sik hye to a boil and add the 1 cup of sugar to dissolve. Skim off the foam and boil for 10 minutes.
8. Once finished boiling, leave to cool. Strain off the rice grains and wash it in cold water to wash off the starch. Keep the rice grains in a separate air tight container with some cold water. If the grains are left in the sik hye, the whole liquid turns grey.
10. Strain off the sik hye into a glass bottle.
11. Serve hot or chilled in a bowl, topped with red date and pine nuts if using, and about two tablespoons of rice grains.
12. Keep the rice grains and sik hye refrigerated for up to a week. Once it goes sour, it's time to throw it away.

Malted barley soaking
Floating rice grains!
Sik hye with rice grains and topped with red date
Recipe feedback
The grains delighted me because they felt so light on the tongue. I was expecting porridge-type of stodgey rice but the grains here were light and fluffy!

Soya sauce Korean rice cakes