By pure taste invention, I decided to try to replicate the satay spices for chicken, inspired by my first pickings of lemon grass from the garden. The taste is quite close, although a tad salty. In a bid to make the marinade less wet, I added salt, but looks like that may not be a good thing to do. Later on, after watching a few Youtube videos, I found my experiment wasn't too far off after all! The secret ingredient, which I've never mastered in the past? Curry powder!
Ingredients
1kg of chicken, cubed into 1 inch by 1 inch sized cubes. I usually find thigh meat more moist but you can certainly use breast if preferred
3 tbsp fish sauce
2 tbsp brown sugar (or honey if preferred)
1 tbsp curry powder
5 stalks of young lemon grass, chopped finely (or 3 mature stalks)
1 tbsp garlic, crushed
1 tbsp ginger, crushed
1 tsp cumin
1 tsp lemon juice
Method
1) Soak satay sticks in water (to prevent them burning when you bbq them).
2) Pour all the marinade ingredients into a large bowl and add the cubed chicken. Mix well, preferably using your hands to really massage the marinade in. Leave to marinade for at least 2 hours, better still if you can do it overnight.
3) Thread the chicken cubes onto the skewers.
4) BBQ or grill until cooked, remember to baste with oil and turn regularly. This should take about 5 to 7 minutes in total. You can do it till its nice a charred.
5) Serve with satay sauce. I've yet to discover that recipe!
Saturday, December 01, 2012
Friday, November 30, 2012
Pork char siew 叉烧
This is another (set of) recipe(s) that I'm dying to try. They're the simplest among those I've found. I have the age old one but although that one tastes really delicious and is simple to prepare, is closer to this recipe but is more like sio bak than char siu. So here the links are, and again, will update after I've tried.
http://msihua.com/2011/07/chinese-barbeque-pork-char-siew-recipe/
Happy Call version: http://jennlip.blogspot.com.au/2012/04/happycall-char-siew.html
Guess which one I'll be trying out first?
http://msihua.com/2011/07/chinese-barbeque-pork-char-siew-recipe/
Happy Call version: http://jennlip.blogspot.com.au/2012/04/happycall-char-siew.html
Guess which one I'll be trying out first?
Malay cake (ma lai go)
I previously posted this recipe and all the times I've tried the recipe, was never quite happy with the results for 3 reasons. First, it requires a beater (or killing myself creaming eggs and sugar!). Second, the cooking time is really long, upwards of 1 hour. Lastly but most importantly, it doesn't turn out fluffy like what my Kao Mo used to do for us. Instead, the cake is very dense, and the top certainly doesn't 'smile' like it's meant to!
I found a new recipe here and am quite anxious to try it. From the looks of the picture, it does look quite airy. I might still need to use a beater, but at least the cooking time is halved!
(recipe reproduced because links do die!) Will update with photos after I try the recipe.
Ingredients
1:
5 eggs
1 1/2 cup brown sugar
3/4 cup evaporated milk
2:
1 tsp vanilla extract
1/2 cup melted butter
1 tsp baking soda
3:
2 cups flour
1 tbsp baking powder
Method:
Mix 1 until thick and well combined. Add combined ingredients under 2 and beat for 1 minute. Sift ingredients under 3 and fold into the mixture to make batter.
Line a 10 inch pan with plastic wrap. Pour batter in pan and steam over high heat for 30 minutes or until completely cooked. Allow to cool completely. Slice and serve.
Update: Malay cake with yeast
Sunday, November 25, 2012
Easy banana bread
We know this as banana cake but for some reason, the Aussies call this bread. Other than it being baked in a loaf tin, otherwise the texture is really more like a cake.
I adapted the recipe from here. As touted in the recipe, it literally takes 15 minutes to mix up!
http://www.easy-banana-recipes.com/easy-banana-bread-recipe.html
Ingredients
1.5 cups flour
1 tsp baking soda
2/3 cup packed brown sugar
Pinch of salt
1 egg, beaten
1 tsp vanilla extract
4 mashed ripe bananas
1/3 cup melted butter
1/4 cup raisins (optional)
1/4 cup chopped nuts (optional)
1 tsp cinnamon (optional)
Method
1) Mix the wet ingredients together. In a separate bowl, mix the dry ingredients. Sift the flour if necessary.
2) Make a well in the centre of the dry and our in the wet mixture. Carefully fold in the dry, taking care not to over mix or knocking air put of the mixture. The mixture should still look a bit dry, lumpy with bits of flour but not to worry, you won't taste the flour after its baked.
3) Transfer to a lined or oiled loaf tin. Bake at 175 deg C for an hour or until a skewer through the centre comes out clean. It took me almost 1 hr 20 mins at 160 but it turned out very moist inside.
4) Let it cool in the tin for 10 minutes before turning out on a wire rack to cool down. Although its nice hot with the crusty top, it's harder to slice up without turning crumbly.
5) It can be served cool too with added butter or honey if preferred.
Feedback on the recipe: The cake turned out very moist with the substitution of brown sugar. It had the added advantage of developing a crusty top when it first came out of the oven, then becoming a very moist cake after a night in the fridge. It was a tad too sweet for my liking though but the addition of raisins added a slight sour flavour that balanced things out. Am not sure if I will cut the sugar next time round simply because that might change the moisture levels!
Monday, November 19, 2012
Tiramisu ice cream
The inspiration for this was simple. I wanted to eat ice cream. I wanted to eat tiramisu. Thus, I combined both into 1 recipe! Just a note that the addition of alcohol is important in making this a bit of a slushy compared to crunching on ice. Alcohol prevents liquids from total freezing, making it more of a slushy instead. The plus side is that I like things with alcohol in it!
Ingredients - makes approx 1 litre of ice cream
350ml condensed milk
500ml thick cream (the packaging will say that it is suitable for whipping)
4 cups of coffee
1 tbsp coffee liqueur
1 tbsp rum (you can add more of either alcohols depending on your taste preferences)
250g mascarpone
1/4 cup cocoa powder for dusting
Approximately 300g of Italian biscotti sponge fingers.

Method
1) Beat the thick cream until it thickens slightly. Add in the mascarpone, condensed milk, and coffee liqueur and mix well.
2) Make the 4 cups of coffee. You can use instant coffee if you prefer. Add the rum to this.
3) To assemble, soak the biscotti in the coffee mixture. Don't let it become too soggy or it will be hard to assemble. Arrange it in your container. Top up with coffee to ensure everything gets a good soaking. Don't put too much or it'll be soggy.
4) Pour on the mascarpone/cream mixture. Dust with cocoa powder.
5) Repeat with biscotti soaked in coffee, then the mascarpone layer, then cocoa dusting. Repeat until you reach the top of your container.
6) Put in the freezer to harder, at least overnight. Serve with shards of chocolate and more dusted cocoa if you want.
Saturday, November 03, 2012
Black sesame paste
Using the instructions given in this link, I basically multipled everything by 6 to get a big pot instead of cooking just 2 bowls. I also slightly altered the method just so that everything gets mixed up better.
Ingredients
3 cups black sesame seeds
1 1/2 cups glutinous rice flour
1 1/2 cups sugar
12 cups water

Method
1) In a pan, gently toast the sesame seeds on medium heat. To prevent burning, keep shaking the pan or moving the sees around with a spatula. I did this in batches so it wouldn't burn and I could toast it more evenly. Since I put in only enough seeds to coat the bottom of the pan in each batch, it took no more than 2 minutes to toast the seeds. Once u can smell it, remove from the heat immediately and set aside.
2) Either pound up the toasted seeds with a pestle and mortar, or use a blender. The original recipe called for the addition of water, but I used a food processor and that worked fine too without the water.
3) In a pot (without the flame on), transfer the ground sesame seeds. Add the glutinous rice flour and sugar, and mix everything well by trying to remove as many lumps as you can. This step is important before you add the water, to ensure that you don't end up eating gluey bits.
4) Once you're sufficiently satisfied that most of the lumps are gone, slowly add the water. Turn on the flame, and slowly add the water as you stir. As the mixture heats up, it will start to thicken. Ensure that you are constantly stirring to prevent the mixture from catching at the bottom of the pot, and to break down any lumps you encounter. You'll realise when it starts to boil, that's when it really gets pastey. Turn down the heat and simmer for about 5 minutes, stirring constantly. You're basically trying to remove the uncooked flour taste.
5) Once its done, turn off the heat and serve immediately to avoid it becoming too gluey.
Tuesday, October 30, 2012
Mac and cheese
It's been some time since I've entered the kitchen because I've been lucky enough to have hubs operating a new and very expensive fancy toy - the monster bbq.
Anyway, this is a really simple reheat dish, so can't really qualify as cooking, but what the heck, I need to chalk up posts!
The basic recipe for the pasta base and sauce can be found from One Pot Chefhttp://onepotchef.blogspot.com.au/2012/10/ham-and-egg-pasta-recipe.html
It's basically a carbonara recipe, except ham is used rather than bacon; and milk is used rather than cream.
Rather than reheating in the microwave which will turn the sauce into little granules, I simply added:
1 cup of cream chicken soup
2 handfuls of grated cheese
1 handful of breadcrumbs
Simply ladle leftover carbonara into a gratin dish. Then ladle on the cream chicken soup, be mindful not to let anything overflow. Sprinkle on the grated cheese and top with bread crumbs.
Grill at 220 deg C for approx 15 minutes, until the top is golden and bubbling.
In my case, I wish I had a blowtorch!
Monday, April 30, 2012
Goma and Rum & raisin ice cream
Based on this recipe, I went on to create more flavours.

 Rum & raisin: This time, I soaked 1/4 cup of raisins in 1/4 cup of rum overnight. I added 1 tsp of vanilla and the rum to the mixture. When it had set (about 6 hours in the freezer), I added in the raisins, otherwise they will all sink to the bottom. The alcohol defintely makes it harder for the ice cream to set, because compared with the Goma which was nicely set after a night, the r&r was still slightly slushy!
Goma: used 4 tbsp of toasted black sesame seeds which were heated in a pan (dry fry) till there was a sizzling sound. Be careful, they burn! I crushed 3 tsp in a pastle and mortar and reserved the last tbsp for some texture. I added 1 tsp of vanilla flavour which was just nice. Next time however, I'll up it to 1 more tsp of crushed sesame seeds.


Friday, April 13, 2012
Kkakdugi (cubed radish kimchi)
Got the recipe from http://www.maangchi.com/recipe/kkakdugi. Interestingly it wasn't so garlicky fresh but it is after a week!

Thursday, April 12, 2012
(Not quite) Toad in the Hole
I got the inspiration to do Toad in the Hole from OnePotChef. Here's the original link.
The recipe is pretty simple but I modified it to include mushrooms and my home grown herbs - the first cut!

Ingredients (serves 4)
16 cocktail British sausages
4 tbsp oil (I can't say for sure, but I basically coated my Pyrex and it had about 0.7cm depth of oil left over)
3/4 cup plain flour
1 1/2 cup milk
2 eggs
Salt and pepper
1/4 chopped fresh herbs
1 cup chopped mushrooms
1 pinch salt
Method
1) Preheat oven to 220 deg C. Pour the oil into the baking dish and coat the sides well. Prepare the sausages by patting them dry.
2) Mix the ingredients for the batter. Sift the flour and add the pinch of salt.
3) In another bowl, combine the wet ingredients - beat the eggs and then add the milk.
4) Make a well in the centre of the flour. Slowly pour in the wet mixture, making sure to stir in. Lastly, add the chopped herbs and mushroom, and fold in to incorporate.
5) Put the baking dish with the oil in the oven for 10 minutes to heat up the oil. Once it is hot (preferably smoking), add the sausages. They should sizzle. Bake for 10 minutes.
6) Take out the pan and turn the sausages. Pour the batter around the sausages. It should sizzle.
7) Put it back into the oven and turn down the temperature to 200 deg C. It should cook for another 20 to 25 minutes. Just check to ensure it is golden brown on top and frothing inside (that's the beauty of Pyrex!) Garnish with parsley and serve with gravy and mashed potato if you're so British!
Wednesday, April 11, 2012
How to make shrimps 'crunchy'
Here's the answer! Alkaline!
http://rasamalaysia.com/how-to-make-shrimps-crunchy/
红油抄手 (Sichuan red oil wanton)
Got the recipe from Rasa Malaysia and adapted it because it was just too involved.
Ingredients

Ingredients
Wantons (I used 10 to 12 that I previously made)
1/4 cup soya sauce
2 tbsp black vinegar (I used balsamic as a pretty good substitute)
1 tbsp sesame oil
1 tsp sugar
2 tsp sichuan pepper corns, crushed
3 tbsp chilli oil
Cilantro
1 stalk spring onion
Fried garlic (optional)

Method
1) Cook the wantons.
2) Mix up the vinaigrette and mix the wanton in it. Garnish with cilantro, chopped spring onion and fried garlic.
Khow Yok (Steamed pork with yam)
Got this recipe from a new Malaysian neighbour, who got it off the internet and made it. The result was pretty good, brought tears to my eyes from the memory of what gran used to make! This could be the long lost recipe which my family has been trying to replicate for years since her passing. Although every family probably has its family secret, but the fundamentals of the recipe are here, so it's a matter of tweaking to taste from memory and going from there!
Ingredients
300g pork belly
1 taro
1/2 tbsp thick dark soya sauce
2 tsp Chinese 5-spice powder
Chopped garlic or shallots (optional)
Marinade
1 1/2 cubes nam yue (fermented bean paste)
1 tbsp taucheow
1 tsp sugar
1 tbsp thick dark soya sauce
1 tsp cooking oil
Sauce
3/4 cup - 1 cup water
1 tbsp oyster sauce
dash of pepper
1 tsp 5-spice powder
1 tsp soya sauce
1 tsp sugar
1 tsp shao hsing wine
1/2 cube nam yue
1/2 tsp thick dark soya sauce
1 tbsp corn flour
Method
1) Marinate the pork belly, preferably overnight. Drain the pork, pat dry and deep fry the whole piece of pork belly. Alternatively, you can buy roast pork belly. Set aside.
2) Slice the yam into 3 cm thick slices. Deep fry the slices and set aside.
3) Combine all the ingredients for the sauce, without the cornflour, and bring to a simmer in a pan. Once the sauce and reduced and thickened slightly, add the cornflour to a bit of water and pour into the sauce to thicken. Once it has thickened, take it off the heat and set aside to cool slightly.
4) In a deep steaming dish, alternate the pork with yam slices. Pour over the sauce and ensure all the pieces are well coated. Steam on a very low heat for 2.5 to 3 hours, checking to ensure that the yam is cooked all the way through with a fork (breaks easily). Serve with fried garlic or chopped shallots.
Monday, April 02, 2012
Tips on salt
I never knew there were so many kinds of salt! I made the mistake of buying iodized salt for doing kimchi. It made my kimchi limp and now I know why! My last batch of salt lasted me over 7 years untll I threw out the remainder. How long is ths one going to last me?
Interesting article on salt
This article gives more specific instructions and comparisons between the types of salts and also advises which salt to use and when. http://www.vox.com/2016/5/15/11409808/when-to-use-sea-salt-kosher-salt
This article gives more specific instructions and comparisons between the types of salts and also advises which salt to use and when. http://www.vox.com/2016/5/15/11409808/when-to-use-sea-salt-kosher-salt
Sunday, April 01, 2012
Home made chocolate chip rum raisin ice cream
I basically used this recipe from the One Pot Chef and adapted it. I also like this link for introducing other flavours.
Ingredients (makes about 1.5ml)
400 ml of condense milk (1 can - I found this way too sweet. Next time I might reduce this by maybe 50 to 100ml to 350 or 300ml? Not sure what effect this would have on the consistency of the ice cream though)
600 ml of thick cream (says 'suitable for whipping' on label)
300g chocolate buttons (white, milk or dark chocolate are all fine)
3 tbsp rum (might increase this to 4 tsp in future because I couldn't taste any rum!)
1/2 cup raisins

Method
1) Soak the raisins in the rum.
2) Melt the chocolate in a microwave. Heat for 30 seconds, stir, repeat until all the chocolate is melted. Set aside to cool.
3) Combine the condensed milk, cream and cooled melted chocolate in a bowl. Use an electric beater and beat until thick. (consistency should be enough to draw a line on the surface which stays for several seconds)
4) Pour into a tub and freeze for at least 6 to 8 hours or better still, over night.
5) Home made ice cream is usually harder than store bought. If it's too hard, leave it on the counter to defrost a little.
Feedback on the recipe
I initially wanted to make 2 different flavours - rum and raisin, and regular chocolate. I put an aluminium foil to create 2 compartments in the 2l container. The ice cream mixture held, but unfortunately, the rum soaked through to the other compartment, so I decided to mix everything up anyway. Note to self, next time use 2 containers!
After letting the melted chocolate cool, for some reason, it actually 'split' and hardened into little flakes. That's how I ended up with chocolate chip, not by design! I'm not sure if it's my brand of cooking chocolate, or whether I let it get too cool, or whether I stirred through the chocolate rather than beating it through but I don't think this should make a difference since the beater beats, not blends. I'm not particularly keen to use cooking chocolate again. Maybe I should try cocoa but that will give it a chalky texture.
Also, I didn't know what stage to beat it till and my mixture actually 'fell' and deflated! I was rather upset. To compromise (and only because I had a lot of time on my hands), although the beauty of this recipe was not having to run a fork through or use an electric beater to break up the ice crystals every 1.5 hours or so, I still did it anyway (about 4 times in total) in an attempt to make the mixture more smooth. I don't think it broke up the chocolate but it certainly made the ice cream smoother!
Finally, my ice cream was still soft (edible) the next morning! I don't know whether the alcohol interrupted the freezing process, or whether it's because my fridge isn't cold enough. But it's a good kinda soft, I can scoup it out straight without waiting for defrosting!
Notes on the seizing up of chocolate
1) Never use a wooden spoon to stir melted chocolate. It retains moisture, which causes chocolate to seize up. The same with any left over moisture in the bowl. Use a metal spoon to stir, and ensure the bowl is completely dry. (I wasn't using a metal spoon but I was using a silicon sputula, so I doubt this caused it)
2) Over heated chocolate can seize up too. That's why the double boiler or bain marie is more fail safe, but it does use more equipment. To melt chocolate in a microwave, use short bursts of 30s. In my case, I might try not using full power (eg use 70%) next time. Also don't heat the chocolate till all is melted. There will still be some residual lumps, use the spoon to stir till everything is melted. The residual heat will melt any lumps.
3) Adding milk or water to a seized chocolate mixture will not revive it. Adding melted butter will kept it molten and it won't set again, whether in the oven or fridge. Good for chocolate sauce though.
4) Also, use small pieces of chocolate, so choco buttons are great, or chop up the cooking choc (don't use regular eating choc!) into little nuggets to melt faster and prevent over-heating.
Friday, March 30, 2012
Gelatine tips
Two very useful websites:
http://homecooking.about.com/od/specificfood/a/gelatintips.htm
http://www.davidlebovitz.com/2009/04/how-to-use-gelatin/
Saturday, March 24, 2012
Perfect oven fried chicken
I have finally perfected the recipe. After observing/researching and testing a lot of different techniques from various sources, this seems to work best for me - ie given my unique environment of oven and utensils. So it may not work as well for you, or you may need to tailor it and find one that does.

Updated: Newer method which seems to work better. http://simmetra.blogspot.com.au/2013/03/oven-chicken.html
Ingredients
4 chicken thighs
1/4 cup all purpose flour
1 egg
1/2 cup panko bread crumbs
1 tsp salt
1 tsp pepper
1 tsp give spice powder
2 tbsp oil (peanut is best for crunch if you have it)
Butter to dot

Method
1) Preheat oven to 220 deg C. Pat the thighs dry with kitchen paper. Beat the egg and add the flour. Mix well till you get a claggy mixture. Add the salt, pepper and five spice powder and mix well. Some recipes call for coating the chicken with flour then dipping in egg wash. After watching what Koreans do with fried chicken, I find it doesn't make a difference. In fact, battering it seems to help.
2) Coat with panko bread crumbs. Dust off the excess. Set in the fridge for about 20 mins for it all to come together. This step is very important so that the panko and batter adhere to the skin of the chicken.
3) Pour 2 tbsp oil into a baking dish. Put that in the oven to heat up (at least 5 minutes). Once it is ready, carefully place the chicken thighs in. Be careful as the oil could splatter and spit. It should sizzle when you place the chicken in the hot fat. Place it straight in the oven at 220 deg C for 10 minutes.
4) Turn over chicken. Place dots of butter on the skin. Bake for another 5 mins at 220 deg C then turn down to 200 deg C and bake for another 15 to 20 minutes until chicken is done. I test for doneness either by pricking the thickest centre of the chicken to see if the juices run clear. Or, I can tell eg the juices run out from the bone, and it's no longer bloody (see my picture)
5) Let rest for 5 minutes (for juices to reincorporate) and not to burn yourself. Serve immediately!
Updated: Newer method which seems to work better. http://simmetra.blogspot.com.au/2013/03/oven-chicken.html
Wednesday, March 21, 2012
Perfect roast potatoes
I never thought I'd get it but it really does work!
Recipe from here: http://www.onepotchefshow.com/
The difference really is in using the right potatoes. I used Deserrie, which are prefect for roast and baked potatoes because it is very floury.
The tips from the video really help to. Here's what I did.
1) Chop the potato into equal sized chunks. I did mine like a 1 to 1.5 inches cube so that it would only take 20 to 25 minutes to cook. That's about slicing the potato (hand sized) into about 3 lengthwise. Pat down to dry with kitchen towels.
2) Important : use a fork to score them all over. This increases the crisp factor.
3) Salt generously, or about 1 tbsp of salt for 2 potatoes. Sounds like a lot, but salt is important to the crispy element. Add about 1 tbsp of oil (avoid olive oil which has a low smoking point). Lard or duck fat is best if you have it. Add herbs (I used rosemary and sage). Toss together well.
4) Arrange on a cookie sheet (preferably a pan which doesn't have high edges which will keep the moisture in. Try to keep them separate to ensure good airflow and crisping on all sides, so that the potato chunks don't stew together. This next step is very important: dot with butter.
5) Put cookie sheet into a hot 220 deg C oven. Bake for about 25 minutes, checking at 20 mins. Turn the potato chunks at 15 mins. For some reason, I put it on foil but the potatoes still stuck to the foil despite all the oil! I used a spatula to loosen them.
6) Serve IMMEDIATELY because it does get soft really fast!
Friday, March 16, 2012
Mandu
Highly adapted from this recipe because the original mandu recipe was just too involved! I couldn't find a lot of ingredients. Anyhow, I did follow the soup quite closely and it tastes brilliant! I'm surprised.

Ingredients

For the filling
1 cup pork mince (about 600g)
5 to 6 dried shitake mushrooms, soaked in about a cup of water
3 tbsp soya sauce
4 to 5 cloves of garlic, minced
40 mandu skins (I could only get Shanghainese dumpling skins at the supermarket)
Black pepper (several dashes)
For the soup
Leftover water used to soak the mushrooms
Enough water to make about 4 cups of liquid in total
8 to 10 ikan billis
3 cloves of garlic, roughly chopped
2 tbsp fish sauce
Method
1) Mix up the ingredients for the filling and leave to marinate.
2) Fill the mandu skins.
3) To a pot, add all the ingredients for the soup. Bring to a boil and simmer for about 20 minutes. Strain the soup. Add the fish sauce.
4) Meanwhile, cook the mandu by dropping them in boiling water. They will float once they are cooked. Drain and pop into the soup.
5) Serve either with noodles, or as a dumpling soup.
Sunday, March 11, 2012
Kimchijeon
http://www.maangchi.com/recipe/kimchijeon
 1 cup kimchi, chopped
Ingredients (serves 2 to 4)
3 tbsp kimchi juice
2 tbsp chopped onion
1/2 tsp salt
1/2 tsp sugar
1/4 cup all purpose flour
1/4 cup water
Method
1) Mix all the ingredients in a bowl.
2) Heat up 1 tbsp of oil and pour in the batter.
3) Fry for 1.5 minutes on each side, or until the pancake slides easily in the pan, and the bottom is golden brown.
4) Serve immediately or chop up into squares.
Saturday, March 10, 2012
Kimchi jigae
http://koreanfood.about.com/od/soupsandstews/r/Kimchichigae.htm
Ingredients: (serves 4)
- 3/4 lb beef, pork, or canned tuna*, thinly sliced
- 1 Tbsp sesame oil
- 2 cups kimchi (the kind made with Napa cabbage), roughly chopped
- 1/2 onion, chopped
- 2 cloves garlic, finely chopped
- 1 Tbsp kochujang
- 1 Tbsp kochukaru
- If using beef or pork, saute in 1/2 Tbsp sesame oil in soup pot for a few minutes. If using pork, you can halve or omit the oil at this point.
- Add kimchi to pot and stir-fry for about five minutes.
- Add remaining oil, onion, garlic, kochujang, and kochukaru, mixing to combine.
- Pour water into the pot and bring to a boil.
- Reduce heat to simmer.
- Cook for 20-30 minutes, adding tofu after the first 10 minutes and scallions at the very end
Preparation:

Thursday, March 08, 2012
Kimchi
Made Mak (wombak) and oisobagi (cucumber) kimchi
Recipes from Maangchi:

Oisobagi kimchi
I had to improvise - couldn't find the Korean hot pepper flakes so used paprika. Gave it a smokey sweet flavour which I'm sure purists would yell at me for! Also, ran out of fish sauce so used just a bit of soya sauce for the salt.

Recipes from Maangchi:

Oisobagi kimchi
I had to improvise - couldn't find the Korean hot pepper flakes so used paprika. Gave it a smokey sweet flavour which I'm sure purists would yell at me for! Also, ran out of fish sauce so used just a bit of soya sauce for the salt.
Overall, given that I used about 1kg of wombak and 3 long cucumbers, the kimchi paste doesn't seem enough. I omitted the porridge, so I guess this is where the difference is. Next time (if there is a next time because this was uber tiring!) I will use original Korean ingredients!
Updated with photo on 28 Jan 15 with proper gochugaru. 1 wombak with 3 carrots and 2 pears makes 1.5 kg of kimchi.
Updated with photo on 28 Jan 15 with proper gochugaru. 1 wombak with 3 carrots and 2 pears makes 1.5 kg of kimchi.
Updated on 16 Dec 16: I came across another recipe from Kitchn which explains the kimchi making process from a foreigner's point of view. The thing about having a foreigner narrate is that she is able to explain things from a fresh pair of eyes compared to someone who is native and may have taken things for granted.
- She doesn't use the 'porridge' that Maangchi does.
- Apparently putting in carrots are a no-no?
- I found out adding too much ginger makes it sticky but adding too much garlic makes the kimchi bitter. I've been experiencing the latter towards the end of the shelf life of my kimchi but could never explain! I've always attributed it to being over fermented.
- Salt matters! Use kosher rather than table or iodized because the latter 2 types have caking agents which may inhibit the salting process. I've noticed that my salted veg doesn't become pliable but snaps even after salting for 2 hours. Another recipe said to soak for 4 hours until the veg stems were bendy rather than snapped but who has time for that?
- Leaving space on top before capping it. I used to think that I should pack it tightly and to the brim to prevent air. One time I had kimchi juice just oozing out and out of my jars. Every day I would mop up the fridge (and it stank!) and next day, they'd be more. I didn't figure it out until much later when I realised that as it ferments, it creats gas so needs space to expand. So I shouldn't be packing it too tight!
Sunday, March 04, 2012
Squidy hard boiled eggs
Ingredients for this are pretty obvious - eggs. In this case, where everything is almost an scientific experiment, it has to be 4 eggs in my smallest AMC pot (which unlike normal pots, retains heat).
The method here is also specific as every factor affects cooking time and thus result:
The method here is also specific as every factor affects cooking time and thus result:
1) Take 4 eggs out of the fridge (aka cold). Prick a hole in the air sac at the bottom.
2) Boil water. Put the eggs in the pot and fill with the boiling water, just enough to cover the top of the eggs.
3) Turn on the flame and let the temp rise to the middle (12 o'clock) position of the AMC pot. Turn off the heat and leave it to steep for exactly 6 minutes.
4) When time is up, place the eggs in cold water immediately. Once the eggs are cool enough to handle, deshell.


Wednesday, February 29, 2012
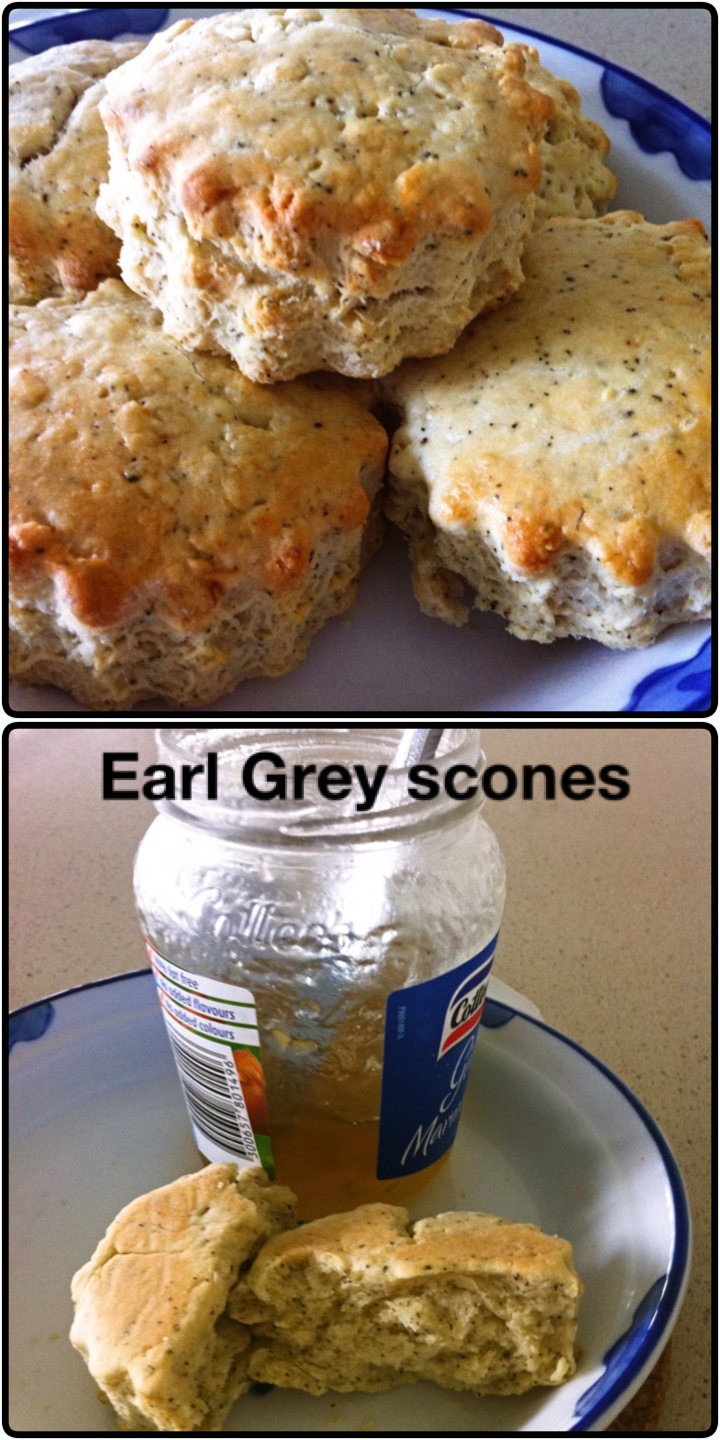
Green Tea Scones
http://www.maduratea.com/tea-recipes/breakfast-morning-tea/green-tea-scones.html

Ingredients
250g (8.8 oz) plain flour
1/3 tablespoon salt
1 tablespoon granulated sugar
1 tablespoon baking powder
1 teaspoon Madura Green Leaf Tea
70g (2.5 oz) butter
150mL (5 oz) milk
1 egg, separated into yolk and white
Method
Sift together the flour, baking powder, salt, green tea and sugar.
Cut the butter into small pieces. With your fingertips, mix the butter into the flour until it becomes dry and flaky.
Combine the milk and egg yolk, and pour the mixture into the flour a little at a time. Mix and knead into a moist dough, but not so moist that it becomes moist.
Preheat the oven to 180°C (350°C)
Place the dough on a floured board and knead slightly until smooth. Roll out to a thickness of 2cm and cut out shapes with a cookie cutter or the rim of a glass.
Brush the tops with a little egg white, place on a baking sheet, and bake for 12-15 minutes, until slightly brown.
Cut each scone in half and eat with jam and fresh cream.
Notes: I replaced the green tea with earl grey, and it actually required 17 minutes cooking time but the inside was still a bit underdone. However too much more and the outside would be burnt.
Saturday, February 25, 2012
Cocktail recipes based on Tia Maria
Without knowing it, I have been drinking

Jamaican Yo-yo which comprises equal parts white rum and tia maria.
Based on my liquor cupboard, other things that I can do are a Black Russian which is 3 parts vodka to 2 parts coffee liquer, or add cream to get White Russian, or coke to get dirty black russian. Vodka can also be substituted for gin in some recipes.

Sunday, February 05, 2012
Everyday Brownies
From Nigella Kitchen

Recipe
Makes 16 brownies
Ingredients
Alternate recipe with substitutions:
Comments
1) The size of pan is very important! My pan was a bit smaller than recommended so after the full 25 minutes, the sides were perfect - crunchy outside and fudgey inside. But the middle of the pan was horrible. The top had set but inside was totally runny! I need a bigger pan so that the mix spreads thinner and thus dries out faster.

Recipe
Makes 16 brownies
Ingredients
- 150g unsalted butter
- 300g light brown muscovado sugar
- 75g cocoa powder, sifted
- 150g plain flour
- 1 teaspoon bicarbonate of soda
- Pinch of salt
- 4 eggs
- 1 teaspoon vanilla extract
- Approx. 150g milk chocolate, chopped into small nuggety chunks
- Icing sugar, to dust (optional)
- 1 x 25cm square x 5cm deep foil- lined baking tin or 1 foil tray, approx. 30 x 20 x 5cm
Method
- 1Preheat the oven to 190°c/gas mark 5. Melt the butter over a gentle heat in a medium-sized saucepan.
- 2When it’s melted, add the sugar, stirring with a wooden spoon (still over a low heat) to help it blend with the melted butter.
- 3Sift together the cocoa powder, flour, bicarb and pinch of salt, and then stir into the pan; when mixed (this will be a very dry mixture, and not wholly blended at this stage), remove from the heat.
- 4In a bowl or jug, whisk the eggs with the vanilla extract and then mix into the brownie mixture in the pan.
- 5Stir in the chopped chocolate and quickly pour and scrape into a foil-lined baking tin or throwaway foil container, spreading the mixture with a spatula, and cook in the preheated oven for approx. 20–25 minutes. It will look set, dark and dry on top, but when you feel the surface, you will sense it is still wibbly underneath and a cake tester will come out gungy. This is desirable.
- 6Transfer the tin to a rack to cool a little before cutting into 16 and dusting with icing sugar. I love these gorgeously warm. But then again, I love them cold, too. Actually, when cold they are properly speaking more brownie-like: gooily tender within and moreishly chewy on top.
Alternate recipe with substitutions:
If you are out of light brown sugar and chocolate, then use 1 1/2 cups regular white sugar and up the butter to 1 1/2 cups, and cocoa to 1 cup.
Comments
1) The size of pan is very important! My pan was a bit smaller than recommended so after the full 25 minutes, the sides were perfect - crunchy outside and fudgey inside. But the middle of the pan was horrible. The top had set but inside was totally runny! I need a bigger pan so that the mix spreads thinner and thus dries out faster.
Friday, January 20, 2012
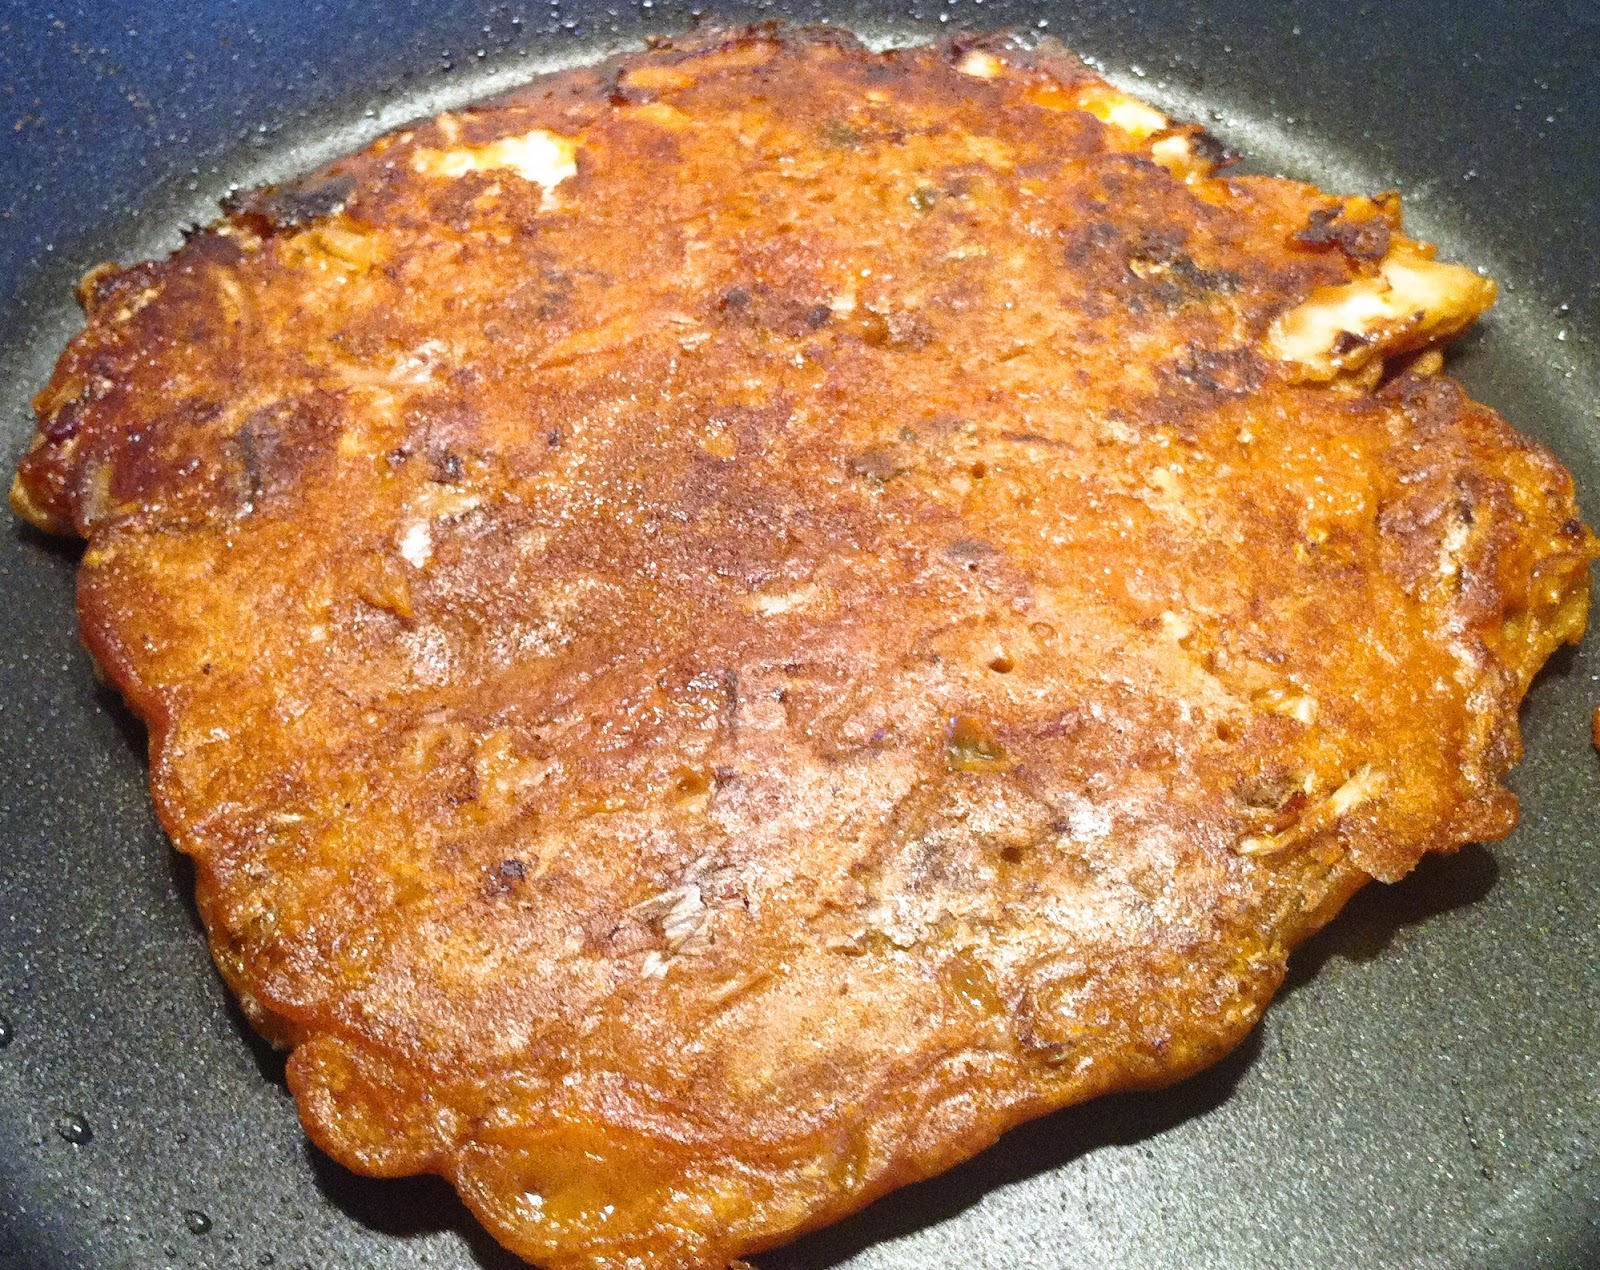
Home made bak kwa
http://sg.entertainment.yahoo.com/news/bak-kwa-kitchen-110056570.html

Use a tablespoon to spread the marinated minced pork thinly (no thicker than 0.5cm) over the tray. Place the tray into the oven set at 150C for one hour. Use the grilling function in your oven. After half an hour has passed, the meat would be semi-cooked. Take out the tray from the oven and using a tablespoon spoon, cut the meat into rectangles. Then flip the meat over to the other side and pop the tray back into the oven. Once the full hour passes, the bak kwa is done. You can eat it immediately, but we suggest, for extra crunch, put it into the toaster oven for 3 minutes before consumption.
Not bad for a first attempt. I found that it was a bit on the salty side and surprisingly despite all that sugar, didn't seem sweet enough. Next time, I would

Ingredients (results in 10 rectangular pieces, each 5cmx7cm)
3tbsp of fish sauce
Half a tbsp of light soy sauce
Half a tbsp of oyster sauce
230g of minced pork 70g of sugar
1 drop of red food colouring
Mix all the sauces and sugar into a bowl and stir until the sugar dissolves. Add the minced pork into the bowl and marinate the meat well. Add the red food colouring. Leave the marinated meat for at least two hours. You can choose to leave it overnight in the fridge. Preheat the oven to 120C for 20 minutes. Grease the baking tray or wrap it with aluminum foil.
Result
1) cut the salt
2) use brown sugar to bring out the taste
3) Add 1/2 tbsp of 5 spice powder
4) cut the cooking time by 5 minutes so that it's less dried out and burnt
5) Omit the red food colouring. It isn't necessary!
Updated recipe: http://simmetra.blogspot.com.au/2018/02/bak-kwa-take-2.html
Updated recipe: http://simmetra.blogspot.com.au/2018/02/bak-kwa-take-2.html
Sunday, January 01, 2012
Nigella Kitchen's Choc Chip Bread Pudding
Can't find the recipe but a blogger posted this http://sistabrownie.blogspot.com/2011/06/chocolate-chip-bread-pudding.html
Frankly I don't dig B&B puddings either but it does sound so easy! Maybe next time.
And here's the corresponding You-tube video
Subscribe to:
Posts (Atom)

-
Here's another one of Nigella's recipes, taken from the episode "Weekend". What I simply love about her receipes are that ...
-
For some reason, all snow skin mooncakes have a custard filling. Maybe because they are best eaten cold and red bean and green bean paste do...
-
 This post contains homemade recipes for lye and golden syrup, different paste recipes, and tips for mooncake making in general. 1. Pandan co...