This SBS recipe for has the best method (video). This Curious Nut recipe has the most standard ingredients but I've tried the method and it doesn't work for my equipment. However, it does say that the type of flour for the lace makes a difference - rice flour makes it most crispy but can mix rice, all purpose and cornstarch.
I won't go into the ingredients for dumpling and dumpling wrapper but focus on the lace-skirt/wing method. The trick is in adding the oil to the lace mixture.
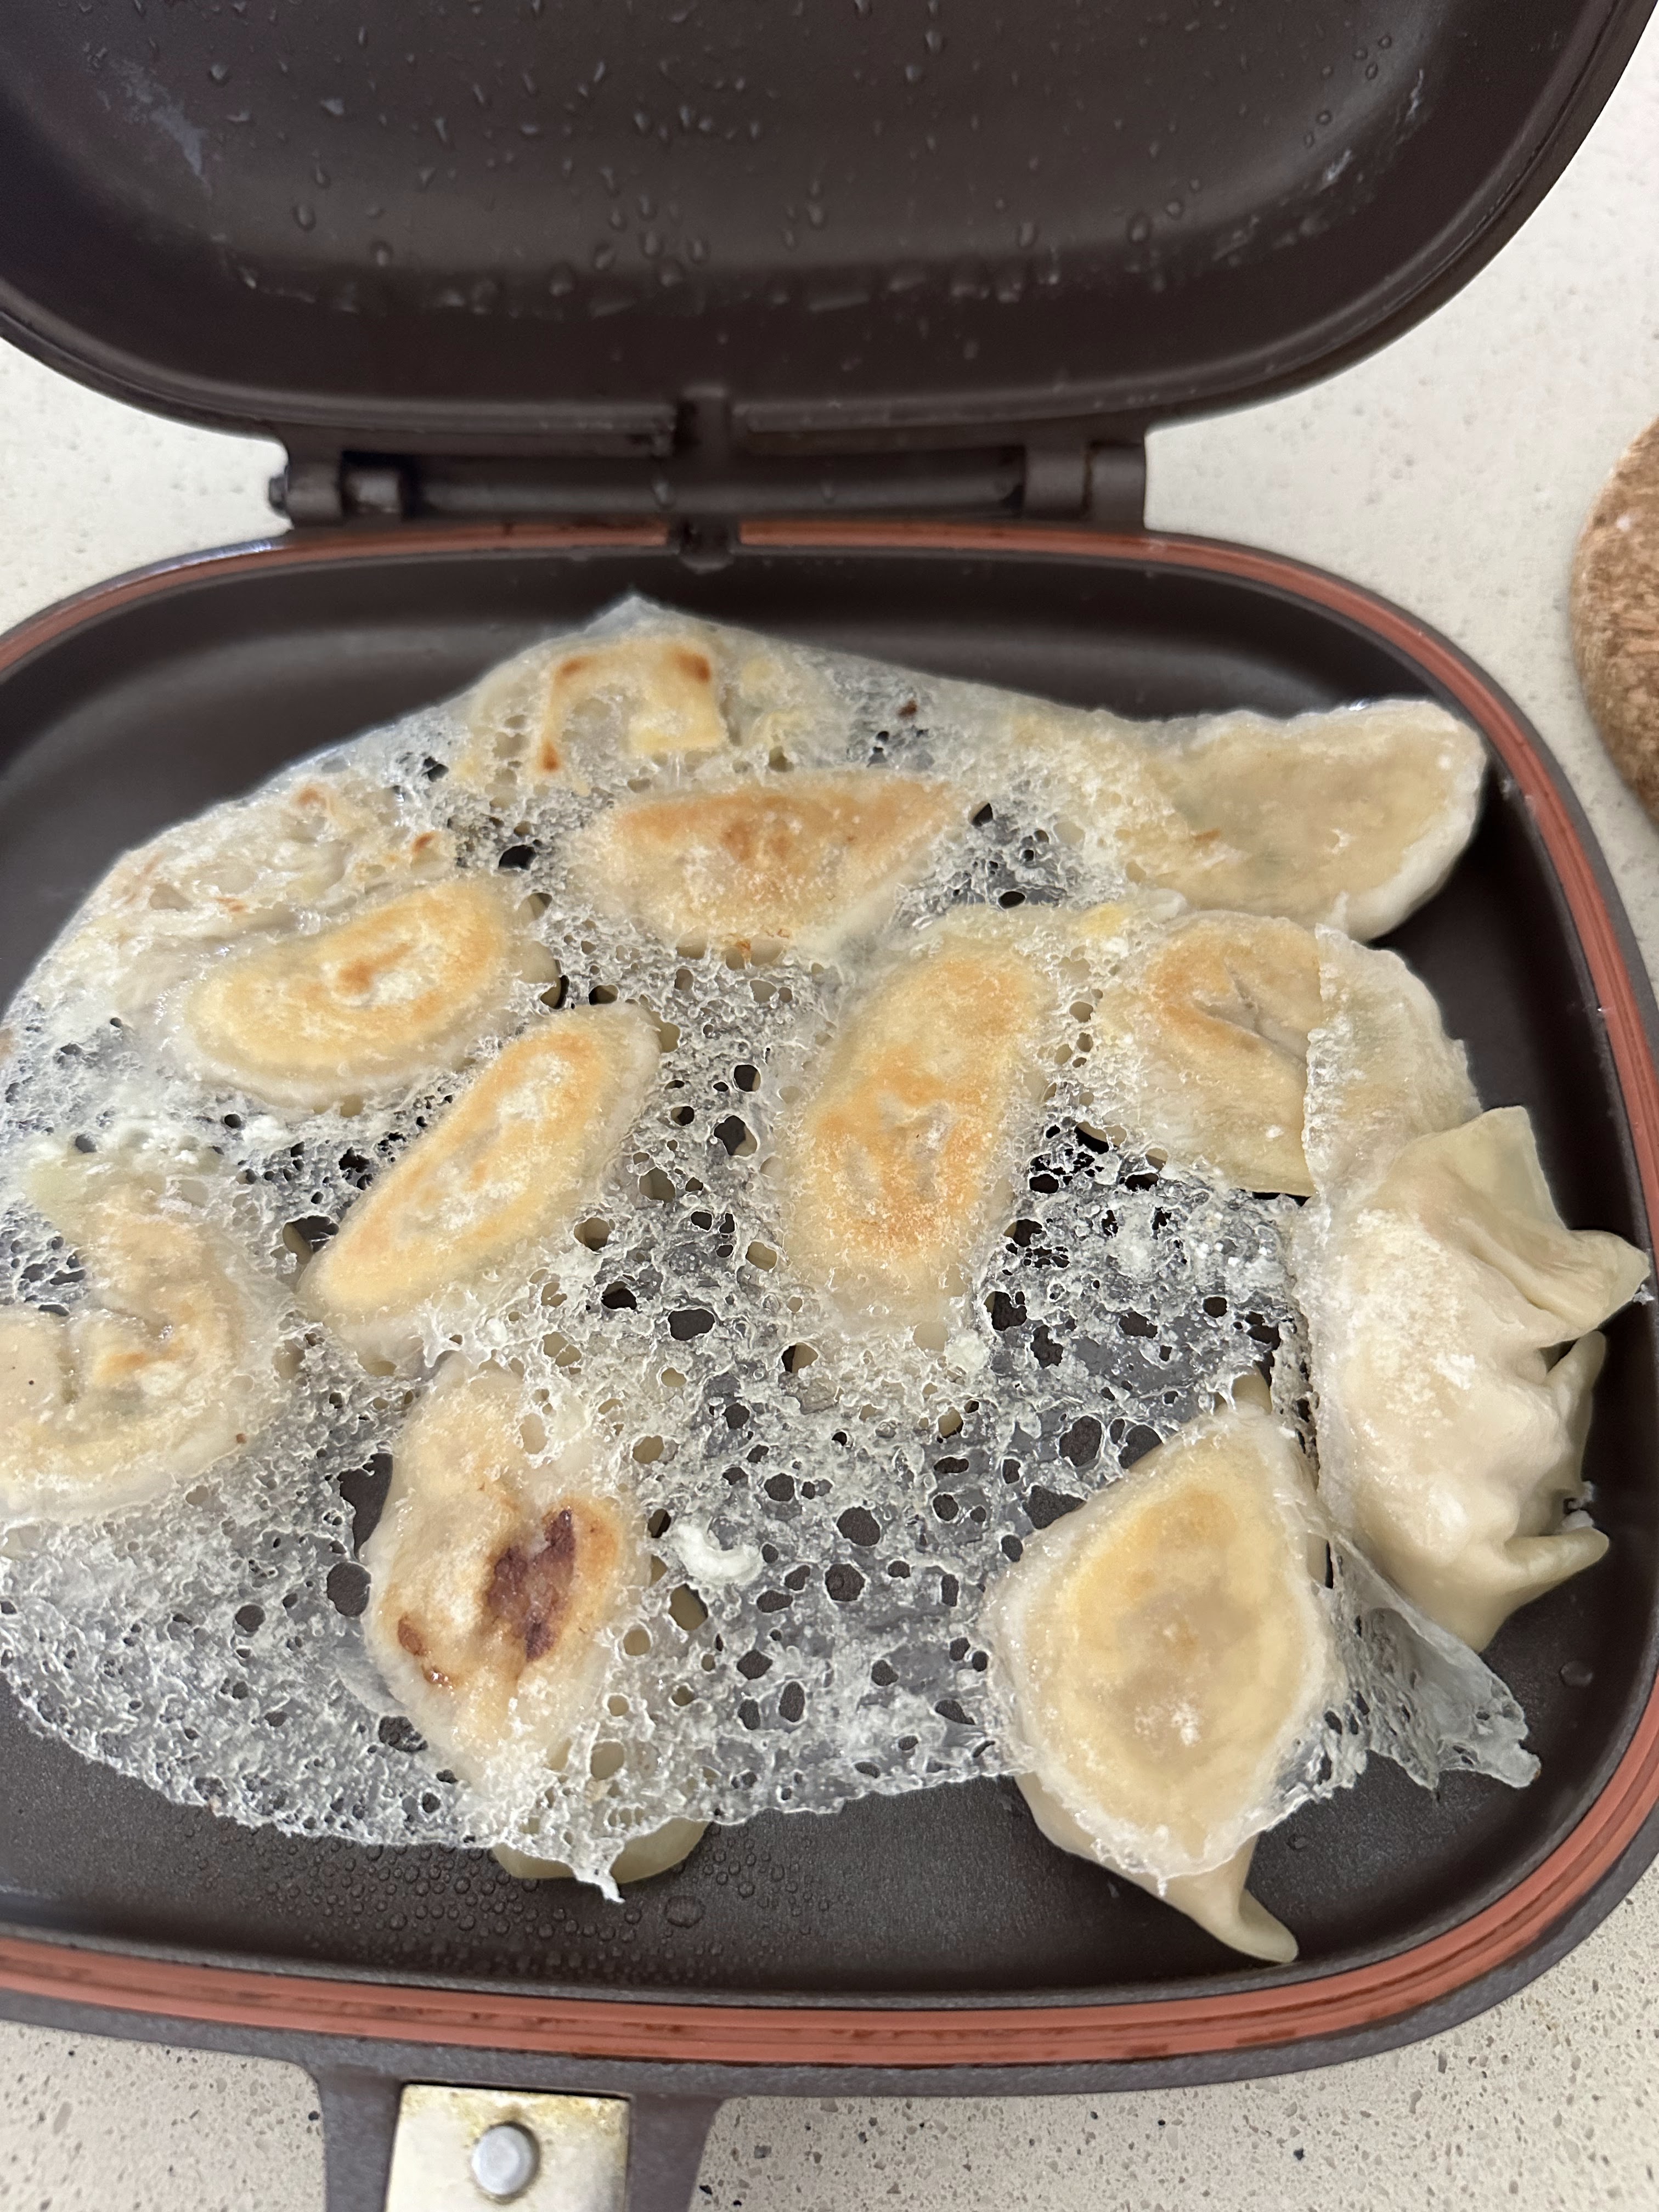
Underside of dumplings with the lace skirt
Ingredients (updated for my HappyCall after testing SBS recipe)
1/3C water (approx 10 tbsp)
4 tbsp flour or cornstarch or mix of starches.
4 tbsp oil
1. Mix ingredients. Add to a squeezie bottle.
2. In a non-stick pan with a tight lid, pre-heat on medium heat.
3. Once hot, squirt a thin later of dumpling lace. Arrange dumplings on top in a circular pattern.
(I put the dumplings directly onto the hot pan and then squirted the slurry in and around the dumplings. Seemed to work too)
4. Reduce heat to medium and clamp on the lid.
5. Cook for 6 minutes, checking every 2 to 3 minutes.
6. Once the water has almost boiled away leaving the lace, remove the lid.
7. Turn down heat and cook until water has evaporated and bottom is even golden brown. Once cooked, turn off the heat, drain away the oil and invert onto a serving plate. Serve with dipping sauce.
Wrapping
1. Modern Pepper 16 styles: Includes 2 different styles of ingot and one cigar shape but otherwise all other shapes included in Souped Up Recipes. Very helpful spoken descriptions and not just demonstration.
2. Souped up recipes 24 styles: Best video ever! Includes simple pleats I've never seen before and complex pleating, also includes open-face dumplings with inserted veg (eg corn, peas, wood ear mushroom etc) that are more suitable for steaming.
2 different styles of ingots for CNY, and trying curry puff, round pasty, and leaf shapes
Homemade wrappers
Wrappers cut using third largest (left) and second largest cutters
This time I decided to cut circles so I don't have to bring out my weighing machine. It worked a treat! I had regular shaped dumplings and didn't need to leave wrapped dumplings standing for so long while I rolled out each wrapper (I usually roll and wrap, roll and wrap, roll and wrap). I am horrendous with rolling the wrappers and can never roll out into a regular round or oval shaped wrapper.
I did take extra time to roll out the dough really thinly before stamping out circles. I only rolled out half of the dough at a time and kept the unused dough and stamped out wrappers well wrapped in cling film. I dusted each wrapper with corn starch so they didn't stick to each other. I made sure not to use corn starch when rolling out the dough and stamping out the wrappers, otherwise any excess starch gets onto the dough and then it becomes impossible to recombine the dough again.
So I had ended up with really thin skin wrappers (using the hot water dumpling recipe) compared to when I rolled out each wrapper individually. Total time taken to produce each wrapper would probably work out to be the same.
Homemade wrappers have a higher moisture content compared to store-bought wrappers, so can fold into more complicated shapes without tearing.
I used the 3 largest of my cookie dough cutters. Here's what I learnt:
- The 3rd largest cutter is tiny and difficult to work with so can only be used with shapes that start from a closed half-moon basis e.g., triangle, square, half-moon with no pleats, Chinese Ba Gwa coin, curry puff, round curry puff using 2 wrappers, ingots
- The 2nd largest cutter is slightly easier to work with without tearing so can fold shapes with simple pleats eg wavy crimp, up to 3-a-side pleats, buddha belly. Open faced shapes are possible but probably require tools (e.g. chopstick) to help make the folds.
- The largest cutter is a good size for complex pleats e.g. soup bun, 6-a-side pleats, leaf shape, and open face dumplings. The downside is that a lot of filling and dough is required.
- Note when preparing the filling: veg and other additions such as prawns need to be thoroughly drained and dried off (e.g. salting veg and squeezing out juices) and finely minced or diced. Otherwise wrapping becomes difficult and the cubed veg will tear the thin skin.
- Magic ratios: 2 cups of flour to 1 cup boiling water to 0.5 C room temp water (or less depending on how dry the flour is, stop when all the dry flour comes together. For ingredients, use 500g meat, 2 tbsp corn/potato flour, 1 egg, 1C packed prawn/seafood and 1C of packed chopped veg. Everything (both wrappers and filling) will be used up!
- Do not add oil to dough for fried dumplings. Adding oil to hot water dough means skin with oil isn't very stretchy and will tear easily. BUT if making dumpling for steaming, add about 1 to 2 tbsp of oil (to the 2C of flour) makes the skin super easy to roll very thin! On the contrary, dough for soup is just normal water and flour, do not use hot water.
Update: use oil:water:starch ratio of 1:5:2 and use a squeezee bottle.
- Preheat pan on medium
- Place dumplings on top (no oil!). Let sit for around 30 seconds.
- Squeeze mixture onto and around the sides of the pan, not onto the dumplings. Use only as much as is necessary to cover the bottom of the pan with a thin layer, otherwise it becomes a corn starch flurry that will never dry up.
- Turn down to medium low and let water evaporate, checking often
- Whole process should take about 7 to 10 minutes. Don't clamp lid shut (use a wooden spoon to keep ajar) because water needs to evaporate.
- Frozen dumplings from frozen work best because of extended cooking time needed to dry out and brown the lace