Sunday, June 30, 2019

Matcha cheesecake

I intended to make a matcha chocolate cheesecake with double cream, 3 eggs, and no flour in a 28 inch tin but unfortunately, my cream had gone bad. I had to quickly switch recipes and found one that also uses 1 packet (250g) of cream cheese but needed cake flour and 6 eggs. That was alright, I had these ready.

Source: https://www.craftpassion.com/matcha-japanese-cheesecake/2/

I adapted the method based on what I had already done halfway and the temperature is indeterminate because I accidentally left the oven on during the portion where the oven door was open.

Ingredients (for 8 inch tin)
1 block (250g) cream cheese, room temp
6 eggs, separated
140g sugar
100ml milk
60g butter
60g cake flour
8g corn flour
12g matcha powder
¼ tsp salt
¼ tsp vinegar or lemon juice

Method
1. Line a 8" tin with parchment. Butter the sides. Wrap the outside of the tin with double layer of foil so that water does not seep in. Meanwhile, prepare a larger baking tin (large enough to fit the cake tin).
2. Melt the cream cheese over a bain marie. Add egg yolks and beat with whisk until smooth.
3. Add half the sugar and whisk. Add the salt and combine.
4. Place the milk and butter in the microwave and microwave until the butter has melted. Add to the batter and combine.
5. Sift together the cake flour, corn flour, and matcha. Pour into the batter in batches and fold.
6. In an extremely clean bowl, beat the egg whites. Add the sugar in batches and beat. Add the vinegar and beat. Beat until stiff peaks.
7. Mix the batter with ⅓ of the meringue. Add the next third and fold in. Finally, pour the batter into the bowl with the remaining third of the meringue and carefully fold in so as not to knock out the air.
8. Pour into the cake tin and drop on the counter top to dispel the big bubbles. Use a spatula to make slashes to dispel more bubbles.
9. Place in the baking tin and pour in just boiled water so that it comes ⅔ up the side of the cake tin.
10. Bake for 160 deg C for 45 mins, then 140 for 45 minutes. Switch off and leave to cool in the oven with door open for 30 minutes.
11. Remove to countertop and drop from a height of 10cm (protect your counter top of course!). This prevents it from shrinking too much. As it cools, it will shrink away from the sides. Leave to cool completely, preferably overnight in the fridge.
Hasn't shrunk that much after cooling for half hour on countertop
12. To unmould the cake, use a spatula to go round the sides to release. Cut with a clean knife and to get really cleanly cut slices, wipe after each cut.

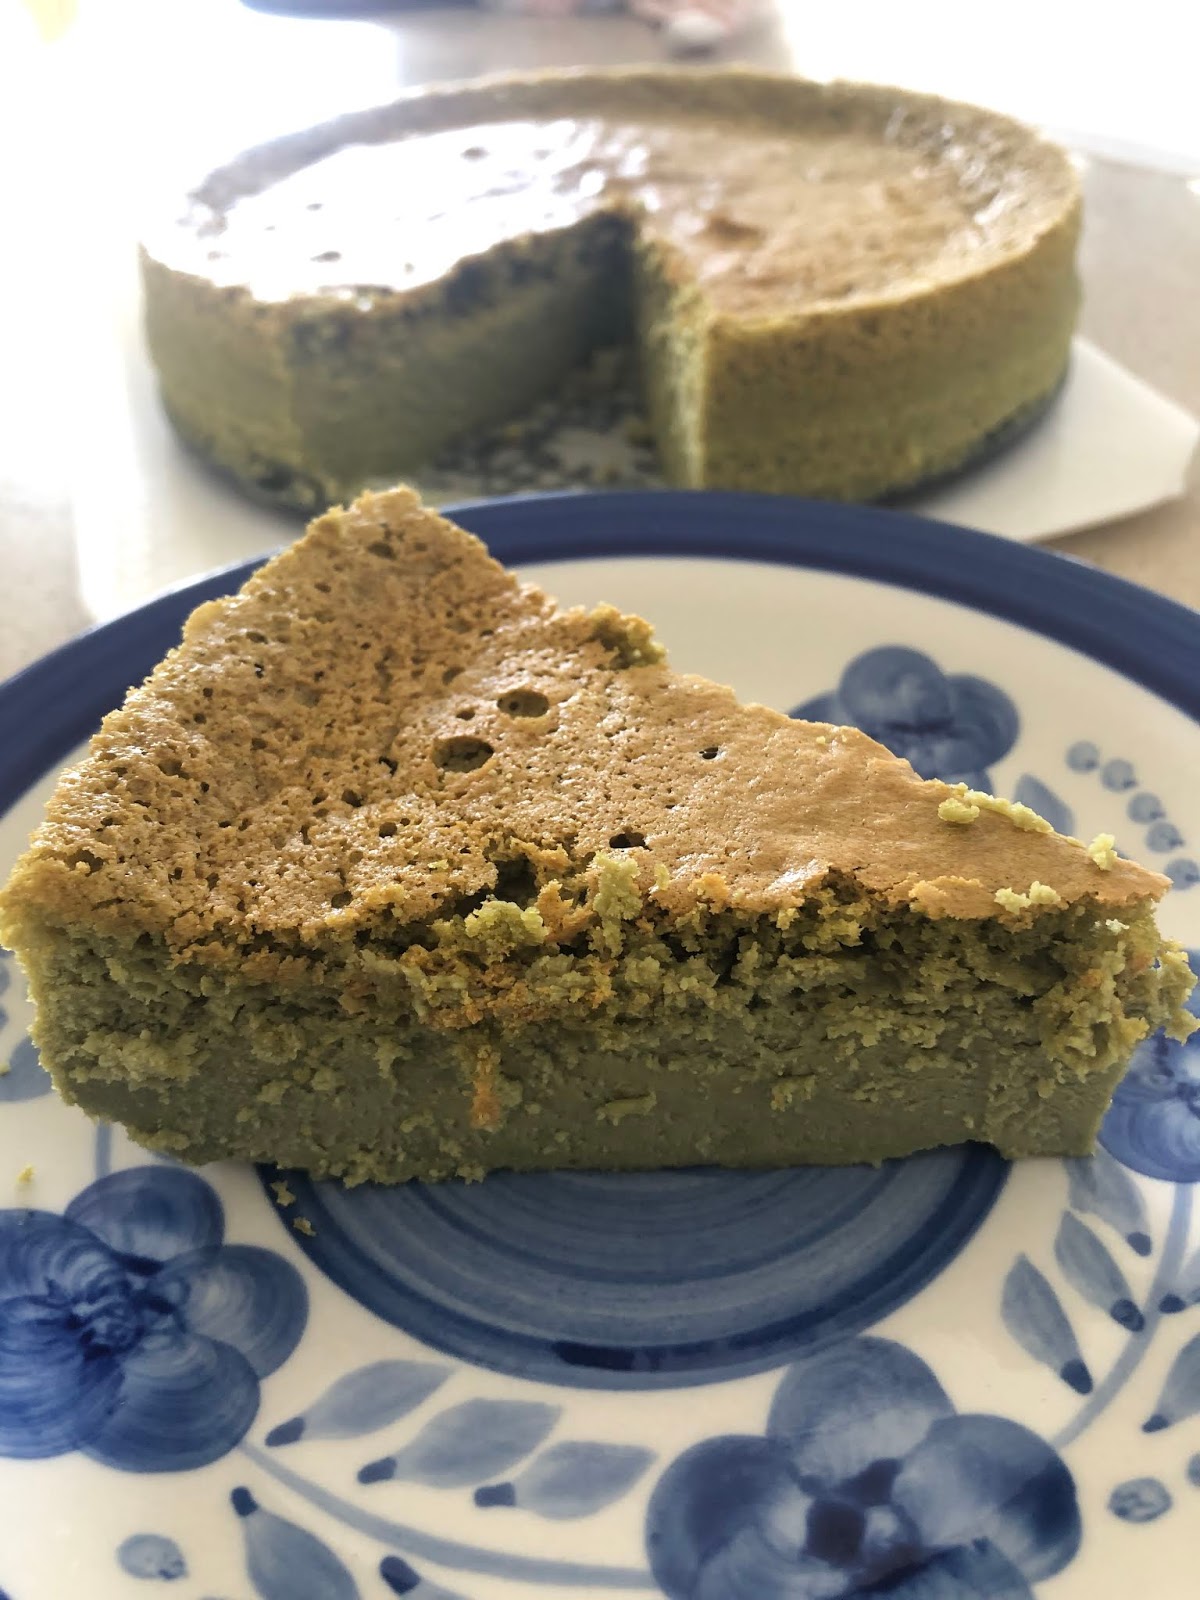
A bit dense but at least not eggy tasting

Recipe feedback
- My temperature control was really bad because I was alternating between fan forced and non-fan forced. I realised that with heating element (non-fan forced) only, the temp dropped 20 deg very quickly and the guage was off by at least 20 deg. So even though I started at 160 deg C, it quickly dipped to 130 or when I switched on the fan, it rose to 170. After I switched off the oven (or thought I did), there was no jiggle left. I and left the door open but had in fact left the heater on so the temp dropped from 160 to 130 in the 45 mins that the door was open. 
- Whatever the case may be, it seems that the initial hot air of 160 is needed to both brown the cake and dry up the top, but also to create the lift. The 140 deg C is then needed to dry the inside and cook through. Thus, a half-half timing that I've incorporated above seems for a 8" cake.
- Matcha is very difficult to work with. It either creates a very dry cake or very dense without much lift. Thus this cake was very dense and I don't know if it's because of the matcha or because my eggs weren't fresh enough. I had beaten still stiff peaks but it didn't seem to have helped.

Sunday, June 16, 2019

Kueh dadar (Pandan pancake with coconut filling)

I had some leftover coconut from the last recipe and no idea what to do with it. Decided to try out these recipes:

1. https://www.curiouscuisiniere.com/mini-kueh-dadar-rolled-coconut-crepes/ : for the proportions and use of tapioca starch in the batter
2. https://www.asianfoodchannel.com/en/recipes/nyonya-kuih-dadar  : how to extract pandan juice
https://www.shiokmanrecipes.com/2016/11/25/kueh-dadar-kuih-ketayap/ : video and tips


Ingredients (makes 8)
Inti (coconut filling)
200g dried coconut shreds, unsweetened
100g palm sugar or gula melaka
2 pandan leaves
1 tbsp water
pinch of salt

Crepe
200g flour (1 cup + 5 tbsp)
10 pandan leaves
250 ml coconut milk
150 ml water
1 egg
1 tsp tapioca starch
1 tsp oil
pinch salt

Method
Filling
1. Shave up the gula. Add the water into the pan and dissolve the sugar over low heat.
2. Add the knotted pandan leaves and stir. Remove the pandan leaves.
3. Add the coconut and stir until all the sugar syrup has been absorbed.

Crepe
1. To prepare the pandan juice, blend the pandan leaves in 150ml of water. Line a sieve with a cheese cloth and pour in the blended pulp. Squeeze out 150ml of juice. Set aside.
2. Sift the flour into a bowl add the salt. Stir and create a well in the centre.
3. Pour in the santan and mix until no lumps remain. Pour in the pandan juice and mix. Add the oil and mix.
4. Pour on 100 ml of batter and pour in the centre of the pan from a height of about 10cm above the pan. Rotate to swirl the batter as thinly as you can. Keep the heat low so as not to brown the crepe. Cook until edges start to curl. Remove (there is no need to cook the other side but it should be dry). Repeat until all the filling has been used up.
5. Depending on the size of your crepe, use about 2 tbsp of filling per crepe. Fold

Sunday, June 02, 2019

Coconut candy

Have saved this recipe in my bookmarks for at least 2 years now but never got down to making it. After positive endorsement of the RotiNRice recipe by my cousin, I decided to try it.

Sources: Recipe ingredients based on https://www.rotinrice.com/coconut-candy/ but method modified from http://lilyng2000.blogspot.com/2010/01/malaysian-coconut-candy.html

Ingredients
3 tbsp butter
2 ⅔ C (227g) coconut dried coconut shreds (not dessicated coconut)
½C sugar (can reduce by ½ C cos too sweet)
½C condensed milk
½C milk
8 - 10 drops of red food coloring
2 tsp vanilla essence

Method
1. Grease a baking tray (mine is 11 by 13 inches). Line with waxed baking paper. Set aside.
2. Melt the butter in a non-stick pan.
3. Mix all the ingredients together. It will be very watery.
4. Bring to a gentle simmer and maintain a simmer. Stir continually. It will take about 25 minutes.
After 25 mins
5. The coconut mixture will turn matt instead of glossy. It will leave the side the pan and leave it clean. To test, roll a ball of the mixture and drop into a bowl of water. If it doesn't disintegrate, it's ready.
Sadly my Cusiena measuring cup fell on the floor and broke! :(
6. Pack into a pan (mine is 11 by 13 inches). Cover with a wax paper and press down to flatten using your hand.
7.  Leave to cool for 10 minutes. Score into pieces with a well-greased pizza cutter. Once completely cool, lift out of pan only a chopping board and and cut completely.


Soya sauce Korean rice cakes